_GOTOBOTTOM
Constructive Feedback
For in-progress or completed build photos. Give and get contructive feedback!
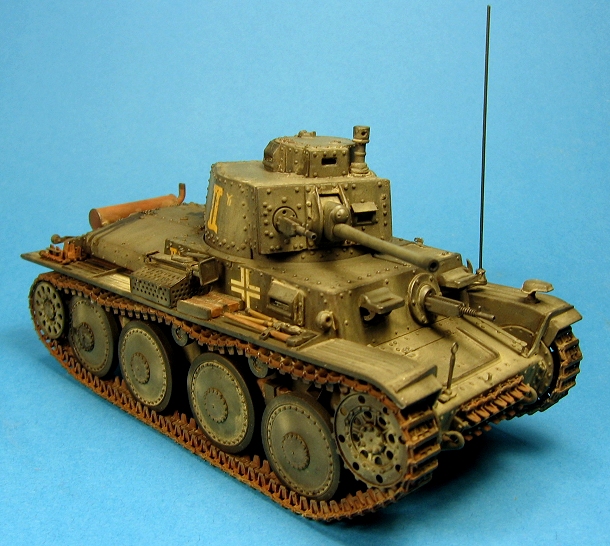
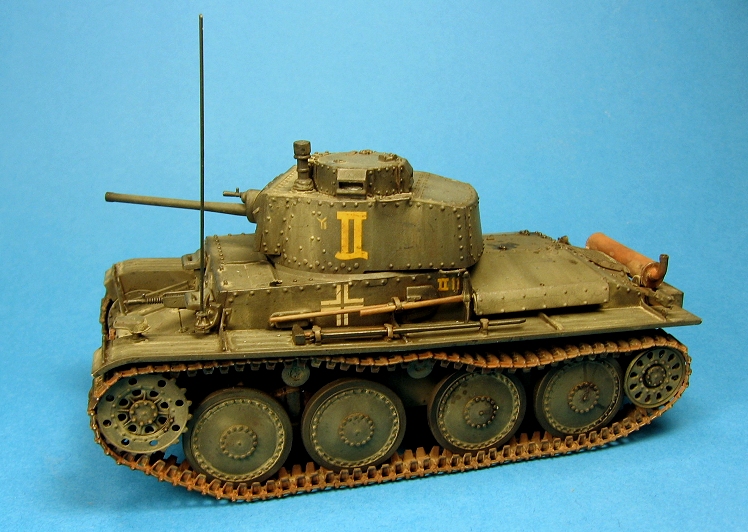
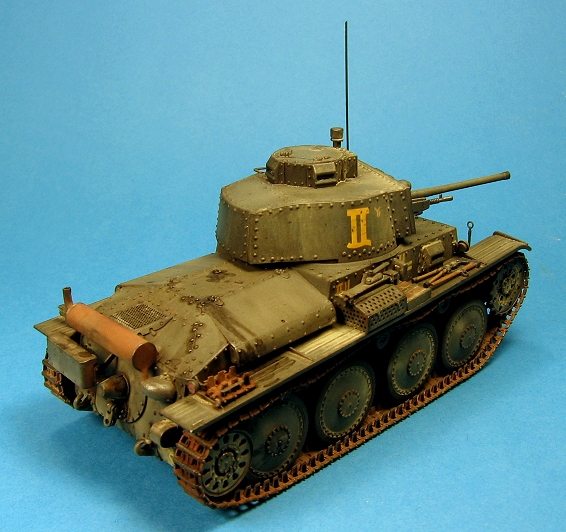
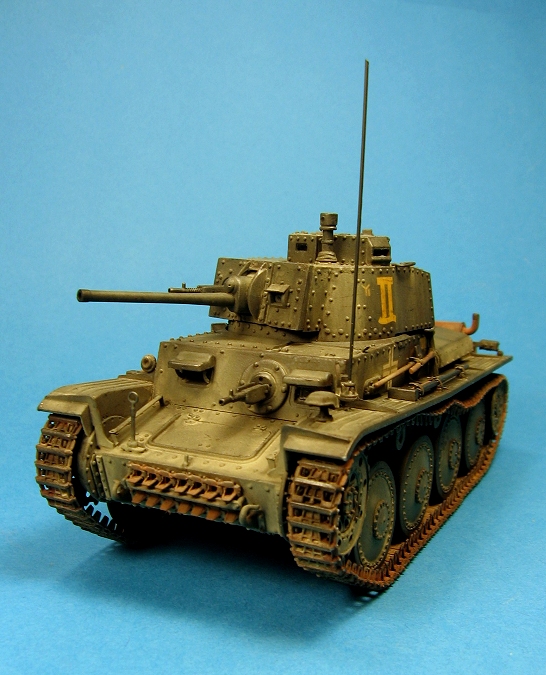
Completed - Tristar PzKpfw 38(t) ausf E/F
Tarkus
Visit this Community
Quebec, Canada
Joined: October 09, 2006
KitMaker: 64 posts
Armorama: 58 posts
Posted: Saturday, November 29, 2008 - 01:03 PM UTC
Greetings everyone.

This is my last build, Tristar PzKpfw 38(t) ausf E/F. This kit is my entry for the On The Eastern Front campaign. Color are a mix of Vallejo and Tamiya acrylics, oil and pastel chalk. The finish was inspired by Adam Wilder's technique shown in Steel Master no. 84, pp. 18-22. Some notes:

Overall, I had a great time building and painting this neat little tank, except for the tracks. Although of a pretty good quality as far as I'm concerned, the best way to use them IMHO is to assemble and paint the lower hull prior to assembling the upper hull. That way, you can better control the way they sit on the return roller and the road wheel. Of course, that's not what I did.

The antenna is a bit on the bulky side. I'm using optic fiber, which has an interesting diameter, but no tapper whatsoever. It looks reasonably good on the kit, but not so good on the pics I must say!

In addition, I made a digital painting of it, see below.

All comments most welcome, as usual.


And the painting (lo-res, jped compressed) I did of my vehicle. To me, almost the most interesting part of the whole project! I hope you like it.


Jean-Vincent
mimeda
Visit this Community
Wisconsin, United States
Joined: August 10, 2008
KitMaker: 204 posts
Armorama: 191 posts
Posted: Saturday, November 29, 2008 - 01:23 PM UTC
Very nice job Jean-Vincent!!!! I recently finished a 38-T from Maquette which was a nightmare but I think this is a nice project though. Very nice and subtle weathering on your kit, and I agree with you on the width of the antenna, looks kindda chubby...anyway, I usually use stretched sprue and looks like this:


I have heard and tried multiple materials for making accurate scale antennas including cat's whiskers..hahahahaha..and found that the sprue works better for me...and my cats...hahaha

Anyway excellent job, and the digital imaging looks impressive...great job.

Mirko
Desmoquattro
Visit this Community
New Brunswick, Canada
Joined: September 10, 2008
KitMaker: 235 posts
Armorama: 168 posts
Posted: Saturday, November 29, 2008 - 02:45 PM UTC
I know some people use guitar string for antennas, might be worth a try. Stretched sprue is the only way you will get a nice taper though. I've used sewing needles before, it works if the original antenna was a heavy-duty item.
Tarkus
Visit this Community
Quebec, Canada
Joined: October 09, 2006
KitMaker: 64 posts
Armorama: 58 posts
Posted: Saturday, November 29, 2008 - 04:01 PM UTC
Yep, that's really not working right. The thing's too big. I'm going to fix that. On my StuG III it didn't come out so out of scale, but for some reason it really looks huge on the pics. Might have something to do with the resizing.

Anyway, I think I'll be tempted by those brass antenna from LionMarc. [Link]

Mirko, nice build! The wood parts on your tank are just awsome, mind to share the technique you used?

Thanks for your comments. Keep em' coming
tjkelly
Visit this Community
Maryland, United States
Joined: May 04, 2007
KitMaker: 1,132 posts
Armorama: 1,123 posts
Posted: Saturday, November 29, 2008 - 04:44 PM UTC
Great work Jean -Vincent! LIke your weathering and how the tracks ended up, looking good!

Nice job to you too Mirko, both of them have come out well.

Thanks for sharing. Cheers -
Tim
mimeda
Visit this Community
Wisconsin, United States
Joined: August 10, 2008
KitMaker: 204 posts
Armorama: 191 posts
Posted: Saturday, November 29, 2008 - 05:15 PM UTC
Hello J-V, basically for any type of wood I usually paint the area with a light skin tone such as Tamiya flesh tone or MM light skin tone. After that a wash with raw umber or van dyck brown oils and voila...you have very realistic wood.....the best thing of oils is that you can clean then easily from the base of acrylics and retry agin and again until the desired effect is achieved.

Mirko
Grumpyoldman
Staff MemberConsigliere
KITMAKER NETWORK
Visit this Community
Florida, United States
Joined: October 17, 2003
KitMaker: 15,338 posts
Armorama: 7,297 posts
Posted: Sunday, November 30, 2008 - 03:33 AM UTC
Very nice jobs on both of those tanks. Thanks for posting them. I'd like to suggest you send lots of photos to the editors for On Displays.
spitfire303
Visit this Community
Vendee, France
Joined: December 22, 2006
KitMaker: 1,437 posts
Armorama: 1,406 posts
Posted: Sunday, November 30, 2008 - 07:58 AM UTC
excellent model. I like the subtle weathering. How did you achieve the dust on the upper hull? As for the tracks they're nice but the a little bit too rusty for me IMHO. However the effect is really great.

spit
jjumbo
Visit this Community
British Columbia, Canada
Joined: August 27, 2006
KitMaker: 2,012 posts
Armorama: 1,949 posts
Posted: Sunday, November 30, 2008 - 08:11 AM UTC
Hey Jean-Vincent,
Nice job on your 38(t), I like the weathering.
Would love to see some more photos.
Cheers

jjumbo
Tarkus
Visit this Community
Quebec, Canada
Joined: October 09, 2006
KitMaker: 64 posts
Armorama: 58 posts
Posted: Sunday, November 30, 2008 - 08:34 AM UTC
Thanks for the kind words everyone.

@ Pawel.

The dust effect is really simple to achieve: it's a wash of Tamiya Buff XF-57, and a very faint application of same with the airbrush, here and there. Precede application by a quick coat of Vallejo Satin Varnish to protect underneath colors, and that's it.

@ John.

Thanks! I'll follow Mr. O'Meara' suggestion and submit some more pictures to Armorama for an On Display appearance. But not before I fix that antenna

JV
 _GOTOTOP