

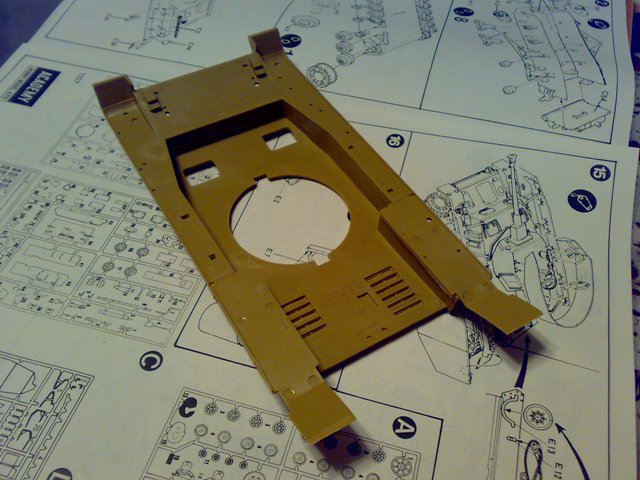
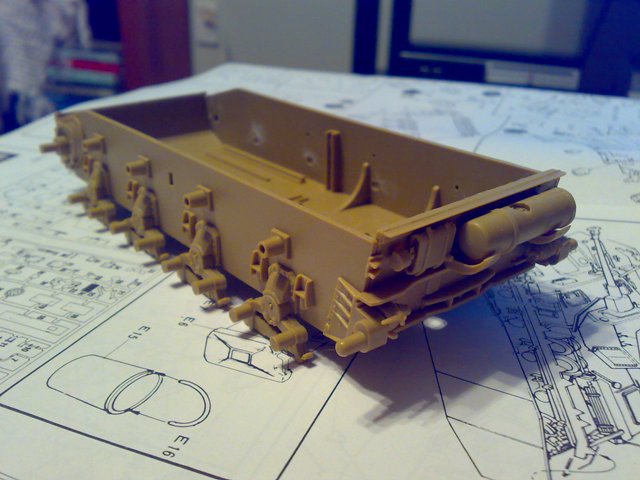
Check out progress so far


 I think I'll see how you go first
Off to a good start mate. I'll be following your progress on this one - have had this kit in the stash for nigh on 10 years now and been wondering if I should start it
Welcome back to the hobby
Rudi

 I'm aiming to get at least 4-5 hours of uninterupted modeling done per day!
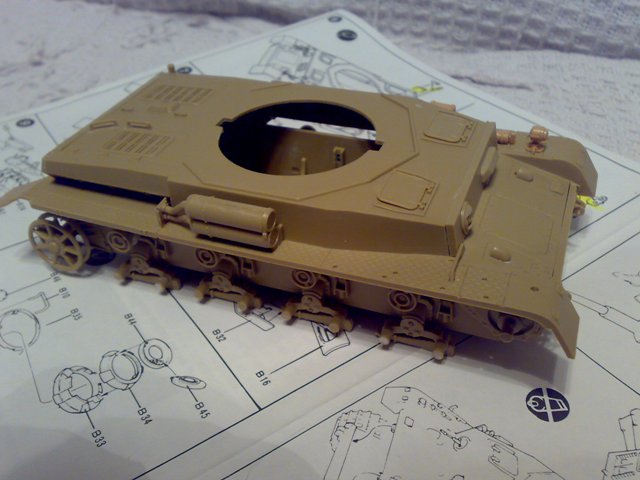


the mrs goes back to work, and I still have another week of holiday! I'm aiming to get at least 4-5 hours of uninterupted modeling done per day!
 . To be honest, I would not waste a turned barrel on this kit. The plastic one is good enough, if a little bit more work.

Quoted Textthe mrs goes back to work, and I still have another week of holiday! I'm aiming to get at least 4-5 hours of uninterupted modeling done per day!
You will have the house to yourself, and you plan on ONLY 4-5 hours.... shameful ...
You are making good work of the old Academy kit Andrew. You'll find that the Tamiya tools should fit perfectly... seeing as the Academy kit is the old Tamiya kit
Don't forget to add some plasticard to fill the hole under the superstructure by the fenders.
Any idea for a paintjob yet?
Looking forward to see more.
Henk

I have the house to myself all the time. I am lucky to get two hours a day. I literally cannot sit for that long. Looking good so far Andrew.
 I have a fishing tackle box loaded with my tools and have a board that I use to build on when sitting on the couch. I've got a huge garage downstairs, but there is issues with dampness and lighting to set up down there! So alot of time is actually spent getting ready to build, and just as much to clean up afterwards! At least with just myself being at home, I can down tools and leave everything where it is, have a break and come back to it, rather than having to clear it all out of the mrs way!
  )
) 


To be honest, I would not waste a turned barrel on this kit. The plastic one is good enough, if a little bit more work. Don't forget to add some plasticard to fill the hole under the superstructure by the fenders.


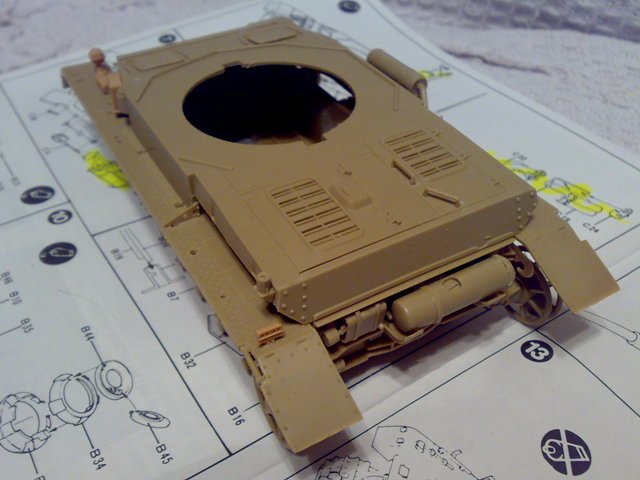
 to build models. Managed to get a bit of progress made with the Panzer today.
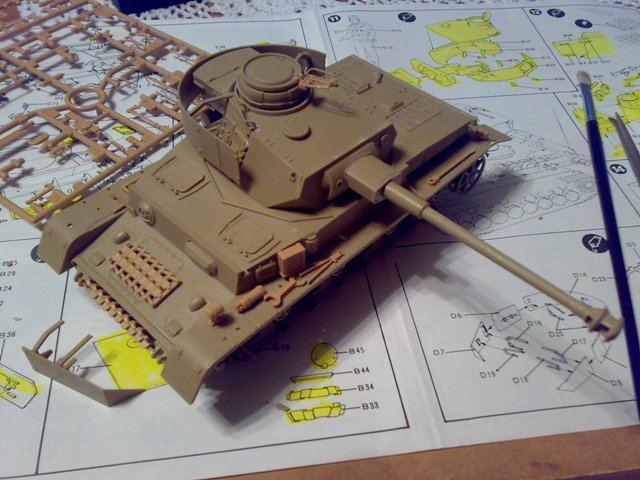
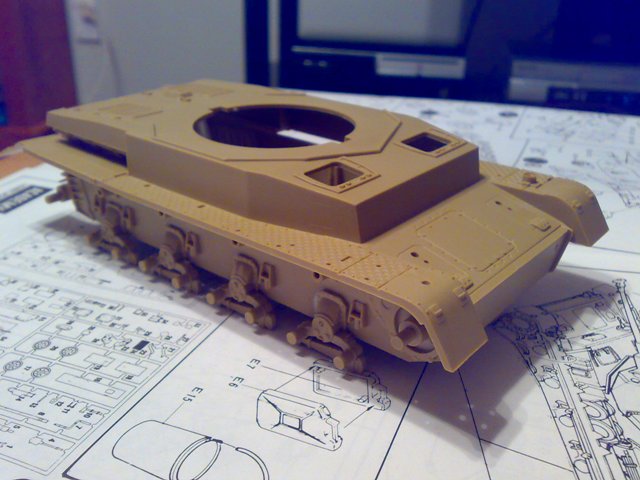
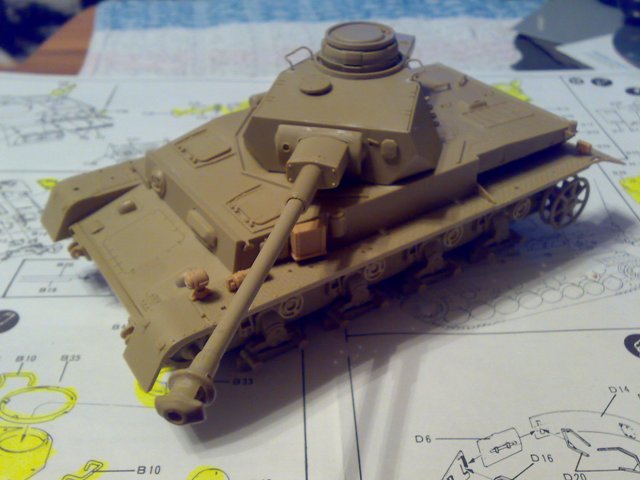
 It may be just me, but the mounting arms seem to be totally the wrong length and have incorrect angles to meet up where the instructions state (another complaint, the Academy instructions leave a lot to be desired, several key components are not mentioned
  , and there is nothing stated about that zimmerit should really be applied to this tank
  ) My kit's rear turret schurzen piece was warped out of shape. I think I managed to get it to a reasonable profile by gluing one side first, then once the glue partially set, I fixed the other side in place. I also had to remove one link from the section of Tamiya Panzer IV equipment in order for it to fit in the academy bracket.
Hi Andrew,
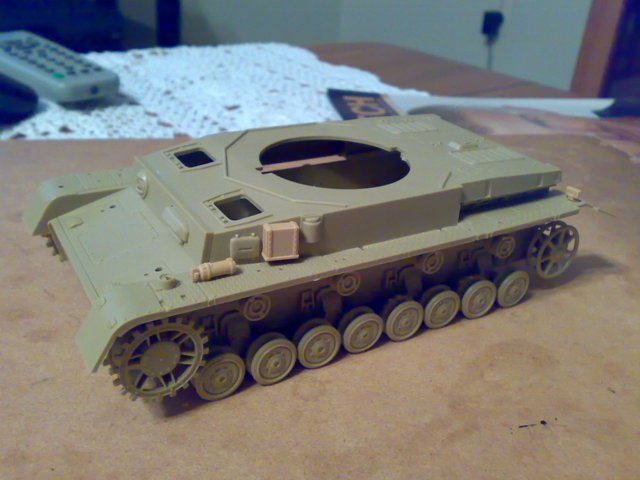
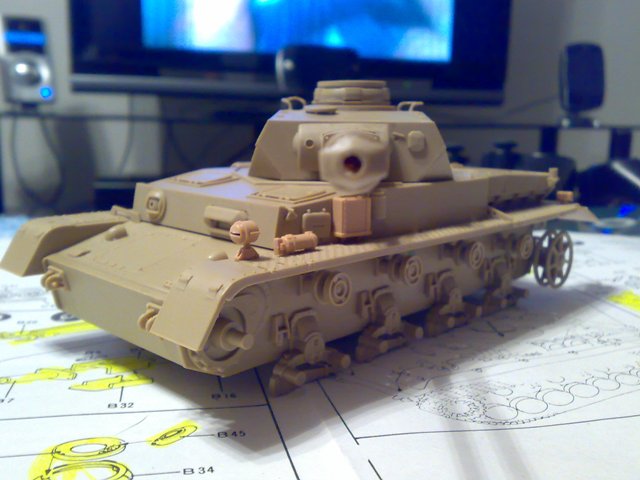
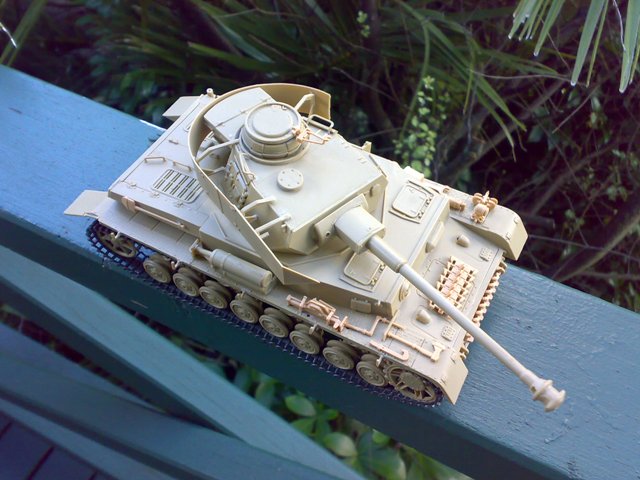
Yep, the schurzen on this kit is definitely a pain in the butt. It seems you need at least three hands to mount the turret schurzen. I had access to the instructions for the original Tamiya version of this kit, which helpfully provide a 1:1 sized overhead pic of the assembled turret schurzen. Just glue the parts, lay over the template and adjust while the glue is still soft. It also helps with the angles for the brackets (which do seem a bit short or at wrong angles to mount properly).
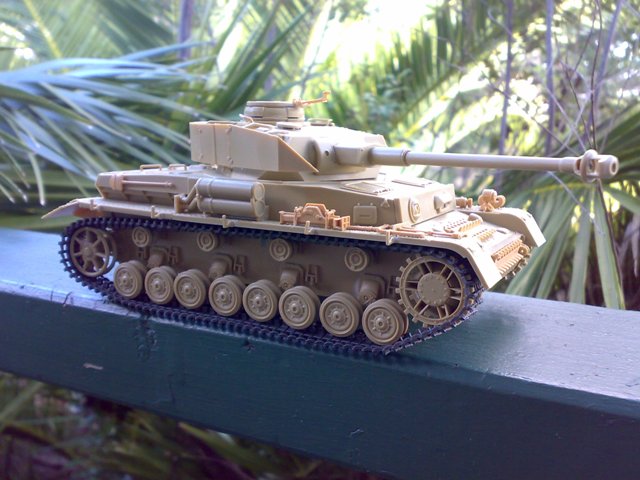
I noticed you haven't mounted the forward schurzen sections on the turret. Is this intentional or have you simply not finished?
The hull schurzen is less problematic than the turret. I glued the brackets to the rail first and then mounted the completed units with the help of some CA glue.
One thing to watch is the thickness of the fender-edge hooks and the corresponding hooks on the back of the schurzen panels. To put it simply, they won't fit as supplied - you need to do some careful thinning/shaving to get them to fit (or simply glue them on if you don't want them to be removable).
I've got the profile all screwed up, I started cutting the brackets to get them to fit, then a litlle more cutting, then a little more and whammo! too much cutting at that stage I got very disheartened with the kit, and was tempted to shelve it. Luckily for the tank, as its a guinea pig for painting and weather I have decided to continue on with it. Progress has been slow today, SWMBO left a whole lot of orders for the day, and with a mate constructed a frame for mounting my logitech steering wheel to 

 .but i manage to get along. your panzer is looking great, i cant believe i havent done one of these either
 |


