


I often find myself going long stretches between painting sessions with an airbrush, and thus my painting skills lack in comparison to other areas. The best way to improve a skill is to practice, so I decided to build a couple quick models, putting the emphasis on painting rather than super-detailing.
My weapon of choice for this painting experiment was Tamiya's 1/35 M5A1 Staurt, purchased for $3US at a my club's annual model auction. The model has a number of accuracy issues including the dread dimensional problems--it is squished lengthwise. The tracks also include a major flaw--the guide horns do not connect adjacent pads as they should. Since my goal was to paint rather than build, I chose to overlook the first issue. I easily remedied the second issue by raiding an Academy M3A1 for much more accurate band tracks. The Academy kit comes with both individual link and band tracks, so this theft left me with a complete model. While I was in the Academy box, I also grabbed the dished road wheels. I forget why I did this, but it made sense at the time.
Construction followed the kit directions with one major and one minor diversion. As with most Tamiya armor kits of its generation, this one does not include sponson floors so I added some using plastic card. This allowed me the option of leaving off the track guards. While I was in there, I also blanked off the motor holes in the bottom of the hull. Since this was a painting exercise I put no further effort into that issue. While building up the turret I decided to try a new technique for making welds--small diameter plastic rod shaved to a hemispheric cross section. I did not melt the rod and smear it out with a pin so it looks rather unrealistic. Did I mention this was a painting experiment? The last modification was blanking plates for the idler wheels.
The tracks did not respond to Testors liquid cement or Super Glue so I heat smashed the pins and put two staples in each one for good measure. Test fitting indicated I could hide the staples in the running gear.
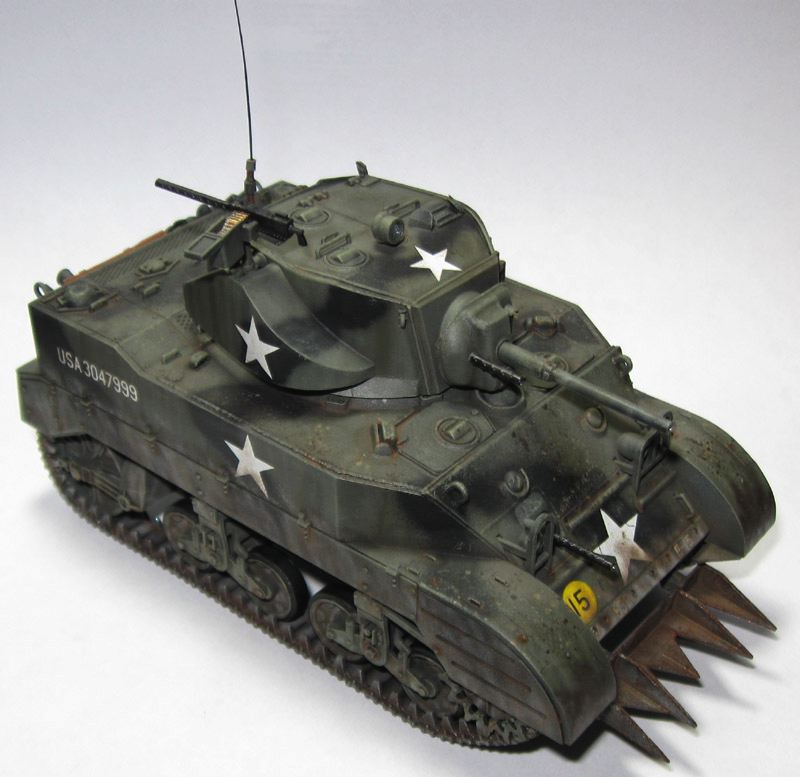
After about 10 hours it was off to the paint shop. Early on I decided to model Victory, an olive drab M5A1 assigned to the 3rd Armored Division in Northwest Europe. This decal scheme comes in the box and I did not have any replacements at the time. The 3rd Armored Division regularly used black as camouflage over olive drab, so I also decided to give this a try. I have no evidence Victory wore such camouflage, but as I may have mentioned, this was a painting experiment.
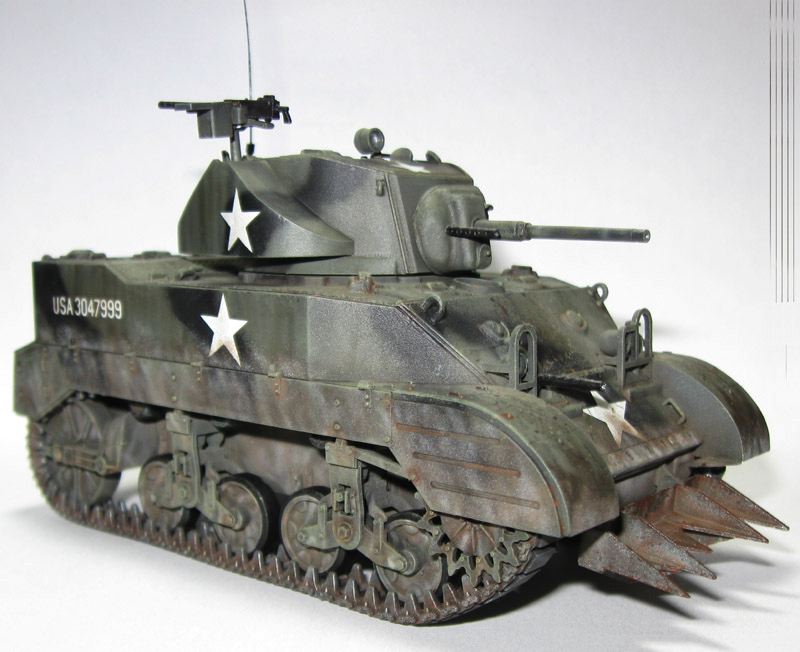
The standard match for US WWII OD is Tamiya XF-62, an acrylic paint. I paint with enamels and chose to fudge an approximation using a Testors British olive drab intended for aircraft. With the base coat in place I began adding streaks and dappling using four or five olive drab variants mixed on the fly. This process adds lots of contrast and depth to the monotone scheme without looking overly faded. I finished off the hull and turret with soft edge black stripes using flat black. The airbrush sputtered while laying down the stripes, but I decided to tackle that in weathering.
The tracks were painted flat black then dappled with burnt umber, raw sienna, and armor sand in succession from darkest to lightest.
A few days later I came back and hit every surface receiving a decal with Testors gloss acrylic overcoat. A few days after that I added the decals. The kit decals, though very thick, laid down fine with some Micro Set. After the decals set up I sealed the entire model with a custom mixed semi-gloss acrylic clear coat (more flat than gloss). I also used the airbrush to weather the bottom of the tank as described for the tracks.
With all primary painting completed I started in on the detail painting and finished up the road wheels using--you guessed it--flat black. I also went ahead and mounted the drive sprockets and tracks.
At this point I moved and the model ended up in storage for about 6 months. This gave lots of time for the paint to cure. In that 6 months I learned quite a bit, completed three other armor models, and developed a whole new list of techniques to try. Before trying those techniques on something involved I decided to pull out my old painting experiment.
Before any weathering I painted all the tools, gun barrels, track teeth, and added the track guards. For the tools I used Testors Wood followed by Burnt Sienna (deep golden stain), Armor Sand (bleached wood), or Burnt Unmber (deep brown stain). The metal parts of the tools were painted Flat Black or Olive Drab. I used the colors above in various combinations to create as much visual contrast as possible. The gun barrels received flat black coats. The track teeth were very lightly dry brushed with Oiled Steel.
I began weathering with a heavy wash of Winsor and Newton Burnt Umber oil paint heavily diluted with Mona Lisa odorless mineral spirits. I added extra doses as required, cleaned up pools, and generally moved the oil paint around as desired. Oil paint works so well in this application because you can "tweak" it again and again until it looks just so. When finished, I put the model aside for a few days.
One thing I wanted to try on this model was rust. I am not a huge fan of the hairspray method because of bad experiences with Testors Metalizers and lifting paint. I am also not a huge fan of rust buckets. The solution--I beat the hell out of the hedgegrow cutter with a sponge. I started by sponging Oiled Steel onto the cutter, especially along the edges. I did not use the silver anywhere else on the model. Next came Raw Umber, then Raw Sienna, and finally Burnt Sienna. These colors were lightly sponged all over the model, but only where the crew would stand or rub.
At this point the cutter looked pretty good and the weathering--okay. What the model needed was some more contrast to counter all those dark colors, so I began to dry brush. The first round, with Faded Olive Drab, hit just about every raised surface on the entire model. Next, I mixed the Faded Olive Drab with some Earth Yellow and did it again, this time keeping to the upper surfaces. Some more Earth Yellow and then round three on prominent features. Yet more Earth Yellow and round four on the most prominent features.
The next step was a spot wash using Rust All, applied here and there (and everywhere on the cutter). In a few cases, when the effect was just too pronounced, I went back and cleaned up the rust by dry brushing some faded olive drab over it.
At this point I would normally add a clear coat to seal it all in; instead I took some pictures. The pictures revealed that the model was really alive--much more alive than anything else on my shelf. No clear coat.
With no overall clear coat I needed to tone down some of the tools so I painted all the black and olive drab parts with a 3/4 flat acrylic clear coat. I also added a gloss coat to the headlight and taillight lenses. In the latter case that may have been a mistake.
The pictures also revealed some flaws--a fingerprint in the paint, problems with the whip antenna, and a few painting issues. The painting issues were cleaned up with spot drybrushing using the base color. To fix the whip antenna I cut off the very top of the US antenna base, replaced it with a section of rod, drilled out a hole for the antenna, put the antenna back in, and painted it. For the fingerprint, I used an Xacto knife and scraped down through the paint coats until it was flat. Bet ya can't figure out where it was!
I also needed to do something with the spotlight. Why oh why did I turn it up? They're never turned up. A punched disk of aluminum foil followed by a punched disk of clear acetate fixed that problem.
What now? I made some fuel spill stains with Black Wash but they mostly disappeared on the black camouflage stripes. I also fixed a few track teeth with more Oiled Steel. The barrels received a dusting of ground pencil lead. A standard mechanical pencil contributed some nicks, scratches, and dings.
After looking at the model a long time I decided not to use pigments on the tracks and running gear. I think they would kill a really interesting effect that somehow congealed out of this experiment.
All feedback welcome. Enjoy!
-Doug
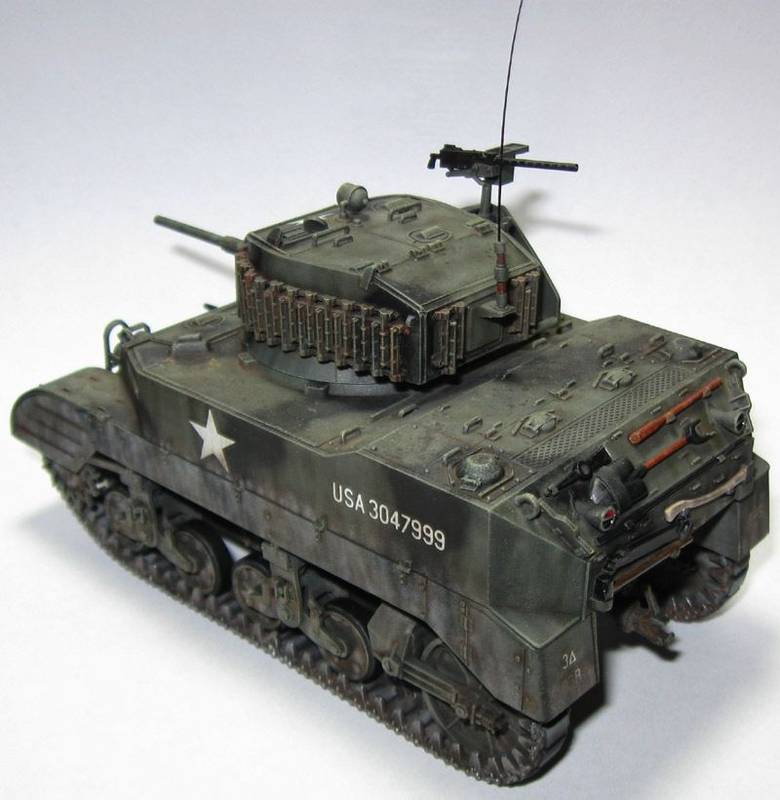
The antenna was made using a cat whisker--another first for me. This may be the only thing a cat is good for.

Love those thick decals. I hit the grousers with quite a bit of rust to liven up the turret--probably too much.
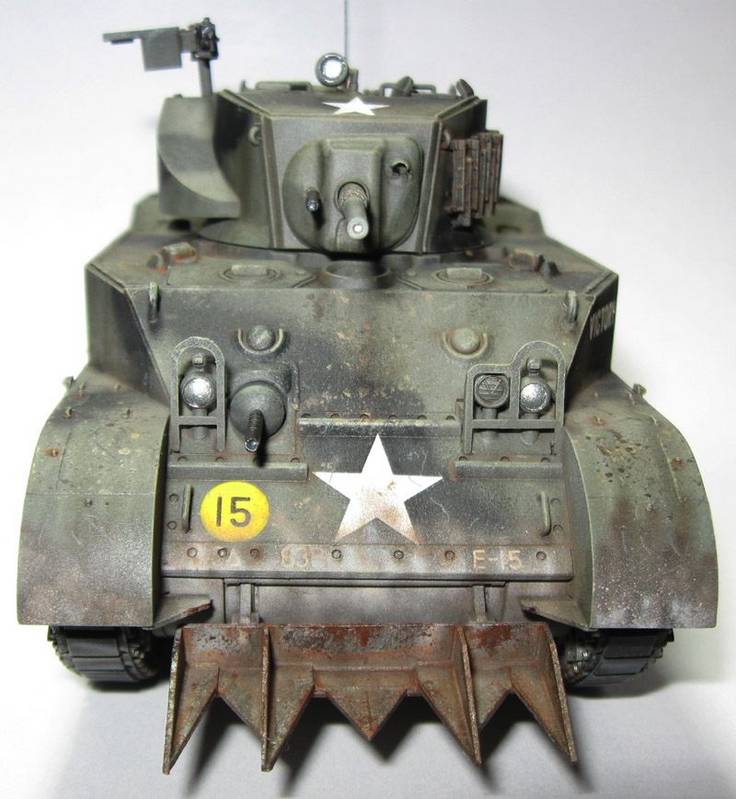
The hedgegrow cutter turned out very well. The extra thick headlight guards look particularly stunning.
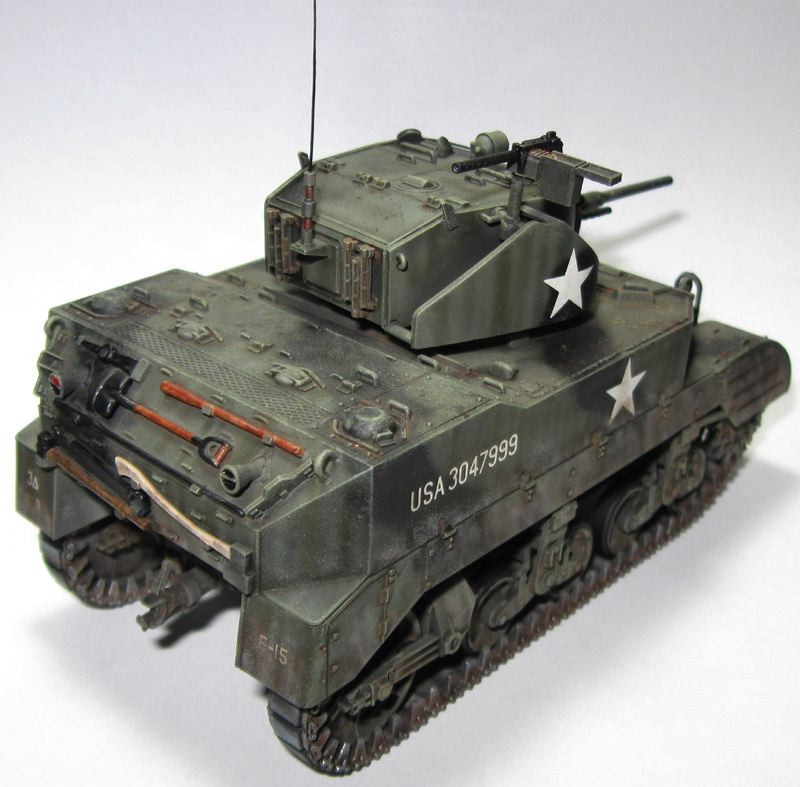
The streaking on the side of the turret came out very well, though probably overdone. The fuel stains disappeared on the black stripes. I did not replace the grab handles with wire!

The welds added to the roof lack the flowing texture of real welds. Still, this technique works well in hard to reach places.


