

my father and i are making a 1/72 scale model of the beach landing at Iwo Jima. so far we have the actual base carved as well as the small section of the mountain we are showing and we primed it with an automotive spray primer. a technique we have used in the past to protect the foam from the up coming layers of paint. but this is out first water effect. I am trying to find a good water effect that i can "float" two balsa wood landing craft in. any help would be totally awesome.
Thanks
"We finished so please scroll to the bottom to see the final Beach landing"
Thanks again, Eric & Scot!
Hosted by Darren Baker
beach landing

crazzyww2buff

Joined: March 05, 2009
KitMaker: 10 posts
Armorama: 9 posts
Posted: Wednesday, March 04, 2009 - 04:26 PM UTC

bigal07

Joined: January 07, 2009
KitMaker: 887 posts
Armorama: 256 posts
Posted: Wednesday, March 04, 2009 - 07:49 PM UTC
There are several water effect's you can buy, silicone from the D.I.Y store very cheep and a little tricky to use, but totally transparent. Up market as they say is something called solid water, this comes with a hardener and is resin based by Eluxe, but like I said a bit on the expensive side, if you were thinking of painting the sea which isn't quite what you want but is the cheepest way forward due to using anything you can set your sea going craft into, then gel medium, or water effect, there is a ton of this info on the internet, some even use wall paper paste with shredded news papers. Good luck. 
crazzyww2buff
Joined: March 05, 2009
KitMaker: 10 posts
Armorama: 9 posts
Posted: Thursday, March 05, 2009 - 03:57 AM UTC
Alec,
Thanks for the tips.
Bases on what we found on this site, GREAT INFO and group of people by the way I wish we had found it earlier, I went out and bought some Cast Craft clear polyester casting resin, Dr Martins die and some gel medium for foam. Your right it is expensive.
So my next question is after I bought it discovered the resin has a 7% shrinkage rate. Eric's diorama is 20"x40" and is about 25% water. The shoreline has both sand and the rocky outcropping that flows into the water at the base of Mt. Suribachi. The depth of the water is about 1" to 1 1/2" at the deepest. With these parameters what is the best pouring method to use to avoid cracking and shrinkage?
Our base is sculpted from green medium density foam and has been sealed with 4 light coats of Automotive primer. We will be using acrylic paint for the terrain . Will this combination stand up to the resin?
Thanks for your input and we will post some pictures tonight of the progress.
Scot
AKA - Eric's dad

Bowman18

Joined: July 19, 2008
KitMaker: 317 posts
Armorama: 286 posts

Posted: Thursday, March 05, 2009 - 04:07 AM UTC
Vallejo do an extra heavy gel which dries transparent - it's an average size tub and would probably be plenty spare after you've completed what you want to do. I picked it up for about £7. Hopes this helps. 
IF YOU PAINT THE SEA AREA BEFORE YOU PUT THE GEL ON IT WILL HELP GET A REALISTIC EFFECT!!!
IF YOU PAINT THE SEA AREA BEFORE YOU PUT THE GEL ON IT WILL HELP GET A REALISTIC EFFECT!!!
Removed by original poster on 03/06/09 - 06:18:34 (GMT).
crazzyww2buff
Joined: March 05, 2009
KitMaker: 10 posts
Armorama: 9 posts
Posted: Thursday, March 05, 2009 - 06:29 PM UTC
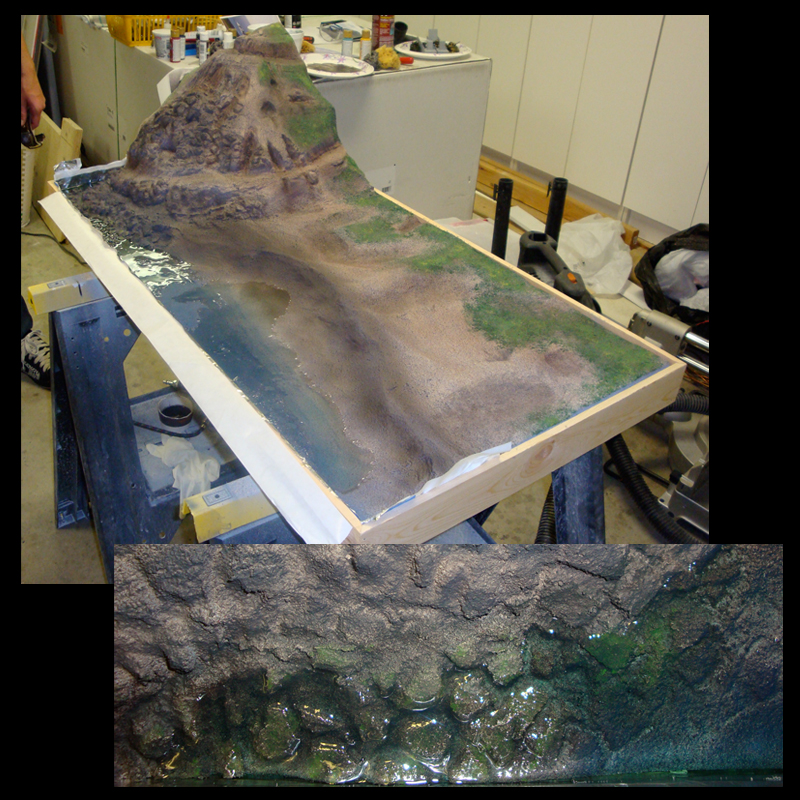
Here are some images of our progress.
The images show the diorama in a primed state so it is a bit difficult to see but I hope it gives a better idea to what I was asking about in regards to the pouring of the polyester resin.
Thanks again for the input.
Scot
AKA Eric's dad


The images show the diorama in a primed state so it is a bit difficult to see but I hope it gives a better idea to what I was asking about in regards to the pouring of the polyester resin.
Thanks again for the input.
Scot
AKA Eric's dad

HONEYCUT

Joined: May 07, 2003
KitMaker: 4,002 posts
Armorama: 2,947 posts

Posted: Thursday, March 05, 2009 - 07:00 PM UTC
Wow you blokes have been busy! This is shaping up well, and the base is looking great. Good elevation there. Can't wait to see how the landing craft turn out 
Brad
Brad

CMOT


Joined: May 14, 2006
KitMaker: 10,954 posts
Armorama: 8,571 posts

Posted: Thursday, March 05, 2009 - 07:21 PM UTC
when using the resin add a little at a time and build it up in layers, do not try and add that depth of resin in one hit.
crazzyww2buff
Joined: March 05, 2009
KitMaker: 10 posts
Armorama: 9 posts
Posted: Friday, March 06, 2009 - 03:09 AM UTC
Bradley,
Yes we have been busy but that is what a deadline will do for you. It is due on Wednesday next week. Tonight is paint, tomorrow we start the water pouring and hope we can layer it up enough by Monday night so we can add the wakes and surf details on Tuesday night.
Darren,
How thick should each pour be?
How long should we let it cure before adding the subsequent layers?
Thanks again for your input.
Scot
AKA- Eric's Dad
crazzyww2buff
Joined: March 05, 2009
KitMaker: 10 posts
Armorama: 9 posts
Posted: Monday, March 09, 2009 - 05:03 AM UTC
this weekend was crazy! we finished the painting and poured the first layer of water. it was totaly awsome and it was only posible because of all the help from the people on this site, and my dad! i know for sure that daylight savings time sucks, we lost an hour of work and sleep.  thanx to all you people who helped! pictures will be posted when my dad and i get home and he shows me how to do that.
it was totaly awsome and it was only posible because of all the help from the people on this site, and my dad! i know for sure that daylight savings time sucks, we lost an hour of work and sleep. thanx to all you people who helped! pictures will be posted when my dad and i get home and he shows me how to do that. crazzyww2buff
Joined: March 05, 2009
KitMaker: 10 posts
Armorama: 9 posts
Posted: Monday, March 09, 2009 - 10:30 AM UTC
Quoted Text
this weekend was crazy! we finished the painting and poured the first layer of water.
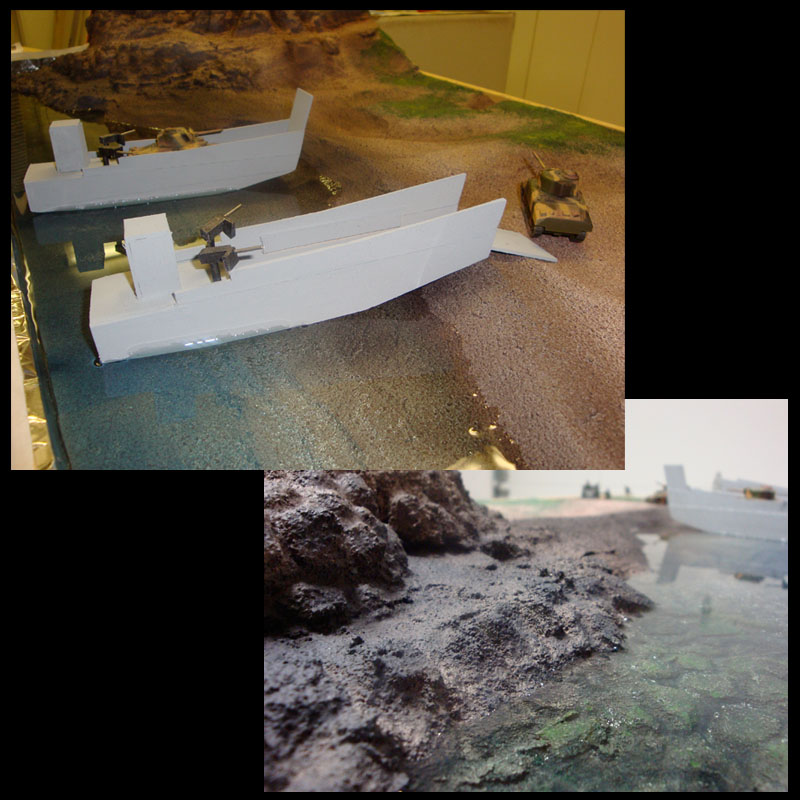
Here are the images Eric is talking about.
Thanks again for all your input and let us know how we are doing.
Scot
aka - Eric's dad
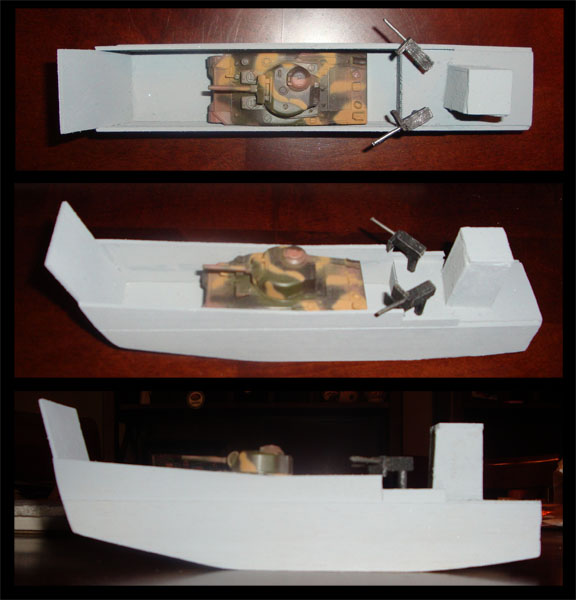
Balsa wood landing craft.

A variety of methods we used throughout the day.

What we start the day with on the left and what we ended up with right before the water pour to check staging.
Right after pouring about 1/4" of Polyester Resin.

youngc
Joined: June 05, 2007
KitMaker: 2,166 posts
Armorama: 1,080 posts

Posted: Monday, March 09, 2009 - 08:04 PM UTC
Great work guys, the water looks good so far.
It might be a bit late to change but the earth on Iwo Jima was volcanic black and from my understanding had very little, if any vegetation.
It looks like you're both having fun though, and that's the main thing.
Chas
It might be a bit late to change but the earth on Iwo Jima was volcanic black and from my understanding had very little, if any vegetation.
It looks like you're both having fun though, and that's the main thing.
Chas

crazzyww2buff
Joined: March 05, 2009
KitMaker: 10 posts
Armorama: 9 posts
Posted: Tuesday, March 10, 2009 - 07:04 AM UTC
Chas,
Thanks for the comments. I think we are going to do a few washes over the terrain to tone it down a bit now that you point it out it is a bit lush in color.
We went back and forth quite a bit as to how the terrain was going to look. We decided to make it early in the invasion after the shelling. We could only find good black and white images from later in the invasion so the vegetation is really trampled down but it can still be seen.

What we pulled together was that the island is tropical and a volcanic eruption hasn't happened in over 300 years from Mount Suribachi so we figured that before the invasion it would look very much like it does today. So we made a hybrid of the two theorizing that it "Could" have looked like this at some point.
As for the island being all black the reference we have shows a wide range of values in the black and white images and when we compared it to the current images those lighter values correspond to lighter terrain.
When you look at the photos we actually condensed all the geological features closer to the beach just to tell the story a little better at this scale. We only have about 300 yards and just a small portion of Mount Suribachi so it is not completely accurate.
But like you said we are having a blast!
Thanks again,
Scot
aka Eric's Dad
Thanks for the comments. I think we are going to do a few washes over the terrain to tone it down a bit now that you point it out it is a bit lush in color.
We went back and forth quite a bit as to how the terrain was going to look. We decided to make it early in the invasion after the shelling. We could only find good black and white images from later in the invasion so the vegetation is really trampled down but it can still be seen.
What we pulled together was that the island is tropical and a volcanic eruption hasn't happened in over 300 years from Mount Suribachi so we figured that before the invasion it would look very much like it does today. So we made a hybrid of the two theorizing that it "Could" have looked like this at some point.
As for the island being all black the reference we have shows a wide range of values in the black and white images and when we compared it to the current images those lighter values correspond to lighter terrain.
When you look at the photos we actually condensed all the geological features closer to the beach just to tell the story a little better at this scale. We only have about 300 yards and just a small portion of Mount Suribachi so it is not completely accurate.
But like you said we are having a blast!
Thanks again,
Scot
aka Eric's Dad

martyncrowther

Joined: September 12, 2007
KitMaker: 1,548 posts
Armorama: 1,407 posts

Posted: Tuesday, March 10, 2009 - 09:03 AM UTC
Amazing work mate! It is a lovely dio.
crazzyww2buff
Joined: March 05, 2009
KitMaker: 10 posts
Armorama: 9 posts
Posted: Thursday, March 12, 2009 - 03:37 AM UTC
Hey all,
Here is a polyester resin cure time/process question.
We did our final pour last night and it looks great. I have been reading a lot about cure time and was wondering if we should wrap it in plastic wrap to isolate the air/humidity to get it to fully cure and harden the tacky surface?
If so how long should it stay wrapped?
Thanks again for all your input it has been invaluable!
Scot
aka - Eric's Dad
crazzyww2buff
Joined: March 05, 2009
KitMaker: 10 posts
Armorama: 9 posts
Posted: Monday, March 16, 2009 - 05:08 AM UTC
We just wanted to say thanks for all the input and help.
Here are some images of the final steps and final Diorama of Eric's version of the Iwo Jima beach landing.
We hope you guy like final product because we couldn't have dome it with out you.
Sincerely,
Eric and Scot
Our final resin pour

Eric working on creating surf and waves with clear acrylic heavy gel medium
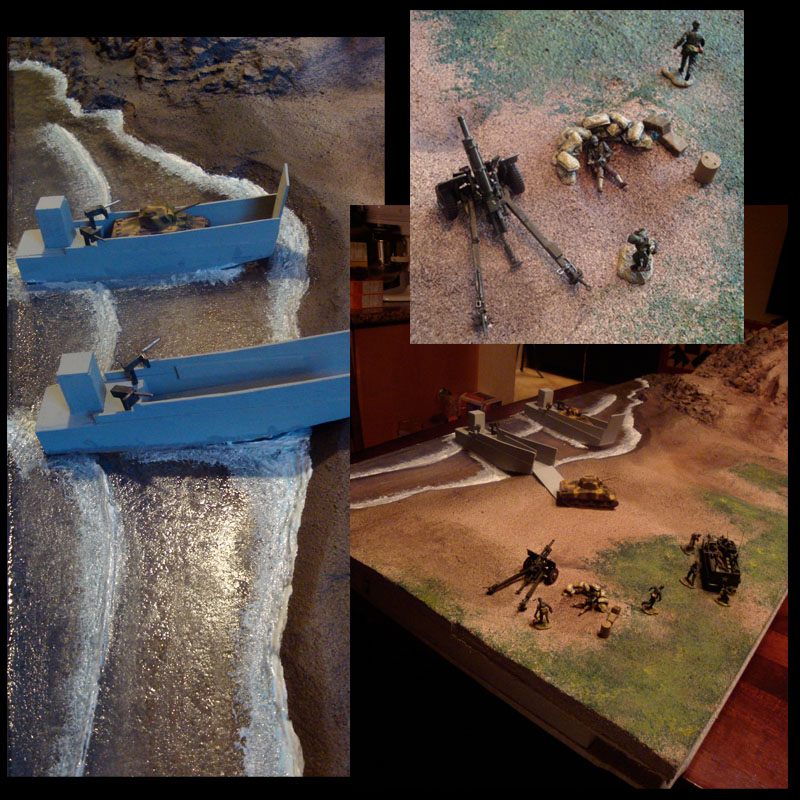
Some more details

Close up of the final beach landing

The final framed Dio
Thanks again,
Scot & Eric
Here are some images of the final steps and final Diorama of Eric's version of the Iwo Jima beach landing.
We hope you guy like final product because we couldn't have dome it with out you.
Sincerely,
Eric and Scot
Our final resin pour
Eric working on creating surf and waves with clear acrylic heavy gel medium
Some more details
Close up of the final beach landing
The final framed Dio
Thanks again,
Scot & Eric
 |

WEB HOSTING BY


Copyright ©2021 Armorama and Kitmaker Network, a subsidiary of Silver Star Enterprises
All Rights Reserved. Please read our Conditions of Use and Privacy Policy.
All Rights Reserved. Please read our Conditions of Use and Privacy Policy.