_GOTOBOTTOM
Dioramas: Before Building
Ideas, concepts, and researching your next diorama.
Hosted by Darren Baker
Christmas Day outside Bastogne
snowgoon81
Visit this Community
United States
Joined: January 30, 2009
KitMaker: 67 posts
Armorama: 67 posts
Posted: Friday, May 01, 2009 - 03:43 PM UTC
A little background to get this started...I'm doing a scene from Christmas day when a group of 18 panzers broke through the US line and surprised two companies of the 502 PIR 101st Airborne marching to the front. The dio is showing a squad counterattacking with the aid of a M-18 Hellcat from the 705th TD battalion.

This is a rough layout of what I'm planning on doing. The sherman hull is a stand in for the AFV M-18 I have yet to purchase. The wooden dowels are approx locations of trees. The figures are from Dragon, Tamiya, and a Nemrod medic. I sculpted a M1942 paratrooper jacket for the medic and cargo pockets on two other soldiers using epoxy putty. The figs are mostly assembled with just a few tweaks left, mostly on the hands. The heads are all hornet. Some have tamiya helmets since they originally were for the USMC so I just sawed off the top and plopped on a green helmet instead.

The pictures aren't the greatest, but I hope they convey what I'm thinking, the scene is not quite as bunched or disorganized as it might appear.


Once I find a suitable base I'll post pics of the final layout. Enjoy, let me know what you think.
slodder
Visit this Community
North Carolina, United States
Joined: February 22, 2002
KitMaker: 11,718 posts
Armorama: 7,138 posts
Posted: Friday, May 01, 2009 - 11:39 PM UTC
Here is what I recommend.
The bazooka figures are to casual for the rest of the men. If the forward two figures are engaging the Germans I would suspect that the bazooka team would be more 'covered'.
The two sprinting figures to the far side of the tank would (in my opinion) be running more to thier right flank to spread out and create a wider defensive position.
I would tuck the bazooka team tighter to the tank, or behind a tree in the final layout.
I would rotate the sprinters to thier left a bit.

Future point to think about, the Hellcat would also be engaging the enemie with its bow gun and if it has a 50cal on the turret, that too would used. Maybe even the main gun. So, plan to have these built pointing in the same direction.

Good start, the figures are nicely done to this stage. Keep us posted.
newfish
Visit this Community
England - West Midlands, United Kingdom
Joined: June 23, 2008
KitMaker: 2,329 posts
Armorama: 2,110 posts
Posted: Saturday, May 02, 2009 - 05:45 AM UTC

Quoted Text

I second that.


Now thats constuctive feedback .

Either ditch the bazooka crew or replace him for one thats in action like firing etc...
Have either some tank commander spotting for Panzers and maybe relating to the
squad leader it will tie in the Hellcat and the infantry and not make them look out of place.

One thing shuffle the two guys engaging the germans because the guys running could be coming up to strengthen the line and engage targets so it looks like there engaging the enemy not charging towards it


other than that great idea and superb work!

snowgoon81
Visit this Community
United States
Joined: January 30, 2009
KitMaker: 67 posts
Armorama: 67 posts
Posted: Sunday, May 03, 2009 - 08:16 AM UTC
Thanks for the critiques guys. It's always good to have someone else look to make sure it makes sense!

I'm going to see if I can scrounge up a wounded trooper to tie in the medic and bazookaman, or make them crouching/kneeling.
montythefirst
Visit this Community
England - South West, United Kingdom
Joined: August 04, 2007
KitMaker: 1,055 posts
Armorama: 199 posts
Posted: Monday, May 04, 2009 - 11:34 AM UTC
looking good have to agree about the bazooka team far to relaxed in relation to the rest
CHESTERNIMITZ
Visit this Community
Vizcaya, Spain / España
Joined: March 01, 2009
KitMaker: 96 posts
Armorama: 95 posts
Posted: Monday, May 04, 2009 - 11:03 PM UTC
Mounting perfect touch now to see the painting that is!
snowgoon81
Visit this Community
United States
Joined: January 30, 2009
KitMaker: 67 posts
Armorama: 67 posts
Posted: Thursday, May 07, 2009 - 03:35 PM UTC
So I re-arranged the dio, hopefully this is better. I tried to separate the action by putting the M-18 in the middle (sherman hull standing in). I've got the officer with the thompson talking to the TD commander (I might have to tilt his head up a bit), and on the other side a medic tending to a trooper with a leg wound and a bazookaman. The wounded guy looks a little stiff, but I hope to have him leaning on a rock or stump and that should help. Started the tree trunks, still experimenting with different materials/ferns to get good boughs. We'll see how much I have to adjust the figs when the trees are done and the branches start taking up a bunch of room (maybe a bigger base).


I'm drawing on the first hand account by Layton Black. According to him, they retreated to a woodlot a few hundred yards from the road, regrouped and started a counterattack when two M-18s just appeared in the woods maneuvering around the big trees.


Hopefully I'll start painting soon. I'll also have updates for the trees, but being unemployed I'm working on a pretty limited budget so progress could be slow.
marsiascout
Visit this Community
Noord-Brabant, Netherlands
Joined: March 24, 2008
KitMaker: 1,247 posts
Armorama: 913 posts
Posted: Friday, May 08, 2009 - 12:57 AM UTC
Looks way better now.

I do have another tip about the figures.It's about the 2 guys helping the other soldier. Normally, when there is an attack they would seek cover, or at least stay lower. They would be easily shot the way they are standing right now.

Lars
slodder
Visit this Community
North Carolina, United States
Joined: February 22, 2002
KitMaker: 11,718 posts
Armorama: 7,138 posts
Posted: Friday, May 08, 2009 - 02:15 AM UTC
It looks much better! Positioning and composition is much better.
If you want to continue working on the injured guy, tip his head toward the other two guys. If possible, cut his ankles and point his toes a bit. Lastly his right shoulder is making him look a bit stiff. When you raise your arm your shoulder naturally 'humps' a bit, his isn't. I'd rotate his arm down and to his belly instead of up. His position on the ground supports his need for assitance.

I wouldn't go bigger on the base.
snowgoon81
Visit this Community
United States
Joined: January 30, 2009
KitMaker: 67 posts
Armorama: 67 posts
Posted: Monday, May 11, 2009 - 04:10 PM UTC
I've started painting, finished the faces and did the base coats for all the uniforms. I'm a little rusty the faces aren't as good as I had hoped. My paint is a little old as well, but I'm making do best I can. Those are all excuses though, more practice and the skills will come! Soon, I'll do the weathering and detail on the uniforms and start the gear.


muddyfields
Visit this Community
Scotland, United Kingdom
Joined: February 04, 2006
KitMaker: 884 posts
Armorama: 622 posts
Posted: Monday, May 11, 2009 - 09:26 PM UTC
Hello Chris
I like what you've done so far. The painting of the face's looks very good to me.
For your Trees you could do the same as mine. I used a dowel tapered to a point, then roughened up with a saw. I then drilled (100's it seemed ) small holes along the length of the dowel. I then used Asparagus Fern to make the branches & leaves. The fern I bought from a local Florist a massive big clump for about £4. As this was fresh I stuck it in a vase for about 2 weeks with some Gylcerin solution. Works well. My 1st time at making those type of trees. You can check it on my Diorama US Rocket Artillery. Hope this is of some help.
snowgoon81
Visit this Community
United States
Joined: January 30, 2009
KitMaker: 67 posts
Armorama: 67 posts
Posted: Wednesday, May 27, 2009 - 03:53 PM UTC
The figures are pretty much done. Just need to pull together some more M1 slings. Sorry about picture quality, I'm going to blame it on poor lighting and camera.


slodder
Visit this Community
North Carolina, United States
Joined: February 22, 2002
KitMaker: 11,718 posts
Armorama: 7,138 posts
Posted: Wednesday, May 27, 2009 - 10:59 PM UTC
Nice job painting. Two things, don't forget all the M1 straps. I would tone down the color of the blood, go a bit more for almost a black with redish undertones. The uniform would really soak up the blood and the color really changes to dark tones quickly.
smitsan
Visit this Community
Latvia
Joined: September 05, 2008
KitMaker: 51 posts
Armorama: 50 posts
Posted: Friday, May 29, 2009 - 06:27 AM UTC
nice idea!Very good paintinfg figure.
Pyromaniac
Visit this Community
England - South East, United Kingdom
Joined: January 10, 2009
KitMaker: 375 posts
Armorama: 362 posts
Posted: Friday, May 29, 2009 - 09:49 AM UTC
looks good. don't overdo the blood. make it dark and don't put too much in. if it's subtle and takes the viewer a few seconds to spot it will be far more effective and meaningful. i'm thinking their will be snow in this dio though. painting some red specs on the ground by the figure could look really good.
snowgoon81
Visit this Community
United States
Joined: January 30, 2009
KitMaker: 67 posts
Armorama: 67 posts
Posted: Saturday, May 30, 2009 - 06:56 AM UTC
Thanks for the tips guys. I had tried to tone down the blood originally, guess I needed a little more this is my first time posting and first dio since I graduated from college a year ago.

As for the rest of the dio...I'm on a serious budget crunch so instead of a M18 I'm using the M4A1 (76) from Italeri since I had it lying around. I know a lot of you Shermaholics will prolly ream me about something but i'm doing the best I can with what I have.

Here is what I've done so far, any tips are appreciated since I don't know a whole lot about this model tank.
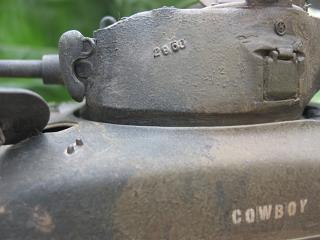


Unfortunately I'm limited by what I currently have on hand. the casting surface was textured with liquid cement and a paint brush.
AlanL
Visit this Community
England - East Anglia, United Kingdom
Joined: August 12, 2005
KitMaker: 14,499 posts
Armorama: 11,675 posts
Posted: Saturday, May 30, 2009 - 07:33 AM UTC
Hi Cris,

Nice work on the figures these look really good. Coming along well.

Al
exer
Visit this Community
Dublin, Ireland
Joined: November 27, 2004
KitMaker: 6,048 posts
Armorama: 4,619 posts
Posted: Saturday, May 30, 2009 - 09:59 AM UTC

Quoted Text


As for the rest of the dio...I'm on a serious budget crunch so instead of a M18 I'm using the M4A1 (76) from Italeri since I had it lying around. I know a lot of you Shermaholics will prolly ream me about something but i'm doing the best I can with what I have.

Here is what I've done so far, any tips are appreciated since I don't know a whole lot about this model tank.

Unfortunately I'm limited by what I currently have on hand. the casting surface was textured with liquid cement and a paint brush.


The Italeri M4A1 76 kit is pretty okay and in some areas better than the Dragon kit. I see you have already tackled the gun, good work. One thing you should look at is the pistol port as it should be proud of the turret side and not recessed.


My fix on the Italeri Pistol port


The other thing is that each suspension unit should have three bolt heads on the bottom.


snowgoon81
Visit this Community
United States
Joined: January 30, 2009
KitMaker: 67 posts
Armorama: 67 posts
Posted: Monday, June 01, 2009 - 05:15 PM UTC

Quoted Text


The Italeri M4A1 76 kit is pretty okay and in some areas better than the Dragon kit. I see you have already tackled the gun, good work. One thing you should look at is the pistol port as it should be proud of the turret side and not recessed.


Unfortunetly my pistol port did not come out as nicely as yours, it's pretty screwed. Oh well.

I did make new lightguards from thin strips of styrene strip which I cut to the right width and soaked in boiling water. I've also finished the stowage. The rolled tarps are from epoxy putty and the covering tarp is tissue coated in watered down elmers glue. the mud/snow texture is cornstarch and elmers glue.


Bowman18
Visit this Community
England - North East, United Kingdom
Joined: July 19, 2008
KitMaker: 317 posts
Armorama: 286 posts
Posted: Monday, June 01, 2009 - 08:34 PM UTC
Great progress, i like the way you painted the figures the uniforms really have a faded look.

Is the machine gun belt going to be attached to one of the ammo tins?

 _GOTOTOP