_GOTOBOTTOM
Dioramas: Beginners
A good place to look if you are just starting out.
Hosted by Darren Baker
The dastardly Hun
bigal07
Visit this Community
England - East Anglia, United Kingdom
Joined: January 07, 2009
KitMaker: 887 posts
Armorama: 256 posts
Posted: Tuesday, May 12, 2009 - 10:18 AM UTC
http://farm4.static.flickr.com/3657/3525881313_f204ffd808_b.jpg
http://farm4.static.flickr.com/3548/3526668946_74c644615c_b.jpg
http://farm4.static.flickr.com/3542/3526668936_703870645a_b.jpg
http://farm4.static.flickr.com/3317/3526668922_6512ecee6f_b.jpg
Hello there, hot on the heels of my 'They called it firefly' this is my somewhat dark bit of history, during WW1 according to stat's 1 if not 2 British whippet light tanks were captured by the German's, although they were never used in combat, I on the other hand believe this not to be true as with all advanced technology, I am darn sure the German high command would have done everything to get the captured tanks up and running, talking of which, these whippets had almost twice the speed of any WW1 tank of the day, hense 'whippet' small and very fast hunting dog, as always, this purely being a start point for my dioramas I would like all comments both good and bad please.
hun - 2 015
hun - 2 011
James - this isn't quite what you had in mind, but it has worked for me, on my flickr there was a box, I just copy and paste, and got the 2 pix, a lot of mucking about though.
hun - 2 009
hun - 2 021
lespauljames
Visit this Community
England - South West, United Kingdom
Joined: January 06, 2007
KitMaker: 3,661 posts
Armorama: 2,764 posts
Posted: Tuesday, May 12, 2009 - 10:34 AM UTC
Hey alec!
good idea,
with the tanks used in combat
i quote from " the illustrated history of ww1" by andy west ( a photo caption indicating how underetimated tank warfare was by the germans)

"the germans, not realising the value of tank warfare, produced very few of their own tanks..."

the captured vehicles were present and a few did see action. but i guess they didnt ever see it taking off.

i like the colours on your tank and i love the composition.

to post pictures, click on the small button at the bottom of your posting screen.
you should get this


delete the "http://put.url.here/image.file" and copy and paste the adress to your pictire
E.g http://farm4.static.flickr.com/3657/3525881313_f204ffd808_b.jpg

so you should get this without the spaces


and that ends up like this


i hope that works, and i hope it helps
bigal07
Visit this Community
England - East Anglia, United Kingdom
Joined: January 07, 2009
KitMaker: 887 posts
Armorama: 256 posts
Posted: Tuesday, May 12, 2009 - 07:23 PM UTC
That's deeply appreciated James, and I dare say I will get the hang of posting photographs sooner or later, at the moment its a bit of a mystery, and when you're as old as me and only owned a computer for a couple of years, this is like a magic box rather than a computer, my 8 year old comes on, knows what buttons to press and goes straight into his Transformers site (the only site he knows - no ebay for him - ) when I was his age, computers were only seen on Star Trek and the like, the blokes at work kept going on and on about getting a computer, stop being like Fred Flintstone and buy a computer, when in 2 years I've crashed it 3 times, not bad for something that's got no wheels, anyway James, many thanks for your comments and help on posting - sorry I got a bit carried away.
Pyromaniac
Visit this Community
England - South East, United Kingdom
Joined: January 10, 2009
KitMaker: 375 posts
Armorama: 362 posts
Posted: Tuesday, May 12, 2009 - 10:46 PM UTC
pretty good dio actually.
good points:
very dramatic
The hight is good
The figures are well posed
The layout and makeup of the groundwork is very good.

the only thing that lets it down is the painting (unless i am missing something and you haven't painted it yet?). the colours are far too garish and bright. i've never seen bright orange mud and you should always paint static grass. The barbed wire is perhaps a bit too shiny and the mud on the tank is very clearly marked. there are parts that are plastered in it and others that are completely clean right next to those. try blending it.
If you don't have an airbrush (i assume you don't) buy a cheap set with a compressor to start out. it will be one of the best investments you make to modelling, and you can use it for loads of other cool stuff too. then paint the whole base a darker, more earthy brown and dry brush with lighter shades. dry brush these colours onto the tank too to make it fit in with the scene better.

in conclusion, a very well planned dio. most of the hard work is already done, it just needs some good painting to turn it into something really special.
bigal07
Visit this Community
England - East Anglia, United Kingdom
Joined: January 07, 2009
KitMaker: 887 posts
Armorama: 256 posts
Posted: Wednesday, May 13, 2009 - 12:53 AM UTC
WOW ! that's a lot of info for me to take in at the moment, I do actually understand where you're coming from, its just putting everything into practice, and basically this is what the dio was all about, playing around with dirt/mud/soil etc etc as I am never sure what or how to do these colours, thank you for the feed back that was most welcome.
bigal07
Visit this Community
England - East Anglia, United Kingdom
Joined: January 07, 2009
KitMaker: 887 posts
Armorama: 256 posts
Posted: Wednesday, May 13, 2009 - 05:03 AM UTC
hun 3 006
I have tried to address some of the problems, the grass, yep that certainly does make a 'lot' of difference I must addmit, the brownish colour on resin to try and show water still a long way to go, the shine on the steel cable fence all gone, please let me know what you think.
hun 3 007
lespauljames
Visit this Community
England - South West, United Kingdom
Joined: January 06, 2007
KitMaker: 3,661 posts
Armorama: 2,764 posts
Posted: Wednesday, May 13, 2009 - 05:39 AM UTC
Hey Al!
looking good , i admit the mud is better!
good job on the pics too.
what do you use to build up your groundwork?
when dabbling with my sopwith camel dio i discovered something that works well for me.

what i did was i picked up some of that brown soft railway scatter, some litte stone chippings, some static grass and some earth coloured railway ballast.
- the scatter and stoney bits,

i also piced up some £1 acryl paints,
burnt umber is the colour i used

i also used a herbal teabag or two for more texture


i mixed all of the scatters and static grass into a bowl, leaning to a majority of brown ballast and cork scatter
when it looked ok i left it,
i mixed up plaster pva glue and warm water, mixed in loads of burnt umber cheapo paint,
then when it was still wet, mixed the other mixture in, making a very textured brown plaster mix. for a damp battlefield i would have mixed in some gloss varnish,

thi is ht ebst pic for seeing the texture you get, just before its entirely dry press in your kit so it looks like it "in" the earth/wet mud, when its dry you can dry brush lighter shades of brown ( not too light ) by puting paint on the brush and wiping it on a towel so there is stll paint on the brush but not much ( what a mouthful)(also i havent dont that much)
if you need more texture and details, you can stipple the plaster when its close to settling with a old big brush, or, if you want details to look like thay are bogged in mud press them in in this stage.
hope im not going over what you know!
good luck mate

bigal07
Visit this Community
England - East Anglia, United Kingdom
Joined: January 07, 2009
KitMaker: 887 posts
Armorama: 256 posts
Posted: Wednesday, May 13, 2009 - 06:08 AM UTC
Hello James, this'll probably give you a laugh, but here goes, you can buy several really good expensive products to build up your diorama base - people say I can peel an orange in my pocket - I use whatever is cheep at the time down my local D.I.Y as I'll use gap filler, caulk is really good especially in a gun, totally dries over night and quite light weight as well, then there's all purpose sealant (clear) this is silacon based as best done outside, but its really good for sea effect, good old pollyfiller by Polycell is very good for building up the land on a diorama, best of all I have found is acrylic gel medium by Spectrum, fantastic stuff which can also be used as a glue (sticking down 1-72 figures and vehicles) also will dry clear which is great for ponds and small lakes, I have a ton of cork and railway stuff, very small stones, and like yourself, mix these together and spread over where I believe it will look good, when I was building my big dio, I completed 3 segments, had time on my hand and then changed them all, now there's only 1 completed segment - what I would love to master is how people make plastic look like metal, happy dioramas
lespauljames
Visit this Community
England - South West, United Kingdom
Joined: January 06, 2007
KitMaker: 3,661 posts
Armorama: 2,764 posts
Posted: Wednesday, May 13, 2009 - 06:15 AM UTC
i ahve tried using the Diy stuff, just never worked for me, ah thats just my luck and impatience
for the plasitc to metal thing, i think your geting there , the paint ont this whippet is your best so far . the way i build up my bases is with polysturene, then cover them up, that saves materials, the trench in the camel was done by putting a long rectangle of packing polystrene in and pouring the plaster around it.
Pyromaniac
Visit this Community
England - South East, United Kingdom
Joined: January 10, 2009
KitMaker: 375 posts
Armorama: 362 posts
Posted: Wednesday, May 13, 2009 - 07:39 AM UTC
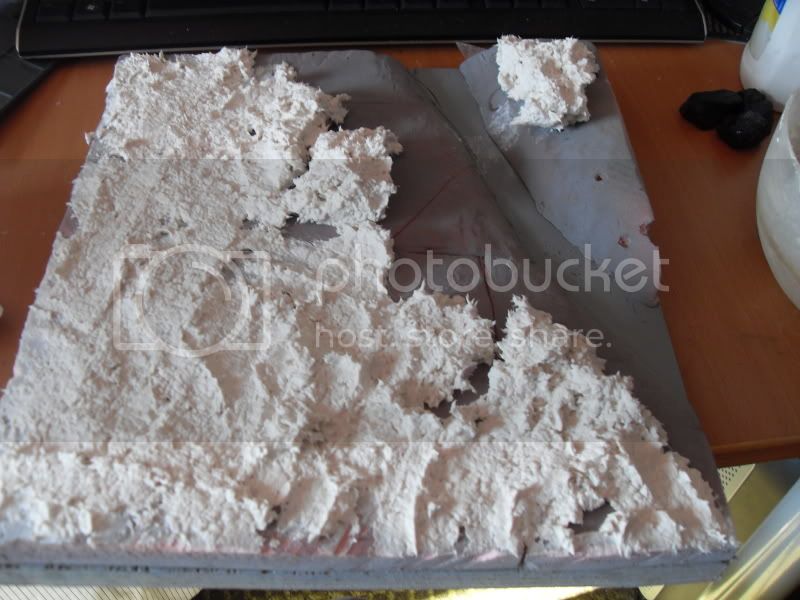
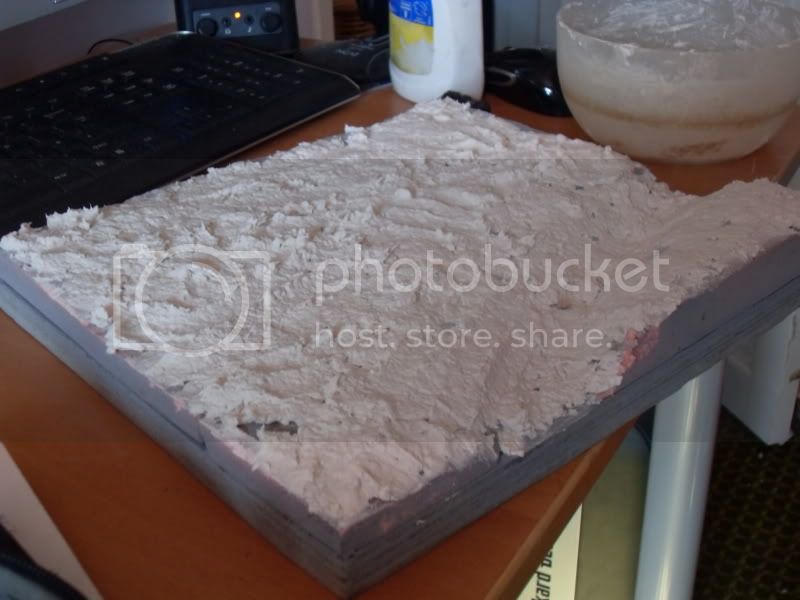
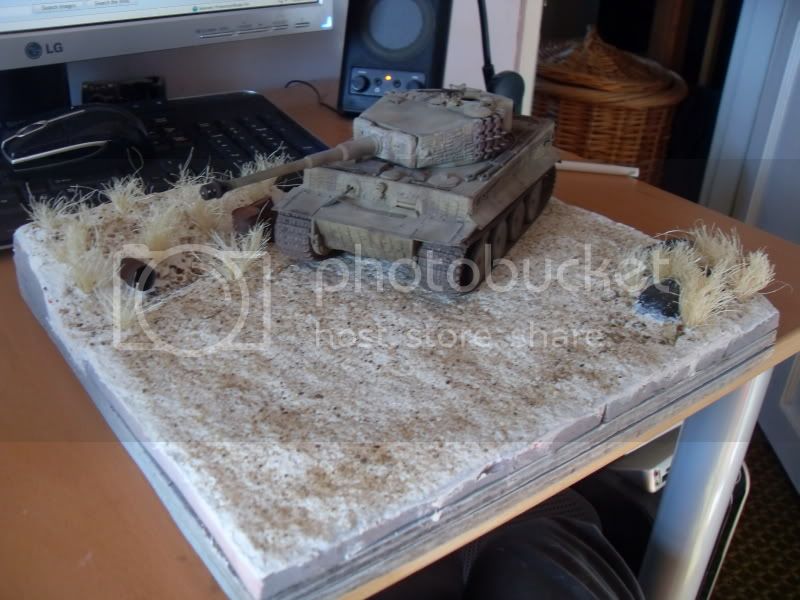
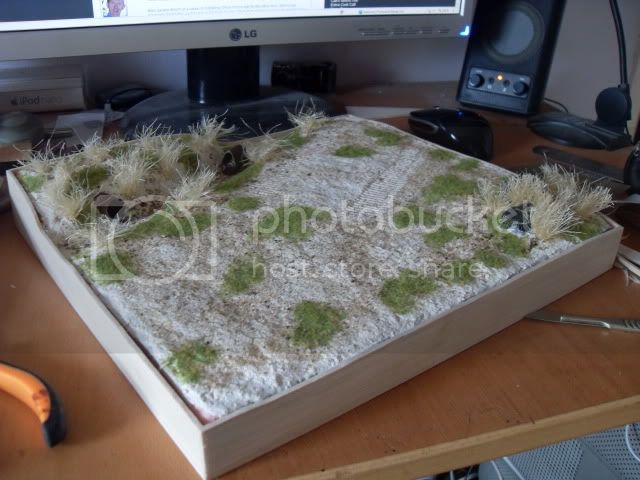
i bought 2Ib of amaco claycrete, not knowing how much you get in a 1Ib bag. it's not as fine as i think celluclay is so i won't buy it again, but i'm stuck with it for now so i made my own recipe. i use 50/50 of claycrete to pollyfilla, plus quite a lot of PVA. it looks quite good on it's own when dry as it has an earthy texture, but i sprinkle sand on usually. i apply static grass in patches when it's dry. the only problem is that you need to build up height with foam first because thick layers take weeks to dry.
here are some pics from my tiger dio project. check it out in the dios section


bigal07
Visit this Community
England - East Anglia, United Kingdom
Joined: January 07, 2009
KitMaker: 887 posts
Armorama: 256 posts
Posted: Wednesday, May 13, 2009 - 08:55 AM UTC
Yep understood where building up layers are concerned, I found a rather large tub of artex, the stuff you'd use to hide cracks, or put wavy lines up on the ceiling, it weighed a ton and took a month of sundays to dry, now I use plastic card, old smashed up model parts, and the good old acrylic gell, I dunk everything into that, plop the lot together resting on top of each other, next day, I get out my caulk gun, five moments later, rasied shaped land, due to the amount of rubbish I've used, I don't use as much caulk, I still dry a full 24 hours, after that time though, you can basically do anything you want, drill holes, sand down, re-apply with gell, glue. There's always the paste and paper over card, very messy but gets the job done.
Pyromaniac
Visit this Community
England - South East, United Kingdom
Joined: January 10, 2009
KitMaker: 375 posts
Armorama: 362 posts
Posted: Wednesday, May 13, 2009 - 09:20 PM UTC
sounds good to me
if you have no problems building up the height then you should seriously consider buying some celluclay in future. it will help stop that smoothness you have, (i know part of that's resin, so go easy on that too in future, it's most effective when flat)
 _GOTOTOP