Constructive Feedback
For in-progress or completed build photos. Give and get contructive feedback!
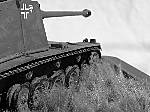
Sturer Emil Build/Review
RSingleton
Visit this Community
Kentucky, United States
Joined: August 26, 2008
KitMaker: 286 posts
Armorama: 273 posts
Posted: Saturday, June 13, 2009 - 02:32 AM UTC

Quoted Text

Hi Rich ...Good work so far ...One thing though ...German antennaes are rigid and wouldn't be bent the way you've got yours bent ....You'd be better to use a straight piece od stretched sprue.

Rick


Thanks for replying. I have made a better one that you'll see in my update
Rich
RSingleton
Visit this Community
Kentucky, United States
Joined: August 26, 2008
KitMaker: 286 posts
Armorama: 273 posts
Posted: Saturday, June 13, 2009 - 02:34 AM UTC

Quoted Text

Your building has gone way up there Richard.

Much better then last I saw of you.

One thing that stands out is the Barrel needs more sanding to get the seam gone.

If you can try one of these.

http://www.michtoy.com/MTSCnewSite/supplies_folder/flex_I_file/flex_I_file.html


Nice job so far.

Better bought from a Local store.


Thanks Jeff,
It isn't noticeable in real life, but I'll sand it down some more before I leave for camp tomorrow so it looks better.

Rich
RSingleton
Visit this Community
Kentucky, United States
Joined: August 26, 2008
KitMaker: 286 posts
Armorama: 273 posts
Posted: Saturday, June 13, 2009 - 02:42 AM UTC
OK, small but important update. I fixed the antannae to be more straight and have a slight taper. It's a little short (53mm when it should be 57mm) but I was able to manage a small taper. I went wiht this one out of the 7 I made as it looked the best.

The decals were really easy to put on and they didn't sliver.


I painted the radio a rough straight metal color, but it's hard to notice.


I got some help from the guys over at missing lynx to help with with some finishing ideas.
http://www.network54.com/Forum/110741/message/1244680959/Sturer+Emil+WIP" TARGET="_blank"> http://www.network54.com/Forum/110741/message/1244680959/Sturer+Emil+WIP

Well, too bad I won't be able to work on the Emil for almost three weeks. I guess it's an acceptable loss at the cost of climbing, canoeing, etc....

Rich
thebear
Visit this Community
Quebec, Canada
Joined: November 15, 2002
KitMaker: 3,960 posts
Armorama: 3,579 posts
Posted: Sunday, June 14, 2009 - 01:51 AM UTC
Have fun at Camp and we'll be here when you get back!
Nito74
Visit this Community
Lisboa, Portugal
Joined: March 04, 2008
KitMaker: 5,386 posts
Armorama: 4,727 posts
Posted: Sunday, June 14, 2009 - 02:55 AM UTC
Anyone used the ABER sets for the Emil ??

I have an Emil waiting to get build soon, so I was wanting to upgraded it a bit.

Fast work on that Emil, looks good too.
VonArnim
Visit this Community
North Carolina, United States
Joined: April 10, 2004
KitMaker: 48 posts
Armorama: 35 posts
Posted: Sunday, June 14, 2009 - 04:40 AM UTC
Hi Richard ,
Nice build ! The only thing i see you might want to do would be to paint the floor boards in the fighting compartment (they were made of wood ! Check out the following link on a build over on planet Armor that shows the floor boards .

http://www.planetarmor.com/forums/showthread.php?t=6016&highlight=sturer+emil


hth
JOEY
RSingleton
Visit this Community
Kentucky, United States
Joined: August 26, 2008
KitMaker: 286 posts
Armorama: 273 posts
Posted: Tuesday, July 07, 2009 - 10:15 AM UTC
Well, I can't say I'm working on a stalled project, but it sure does seem like it...

Anyway here's the limited amount of progrress:

I followed VonArnims advice and made some wood planks. I thinking a light black wash might make it much better. Any suggestions?


Here are some pics of the spare tracks.


Now, if anyone can help me out in the colors of the following items, I'd appriciate it.


As always, thanks for watching and all help is appriciated.
Rich
muchachos
Visit this Community
Ontario, Canada
Joined: May 21, 2008
KitMaker: 537 posts
Armorama: 439 posts
Posted: Tuesday, July 07, 2009 - 11:03 AM UTC
NO! Don't use a black wash! A brown colour would work far better.

I'll do the items in the order of the pics.

MP40 - holder is the vehicle color, and gun is gunmetal.

grenade holders are grey, handles are wood, and explosive part is grey of dark yellow

pistol holder - black or brown leather

gasmask case - german grey, straps are brown leather, and holders are vehicle colour

canteen - brown felt, green metal cap.

Look on reenactor sites for more info , such as at the front.

SCOTT
RSingleton
Visit this Community
Kentucky, United States
Joined: August 26, 2008
KitMaker: 286 posts
Armorama: 273 posts
Posted: Thursday, July 09, 2009 - 09:53 AM UTC
That list is extremely helpful. Thanks a lot for it!

Using that list, I made a small amount of progress by painting the MP40's and the grenades.


That's it for now. I'm hoping to get the gas mask holders and the canteens finished sometime soon.

I do have a question about painting the rubberband tracks. How should I do them?

Rich
smitsan
Visit this Community
Latvia
Joined: September 05, 2008
KitMaker: 51 posts
Armorama: 50 posts
Posted: Thursday, July 09, 2009 - 08:58 PM UTC
Richard Singleton very interesting tank is coming.Good building process,hope to see this when it finish
RSingleton
Visit this Community
Kentucky, United States
Joined: August 26, 2008
KitMaker: 286 posts
Armorama: 273 posts
Posted: Saturday, July 11, 2009 - 04:10 AM UTC
Thanks Smitsan, this update is for you:

Construction is basically finished except frothe casemate joining to the upper hull, the upper hull to the lower one, and the tracks to the suspension.


But when they are together (not glued) It looks like an Emil straight from the factory (except for the tracks)


I didn't do too well on painting the interior fittings but I tried my best to make 'em look good:


I also made an accryllic wash of Burnt Umber, Raw Sienna, black, and sandgelb to the wooden planks to make it look a little bit more like wood. Maybe next time I should just use balsa wood instead of plastic to look like wood.


Now comes the hardest part for me: The weathering.


Here's some questions about the weathering. Keep in mind that I'm aiming for a vehicle relatively "new to the front" in the summer getting dirty but not being affected from outdoor effects heavily yet like streak marks and rust. Just a dirty dusty vehicle.

1) The gloss. What am I looking for? Am I hindered by a lack of an Airbrush? How do I apply it?

2) Do I need to add another gloss after the filter breaking up the grey to protect it when I add the film of "dust"?

3) Going by logic here: Should more of the dust be concentrated towards the bottom and front than the top and rear?

4) Which would be more efficient for the dirt wash, accryillic or oil/enamel? I ask because I have a lot of accryllic earth tones but nothing else on hand. I hope accryllic will work because I don't know how much gloss is and the oil paints for the filtering are kind of pricey.

OR

Can I survive without the gloss and the fading and just make it dusty using the chalk pastels that I used for the suspension?


I know, I should know better, but I'm trying to make this look like mini steel than painted plastic.
Rich
RSingleton
Visit this Community
Kentucky, United States
Joined: August 26, 2008
KitMaker: 286 posts
Armorama: 273 posts
Posted: Sunday, July 12, 2009 - 02:57 AM UTC
I have finished the suspension. I mainly used ground up pastels mixed very lightly with water and applied it to the tracks that were painted flat black. I also applied it to the wheels, the front and some on the rear. I can take more pictures of it for critcism if need be.


Now all that's left is the upper hull
Rich
RSingleton
Visit this Community
Kentucky, United States
Joined: August 26, 2008
KitMaker: 286 posts
Armorama: 273 posts
Posted: Sunday, July 12, 2009 - 09:35 AM UTC
Here are a few more that show the upper hull completely attached and hopefully shows a little more of the suspension:


I still have the questions from my previous post:

1) The gloss. What am I looking for? Am I hindered by a lack of an Airbrush? How do I apply it?

2) Do I need to add another gloss after the filter breaking up the grey to protect it when I add the film of "dust"?

3) Going by logic here: Should more of the dust be concentrated towards the bottom and front than the top and rear?

4) Which would be more efficient for the dirt wash, accryillic or oil/enamel? I ask because I have a lot of accryllic earth tones but nothing else on hand. I hope accryllic will work because I don't know how much gloss is and the oil paints for the filtering are kind of pricey.

OR

Can I survive without the gloss and the fading and just make it dusty using the chalk pastels that I used for the suspension?
PvtMutt
Visit this Community
Missouri, United States
Joined: July 01, 2006
KitMaker: 614 posts
Armorama: 601 posts
Posted: Sunday, July 12, 2009 - 10:14 AM UTC
Well Richard if I were where you are at this point and the way your build is, which looks pretty dang good I might add, I would just use my chalks to shade the gray. Then with my earth tones do the dusting and the dust would be heavier as you move to the rear.

You've already got a flat finish and that's what you need for the chalks to grab and stay put, just be careful when you handle it because the chalk will come off.

Just my opinion and others will have one too i'm sure
Tony the Mutt
Jeff8600
Visit this Community
Georgia, United States
Joined: June 19, 2007
KitMaker: 254 posts
Armorama: 76 posts
Posted: Monday, July 13, 2009 - 02:03 AM UTC
Looking very good... the one thing that I'd like to add is to get you one of these for the wheels,
http://www.officedepot.com/a/products/730600/Staedtler-Mars-Template-Circle-Combo/

I noticed that the rubber was just a little rough with this you can spray the rubber first (I like NATO black) and than find the right size hole and hold it over the wheel and spray your wheel color.
RSingleton
Visit this Community
Kentucky, United States
Joined: August 26, 2008
KitMaker: 286 posts
Armorama: 273 posts
Posted: Tuesday, July 14, 2009 - 03:13 AM UTC
Tony- Thanks for the compliments, I've gone ahead and skipped the gloss and applied the chalks, I'll hopefully have some pics up tonight.

Jeff- A stencil would have definitely beaten toothpicks for painting the rims, maybe I can find one if I ever do another project.

Here's the base I'm planning for it. I'm hoping to find a fairly large sized frame. An 8X10 Maybe?


It's just going to show it in a dusty, grassy, field in Russia What do you guys think?


Rich
muchachos
Visit this Community
Ontario, Canada
Joined: May 21, 2008
KitMaker: 537 posts
Armorama: 439 posts
Posted: Tuesday, July 14, 2009 - 03:39 AM UTC
Pretty good, but you should move the Emil so that it isn't parallel to the frame, so its at an angle to it. It makes the scene more natural and dynamic.
lespauljames
Visit this Community
England - South West, United Kingdom
Joined: January 06, 2007
KitMaker: 3,661 posts
Armorama: 2,764 posts
Posted: Tuesday, July 14, 2009 - 05:53 AM UTC
thats a really good build ,
i wouldnt make the base big, there will be lots of space that you will need to fill,
im looking forward to it !
RSingleton
Visit this Community
Kentucky, United States
Joined: August 26, 2008
KitMaker: 286 posts
Armorama: 273 posts
Posted: Tuesday, July 14, 2009 - 11:11 AM UTC
Scott- That does make sense, Final placement is still undecided but I'm pretty confident I can make a field. Hopefully

James- A smaller base would probably be easier for me. Gives me less area to screw up .
RSingleton
Visit this Community
Kentucky, United States
Joined: August 26, 2008
KitMaker: 286 posts
Armorama: 273 posts
Posted: Tuesday, July 14, 2009 - 11:15 AM UTC
Well, here's my rendition of my BFG. Weathering was just done with chalk pastels only. I know it could look better but I'm not much of an artist so I'm not too disappointed in the final result.

Less talk, more pics:


RSingleton
Visit this Community
Kentucky, United States
Joined: August 26, 2008
KitMaker: 286 posts
Armorama: 273 posts
Posted: Tuesday, July 14, 2009 - 11:27 AM UTC


So, whats my final opinion on the Trumpeter Sturer Emil. I'll start off with the bad:
1) There were basically no issues with the kit I noticed. Granted there were a few minor gaps here and there but it was probably constructer's error
2) Instructions were vague in a few places. But this was rare and nothing some common sense wouldn't notice.


The good:
1) The kit as it's whole self. It was a joy to build. Besides, it's a vehicle with a REALLY big gun. If that doesn't inspire you to get this good kit, I don't know what will. It's good from both a beginners standpoint and would still be a good kit for those more experienced. Maybe for the more experienced people, aftermarket sets would probably make this awesome kit even better.

Well, there you have it. Now I have to work on the base, and that's a whole 'nother problem for me

Rich
metooshelah
#011
Visit this Community
Jerusalem, Israel
Joined: February 06, 2009
KitMaker: 1,507 posts
Armorama: 1,304 posts
Posted: Tuesday, July 14, 2009 - 11:46 AM UTC
very nice build and painting. had fun reading
RSingleton
Visit this Community
Kentucky, United States
Joined: August 26, 2008
KitMaker: 286 posts
Armorama: 273 posts
Posted: Wednesday, July 15, 2009 - 07:54 AM UTC

Quoted Text

very nice build and painting. had fun reading


Thanks for the compliment and I'm glad you enjoyed the build.

Rich
RSingleton
Visit this Community
Kentucky, United States
Joined: August 26, 2008
KitMaker: 286 posts
Armorama: 273 posts
Posted: Friday, July 17, 2009 - 09:59 AM UTC
My Last Update: IT IS COMPLETE

Well, here it is:


And just for kicks= My first tank and base and the progress in a little over a year
(I know, not as good pics, these were taken inside)


The size difference between the two is just amazing, especially because both were early war TD's


If anyone want some better pics, just say so and it'll be done.

Anyway I'm going to say I'm done and any comments are welcome!
As from Homer Simpson- "Woo Hoo"!

Rich
PvtMutt
Visit this Community
Missouri, United States
Joined: July 01, 2006
KitMaker: 614 posts
Armorama: 601 posts
Posted: Friday, July 17, 2009 - 12:16 PM UTC
Hey that looks good Richard,simple but effective.

Tony the Mutt