_GOTOBOTTOM
Dioramas: Buildings & Ruins
Ruined buildings and city scenes.
Hosted by Darren Baker
Building Miniart's Village Road kit
kbm
Visit this Community
Texas, United States
Joined: June 16, 2003
KitMaker: 678 posts
Armorama: 448 posts
Posted: Tuesday, June 30, 2009 - 03:16 PM UTC
As a diorama builder, I have been interested in Miniart’s building ruin and diorama kits. In fact, over the years I have collected several with specific projects in mind. However, being unfamiliar with vacuform kits and the techniques used to construct them, I put off working on them. I was also puzzled by the continuing lack of builds online and in the modeling media.

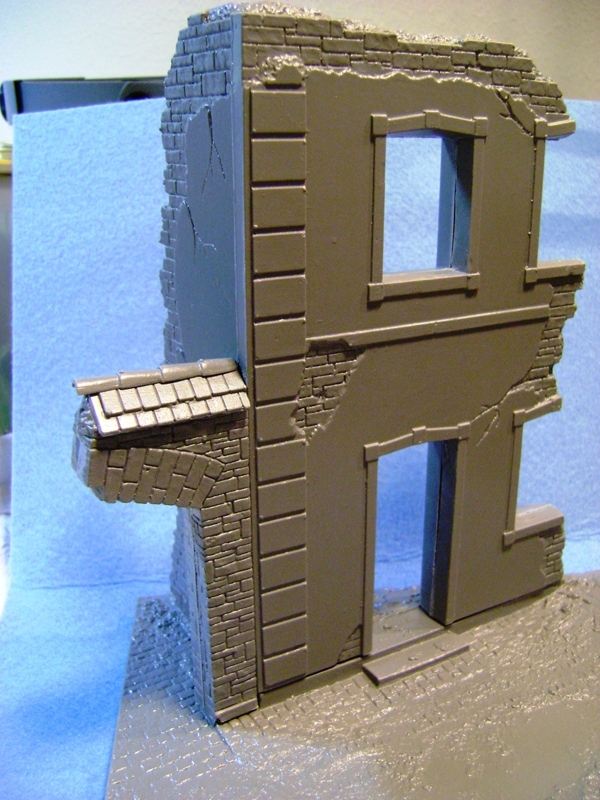
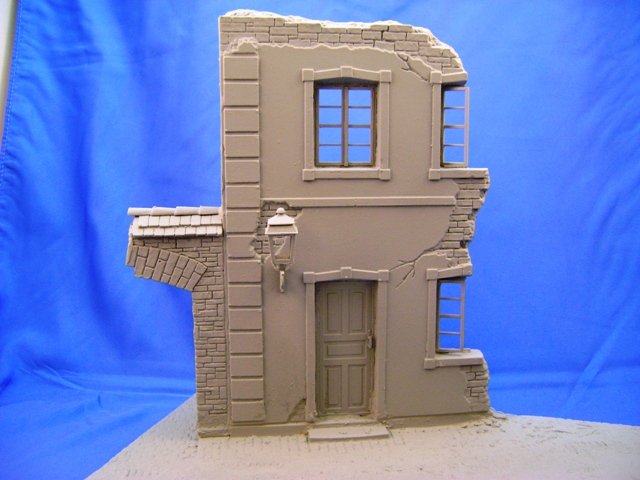
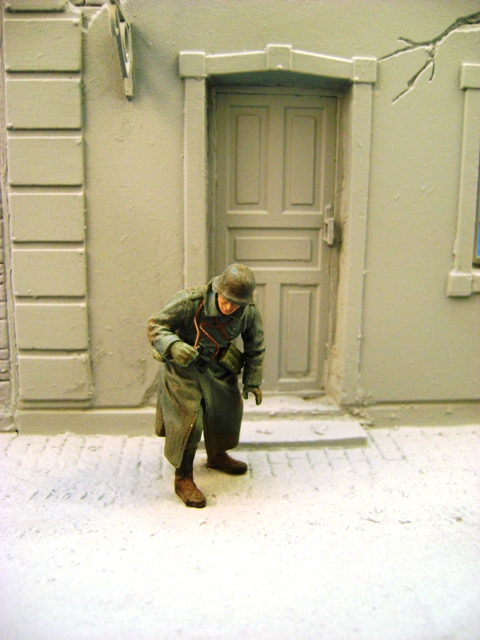
Well, I put myself on the spot when I got the opportunity to review a new diorama set, Village Road with Ruined House, kit number 36020. The review sample came with the caveat that, in addition to an in-box review, I was also to do an online building log. Because I was also expected to actually build the kit and prepare a build log of the process, I had no choice but to actually figure out what to do with one of these things.

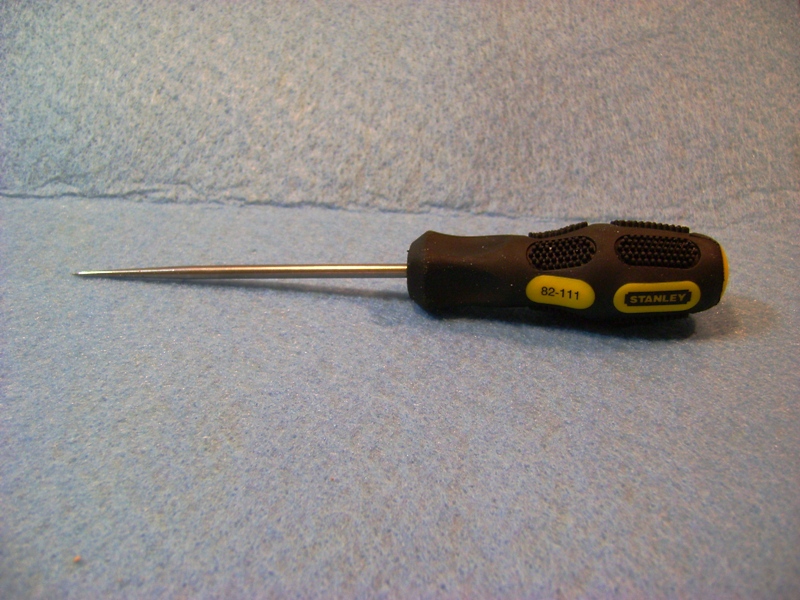
So, the first thing I did was check out Miniart’s website where they have two very good tutorials: one for construction and one for painting. I then gathered my scribing tools, which included these Stanley tools picked up at my local Home Depot.
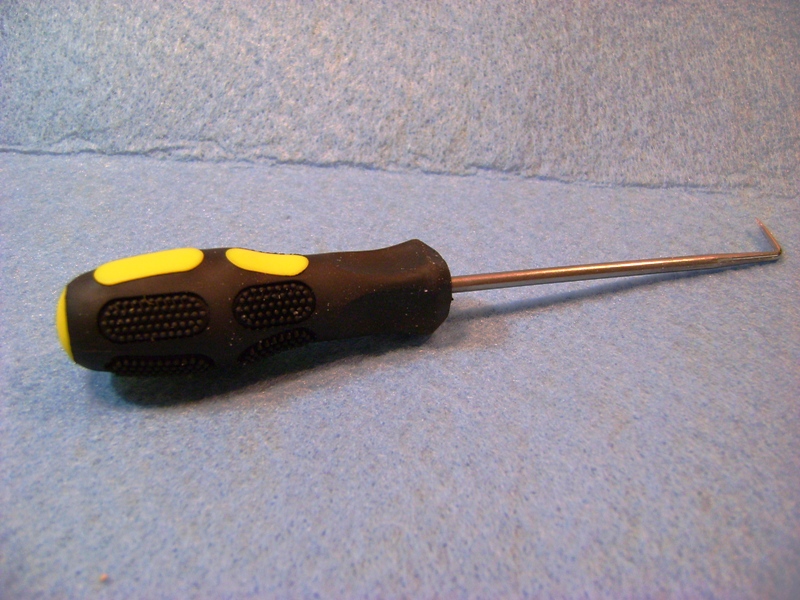
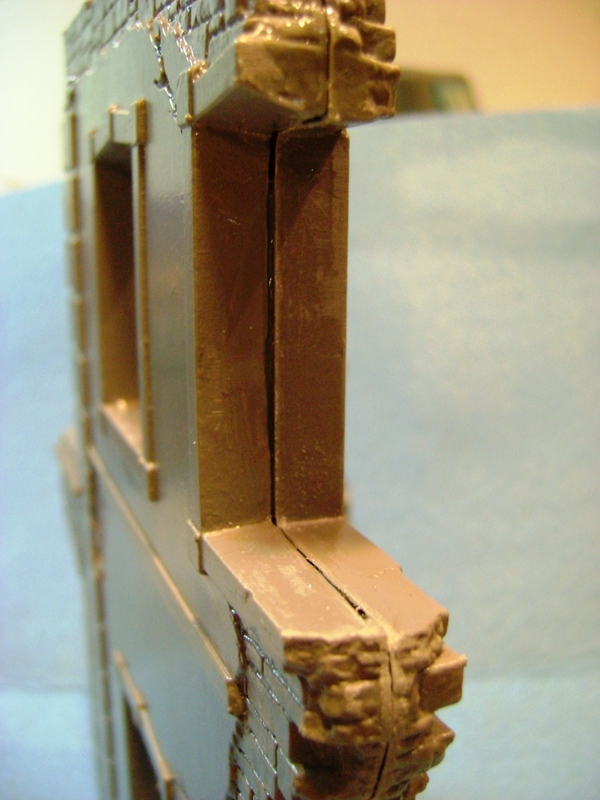
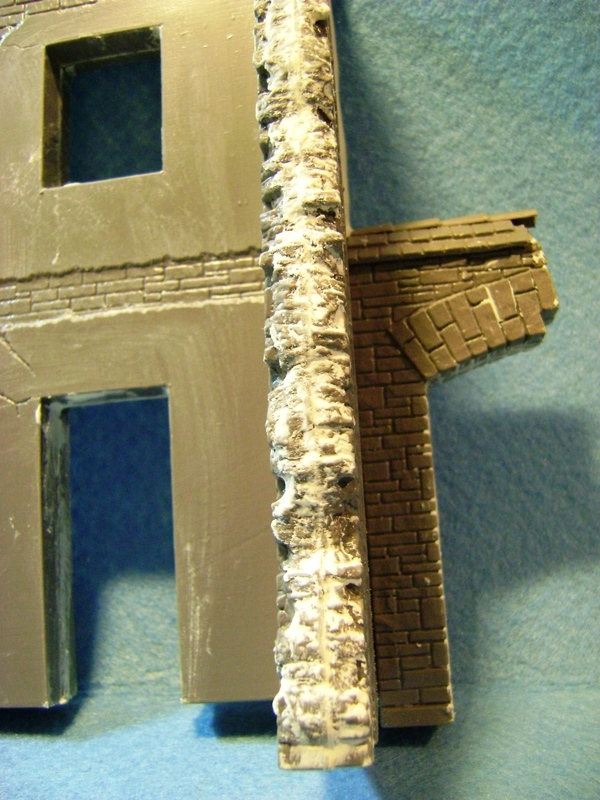
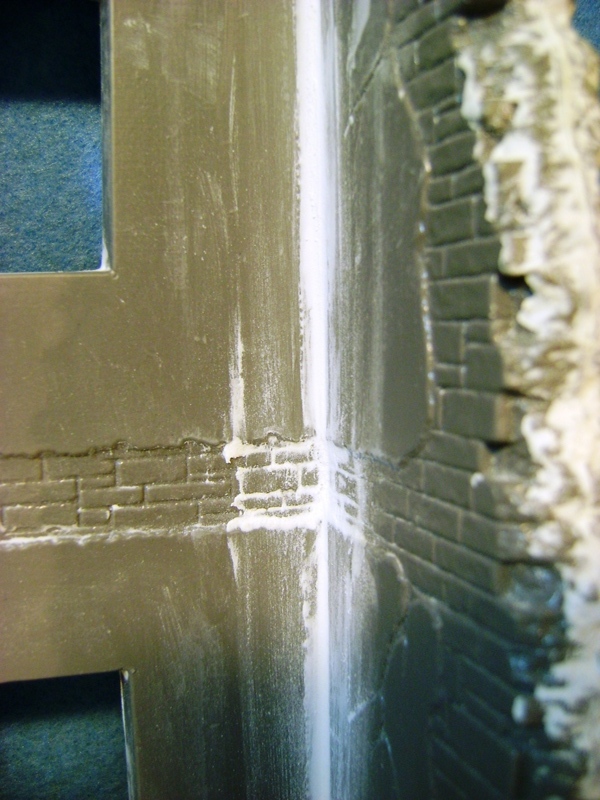
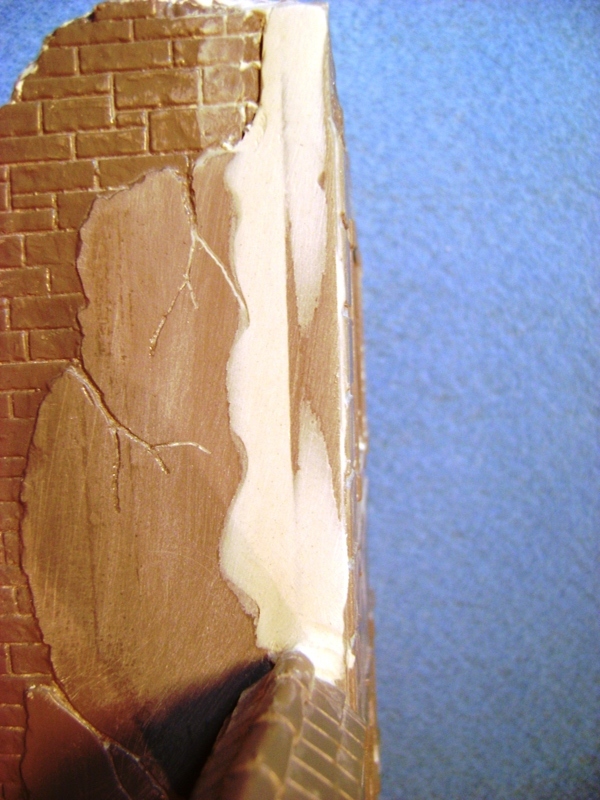
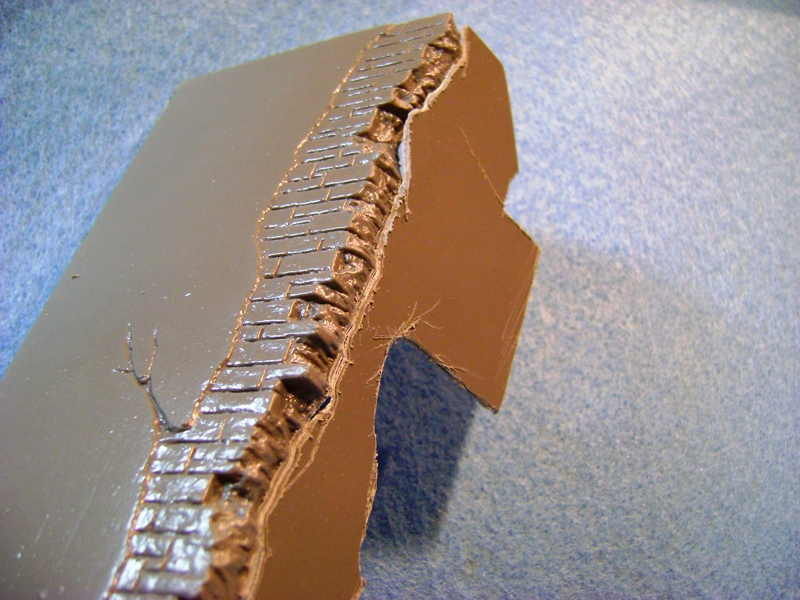
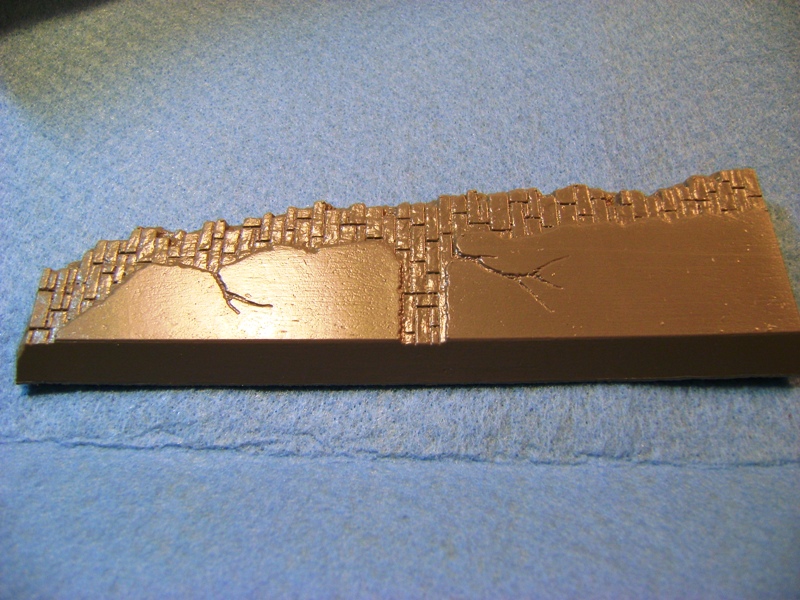


Following Miniart’s suggestion, I then started scribing a line along the outline of the building parts, which proved easier than I expected. I had the most luck with the bent tool. However, due to the thickness of the parts, it still takes a while. Once I believed I had scratched a deep enough line in the plastic, I snapped the excess plastic off the building part. Here you can see where I have made the initial snap, but not yet fully removed the excess plastic:

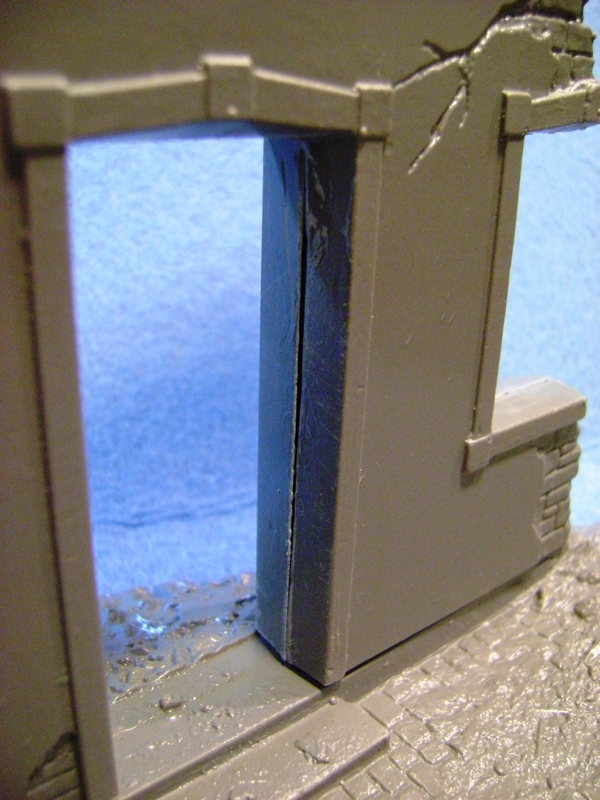
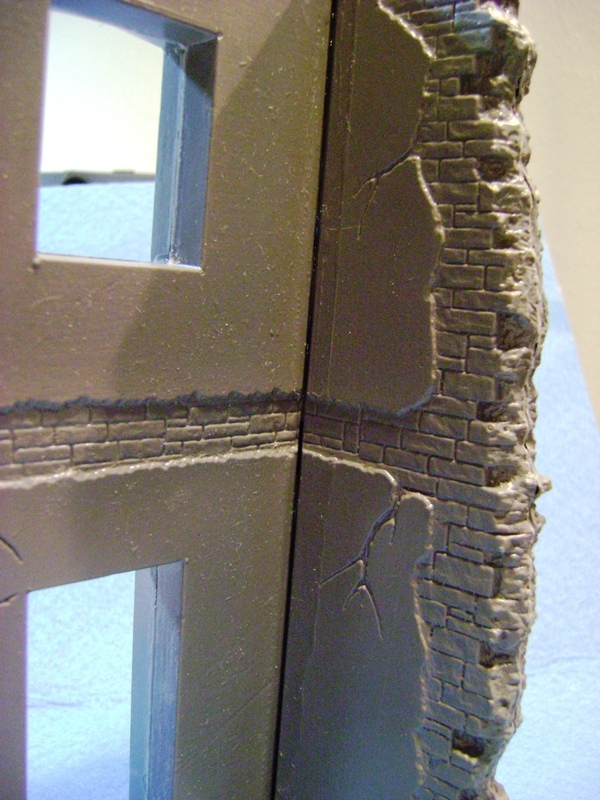
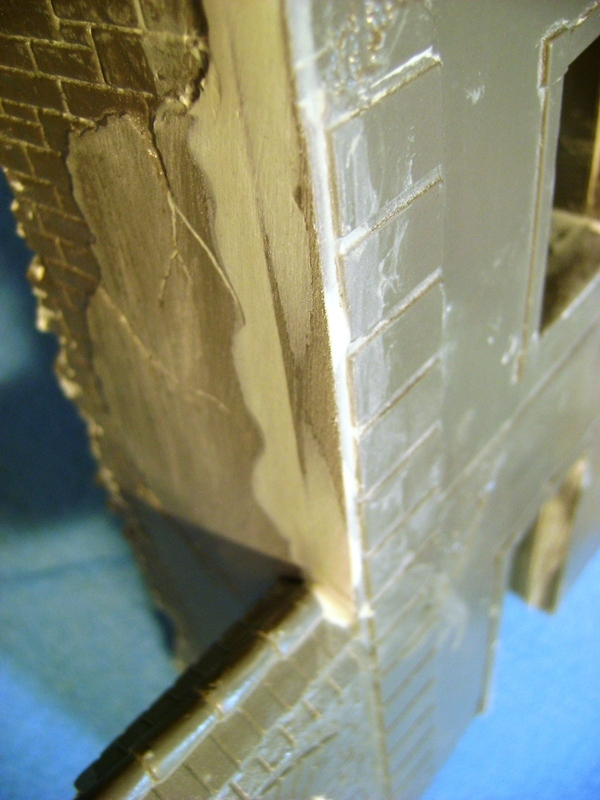
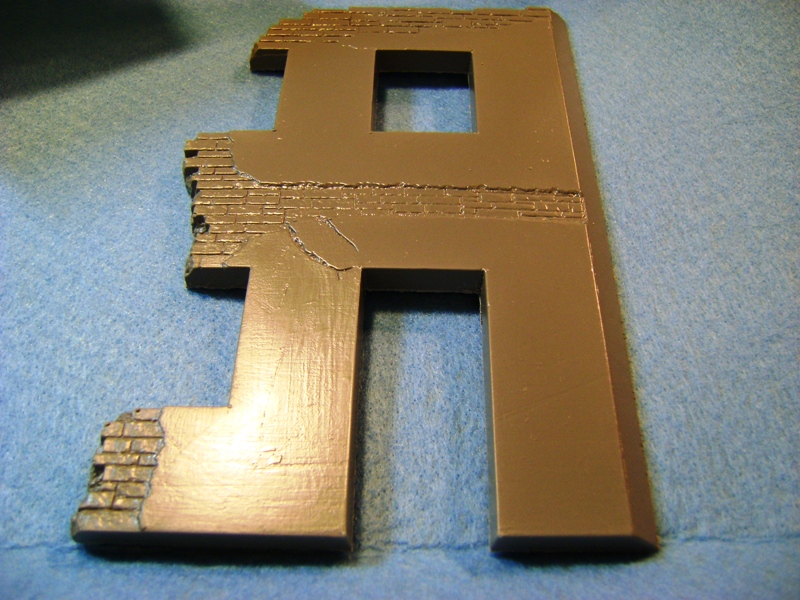
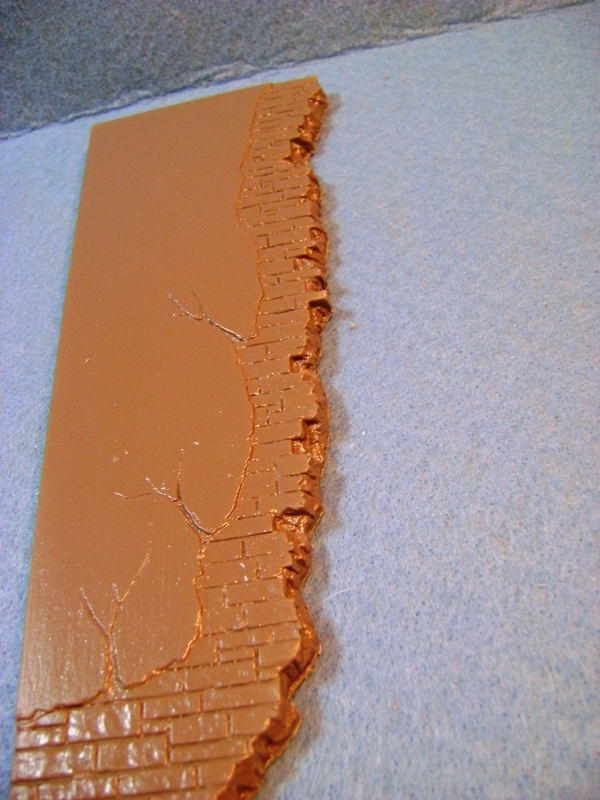
I then repeated the process on additional parts:


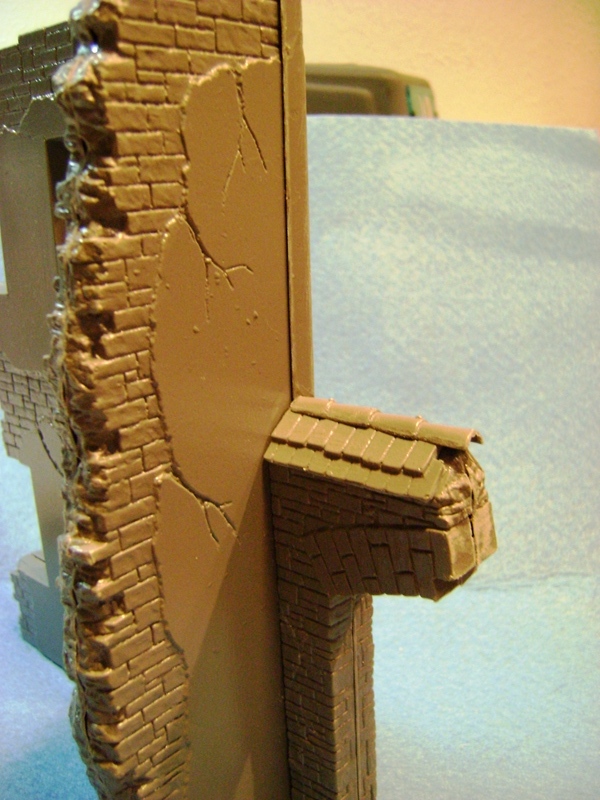
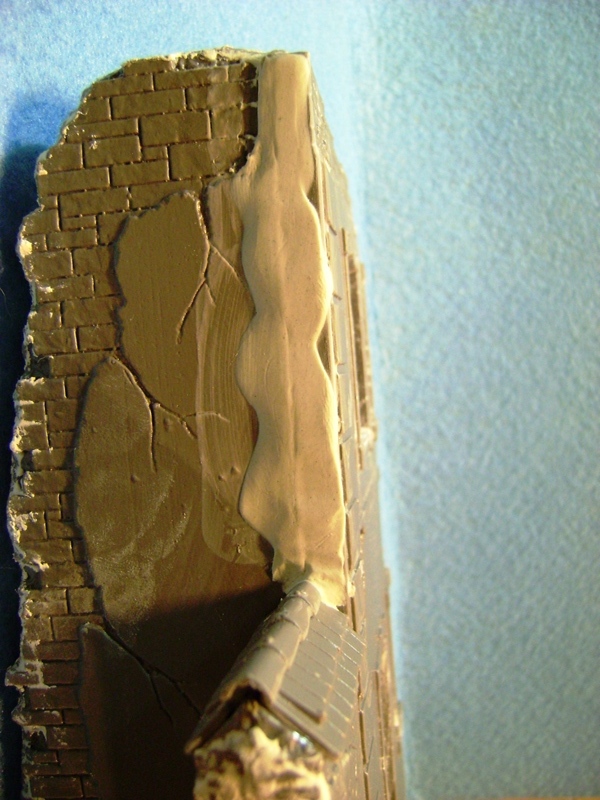
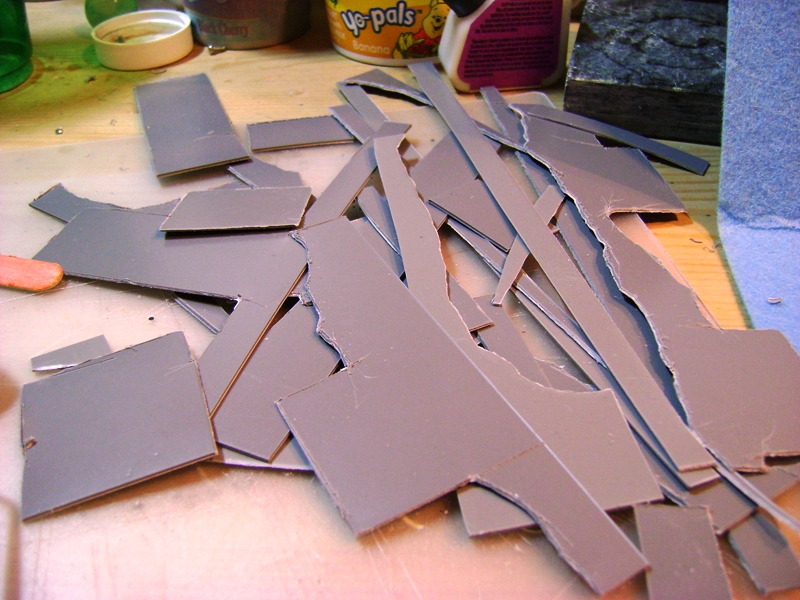
Here you can see the excess plastic that was removed in my initial session:

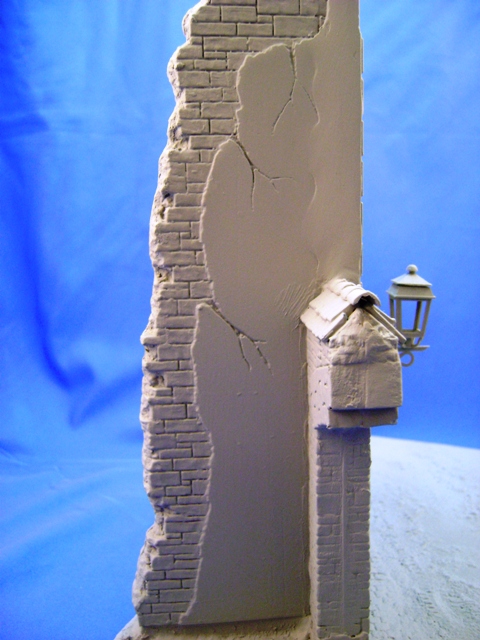
At this point, I had invested about two hours of time in the project and I still had large sections of the building to go, and I had not even started the assembly of the building ruin. I was beginning to think those plaster buildings aren't so bad after all. Anyway, i am continuing to plug away and will post more pictures soon.

Keith
BigJon
Visit this Community
England - West Midlands, United Kingdom
Joined: July 12, 2005
KitMaker: 757 posts
Armorama: 609 posts
Posted: Tuesday, June 30, 2009 - 07:34 PM UTC
Keith,

That pile of plastic you have removed.... the plastic seems really thick ! Was it hard going chopping through all that ?

I always imagined that being vac formed these kits would have the kind of thin plastic you get on those cheap halloween masks
thomokiwi
Visit this Community
Christchurch, New Zealand
Joined: January 11, 2006
KitMaker: 438 posts
Armorama: 359 posts
Posted: Tuesday, June 30, 2009 - 09:18 PM UTC
I have a Miniart diorama base with which I have finished the walls and filled the base with gipsim. It was an interesting and painstaking business and it appears that you had a lot more parts to content with than me. I will watch with great interest in the build as I haven't filled the gaps yet and I am looking for ideas. Currently I am thinking Mr surfacer 500. All that said I think they are excellent
exer
Visit this Community
Dublin, Ireland
Joined: November 27, 2004
KitMaker: 6,048 posts
Armorama: 4,619 posts
Posted: Tuesday, June 30, 2009 - 09:33 PM UTC
And you haven't even got to the fun part yet of matching the halves to gether? I've built a few of these and really like them. They do take a lot of time though.
jimbrae
Visit this Community
Provincia de Lugo, Spain / España
Joined: April 23, 2003
KitMaker: 12,927 posts
Armorama: 9,486 posts
Posted: Tuesday, June 30, 2009 - 09:34 PM UTC
The best way, IMO, to remove the Vac-Form parts is with a panel-line scriber. I bought mine years ago to deal with raised panel lines on Aircraft models. Now, it's found a new lease of life with these building kits.

This set has been Reviewed here:

https://armorama.kitmaker.net/review/4238
sgtreef
Visit this Community
Oklahoma, United States
Joined: March 01, 2002
KitMaker: 6,043 posts
Armorama: 4,347 posts
Posted: Tuesday, June 30, 2009 - 09:34 PM UTC
Have done one miniart item not bad really.

I used a Ex-acto knife back wards worked pretty good .

Can't wait to see what you have done with this one.

kbm
Visit this Community
Texas, United States
Joined: June 16, 2003
KitMaker: 678 posts
Armorama: 448 posts
Posted: Friday, July 10, 2009 - 02:54 PM UTC
Back for another segment in the build process.

First, yes Jon, the plastic was surprisingly thick. It took numerous "cuts" to get it ready to snap off the piece. How many exactly, I don't know as I did not keep count. However, as I grew more confident I realized it did not take as many cuts as I originally thought so the process became much faster. Also, I switched to an exacto blade and realized that was more efficient at making the irregular cut lines on the destroyed edges of the building.

Using the blade, I finished removing the various pieces from the surrounding plastic sheets. Once all the pieces had been removed, I then gave each piece a good sanding to remove any vestiges of excess plastic. At this point, the time investment was in the neighborhood of 5 plus hours.

Once the edges had been sanded, I did some quick test fitting and realized how difficult it was going to be to get these various pieces aligned and glued in place. I followed an idea I had read somewhere on the internet to glue tabs on the edges of the pieces to increase the glueable surface area, thus making the assembly process easier and the bond more solid. I used the excess plastic created when I cut out the building pieces and glued tabs on the flat and straight parts. As expected, the result was not the best alignment and there were major gaps all over the place:


The most serious was the building side where there was an overlap between the two pieces:


Once I had assembled the building ruin, but before filling in any gaps, I did a test fit on the base:


Satisfied with the overall fit of the ruin to the base, I then moved on to filling the gaps. Most of the gaps were easily filled using premixed wall spackle paste available at any Wal-Mart or DIY home improvement store. I simply used my finger to get a “glob” of spackle and apply it to the gap. You can see the results here:


For the side of the building with the overlap, I mixed up some Apoxie Sculpt two-part putty and applied it to the overlap.


I then waited a couple of days for the putty to dry thoroughly and then commenced sanding. After what seemed like an eternity I got the side of the wall sanded down smooth and hopefully removed all vestiges of the overlap. The final test will come when I prime the building ruin. I also sanded away any excess spackle.


At this point, my time investment is 9+ hours and I have not even started adding the doors, windows, etc. to the structure.

Keith
c5flies
Visit this Community
California, United States
Joined: October 21, 2007
KitMaker: 3,684 posts
Armorama: 2,938 posts
Posted: Friday, July 10, 2009 - 04:18 PM UTC
Whew, lotta work Keith, but it looks like it's really starting to pay off. Thanks for the SBS so far, now I know what to expect when I start one of these. Will be looking forward to seeing more of this one
kbm
Visit this Community
Texas, United States
Joined: June 16, 2003
KitMaker: 678 posts
Armorama: 448 posts
Posted: Thursday, October 29, 2009 - 01:45 PM UTC
It has been quite some time since I posted an update on my slow progress on this kit. Here is the front of the now primed ruin:


Not too bad from a distance. But, here is a side view, much closer up:


You can see there are still seams to be addressed and I am not sure how to do it without destroying the surrounding detail.

Finally, after taking the base to a meeting of the Houston Armor Club, there was some discussion the building ruin might be overscale. Here is a picture with a Dragon figure in front of the door:

Does appear to be more than a little overscale.

Anyway, I will continue updating as my glacial pace continues.

Keith
Tarok
Visit this Community
Victoria, Australia
Joined: July 28, 2004
KitMaker: 10,889 posts
Armorama: 3,245 posts
Posted: Thursday, October 29, 2009 - 02:11 PM UTC

Quoted Text

Finally, after taking the base to a meeting of the Houston Armor Club, there was some discussion the building ruin might be overscale. Here is a picture with a Dragon figure in front of the door...... Does appear to be more than a little overscale.


Hi Keith,

Good to see you still plugging away at this one.

I started a similar MiniArt building a few months ago (temporarily shelved at the mo) and I noticed a similar size/scale issue to the one you demonstrate when placing an Alpine figure in the doorway.

Rudi
Pyromaniac
Visit this Community
England - South East, United Kingdom
Joined: January 10, 2009
KitMaker: 375 posts
Armorama: 362 posts
Posted: Friday, October 30, 2009 - 06:09 AM UTC
I would say that the scale is about right there. You have to take into account the fact that there are two steps up to the door which add height, and the figure is slightly hunched. There is also a frame right the way around the door which makes it look even bigger. Taking all these things into account i'd say it was fine. If you wan't to check it just measure the distance from the top of the door to the bottom, multiply it by 35 and compare it to your own door.
docdios
#036
Visit this Community
England - West Midlands, United Kingdom
Joined: December 01, 2001
KitMaker: 1,998 posts
Armorama: 1,236 posts
Posted: Friday, October 30, 2009 - 07:18 AM UTC
Hi Keith

Nice Blog build, is there any chance once you have finished you could create a feature for me so that it will be easily available for others in the future?

cheers

Keith
Neo
Visit this Community
North Carolina, United States
Joined: January 20, 2005
KitMaker: 916 posts
Armorama: 758 posts
Posted: Friday, October 30, 2009 - 07:31 AM UTC
Keith...


If you turn the door 180 d's the door knob will be on the lower half.

I think the location of the latch is what makes it look big - if you look at your own door at home I think you will notice the door knob is set on the lower half of the door panels (gen. about 36" in the US or 92 cm for our Euro Friends).

Also some bldgs / homes have the oversized door for that expensive look.


Good Luck
Tom
cach7
Visit this Community
New York, United States
Joined: October 13, 2002
KitMaker: 444 posts
Armorama: 439 posts
Posted: Friday, October 30, 2009 - 08:01 AM UTC
I completed my first MiniArt kit not to long ago. I did less sanding when i put my sheetrock up in my garage. I still enjoyed it and its worth the money.
retiredbee2
Visit this Community
Florida, United States
Joined: May 04, 2008
KitMaker: 757 posts
Armorama: 518 posts
Posted: Friday, October 30, 2009 - 09:23 AM UTC
I bought the Miniart Austrian building and screwed it up royally because I tried to use scissors and a razor knife to cut out the parts. Didn't know you had to use a scribe. Anyway to save the day...I took Woodland scenics liquid latex and made molds of the walls. I then poured in lightweight hydrocal and the result was fantastic and I have since molded two more with slight modifications to make the thing look different. Next time though I will try using a scribe.............And a note to Rudi......I think that the door handle is a bit high on the door even if there was not a figure. If he took it off and scratch built another one a bit lower it will fix that issue........Al.......Ooops just realized someone else mentioned the doorknob.
viper29_ca
Visit this Community
New Brunswick, Canada
Joined: October 18, 2002
KitMaker: 2,247 posts
Armorama: 1,138 posts
Posted: Friday, October 30, 2009 - 03:24 PM UTC
Looks just find to me.

Keep in mind folks, that this is not a "modern" door, and was probably not subject to the standardized building codes that we use today. This building represents a European building which could have been built 100's of years ago. It wouldn't be uncommon to see the door handle placed that far up the door, and I have seen it that way many times.
Neo
Visit this Community
North Carolina, United States
Joined: January 20, 2005
KitMaker: 916 posts
Armorama: 758 posts
Posted: Friday, October 30, 2009 - 04:05 PM UTC
Don't forget alot of the "historic" bldgs are post war.

Top photo is all new construction from the 50's (this area was flattened in the Jan. 44 bombing. Bottom photo is in a small town about 5 mi. / 10 km away and is real historic ca. 1750's. The wood / timber styles are similar but few hundred years apart.

The door in the historic bldg does have a high door knob - but I think it was a fairly standard size door.


Plasticbattle
#003
Visit this Community
Donegal, Ireland
Joined: May 14, 2002
KitMaker: 9,763 posts
Armorama: 7,444 posts
Posted: Saturday, October 31, 2009 - 07:58 AM UTC
Nice build so far Keith. I think the door is perfect in size and the door handle could even be considered as a bit low in some cases. These are quite common details in a lot of the buildings I have seen in my life, and especially in older buildings.
One thing you should clean off is the little dots/bumps on the corners of details (see you last image). These are something that MiniArt use in their thermoforming/vacuuming process, and they´re pretty noticable now, but will be more so after painting.
retiredbee2
Visit this Community
Florida, United States
Joined: May 04, 2008
KitMaker: 757 posts
Armorama: 518 posts
Posted: Saturday, October 31, 2009 - 08:06 AM UTC
OK...so now I am a little more educated on European style door knobs.....go figure!!!! Al
 _GOTOTOP