

Fieldkitchen would be a huge overkill to have an SdKfz 7 tow that. A Protze is enough for that.
Basically, what the 7 hauls is big guns and damaged tanks, nothing else.
About sanding small parts, what I usually do is cut the sprue as close to the part as I can, then fix it, and when it is dry, use sandpaper to get it cleaned up.
That way, I can handle it the best and it won't spring out of my hands.
Armor/AFV
For discussions on tanks, artillery, jeeps, etc.
For discussions on tanks, artillery, jeeps, etc.
Hosted by Darren Baker, Mario Matijasic
Sd.Kfz.7 8t Late Production Build

H_Ackermans

Joined: July 11, 2006
KitMaker: 2,229 posts
Armorama: 2,221 posts

Posted: Saturday, November 21, 2009 - 01:38 PM UTC

cach7

Joined: October 13, 2002
KitMaker: 444 posts
Armorama: 439 posts
Posted: Saturday, November 21, 2009 - 02:02 PM UTC
Thanks Herbert, i do realize that . I just wanted to throw something different on the back. I plan on having ammo, spareparts clothing food, basicly anything in the bed.

keenan
Joined: October 16, 2002
KitMaker: 5,272 posts
Armorama: 2,844 posts
Posted: Monday, November 30, 2009 - 02:12 PM UTC
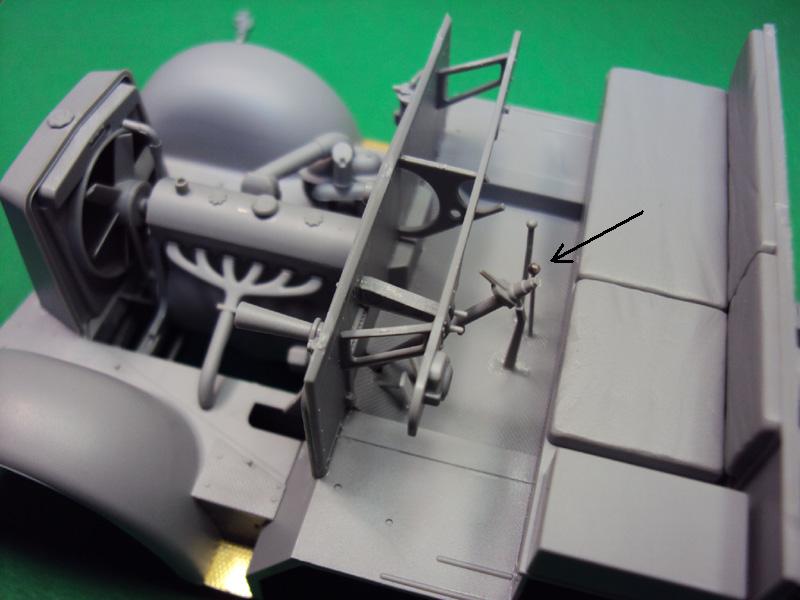
Okay, Step nine and ten sub assemblies came together. Given the warnings about the how everything was going to fit together I went and skipped ahead a step and glued the assembby from step 10 to the chassis.
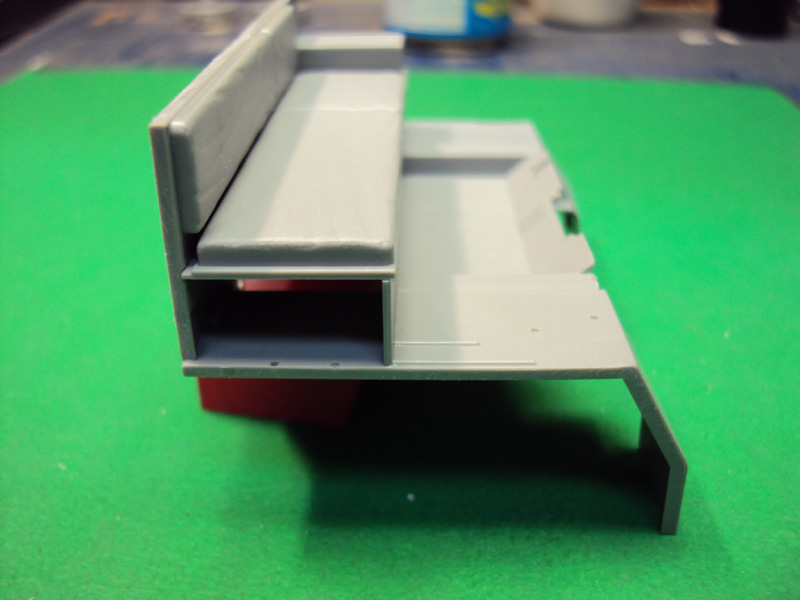 Everything was square...
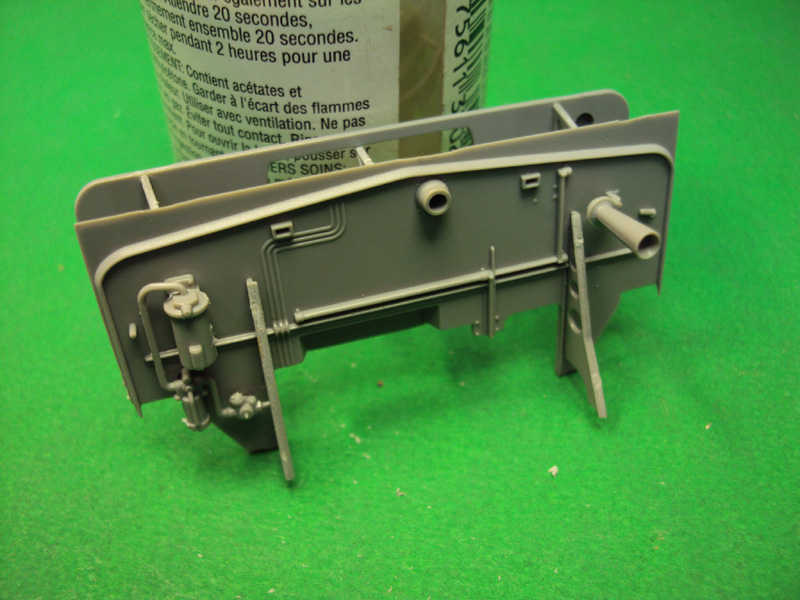 Front side of the fire wall
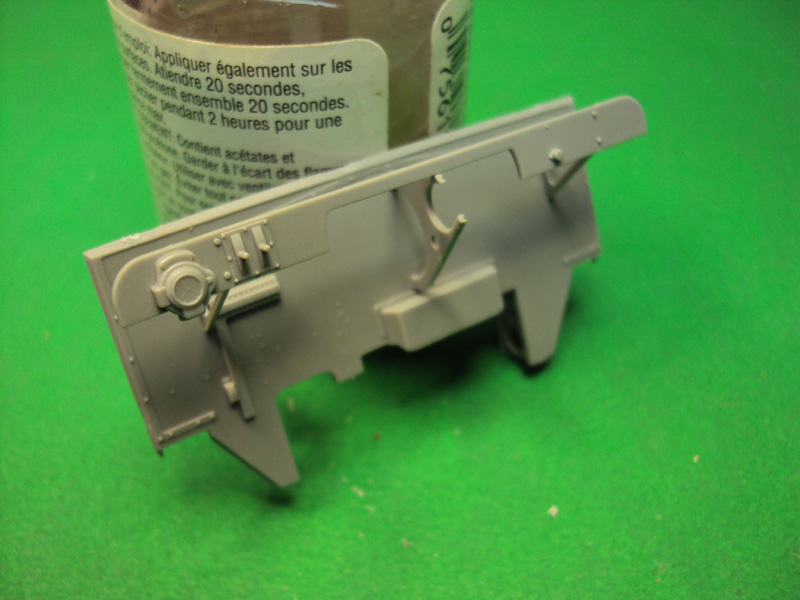 Driver's side of the fire wall with out the dash board
 Assembly 10 without parts D38, 59, 24, 25, 60, on purpose. I would knock them off later.
I really did not have any issues getting the major sub assembly from step 10 fitting on the chassis.

I hope there are some folks still following along
Everything was square... Front side of the fire wall Driver's side of the fire wall with out the dash board Assembly 10 without parts D38, 59, 24, 25, 60, on purpose. I would knock them off later.I really did not have any issues getting the major sub assembly from step 10 fitting on the chassis.
I hope there are some folks still following along


c5flies
Joined: October 21, 2007
KitMaker: 3,684 posts
Armorama: 2,938 posts
Posted: Monday, November 30, 2009 - 04:43 PM UTC
I'm all eyes, Shaun....I just don't say much 


lesrogers

Joined: August 02, 2007
KitMaker: 50 posts
Armorama: 22 posts

Posted: Monday, November 30, 2009 - 05:50 PM UTC
A very timely post for me as I am about to start mine.
My Voyager PE 35299 for this model arrived today and it looks great.
That said I hope that my eyesight holds out as some of the parts are really small.
I expect the wheel masks to arrive in the next day or so and that will complete my extra pieces.
Keep it up Shawn I need the help.
Regards Les
My Voyager PE 35299 for this model arrived today and it looks great.
That said I hope that my eyesight holds out as some of the parts are really small.
I expect the wheel masks to arrive in the next day or so and that will complete my extra pieces.
Keep it up Shawn I need the help.
Regards Les
keenan
Joined: October 16, 2002
KitMaker: 5,272 posts
Armorama: 2,844 posts
Posted: Wednesday, December 02, 2009 - 01:54 PM UTC
Balance of the massive step 10:
I trimmed parts C2 backwards, what I thought was the sprue attached point was actually the pedal. No harm done. I sliced sections of sheet styrene and made new pedals.
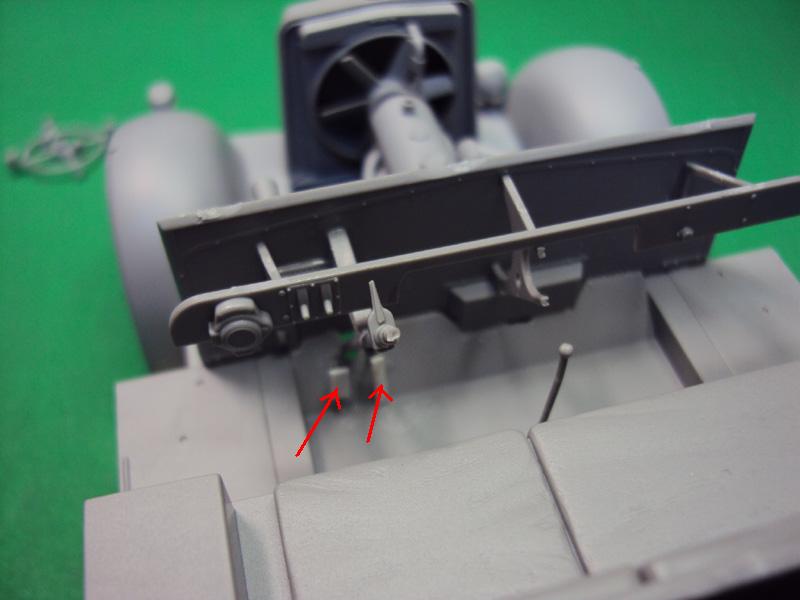
I lost part D24 when I blew off the bench, I am sure it is hiding next to the headlight I lost three weeks ago. I any case, I made a new one out of stretched sprue and glued it in.
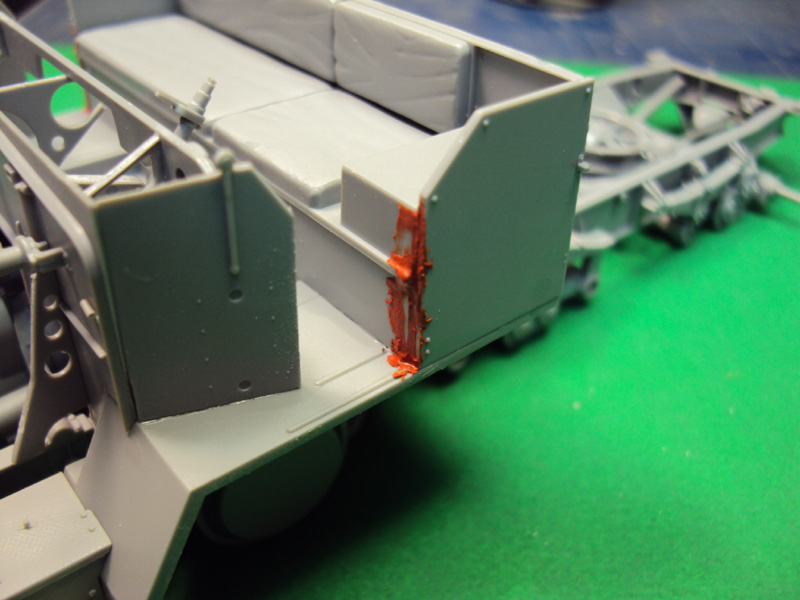
Now for the first issue I have had with the kit. There are gaps on both sides of the cab where E2(E3) and E18(E17) attach to the cab. It might be a Shaun issue but if the attachment points were more "positive" I don't think it would have happened. I will slice some shims and fill the gaps like the guys that build those winged things do and post pictures of that when that is finished. I would like to tell everyone how to avoid this issue but I have no idea. In any case, here are pictures of the gaps I am dealing with:
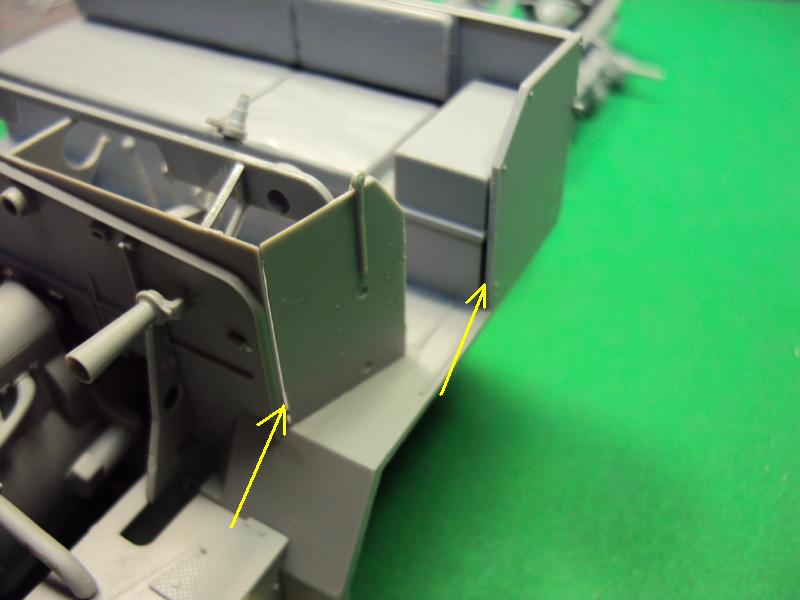
Not a huge issue for me but it may be for some younger modelers.
Shaun
I trimmed parts C2 backwards, what I thought was the sprue attached point was actually the pedal. No harm done. I sliced sections of sheet styrene and made new pedals.
I lost part D24 when I blew off the bench, I am sure it is hiding next to the headlight I lost three weeks ago. I any case, I made a new one out of stretched sprue and glued it in.
Now for the first issue I have had with the kit. There are gaps on both sides of the cab where E2(E3) and E18(E17) attach to the cab. It might be a Shaun issue but if the attachment points were more "positive" I don't think it would have happened. I will slice some shims and fill the gaps like the guys that build those winged things do and post pictures of that when that is finished. I would like to tell everyone how to avoid this issue but I have no idea. In any case, here are pictures of the gaps I am dealing with:
Not a huge issue for me but it may be for some younger modelers.
Shaun
keenan
Joined: October 16, 2002
KitMaker: 5,272 posts
Armorama: 2,844 posts
Posted: Friday, December 04, 2009 - 12:49 PM UTC
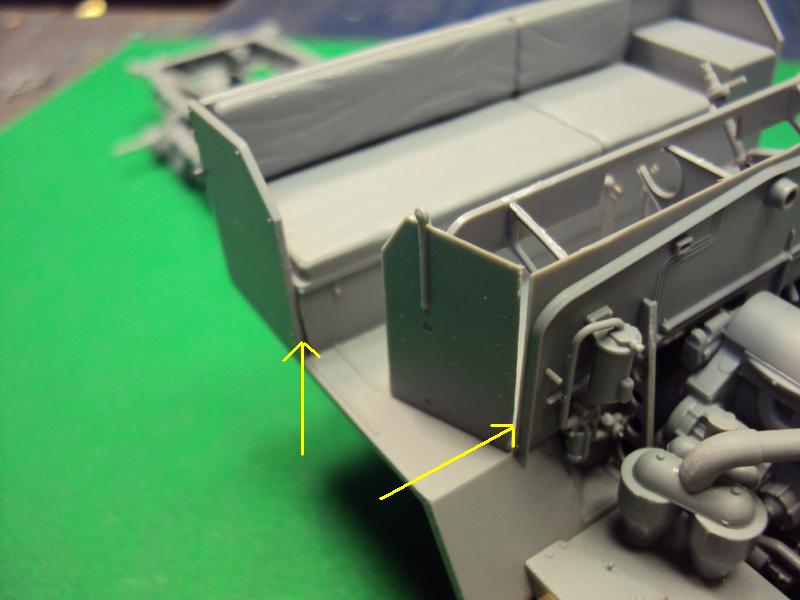
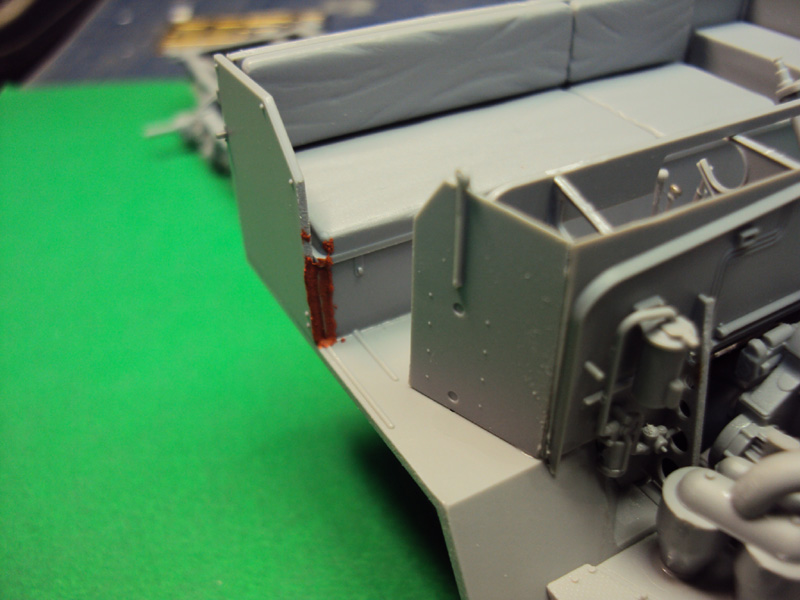
Fixing the gaps on sides with filler was the best option.
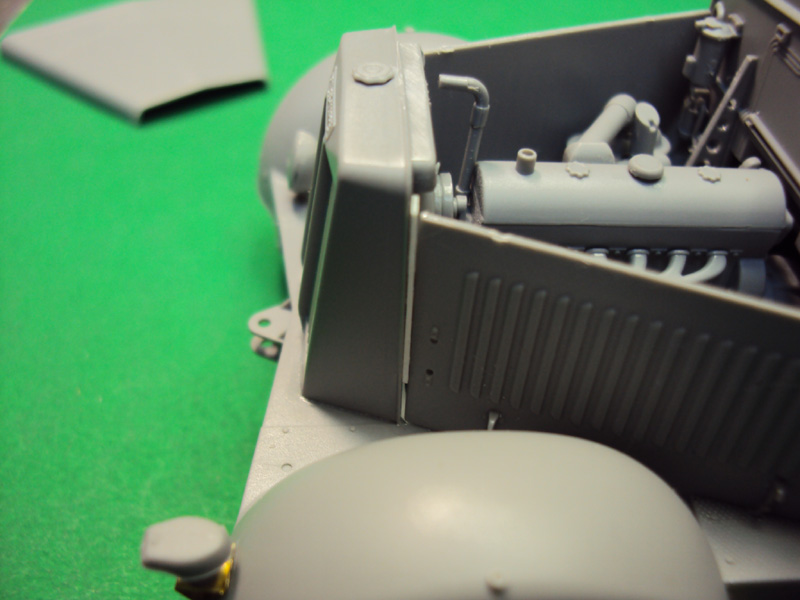
However, after installing parts G9(G8) and E6 more gaps showed up, primarily between radiator assembly and the G9(G8) Some thing did not stack up right during the chassis assembly.
Gaps on both sides:
Actually pretty happy with the progress but cannot figure out what went went wrong to create all the gaps.
You will never see them when she is done, trust me. First coat of primer out of the rattle can on.
Looks almost painful, doesn't it.
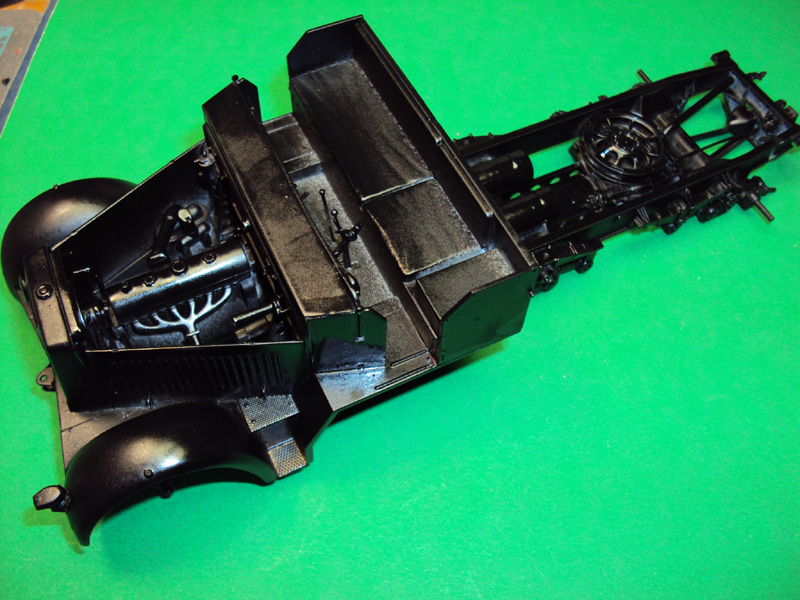
Trust me, it will look fine.
Shaun
However, after installing parts G9(G8) and E6 more gaps showed up, primarily between radiator assembly and the G9(G8) Some thing did not stack up right during the chassis assembly.
Gaps on both sides:
Actually pretty happy with the progress but cannot figure out what went went wrong to create all the gaps.
You will never see them when she is done, trust me. First coat of primer out of the rattle can on.
Looks almost painful, doesn't it.
Trust me, it will look fine.
Shaun
lesrogers
Joined: August 02, 2007
KitMaker: 50 posts
Armorama: 22 posts
Posted: Sunday, December 06, 2009 - 06:04 PM UTC
Hi Shaun
I have just caught up with you but was surprised to find that although my model is Dragon
Kit 6525 it is different to yours!
My section X is all one piece from front to rear.
Therefore the seating assembly is quite different to your model.
Had me confused for a while as the instructions for the seat assembly are vague so I thought I would use your knowledge and pictures,
No way.... they have changed the set up. My model is only a few months old and that may be the difference.
I finnaly worked it out.
So others beware!
Regards Les

keenan
Joined: October 16, 2002
KitMaker: 5,272 posts
Armorama: 2,844 posts
Posted: Tuesday, December 08, 2009 - 12:44 PM UTC
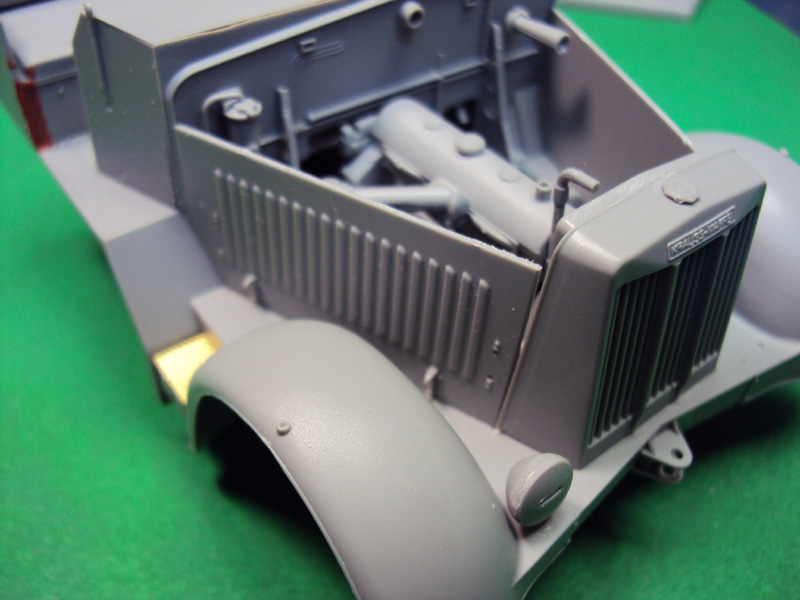
Test fitting the hood it doesn't look too bad so I decided to wade into the PE in the side bar of step 11. I am leaving off the wind shield and the PE wind shield wipers until final assembly for two reasons: I haven't decided what color I am going to paint this beast yet and I want to take full advantage of the handy masks that come with the kit.
I did a test fit on the hood after some more gap filling and was fairly happy:
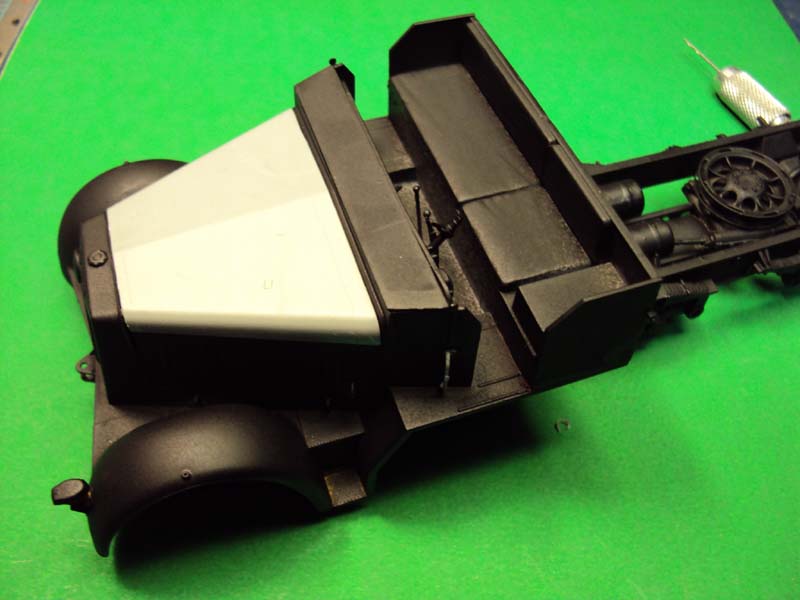
I also added a couple of parts C20 and four parts C9.
The whole MA9, MA10,MA11 scared the crap out of me until I did the first one. I have three more to do but I am really pleased with the first one.
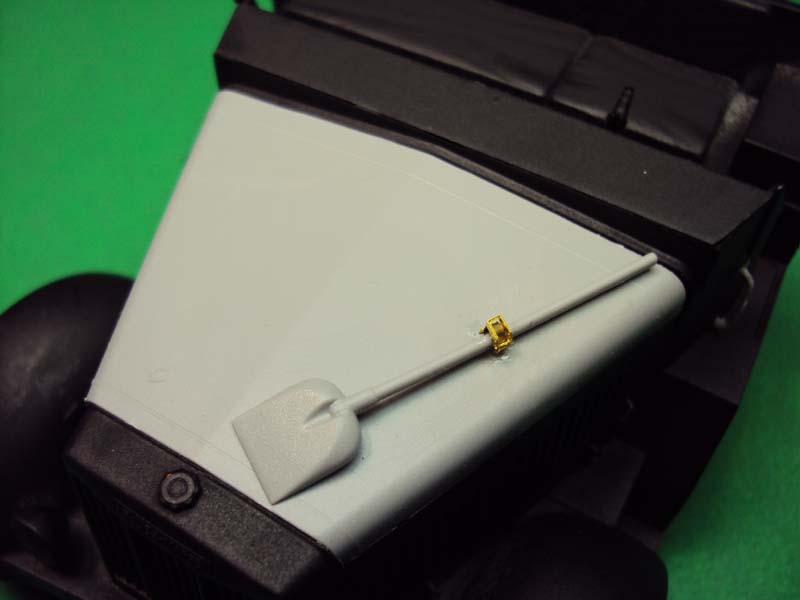
I was dreading the PE hood details but now I am looking forward to doing the rest of them.
Stay tuned. Painting the road wheels with the circle template is next on the agenda so I can finish the running gear.
Shaun
I did a test fit on the hood after some more gap filling and was fairly happy:
I also added a couple of parts C20 and four parts C9.
The whole MA9, MA10,MA11 scared the crap out of me until I did the first one. I have three more to do but I am really pleased with the first one.
I was dreading the PE hood details but now I am looking forward to doing the rest of them.
Stay tuned. Painting the road wheels with the circle template is next on the agenda so I can finish the running gear.
Shaun
NebLWeffah

Joined: October 13, 2004
KitMaker: 1,683 posts
Armorama: 1,248 posts

Posted: Friday, December 31, 2010 - 10:36 AM UTC
Hi Shaun
Great blog so far.... I'm just starting into this kit myself and will be following this with great interest.
thanks!
Bob

Great blog so far.... I'm just starting into this kit myself and will be following this with great interest.
thanks!
Bob

 |

WEB HOSTING BY


Copyright ©2021 Armorama and Kitmaker Network, a subsidiary of Silver Star Enterprises
All Rights Reserved. Please read our Conditions of Use and Privacy Policy.
All Rights Reserved. Please read our Conditions of Use and Privacy Policy.