_GOTOBOTTOM
Armor/AFV
For discussions on tanks, artillery, jeeps, etc.
Some USMC M1A1 WIP's
Citizinsane
Joined: July 27, 2006
KitMaker: 463 posts
Armorama: 450 posts
Posted: Sunday, March 14, 2010 - 10:26 PM UTC
Hey Folks,
just wanted to share some of my most recent works.

The first build is a kitbashing project, using a dragon M1 Panther II hull and the old Dragon M1A1 Turret along with some scratch built and custom cast resin parts.

This is the original:


Just prior to painting:


With the base paint, post shading/highlighting, details painted, filters and detail washes:


Here are a couple more shots of my dragon M1A1 AIM kit, converted to USMC standarts with a scratch built TAB adapter:


Finally here's an overview of what else is going to come... someday... maybe


Hope you'll like it, if so please leave a comment!

Cheers Max
chnoone
Visit this Community
Armed Forces Europe, United States
Joined: January 01, 2009
KitMaker: 1,036 posts
Armorama: 1,033 posts
Posted: Monday, March 15, 2010 - 12:55 AM UTC
Looks like somebody has opened a tank-factory !
I wonder, are they all going to be in tan camo ?
Nice build !

Semper Fi
Christopher
Herchealer
Visit this Community
Indiana, United States
Joined: July 31, 2003
KitMaker: 1,523 posts
Armorama: 710 posts
Posted: Monday, March 15, 2010 - 01:08 AM UTC
Looking good Max. You know we have an Abram's Campaign going on right now that doesn't end Until July. Why don't you join Us. Might give you that little extra to get another one finished..... They are all looking good though!


Herky
Tonyfr
Visit this Community
Ohio, United States
Joined: June 12, 2009
KitMaker: 516 posts
Armorama: 391 posts
Posted: Monday, March 15, 2010 - 03:31 AM UTC
Hey Max,

Builds are looking really good. Like the additions you made.

Tony
Tomcatter
Visit this Community
Nordrhein-Westfalen, Germany
Joined: May 16, 2009
KitMaker: 14 posts
Armorama: 12 posts
Posted: Monday, March 15, 2010 - 07:31 AM UTC
Great work

Very well done with many details.

I`m also planning to build a Marine M1 Abrams, but I`m still searching for the correct Smoke Grenade Discharger.

Can you please tell me, from which Kit you took them???

And how did you paint the Clear Parts`??

Greets
Chris
majjanelson
Visit this Community
South Carolina, United States
Joined: December 14, 2006
KitMaker: 1,355 posts
Armorama: 979 posts
Posted: Monday, March 15, 2010 - 01:11 PM UTC
Max,

EXCELLENT little PLT of Abrams!!


In this picture it looks like the M240's barrel is bent slightly?
dsaulino
Visit this Community
Pennsylvania, United States
Joined: July 01, 2009
KitMaker: 71 posts
Armorama: 61 posts
Posted: Monday, March 15, 2010 - 01:39 PM UTC
Great looking Abrams! Just out of curiosity, what is the box like structure attached to the front hull? I have seen pictures of it on tanks during OIF but cannot seem to find any information on exactly what it is or does.
Citizinsane
Joined: July 27, 2006
KitMaker: 463 posts
Armorama: 450 posts
Posted: Tuesday, March 16, 2010 - 03:37 AM UTC
Hey folks,
first off a really BIG thank you for all the kind words!

as for your questions:

Christopher,
exept for the dragon kitbash the tamiya kit (which is going to represent a tank called "minor threat") is the only one to recieve a tan camo.
The M1A1 AIM is supposed to represent a tank called "got armor" in NATO three tone camo with the CIP's and the TAB being painted tan.
Yet, since the entire hull is badly warped, I'm not quite shure if I'll finish the Italieri kit at all. Anyway, if I'll finish it, it'll be painted all OD with tan CIP's and Tab as well.
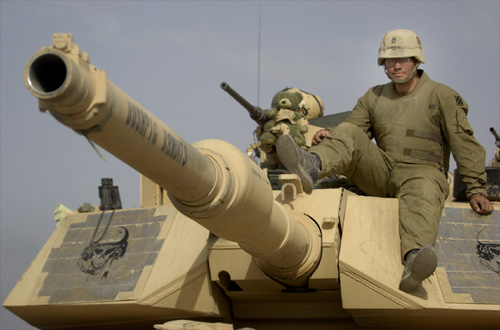
Pictures of all of them can be found here: http://www.seanfairburn.com/iraqifreedom/02.html
(both tanks can be seen on the bottom of page #5)

Jeremy,
how can I sign up? (sorry for the dumb ass question)

Christian,
the discharger itself is a tamiya part with its cap removed, so only a lid on the upper edge remained. The grenade comes from academy's "M1A1 iraq" kit. (I could only use one single grenade since most of the pieces are cast really crooked)
the other grenades were then cast in resin.
Here's a pic of the "prototypes" and their respective casts:


regarding the "clear parts", the Dragon M1A1 AIM is the only kit to actually have clear parts.
I usually tend to paint the optics using red and blue gunze acrylics, painted wet in wet. This way, using the lighter shades (red in this case) for those areas facing into the direction my imaginary light hits the vehiecle and the darker shade (blue) for the shadow areas and different variations of purple for the mids, it's really easy to paint the potics.
As for the "real" clear parts I do the same just with clear colors and the rear side of the optic being painted a silver color.

Jeff,
Thanks for the pointer, I'll see if I can correct that.

David,
That device is called a "TAB adapter" which stands for "towed assault bridge adapter".
As far as I know it's an attachment point for another device used to cross tank obstacles and is manufactured by IMI.
Anyway don't ask me how it works, as I have absolutely no idea...
I scratch built mine, but Blast also have a resin version of it (highly recommended!):


Hope this helps.if you have further questions feel free to ask!

Cheers Max
chnoone
Visit this Community
Armed Forces Europe, United States
Joined: January 01, 2009
KitMaker: 1,036 posts
Armorama: 1,033 posts
Posted: Tuesday, March 16, 2010 - 05:03 AM UTC


David,
That device is called a "TAB adapter" which stands for "towed assault bridge adapter".
As far as I know it's an attachment point for another device used to cross tank obstacles and is manufactured by IMI.
Anyway don't ask me how it works, as I have absolutely no idea...
I scratch built mine, but Blast also have a resin version of it (highly recommended!):


Hope this helps.if you have further questions feel free to ask!

Cheers Max [/quote]

http://www.youtube.com/watch?v=Jy4Y-kWU8v4&feature=PlayList&p=FA6D26F11008FDAC&playnext=1&playnext_from=PL&index=3


Check this vid at approx. 48 sec you will see one in action, I not quite sure what it is , but ask Mike Mummy, he should know.

Cheers
Christopher

dsaulino
Visit this Community
Pennsylvania, United States
Joined: July 01, 2009
KitMaker: 71 posts
Armorama: 61 posts
Posted: Tuesday, March 16, 2010 - 03:30 PM UTC
Thanks guys! I am still not sure what it is. it almost looks like a mine clearing device.
junglejim
Visit this Community
Alberta, Canada
Joined: February 18, 2003
KitMaker: 1,728 posts
Armorama: 1,629 posts
Posted: Tuesday, March 16, 2010 - 04:17 PM UTC
Well I'm no Mike Mummey , but I think the dealy in the video is similar, but different then the TAB. In the video, it appears to be some sort of mine roller/attachment plate, but the TAB was used to push/pull bridge sections around.

Jim
chnoone
Visit this Community
Armed Forces Europe, United States
Joined: January 01, 2009
KitMaker: 1,036 posts
Armorama: 1,033 posts
Posted: Tuesday, March 16, 2010 - 09:48 PM UTC

Quoted Text

Well I'm no Mike Mummey , but I think the dealy in the video is similar, but different then the TAB. In the video, it appears to be some sort of mine roller/attachment plate, but the TAB was used to push/pull bridge sections around.

Jim


Jim,
first seeing the device I though it was some kind of "mega broom" for dusting the sand, but on second looks it probably is some kind of mine clearing thing.
My attention was drawn more to the attaching this device to the TAB, somehow the definition of a "Bridge pushing attachment" never fully convinced me.
I still believe that the TAB is an attachment for multiple purposes.
In all my time as a TC on various M1s, in different countries and units (USMC + ARMY), I never have seen nor came across the need to "push" bridging equipment with a tank. I am skeptical if the description given by BLAST is correct in the first place, but to be honest I am no expect on mine clearing devices old or new.

Cheers
Christopher
Citizinsane
Joined: July 27, 2006
KitMaker: 463 posts
Armorama: 450 posts
Posted: Wednesday, March 31, 2010 - 05:39 AM UTC
Hey folks,
just a small update for now. anyway I'll post more pics in due time.

Started out with the chipping and some more streaks on "got oil", which went pretty well(see first pic) until the tank was attacked by a cup of brush cleaner which started to meld down the evergreen plastic the CIP's were made of.
so I spent the last few weeks trying to fix things up but now I'm finally done with that and can continue the weathering process.
I also scratch built the BRE for the AIM and made some stowage for "got oil".

The chips:


due to my accident I had to remove the part melted, part warped chips, which then looked like this:


BTW. I'm curious how often this kind of accidents happen to you'll?
Cheers Max
osjohnm
Visit this Community
Western Cape, South Africa
Joined: May 07, 2006
KitMaker: 122 posts
Armorama: 121 posts
Posted: Wednesday, March 31, 2010 - 10:08 PM UTC

Quoted Text


BTW. I'm curious how often this kind of accidents happen to you'll?
Cheers Max


Fortunately, I've never spilled brush cleaner over a kit but a few weeks ago I knocked over my Tamiya Liquid Cement bottle. Ended up with some "rough" turret parts.

Your accident has given me an idea for one of the US Army Abrams on Echelon's 4th decal sheet. The tank's CIP panels have been torn off the turret but there are still visible remnants left behind. Up until now wasn't sure how to replicate that.

If I may ask, which colours did you use for your filters and washes?

Thanks

John
Citizinsane
Joined: July 27, 2006
KitMaker: 463 posts
Armorama: 450 posts
Posted: Thursday, April 01, 2010 - 06:42 AM UTC
Hey John,
oh yeah, the good old glue over model trick... still one of my favorites

are you referring to the cavalary decal sheet (35016)?
if so the CIP's wouldn't have been removed on those tanks, they're just covered with duct tape...

As for the filters, I've used a mix of revell kaki, with a hint of red and some grey first and then applied a second filter using 502 abteilung's wash brown.
I also used some "dot filter filters" of 502's shadow brown, meaning that I first mixed a filter, then placed random spots all over the model and finally blended those dots in using a streaking/dabbing motion.

the washes were dome simultaneously with the "dot filter filter" using the same color.

hoping that'll help you

Cheers max
osjohnm
Visit this Community
Western Cape, South Africa
Joined: May 07, 2006
KitMaker: 122 posts
Armorama: 121 posts
Posted: Thursday, April 01, 2010 - 07:06 AM UTC
Thanks for the feedback regarding your filters and washes.

Yes, I'm referring to 35016 and to "Baghdad's Nightmare" which is on the cover.

So if I'm understanding you correctly, the white "residue" is actually duct tape used to attach the panels?

John
Citizinsane
Joined: July 27, 2006
KitMaker: 463 posts
Armorama: 450 posts
Posted: Thursday, April 01, 2010 - 09:44 AM UTC
Hey John,
glad I could help you!

Well, I thought you're referring to two of the other vehicles from that sheet, which definitely feature duct tape on the CIP's
Anyway I don't know whether it's used to secure it in place or not.
It could be some unit specific "quirk".

As for your tank it could also be a large paint chip. but I'm pretty sure it's silver, not white and the CIP is still in place.

so here's the cover:


Here's one of the tanks I was referring to (which belonged to the same unit as baghdads nightmare):


Cheers Max
osjohnm
Visit this Community
Western Cape, South Africa
Joined: May 07, 2006
KitMaker: 122 posts
Armorama: 121 posts
Posted: Tuesday, April 06, 2010 - 02:31 AM UTC
Hi Max

Sorry for belated reply, thanks for getting back to me.

Comparing the cover picture and the one you posted, would agree that the tank on the cover also has duct tape on it.

Perhaps the angle of the shot or the way the image was printed makes it look white.

Building one with duct tape on would be interesting, suppose one just has to scribe horizontal lines into the cip panel and match the correct colour.

Or just use real duct tape

Thanks again
Citizinsane
Joined: July 27, 2006
KitMaker: 463 posts
Armorama: 450 posts
Posted: Tuesday, April 06, 2010 - 05:58 AM UTC
hey John,
must agree, the duct tape version is really tempting...
I think real duct tape would propably be way too thick, (given the tape used to cover the CIP has to be thinner than the M9 on the outer edges)
but you could use aluminum foil instead. At least that's what I'm going to do on "got armor" since it had it's CIP's covered with sand colored thermal tape with some damage to it.

Cheers max
osjohnm
Visit this Community
Western Cape, South Africa
Joined: May 07, 2006
KitMaker: 122 posts
Armorama: 121 posts
Posted: Wednesday, April 07, 2010 - 03:38 AM UTC
Looking forward to seeing your rendition of "Got Armor" and how your CIP panels turnout.

Now all this talk makes me want to build one of my Abrams kits.
Guess it can't hurt to put the pzh2000 on hold

Good luck with the builds
MikeMummey
Visit this Community
New Mexico, United States
Joined: February 09, 2005
KitMaker: 672 posts
Armorama: 653 posts
Posted: Wednesday, April 07, 2010 - 05:18 PM UTC
Kris Noonane you old wardog you. The TAB (Towed Assault Bridge) Adapter is used to launch the TAB into an Anti-Tank Ditch. It serves no other purpose. Blast has it labeled and modeled correctly. Nice work on those Jarhead tanks Max, happy USMC modeling. Outta here, Mike sends . . .
chnoone
Visit this Community
Armed Forces Europe, United States
Joined: January 01, 2009
KitMaker: 1,036 posts
Armorama: 1,033 posts
Posted: Wednesday, April 07, 2010 - 08:28 PM UTC

Quoted Text

Kris Noonane you old wardog you. The TAB (Towed Assault Bridge) Adapter is used to launch the TAB into an Anti-Tank Ditch. It serves no other purpose. Blast has it labeled and modeled correctly. Nice work on those Jarhead tanks Max, happy USMC modeling. Outta here, Mike sends . . .


That issue settled would you know what kind of device/purpose is seen in that vid, if you got a chance to watch it, the "Adapter" looks quite similar to the TAB.

Thankx and Cheers
Christopher
MikeMummey
Visit this Community
New Mexico, United States
Joined: February 09, 2005
KitMaker: 672 posts
Armorama: 653 posts
Posted: Thursday, April 08, 2010 - 06:28 AM UTC
The device in the video is a version of the SPARK(Self-Protection Adaptive Roller Kit). The SPARK is used for Route Clearance to detonate IEDs and Mines and not suited for cross country use. Though normally seen mounted on HUMVEES the Spark can be mounted on most tactical vehicles when used with a vehicle specific adapter and kit. The TAB and SPARK adapters are two different pieces and not interchangeable. Outta here, Mike sends . . .
chnoone
Visit this Community
Armed Forces Europe, United States
Joined: January 01, 2009
KitMaker: 1,036 posts
Armorama: 1,033 posts
Posted: Thursday, April 08, 2010 - 08:06 AM UTC
Thankx for the info !
Would be a nice project to attach the SPARK to an M1, somewhat out of the ordinary.

Cheers
Christopher
Citizinsane
Joined: July 27, 2006
KitMaker: 463 posts
Armorama: 450 posts
Posted: Friday, April 09, 2010 - 04:39 AM UTC
Here's the update I've promised:
unfortunately the colors are a little off and the entire thing actually looks a little more "defined"


Cheers Max
 _GOTOTOP