Armor/AFV
For discussions on tanks, artillery, jeeps, etc.
For discussions on tanks, artillery, jeeps, etc.
Hosted by Darren Baker, Mario Matijasic
WIP Bronco Hotchkiss H39
Grumpyoldman

Joined: October 17, 2003
KitMaker: 15,338 posts
Armorama: 7,297 posts

Posted: Saturday, May 15, 2010 - 04:41 AM UTC
As promised Robert:


panzerbob01

Joined: March 06, 2010
KitMaker: 3,128 posts
Armorama: 2,959 posts

Posted: Saturday, May 15, 2010 - 06:18 AM UTC
Robert:
REALLY NICE work on that H! You are making what I think to be a pretty nice kit of an interestingly different tank just SING! Your interior is spectacular.
I have the Bronco German service H39 with wurframen kit "WIP"- did a little bit of styrene scratch (all I ever do- PE is mostly terra incognito to me). Your kit is inspirational (and rather intimidating!) My hat is off to you! Can't wait to see you get it all done up.

Not too many folks have done French tanks... Nice to see some here.
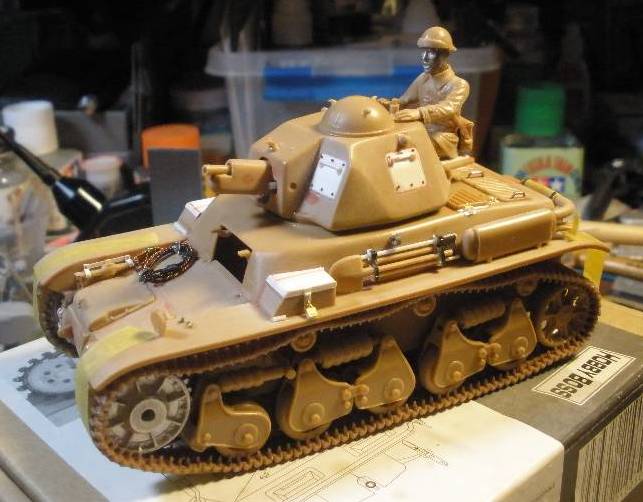
@Dave: I love your R35! You have put a lot of nice stuff on it! When are you going to paint it up, and with what scheme?
Just so happens I started my antique 1972 stash-aged Heller R35 about a year ago- made it to the primary camo and then rested while looking for some tracks... got some Fruili in April and now I'll warm the bugger up!
Just for laughs and to offer you French tank fans something to snerk at over beer, I have attached herewith a couple of pics of my modest effort.
 Of course, comments are welcome!


REALLY NICE work on that H! You are making what I think to be a pretty nice kit of an interestingly different tank just SING! Your interior is spectacular.
I have the Bronco German service H39 with wurframen kit "WIP"- did a little bit of styrene scratch (all I ever do- PE is mostly terra incognito to me). Your kit is inspirational (and rather intimidating!) My hat is off to you! Can't wait to see you get it all done up.


Not too many folks have done French tanks... Nice to see some here.
@Dave: I love your R35! You have put a lot of nice stuff on it! When are you going to paint it up, and with what scheme?
Just so happens I started my antique 1972 stash-aged Heller R35 about a year ago- made it to the primary camo and then rested while looking for some tracks... got some Fruili in April and now I'll warm the bugger up!
Just for laughs and to offer you French tank fans something to snerk at over beer, I have attached herewith a couple of pics of my modest effort.

 Of course, comments are welcome!
Posted: Saturday, May 15, 2010 - 07:51 AM UTC
Ola Guys
@ Dave
That is a really nice built. I see some nice added details. Did you use a PE set for it? I see Friul Sprockets. How is the fit of this old kit? Did you add more AM stuff. And it should look good in any of the nice french colorcoats
@ Bob
Thanks a lot for the compliments. You're too kind. I'm slowly working further. But it's coming together nicely.
And you call it intimidating but I always break it down into sections to make it more manageable.
I am very interested in your H39 with Wurfrahmen. I love the Bronco kits. They are well designed and the subjects are interesting. And about PE. If you want to experiment a bit in that area I would suggest starting of with eduard sets. They are not as intrinsic as other brands and work very well for people who have not that much experience in the PE field.
And I think you are being to harsh on yourself about your R35. It looks pretty good. Very well executed camo with the tracks and some nice weathering this will completely come to live. I hope my paintjob comes out just as nice as yours.
In fact after seeing these nice R35's I think I'mgoing to hunt one down for a future project.
Thanks for showing your efforts guys
Posted: Saturday, May 15, 2010 - 08:05 AM UTC
Hello Mr. Blokker!! Great to see you back in action again, and back with a little beauty. Great work on the interior .. wish the Focus book was available when I built mines ... there wasnŽt much in the Trackstory book regarding the interior. I had nothing of the engine, so I ended up closing that and also the turret, which meant what is visible through the drivers hatch is not much as its so dark. None-the-less, I really enjoyed it and it definatly looks cool on the shelf. I have a feelin this will be another stunner as well.Looking forward to more.
My build blog


I never got around to taking photos of the finished scene, and the image below is the only one I have (taken by Marko Rouvinen)

Nice build Grumpy ... some very nice details. I wish I was closer to kick you a$$ to get it finished
Excellent camo Bob. IŽll definatly build more early war French ... those camos are so cool!!

My build blog


I never got around to taking photos of the finished scene, and the image below is the only one I have (taken by Marko Rouvinen)

Nice build Grumpy ... some very nice details. I wish I was closer to kick you a$$ to get it finished

Excellent camo Bob. IŽll definatly build more early war French ... those camos are so cool!!

Grumpyoldman

Joined: October 17, 2003
KitMaker: 15,338 posts
Armorama: 7,297 posts

Posted: Saturday, May 15, 2010 - 02:15 PM UTC
Robert, the tracks are ModelKlasten-- think I spelled it right, the sprokets came with the tracks. No photo etched, just strip plastic, and lead foil, some Grantline nuts and bolts, and some Tichy nuts and bolts and rivets. Bob, haven't decided what paint scheme to use, although I certainly like the one you used.
Posted: Monday, May 24, 2010 - 10:24 AM UTC
Ola Guys
@ Frank... to tell you the truth... Before I started building the H39 I have read pretty much every builtreport I could find of this particular kit... Your builtreport was among them and it was the way you tackled your interior that made me decide to try and get something looking just as good. Even though you did not have the Focus book available I think you did a pretty decent job. And thanks for the compliments.
@ Dave
Thanks for clearing that up. I think I'm going to hunt one of those down. Probably will look for tracks as well. I really like what you have done with this ancient kit. And you were close... the brand is called Modelkasten but you never can go wrong with MK tracks
Time for another little update of this vehicle. Compared with the builtspeed others manage to get it seems I'm going backwards. All the PE on the fenders and on the upperhull are done now. And everything received a neat cover of primer.
Here are the pics:
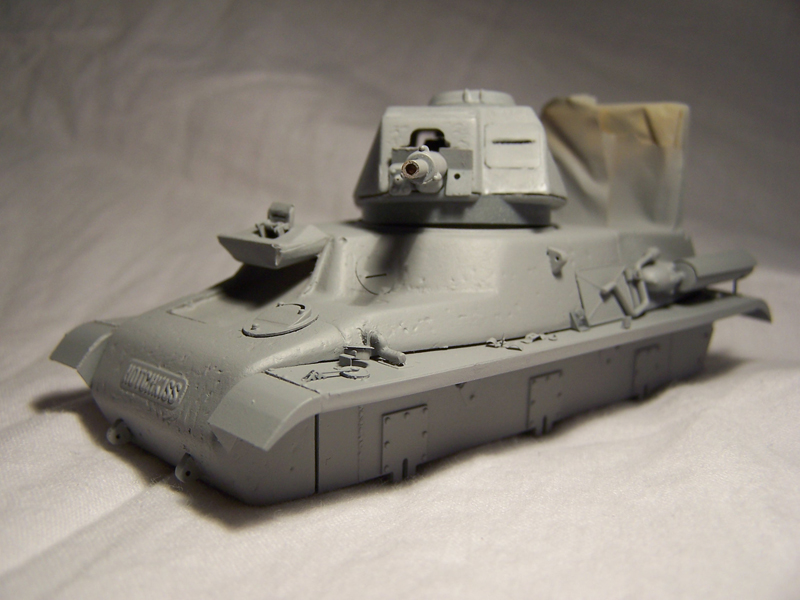
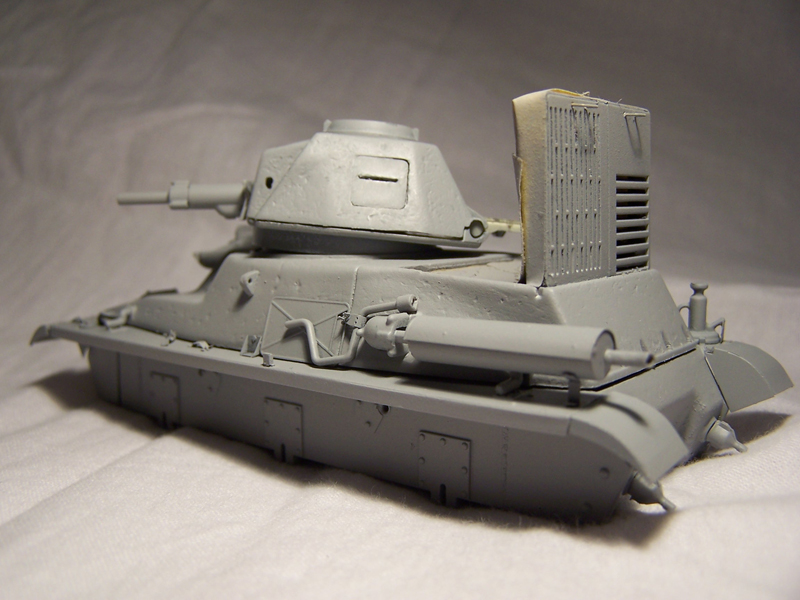
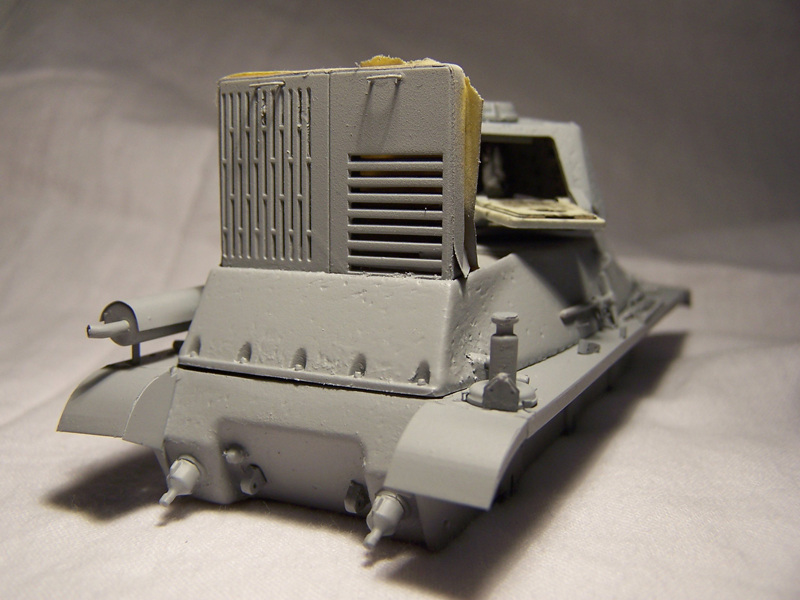
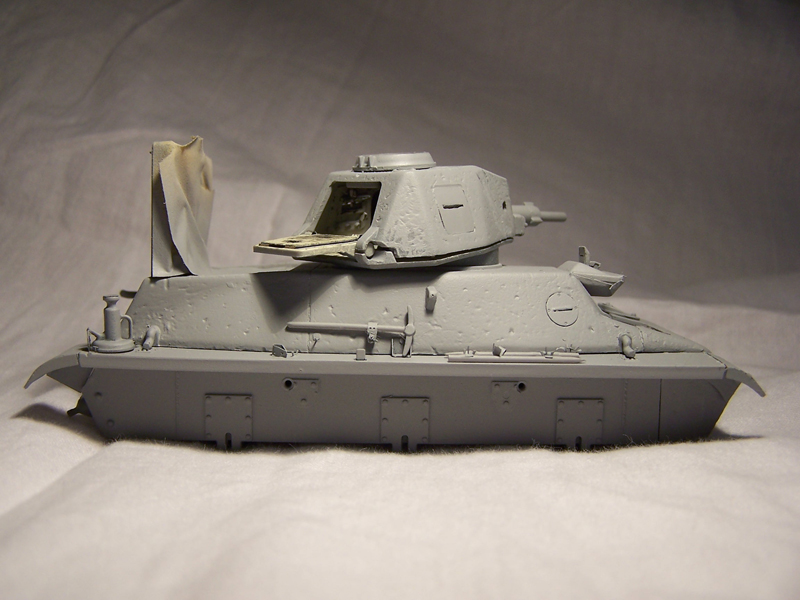
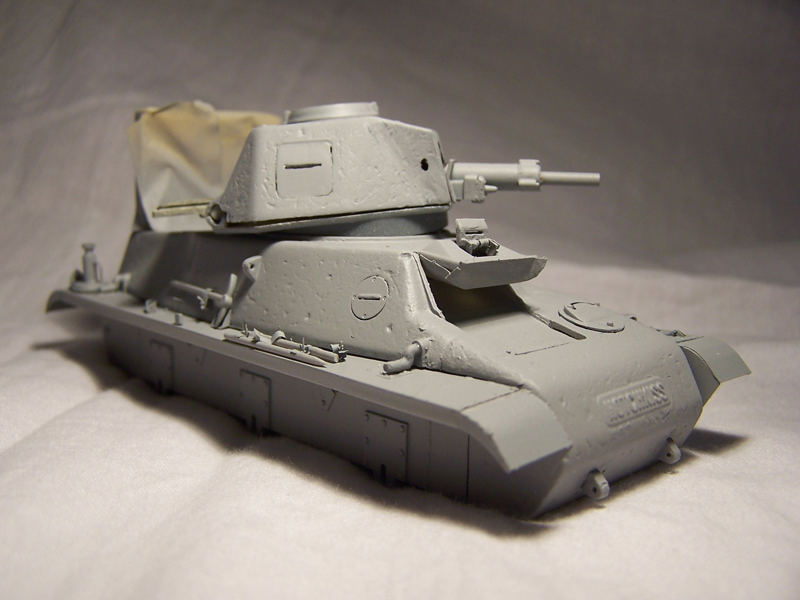
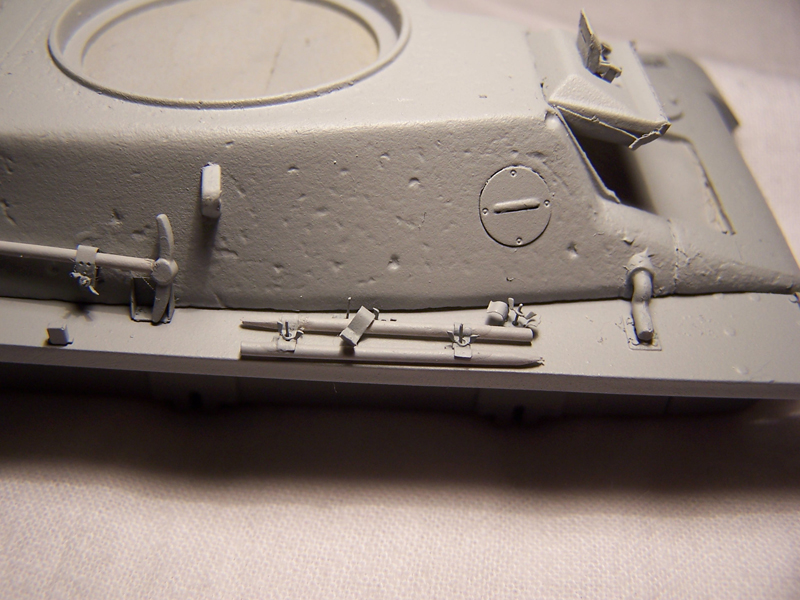
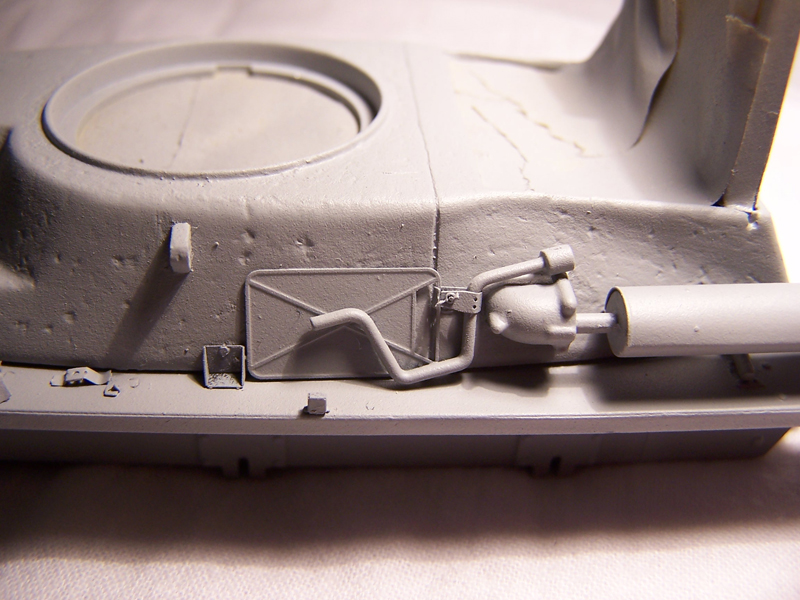
All that rests till painting is the runninggear and the trenchskid. All openings are taped closed and it will not take too long now before it will show color.
As usual looking forwards to all feedback.
With friendly greetz
Robert Blokker
@ Frank... to tell you the truth... Before I started building the H39 I have read pretty much every builtreport I could find of this particular kit... Your builtreport was among them and it was the way you tackled your interior that made me decide to try and get something looking just as good. Even though you did not have the Focus book available I think you did a pretty decent job. And thanks for the compliments.
@ Dave
Thanks for clearing that up. I think I'm going to hunt one of those down. Probably will look for tracks as well. I really like what you have done with this ancient kit. And you were close... the brand is called Modelkasten but you never can go wrong with MK tracks

Time for another little update of this vehicle. Compared with the builtspeed others manage to get it seems I'm going backwards. All the PE on the fenders and on the upperhull are done now. And everything received a neat cover of primer.
Here are the pics:


All that rests till painting is the runninggear and the trenchskid. All openings are taped closed and it will not take too long now before it will show color.
As usual looking forwards to all feedback.
With friendly greetz
Robert Blokker
Posted: Friday, November 22, 2013 - 09:33 AM UTC
Right... time to drag another corpse out of the dust.
Ola guys
I decided to pick up another shelfqueen. One that got stalled for a rather stupid reason. As I have been building kits with AM tracks for so long I completely forgot how to do the single link kit tracks which in turn ended up in me making a huge mess of it. So I put it back in a dust free container and waited till I came across AM tracks for this vehicle for a decent price. Which I luckily picked up last year through a Dutch Auction site. And then I left it for another year. Actually It wasn't untill I started last week that I wondered when I actually last posted an update of this built and it turned out to be 3 (Three!!!) years back. So time to get into gear and try to finish this kit.
First starting off with the beautiful Modelkasten tracks for the H39

And After a few days of labour the results was 2 beautiful runs of workable tracks

I also added the suspension. Well most of it except for the sprockets which will make life a lot easier when installing the tracks

So there you go... after 3 years another project is on the move again...
More to follow soon.
With friendly greetz
Robert Blokker
Ola guys
I decided to pick up another shelfqueen. One that got stalled for a rather stupid reason. As I have been building kits with AM tracks for so long I completely forgot how to do the single link kit tracks which in turn ended up in me making a huge mess of it. So I put it back in a dust free container and waited till I came across AM tracks for this vehicle for a decent price. Which I luckily picked up last year through a Dutch Auction site. And then I left it for another year. Actually It wasn't untill I started last week that I wondered when I actually last posted an update of this built and it turned out to be 3 (Three!!!) years back. So time to get into gear and try to finish this kit.
First starting off with the beautiful Modelkasten tracks for the H39

And After a few days of labour the results was 2 beautiful runs of workable tracks

I also added the suspension. Well most of it except for the sprockets which will make life a lot easier when installing the tracks

So there you go... after 3 years another project is on the move again...
More to follow soon.
With friendly greetz
Robert Blokker
Pedro

Joined: May 26, 2003
KitMaker: 1,208 posts
Armorama: 1,023 posts

Posted: Friday, November 22, 2013 - 10:53 AM UTC
Hi Robert,
Great build and the PE set really looks the part, I also like the details you've added by yourself. Also your building speed very much reminds me of something... my own pace at which I finish off those "corpses"
One thing of notice and probably a must on a build that is already this detailed, is the location of the actual seam where the bow meets upper hull. I think it was mentioned in Terry Ashley's review on his PMMS, or in some other review I cant find right now. I only remember that the parting line should be moved around 2,5 mm aft, so it would be a bit above the armored visor cover(?). There are some photos in my article illustrating the build of Bronco hotchkiss from a few years back: http://www.armorama.co.uk/features/2911
Cheers and happy modelling,
Greg
Great build and the PE set really looks the part, I also like the details you've added by yourself. Also your building speed very much reminds me of something... my own pace at which I finish off those "corpses"

One thing of notice and probably a must on a build that is already this detailed, is the location of the actual seam where the bow meets upper hull. I think it was mentioned in Terry Ashley's review on his PMMS, or in some other review I cant find right now. I only remember that the parting line should be moved around 2,5 mm aft, so it would be a bit above the armored visor cover(?). There are some photos in my article illustrating the build of Bronco hotchkiss from a few years back: http://www.armorama.co.uk/features/2911
Cheers and happy modelling,
Greg
Nito74

Joined: March 04, 2008
KitMaker: 5,386 posts
Armorama: 4,727 posts

Posted: Friday, November 22, 2013 - 11:08 AM UTC
Nice to see back at the bench Robert !!
Thanks for the Marder I you showed me awhile ago and the useful tips on the RPM kit !
Hope to see this one finished
Thanks for the Marder I you showed me awhile ago and the useful tips on the RPM kit !
Hope to see this one finished

Posted: Friday, November 22, 2013 - 11:23 AM UTC
@ Grzegorz
Lol... you mean to say I'm not the only modeler who builts with the speed of continental drift?
A really nice built of yours and I checked the pictures.. Great job. If my H39 comes out half as good I will be a happy man. And thanks for that tip on the seam of the transmission cover. Somehow I must have missed that in all the refs I have collected... I looked back in the H39 book I have and indeed it is a bit more to the back. Luckily it is still an easy fix at this stage and I think it is about the last thing I can still add to this built.
@ John
Thanks a lot for the compliments. Really appreciated. Your Marder I looked the part... And while on that subject... I have plans to pick that one up as well very soon... Well as soon as I can remember where the hell I left the Friuls for that kit.
Posted: Saturday, November 23, 2013 - 04:47 AM UTC
So... Another update
I have added all the remaining parts on the turret and assembled the last big part: the trench skid. Which I left in 3 convinient subassemblies so I can get the insides with primer and paint first.


I also moved the seam between the transmission cover and the hull a few mm to the back as per Grzegorz comment and that is about it... Time for primer and paint.
I have added all the remaining parts on the turret and assembled the last big part: the trench skid. Which I left in 3 convinient subassemblies so I can get the insides with primer and paint first.


I also moved the seam between the transmission cover and the hull a few mm to the back as per Grzegorz comment and that is about it... Time for primer and paint.
steph2102

Joined: April 23, 2011
KitMaker: 735 posts
Armorama: 606 posts

Posted: Sunday, November 24, 2013 - 02:31 AM UTC
Hello, Robert, your Hotchkiss is superb, I am anxious to see it finished
steph
steph

ColinEdm


Joined: October 15, 2013
KitMaker: 1,355 posts
Armorama: 1,229 posts

Posted: Sunday, November 24, 2013 - 03:16 AM UTC
Beautiful work, can't wait to see it finished!
Posted: Sunday, November 24, 2013 - 05:20 AM UTC
@ Steph and Colin
Thanks the both of you for the compliments. It should not take much longer now... Started the first step of painting today... Preshade
Thanks the both of you for the compliments. It should not take much longer now... Started the first step of painting today... Preshade
Posted: Sunday, November 24, 2013 - 06:54 AM UTC
And to add to the fact that I did the preshade. Here are the pics. The inside of the trenchskid was painted panzer grey. I wanted to show this tank has been around for a while. So it was painted grey when it went into service after the occupation of france. Was repainted panzergelb in 1943 but the soldiers who were responsible for that couldn't be bothered to repaint the insides of the trench skid. And with some green camo it will be abandonned somewhere in a French village after the D-day landings.


Posted: Sunday, November 24, 2013 - 01:01 PM UTC
End of a busy day at the bench. Pretty much all the airbrushing bar the tracks and some bits I missed are done now. And Finally after 3 years the masking tape has been removed to reveal the full interior through all the hatches. Pretty happy with the result so far. Now just a little bit of airbrushing and then it is on to the weathering.


Posted: Thursday, December 05, 2013 - 03:38 AM UTC
Well I call this one finished. Let's close of this monologue.

And some details


And some details

Pedro

Joined: May 26, 2003
KitMaker: 1,208 posts
Armorama: 1,023 posts

Posted: Tuesday, February 11, 2014 - 07:30 AM UTC
Hi Robert,
It is a shame that the finish of your build went without even one comment and last couple of posts were a monologue!
I must say that the finished piece looks very good! (for a vehicle in german markings ) Naaah, kidding, great detail work!
With its broken track and kind of abandoned looks, was it put on a base or a dio of some sorts?
Anyway, a Job well done!
Cheers,
Greg
It is a shame that the finish of your build went without even one comment and last couple of posts were a monologue!
I must say that the finished piece looks very good! (for a vehicle in german markings
 ) Naaah, kidding, great detail work!
With its broken track and kind of abandoned looks, was it put on a base or a dio of some sorts?
Anyway, a Job well done!
Cheers,
Greg
Blackstoat

Joined: October 15, 2012
KitMaker: 568 posts
Armorama: 561 posts

Posted: Tuesday, February 11, 2014 - 07:59 AM UTC
Nice job on that mate - looks the business.
it's really subtly weathered and everything looks in register. If I can just make one constructive comment? Those German markings look a little too bright and bold to my eye. If you could calm them down a bit to blend in a little more it would be perfect
Andy
it's really subtly weathered and everything looks in register. If I can just make one constructive comment? Those German markings look a little too bright and bold to my eye. If you could calm them down a bit to blend in a little more it would be perfect
Andy
Posted: Tuesday, February 11, 2014 - 08:51 AM UTC
Ola Guys
Thanks for your comments.
@ Grzegorz
Thanks for your compliments and kind words. Yeah my posts tend to go unnoticed one way or another.
The project is finished now and I have made a base with a figure for it but sadly I cannot share pics of that yet as I got a Publisher interested for publication in a magazine. So the world will have to wait a bit till pics of that surface

@ Andy
Thanks to you as well for the kind words. You are right about the corsses being quite bright. Allthough I have to say this is strengthened by the photo. It also got the oildot method of weathering so there are some color variations in the white. That said. Some of these markings remained very bright. Look at the cross on the trenchskid of this H39 for instance

Or this one


And the pic I based my built on and of which I can't find a good image online also has this marking so sharp it looks like it is decalled on. That was the main reason for me to leave the decal as it is now.
With friendly greetz
Robert Blokker
Thanks for your comments.
@ Grzegorz
Thanks for your compliments and kind words. Yeah my posts tend to go unnoticed one way or another.
The project is finished now and I have made a base with a figure for it but sadly I cannot share pics of that yet as I got a Publisher interested for publication in a magazine. So the world will have to wait a bit till pics of that surface


@ Andy
Thanks to you as well for the kind words. You are right about the corsses being quite bright. Allthough I have to say this is strengthened by the photo. It also got the oildot method of weathering so there are some color variations in the white. That said. Some of these markings remained very bright. Look at the cross on the trenchskid of this H39 for instance

Or this one


And the pic I based my built on and of which I can't find a good image online also has this marking so sharp it looks like it is decalled on. That was the main reason for me to leave the decal as it is now.
With friendly greetz
Robert Blokker
Pedro

Joined: May 26, 2003
KitMaker: 1,208 posts
Armorama: 1,023 posts

Posted: Tuesday, February 11, 2014 - 10:46 AM UTC
Wow, I'm glad it wasn't completely unnoticed, congratulations on getting it published!
Cheers,
Greg
Cheers,
Greg
Posted: Tuesday, February 11, 2014 - 11:03 AM UTC
Yeah it got more attention and feedback on Facebook. So I decided to post the updates of the latter stages there. Untill the Publisher came round. Not many people so far have seen the final result.
 |


