Hosted by Darren Baker
AS90
Posted: Monday, March 29, 2010 - 05:45 AM UTC
Is there any interest in me trying to do a super detail build of Trumpeter’s AS90? If there is I will be using another RB model barrel reviewed here and the kit and a build review can be viewed here and here. All the improvements I will attempt beyond those in the previous build review will be done with scratch items, pieces of wire, odds and ends. The build will be supported by pictures of the AS90 from Prime Portal, David J Ross, Paul Cooke, and last but by no means least pictures from Larkhill camp if I ever manage to get hold of the right person to obtain permission.

sauceman

Joined: September 28, 2006
KitMaker: 2,672 posts
Armorama: 2,475 posts

Posted: Monday, March 29, 2010 - 06:08 AM UTC
Yup!
cheers
cheers
trahe

Joined: April 03, 2006
KitMaker: 1,158 posts
Armorama: 950 posts

Posted: Monday, March 29, 2010 - 06:34 AM UTC
[quote]Yup!
Ditto!
Ditto!
Posted: Monday, March 29, 2010 - 10:17 AM UTC
Ok I will start this over the next four days. Please could an editor make this a Blog for me.
woody6968

Joined: March 02, 2006
KitMaker: 454 posts
Armorama: 380 posts

Posted: Tuesday, March 30, 2010 - 06:36 AM UTC
hell yes , i love the as90 been wanting to build one for a few years ,, id love to see the interior done ,wires and all ...cant wait to follow this one darren and good luck ,, which pe sets and updates will you be using ???

chnoone

Joined: January 01, 2009
KitMaker: 1,036 posts
Armorama: 1,033 posts

Posted: Tuesday, March 30, 2010 - 11:50 AM UTC
"On the way"
Cheers
Christopher
Cheers
Christopher
Posted: Tuesday, March 30, 2010 - 12:08 PM UTC
Ian there will not be any PE sets used as everything other than the barrel will be from the box or scratched from bits and pieces. Regarding the interior I do want to cover the interior however I do not have access to enough pictures for it to be feasible. I should add this vehicle is a really good one for building an interior as the large door in the rear and on the side makes for good viewing areas. Thank you all for the interest.

chnoone

Joined: January 01, 2009
KitMaker: 1,036 posts
Armorama: 1,033 posts

Posted: Tuesday, March 30, 2010 - 12:22 PM UTC
Got this book yet?
http://www.wwpbooks.com/index.php?lang=en&page=showbook&book=33
Has some very good details
Cheers
Christopher
http://www.wwpbooks.com/index.php?lang=en&page=showbook&book=33
Has some very good details
Cheers
Christopher
Posted: Tuesday, March 30, 2010 - 12:40 PM UTC
I have been given permission to use pictures from Prime Portal and have pictures kindly provided by David J Ross, Plus Paul (Cookie) Cooke has offered to supply some pictures he has taken as well. I do not at this time have any literature on the AS90 however I am sure I will eventually.
Posted: Wednesday, March 31, 2010 - 06:30 AM UTC
Here is the kit from Trumpeter I intend to try and make as accurate as possible without purchasing large numbers of after market add ons. The base kit is reviewed by me here.
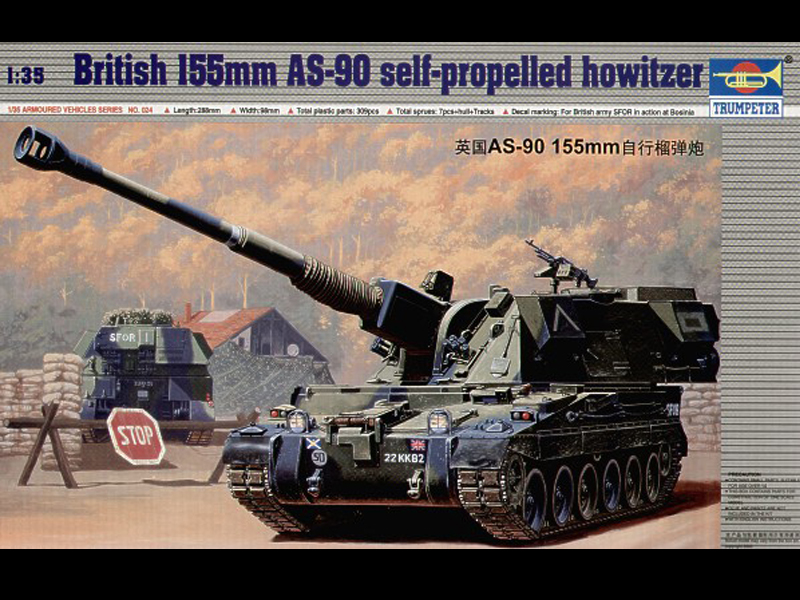
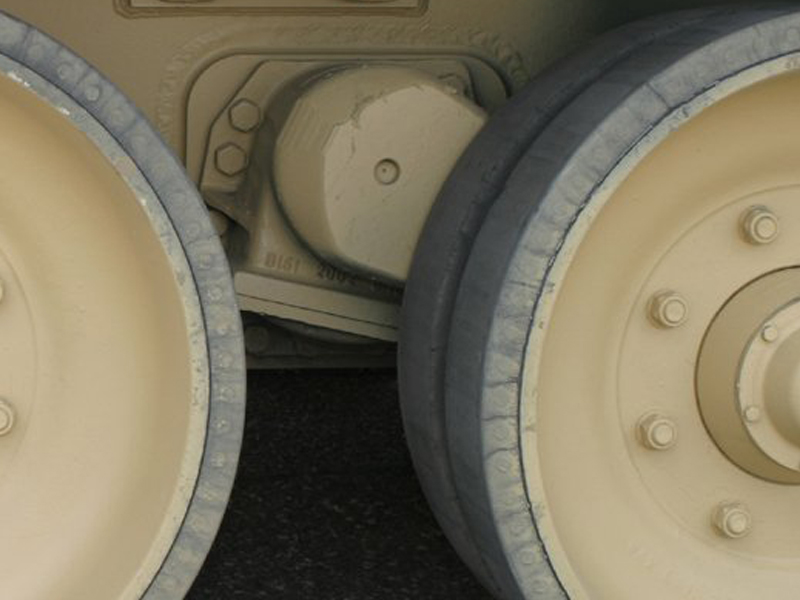
The wheels are reasonably accurate straight from the box, however the drive wheel needs a little surgery to correct.
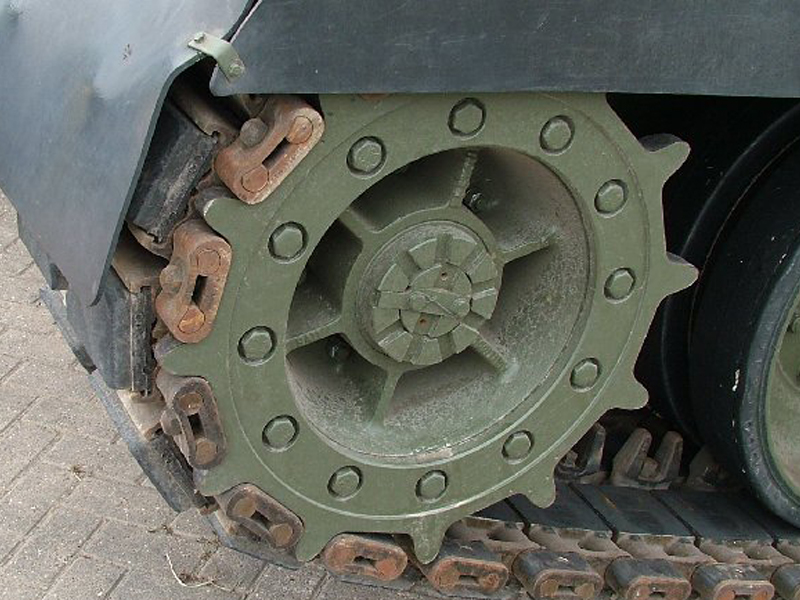
On the real vehicle you will notice what I believe to be a locking mechanism.
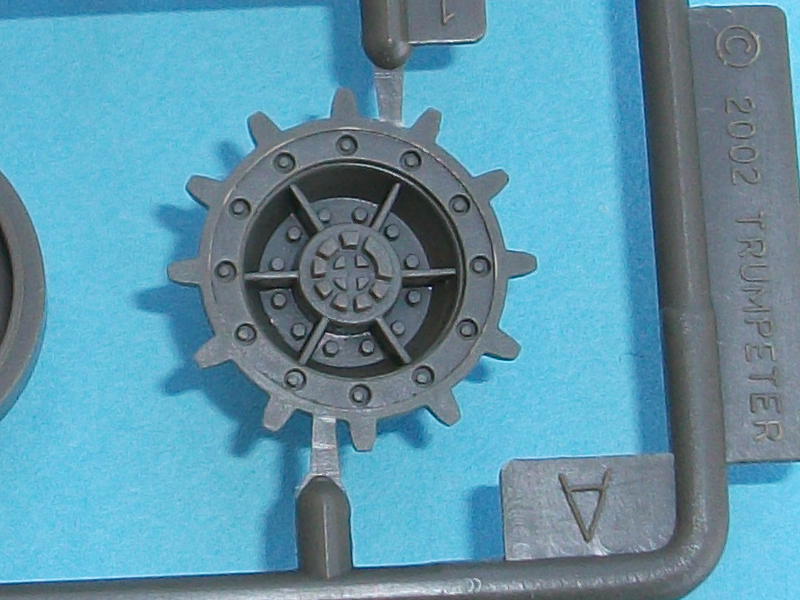
the drive wheel on the sprue does not have this detail correct, however with minimal surgery and a small piece of Evergreen strip it is easily corrected.
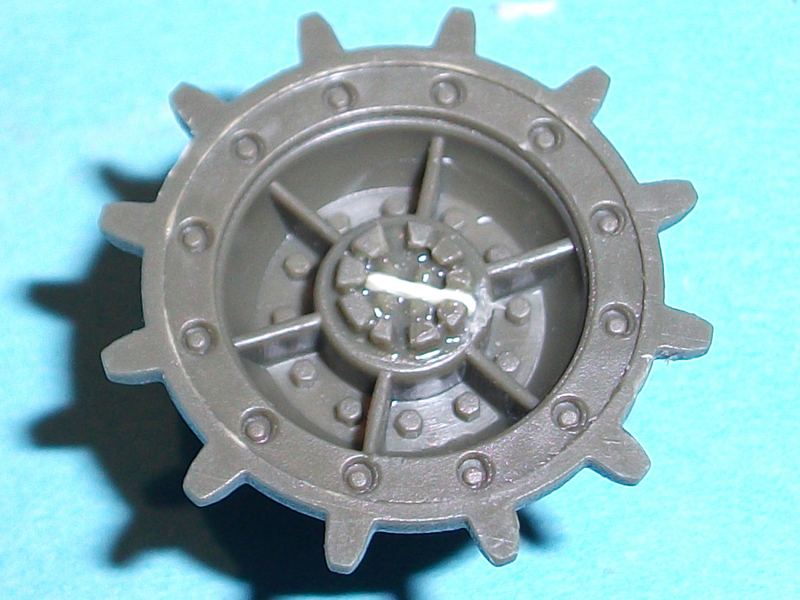
It should be noted that the centre detail of the wheel is a little shallow, but it is not overly noticeable.

The wheels are reasonably accurate straight from the box, however the drive wheel needs a little surgery to correct.

On the real vehicle you will notice what I believe to be a locking mechanism.

the drive wheel on the sprue does not have this detail correct, however with minimal surgery and a small piece of Evergreen strip it is easily corrected.

It should be noted that the centre detail of the wheel is a little shallow, but it is not overly noticeable.

sauceman

Joined: September 28, 2006
KitMaker: 2,672 posts
Armorama: 2,475 posts

Posted: Wednesday, March 31, 2010 - 06:39 AM UTC
Don't forget the lock wire 
cheers

cheers
Posted: Wednesday, March 31, 2010 - 06:39 AM UTC
The suspension on this model is made completely from separate mouldings, with the tub being bare except for location points.

It is not easy to get a clear picture of the suspension arms and this was the best I could do.
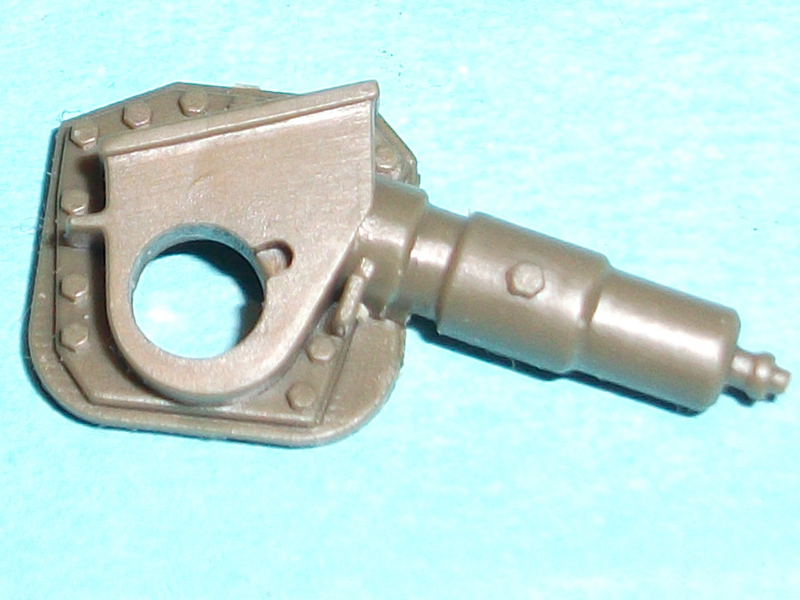
Here is the kits suspension mount and is accurate as best as I can tell, including the bolt detail. Locating these parts onto the tub is straight forward and requires no real work other that a light scrap of the top and bottom of the shock absorber to remove very light mould seams.
Please take not that there is a locating point for the suspension arms in order to make it easy to have the road wheels sit on a flat surface.

It is not easy to get a clear picture of the suspension arms and this was the best I could do.

Here is the kits suspension mount and is accurate as best as I can tell, including the bolt detail. Locating these parts onto the tub is straight forward and requires no real work other that a light scrap of the top and bottom of the shock absorber to remove very light mould seams.

Please take not that there is a locating point for the suspension arms in order to make it easy to have the road wheels sit on a flat surface.
Posted: Wednesday, March 31, 2010 - 06:46 AM UTC
Quoted Text
Don't forget the lock wire
cheers
Rick as this is hard to see even on the real vehicle I am sure you will forgive me for omitting it.

 Or should I ask my daughter if I can have a strand of her hair, which I suspect would still be over scale.
Posted: Wednesday, March 31, 2010 - 03:23 PM UTC
I have taken a good look at some interior pictures of the AS90, and it has made me believe that I can do a partial interior at least. My concern as regards a full interior build is the breach and auto loader which looks like I am going to require a lot help from all of you to complete. I also could do with a picture of the top side of the breach if anyone can help.

The3rdPlacer

Joined: July 29, 2008
KitMaker: 430 posts
Armorama: 407 posts

Posted: Thursday, April 01, 2010 - 02:00 AM UTC
Hi Darren, I'll be watching your progress on this one, have you sorted out a camo scheme yet?
Ryan
Ryan
Posted: Thursday, April 01, 2010 - 07:10 AM UTC
I had considered the yellow all over scheme used in Iraq, however I am a little bored (not a complaint) of seeing yellow vehicles so it is going to be NATO green and black. I should add that the BATAN scheme may also end up being used instead.
Posted: Thursday, April 01, 2010 - 11:32 AM UTC
I have not done a lot today on the AS90 as I was looking through a lot of referances for the build trying to answer a question. below you see the assembly of the three return roller supports.

And now you see those supports attached to the model. Please note that the arms are not on a level plain, with the middle support arm being quite a but higher.
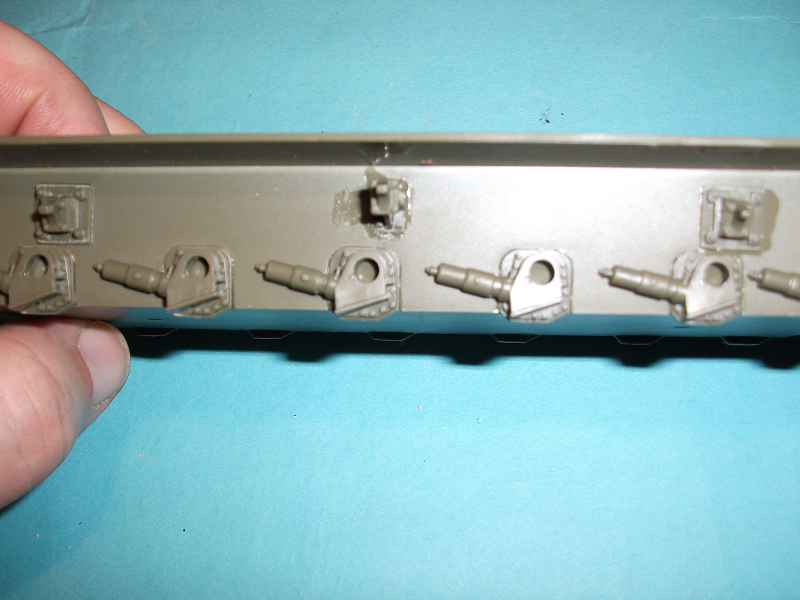
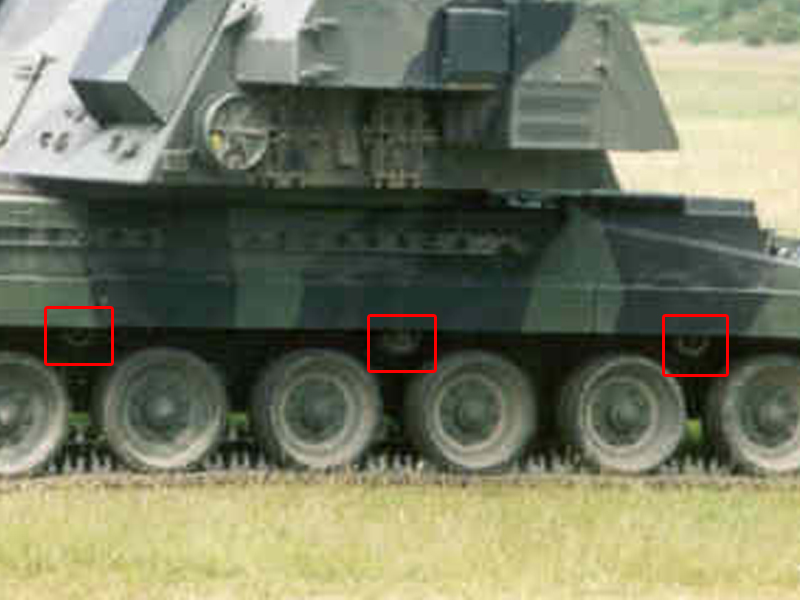
The wheels for the return rollers connect via an offset location hole, however even with the two outer wheels being attached upside down in terms of the location point they still don't sit level. Now this is a fairly minor point but I would be interested to know if the return rollers should be high at the centre one or on a level as appears to be the case of ref pictures.

And now you see those supports attached to the model. Please note that the arms are not on a level plain, with the middle support arm being quite a but higher.

The wheels for the return rollers connect via an offset location hole, however even with the two outer wheels being attached upside down in terms of the location point they still don't sit level. Now this is a fairly minor point but I would be interested to know if the return rollers should be high at the centre one or on a level as appears to be the case of ref pictures.


The3rdPlacer

Joined: July 29, 2008
KitMaker: 430 posts
Armorama: 407 posts

Posted: Thursday, April 01, 2010 - 12:34 PM UTC
Darren,
Good choice on the camo scheme. The roller situation is irritating.....can you mock up the road wheel and skirt? It's hard to tell from the in action photo which way to go.
Ryan
Good choice on the camo scheme. The roller situation is irritating.....can you mock up the road wheel and skirt? It's hard to tell from the in action photo which way to go.
Ryan
Posted: Thursday, April 01, 2010 - 02:58 PM UTC
I will supply pictures of the other one that is built to show the problem more clearly with the skirt attached tomorrow. The wife would kill me if I woke her at 3am just so I could bring down a model..

The3rdPlacer

Joined: July 29, 2008
KitMaker: 430 posts
Armorama: 407 posts

Posted: Thursday, April 01, 2010 - 03:14 PM UTC
Ha ha, at least I know now I'm not the only one who reads these things at 3:00 in the morning!
Ryan
Ryan
Posted: Thursday, April 01, 2010 - 07:27 PM UTC
Thanks to JungleJim who sent me some pictures an error in the kit has been identified with the return roller arms.

Part A18 and 19 are shown as being attached upside down. So while it is not strictly accurate I will reverse part A18 which along with the wheel being placed the opposite way up to the instructions may bring them into line. Of course if you correctly aline A18 and 19 you will still have the issue of the wheels being out of alignment.

Part A18 and 19 are shown as being attached upside down. So while it is not strictly accurate I will reverse part A18 which along with the wheel being placed the opposite way up to the instructions may bring them into line. Of course if you correctly aline A18 and 19 you will still have the issue of the wheels being out of alignment.
armouredcharmer

Joined: June 09, 2009
KitMaker: 670 posts
Armorama: 410 posts

Posted: Thursday, April 01, 2010 - 08:07 PM UTC
Hi Mate,watching this one with interest - i`m hoping to do this in combination with Revell`s Panzerhaubitze,two different approaches to the same problem.
Posted: Friday, April 02, 2010 - 04:45 AM UTC
Hello Danny thanks for watching, as I have said before I still believe this is a good kit that unfortunatly suffers from a lack of correctly placed items. The instructions could do with being re-written as well.
Posted: Friday, April 02, 2010 - 05:35 AM UTC
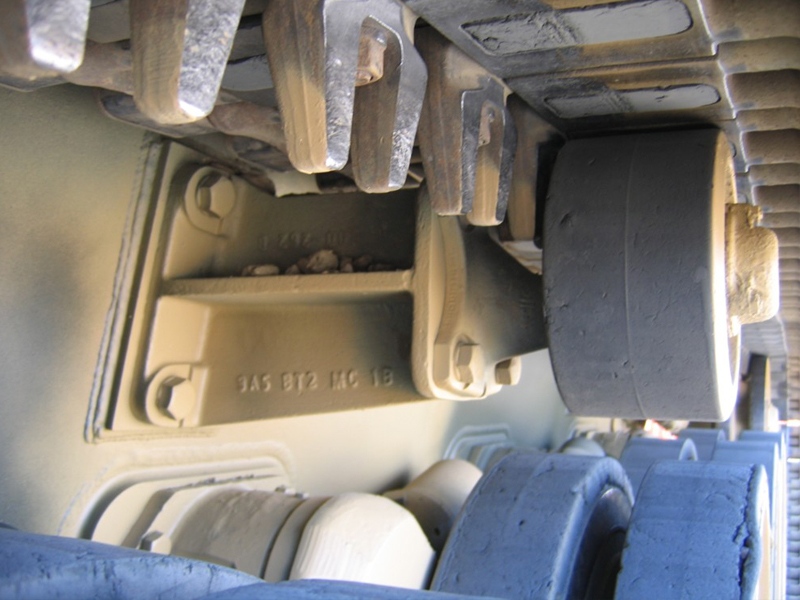
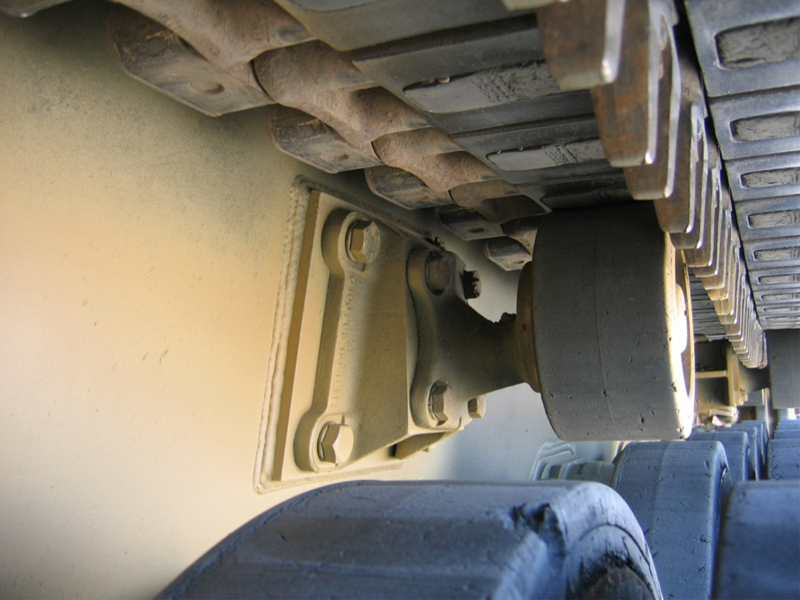
Here are the pictures Jungle Jim kindly provided showing the incorrect directions in the instructions.
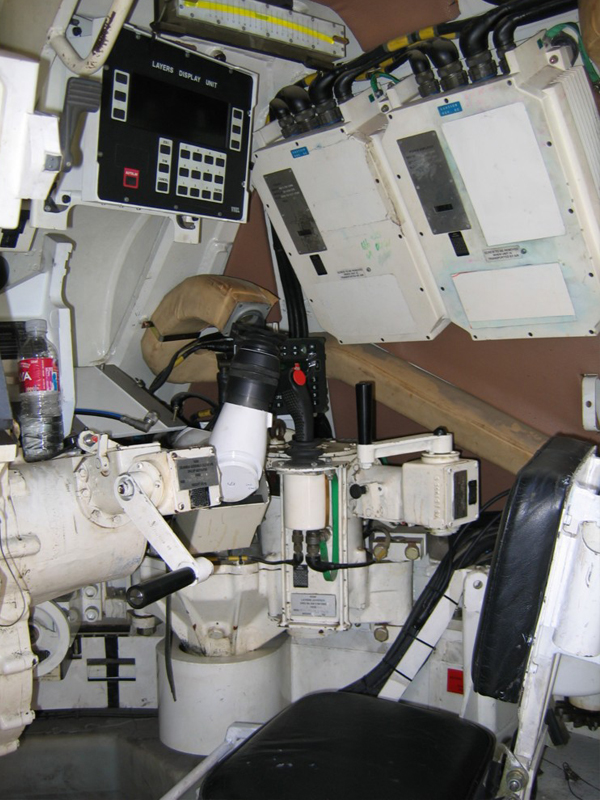
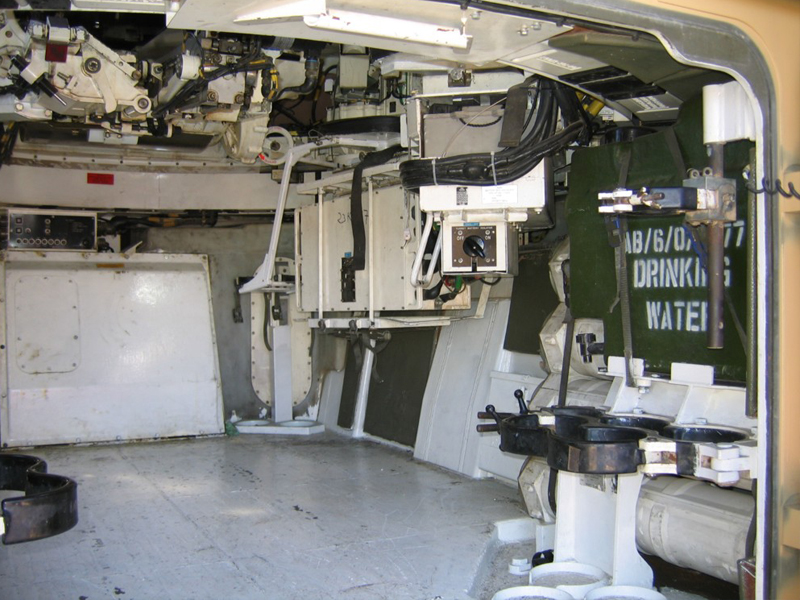
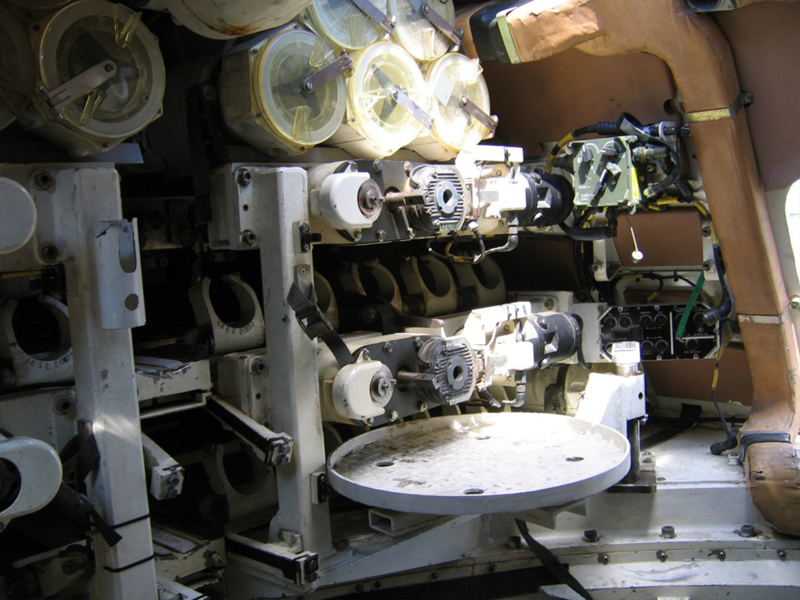
Here are some pictures showing some of what I am letting myself in for with an attempt at an internal build.

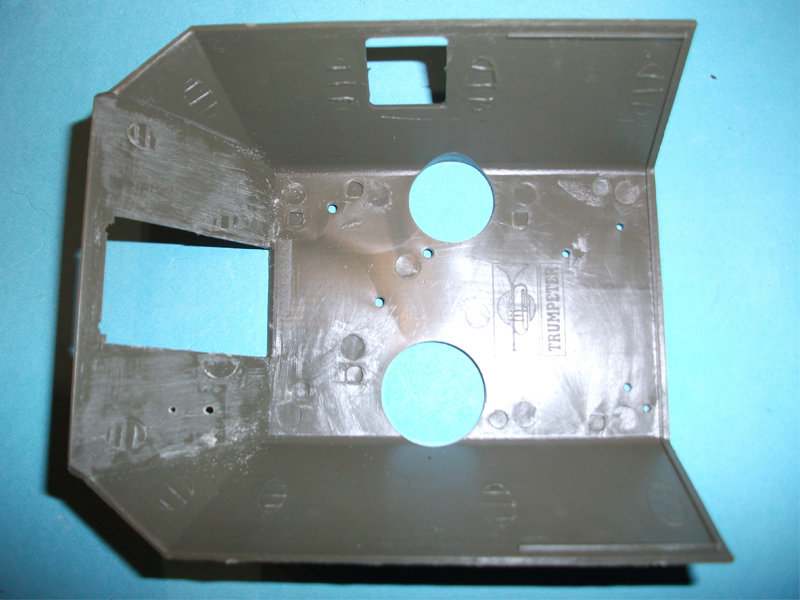
Lastly here is the internal surfaces of the turret. As can be seen there are some ejector pin marks that need filling, but it does provide a large area to make busy.


Here are some pictures showing some of what I am letting myself in for with an attempt at an internal build.


Lastly here is the internal surfaces of the turret. As can be seen there are some ejector pin marks that need filling, but it does provide a large area to make busy.

Posted: Wednesday, April 07, 2010 - 12:36 PM UTC
Having finished my shifts for the next 4 nights I figured I had better get to work on the inside of the AS90. Today I have fitted the fire walls, deck, side walls, and rear panels, I then added the large central box and its access panel and the panel beside it. Tomorrow I hope to crack on with the drivers position. I will be printing out control panel faces and internal warning signs, so if anyone wants a set of these when I have finished for an internal build just E-mail me at the end of this build.
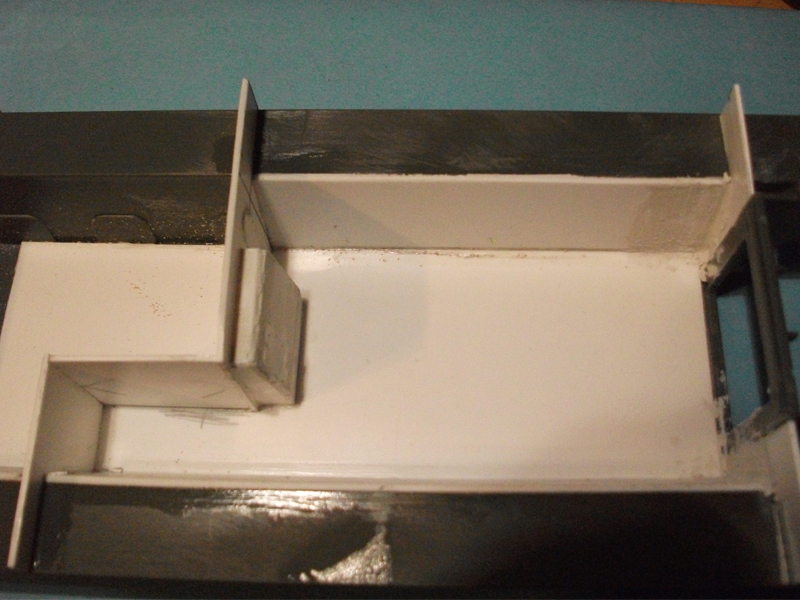
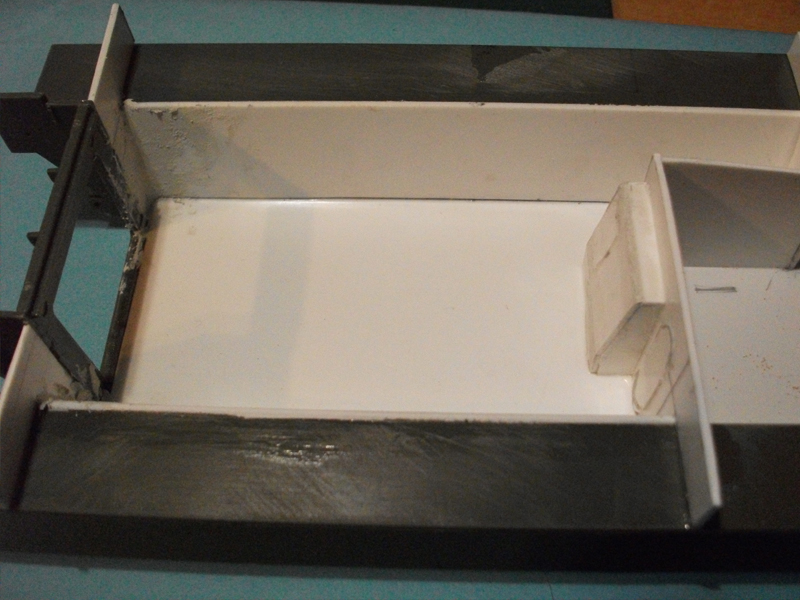
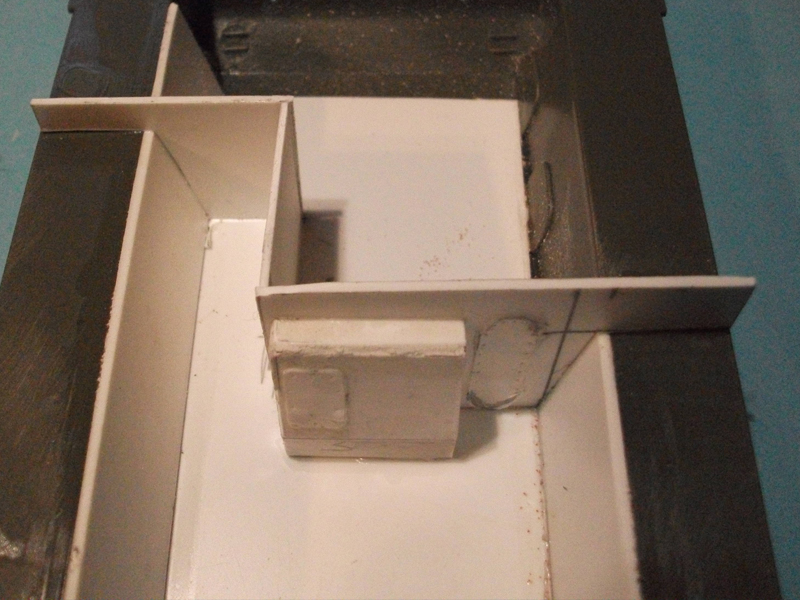
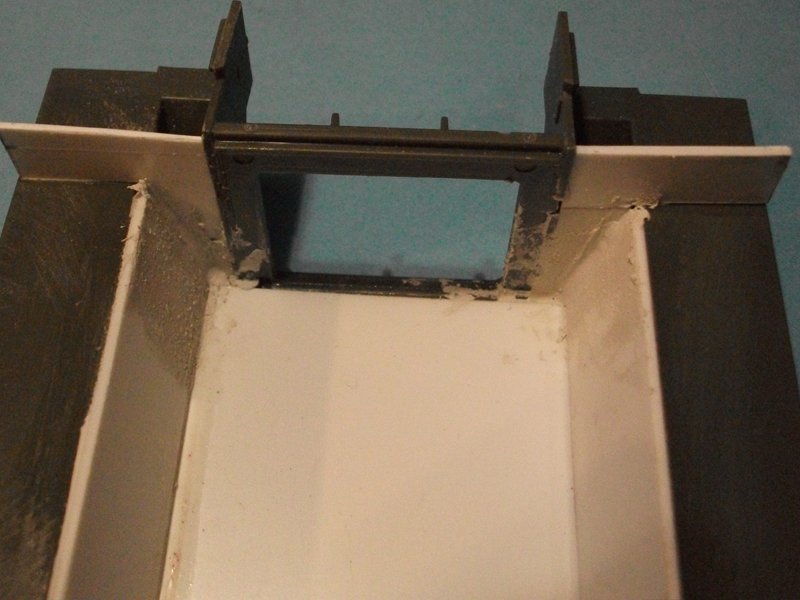
Sorry the pictures are a little dark but the flash on the white Plasticard just blinds everything.


Sorry the pictures are a little dark but the flash on the white Plasticard just blinds everything.
 |


