ZU-23-3 AA gun - 1/48 ACE
Germany
Joined: September 07, 2005
KitMaker: 5,609 posts
Armorama: 264 posts
Posted: Friday, May 07, 2010 - 02:59 AM UTC
Hi All
I started this kit a few days ago (though I wanted to focus on aircraft

) well I am nearing it as this is an Anti-aircraft gun. Somehow it reminds me on the German 2cm Flak 30 and 38 but I do not know enough about Soviet AAA to deduce any kind of heritage. Most quarterscale modellers will know the kit. If not, you can have a short look
here (some pix of the kit parts and a German text).
It is a very detailed and also filigree kit, but the execution of the tool and injection molding is somehow "russisch" (i.e. rather crude) if wwe had such a model in this detail done by BigT everyone wwould be hilariuos. But it is not the case so building this kit is kind of a work with lots of guessing, test fitting, filing and sanding ... but it is doable. I still need to improvee a few things on the stuf I have already done and I also still have a lot to do .....
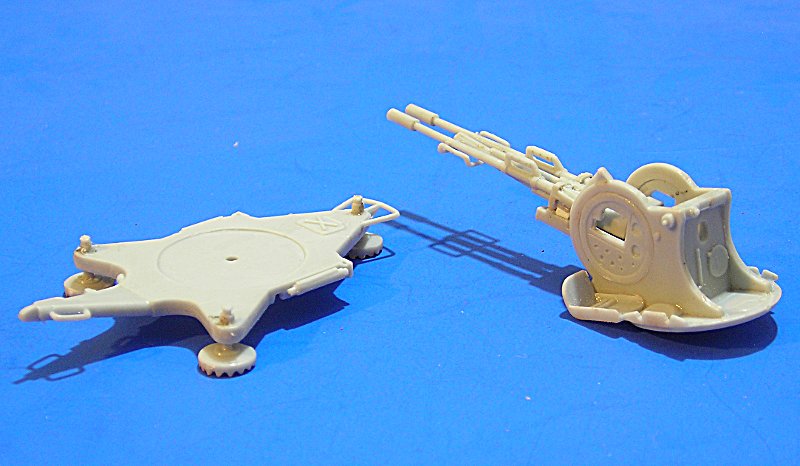


all the best
Steffen
DULCE ET DECORUM EST PRO HOBBY MORI
Sachsen, Germany
Joined: November 28, 2007
KitMaker: 1,462 posts
Armorama: 1,289 posts
Posted: Friday, May 07, 2010 - 04:02 AM UTC
Hi Steffen, thanks for sharing the build-log!
I also found your ipms-description some weeks ago.
Some years ago I built a 1/35 version, made by "Scale"... which was a good kit.
But on my one, I replaced the flash-supressors by "drilled" plastic-parts, to get a better appearance.
greetings...
Soeren
progress:
- Venera-14-lander on Venus
- Dragon s.10cm K18 at the Atlantic-wall
completed:
- Venera-10 lander on Venus
Germany
Joined: September 07, 2005
KitMaker: 5,609 posts
Armorama: 264 posts
Posted: Friday, May 07, 2010 - 04:12 AM UTC
Thanks Sören!
I drilled out the flash suppressors and they look quite good in real life (though not so good on the pix).
The kit is really cool; though there are many tiny parts with huuuuuge conectors to the frames, "good" amount of flash ... also the instructions are pretty weak and I am not sure about the wheel mounts (but I hope these will be hidden by the mud guards...
all the best
Steffen
P.S. dang, I've just see I mistyped the title .. of course it's ZU-23-2
DULCE ET DECORUM EST PRO HOBBY MORI
Germany
Joined: September 07, 2005
KitMaker: 5,609 posts
Armorama: 264 posts
Posted: Friday, May 07, 2010 - 09:59 PM UTC
Here is a bit of progress on the ZU-23-2
Some more small parts added on the gun carriage and the gun. the whole aiming device is still missing and I have to find proper locations for some parts...
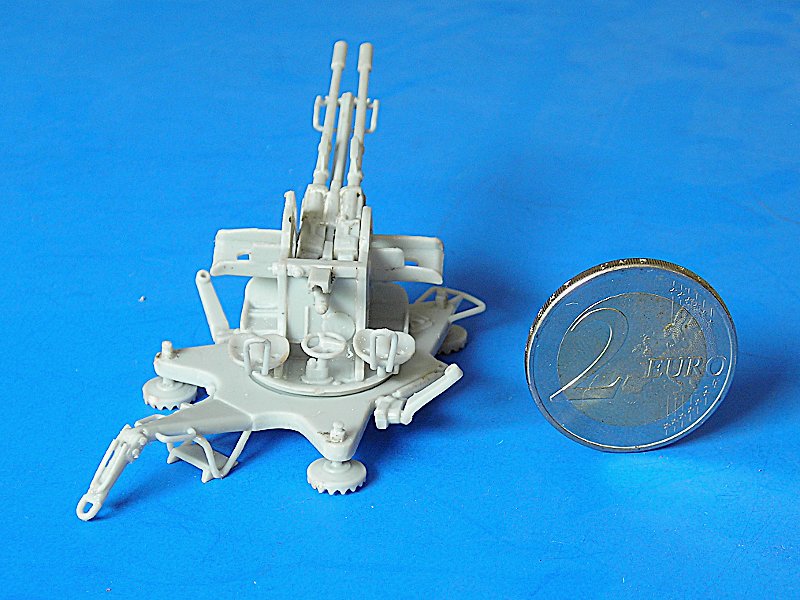
all the best
Steffen
DULCE ET DECORUM EST PRO HOBBY MORI
Germany
Joined: September 07, 2005
KitMaker: 5,609 posts
Armorama: 264 posts
Posted: Sunday, May 09, 2010 - 05:45 AM UTC
Progress is slow, as I spend most of the time searching for the right location of the parts. I also found a few that I placed not totally correct, but so be it. The optics is a real pain and despite the several walk arounds at ACE's website I cannot figure out where to place the next part .... maybe I take a fresh look tomorrow.

all the best
Steffen
DULCE ET DECORUM EST PRO HOBBY MORI
Germany
Joined: September 07, 2005
KitMaker: 5,609 posts
Armorama: 264 posts
Posted: Wednesday, May 12, 2010 - 02:05 AM UTC
Hi all
seeing the thread views there are some people that have a look so here is a short progress report. It is really dificult to find the correct (or I should better say: a plausible) spot for the small parts of the optics boom. Sadly I only found museums WA and most of them are demilitarized or have at least parts missing. So here is what it looks now.
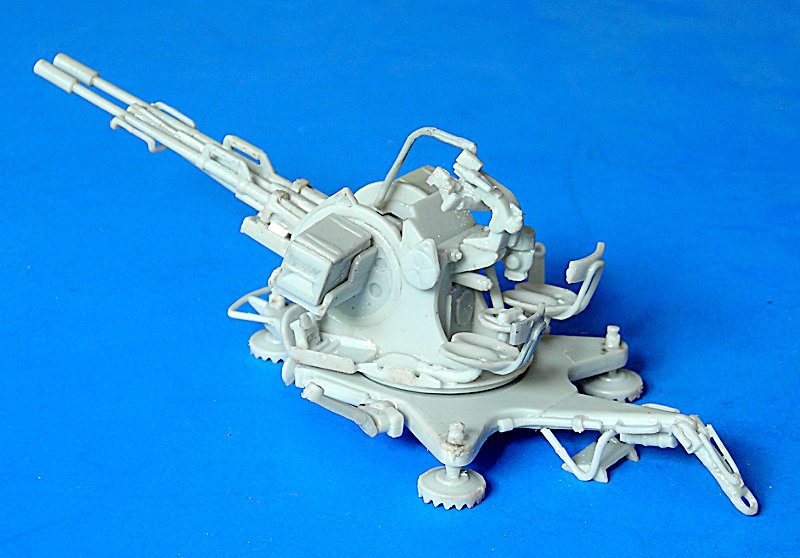
I do not think it is useful to spend more time on this as I will use the model in a diorama seting and not as a sstand alone kit. Also the pictures show it much larger than it really is. Here is an overview of the table top which I will use as photo background and model show display (for aircraft ... sorry guys but that's the way this is

)
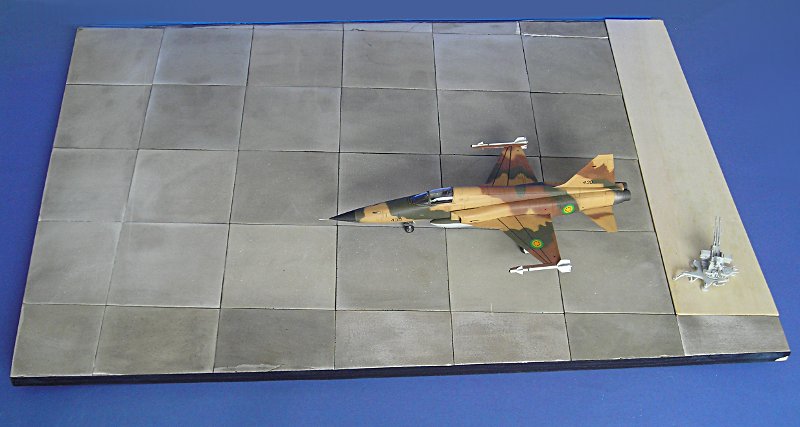
all the best
Steffen
DULCE ET DECORUM EST PRO HOBBY MORI
Germany
Joined: September 07, 2005
KitMaker: 5,609 posts
Armorama: 264 posts
Posted: Thursday, May 13, 2010 - 05:23 AM UTC
Slowly closing in.
Just a lever and the two reflectors on the mud guards and I'll be done constructing. I'll leave off the wheels until after painting, but I need to bore some new holes for the axles and insert wire as I mistakenly mounted the parts as tail lights ... it is difficult for me to always cross check the instruction sheet, the sheet with the sprues that contain the numbers (nothing on the sprues) and the Inet for some reference .. still: Completely my bad!!

This will be put to the side to fully dry over night. The material is pretty cool stuff (though it does not look so). First it seems as if my Tamiya extra thin does not affect the plastic, but it does after a few more seconds. When dry the bond is sturdy. Furthermore the parts are quite delicate and still strong.
all the best
Steffen
DULCE ET DECORUM EST PRO HOBBY MORI
Germany
Joined: September 07, 2005
KitMaker: 5,609 posts
Armorama: 264 posts
Posted: Friday, May 14, 2010 - 05:00 AM UTC
Two more pictures now with the first primer coat on. A dark one will follow when I have repaired some blemishes
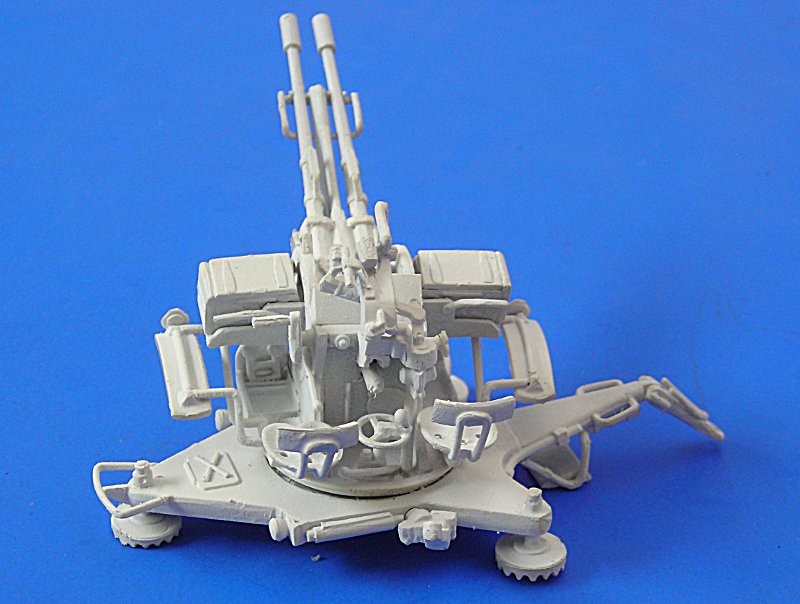

and another size comparison
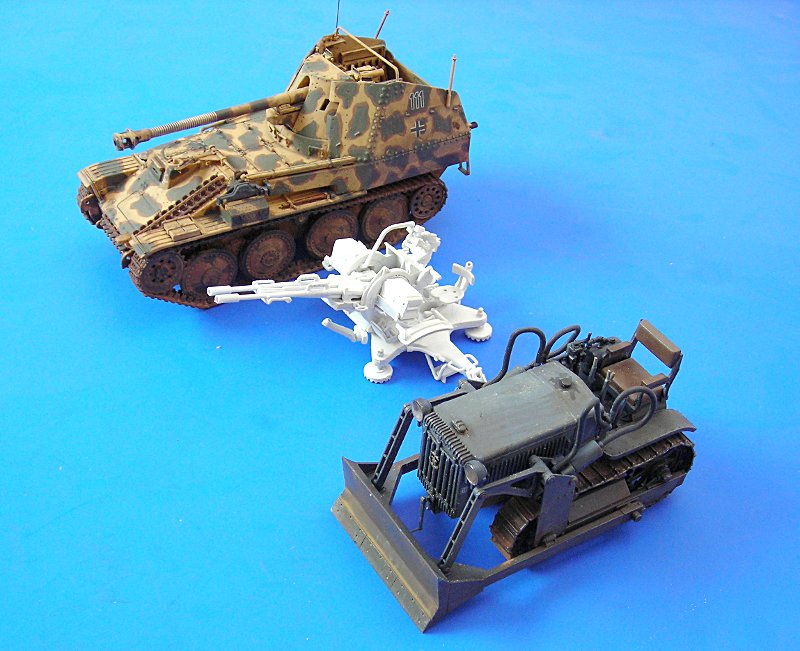
all the best
Steffen
DULCE ET DECORUM EST PRO HOBBY MORI
Tel Aviv-Yafo, Israel
Joined: October 25, 2007
KitMaker: 14 posts
Armorama: 13 posts
Posted: Friday, May 14, 2010 - 05:44 AM UTC
I see ACE kit quallity is poor like in 1/72 scale

great job man !!!
Germany
Joined: September 07, 2005
KitMaker: 5,609 posts
Armorama: 264 posts
Posted: Friday, May 14, 2010 - 07:16 AM UTC
Hi Richard
IMHO it looks much worse when you see the sprues that it actually is. What really sucks are the explosion view instructions. Of course this is no Tamiya kit and some smaller sprue connectors would be nice (the Trytool PE Scriber saws came to very good use here) but all in all it is a good kit .. as I wrote in my opinion.
Edit: It is greeeeeeen...
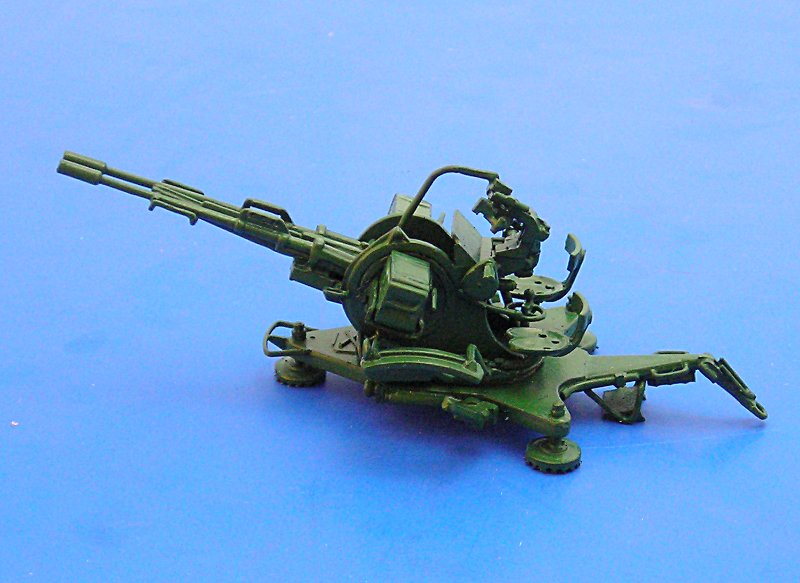
cheers
Steffen
DULCE ET DECORUM EST PRO HOBBY MORI
Germany
Joined: September 07, 2005
KitMaker: 5,609 posts
Armorama: 264 posts
Posted: Friday, May 14, 2010 - 10:10 PM UTC
another picture
the paint is not fully dry yet, but I still attached the wheels. Gun and carriage are still separate for further weathering steps..

all the best
Steffen
DULCE ET DECORUM EST PRO HOBBY MORI
Sachsen, Germany
Joined: November 28, 2007
KitMaker: 1,462 posts
Armorama: 1,289 posts
Posted: Friday, May 14, 2010 - 11:19 PM UTC
Looking good so far... also on this "not so good-kit".

As I built my kit some years ago, I didn´t painted it, but I was very happy with the result.
greetings...
progress:
- Venera-14-lander on Venus
- Dragon s.10cm K18 at the Atlantic-wall
completed:
- Venera-10 lander on Venus
Germany
Joined: September 07, 2005
KitMaker: 5,609 posts
Armorama: 264 posts
Posted: Saturday, May 15, 2010 - 12:15 AM UTC
Many thanks Sören!
Well, I am happy and in retrospect it was quite a good kit. I do not like the instructions at all and clean up was not really easy because of all the small parts and my chubby fingers but the kit really is good.
Just applied the first black wash. I will add another in green and probably a brown (mud) wash too .. some drybrushing tomorrow and defintely some sandy pigments after the flat coat (as mentioned above it is for a african/middle east scenery...)
all the best
Stefffen
DULCE ET DECORUM EST PRO HOBBY MORI
Germany
Joined: September 07, 2005
KitMaker: 5,609 posts
Armorama: 264 posts
Posted: Saturday, May 15, 2010 - 04:02 AM UTC
First washes are on. I still need to adjust a few things (e.g. the "shadow" at the ammo boxes)

greets
Steffen
DULCE ET DECORUM EST PRO HOBBY MORI
Germany
Joined: September 07, 2005
KitMaker: 5,609 posts
Armorama: 264 posts
Posted: Saturday, May 15, 2010 - 07:35 AM UTC
Wow I had a good day and made quite a bit of progress. I think I am pretty much done now (except for some cleanup at the red lights and reflectors). So I am open for suggestions or comments before I call it done ...
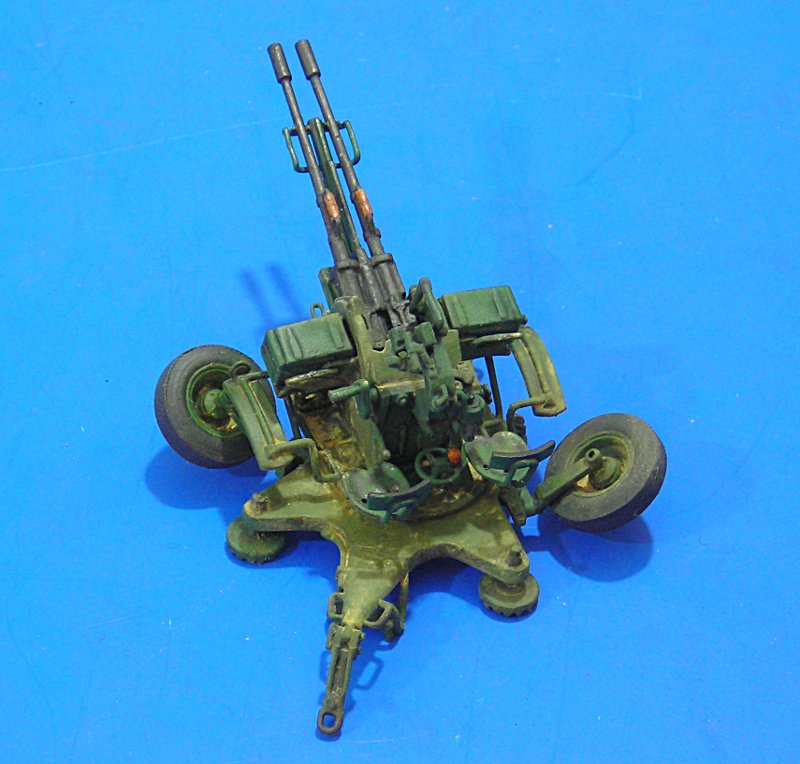

all the best
Steffen
DULCE ET DECORUM EST PRO HOBBY MORI
Germany
Joined: September 07, 2005
KitMaker: 5,609 posts
Armorama: 264 posts
Posted: Saturday, May 15, 2010 - 10:37 PM UTC
Hi All
as I got no further response to my pictures yesterday, I assume that there were no suggestions so I call it done. I took a few pictures but not that much as most can be seen in the progress shots. Thanks for watching!
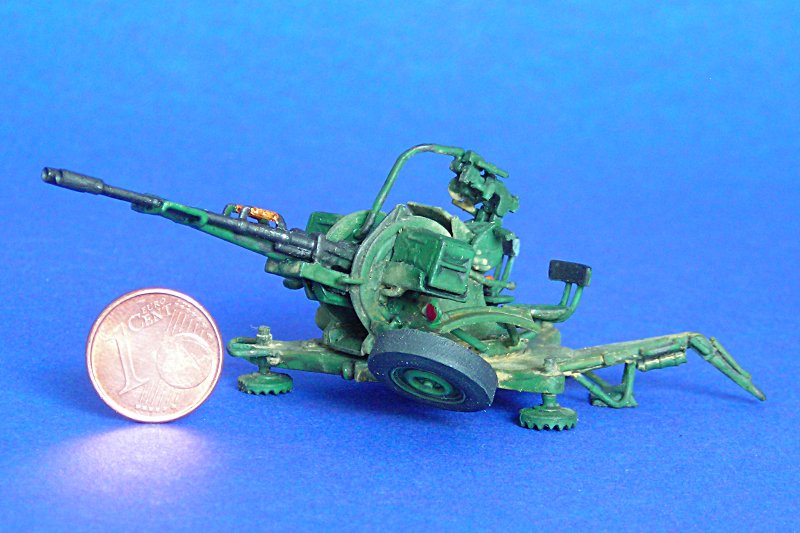


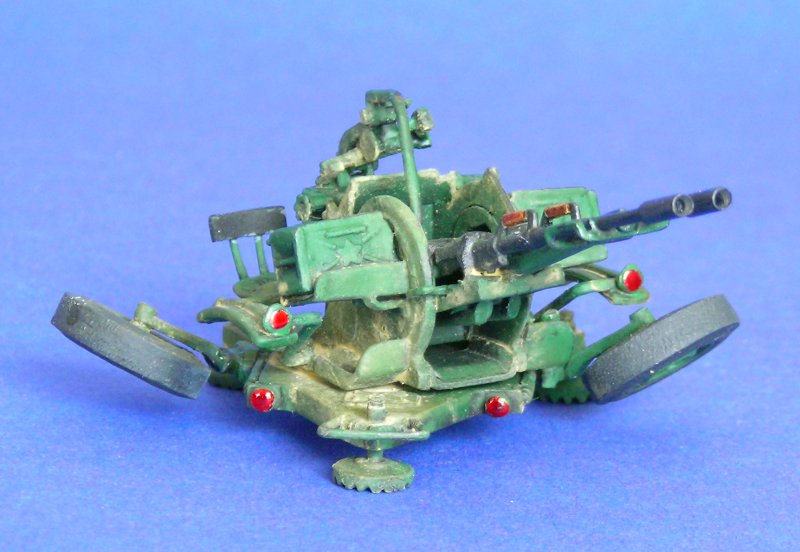


all the best
Steffen
DULCE ET DECORUM EST PRO HOBBY MORI
Correze, France
Joined: June 10, 2004
KitMaker: 5,329 posts
Armorama: 5,204 posts
Posted: Wednesday, May 19, 2010 - 08:13 AM UTC
Knowing the quality of the kit, I think yours has turned pretty well; congratulations for the efforts you put in it and the result you got.
Olivier
Visit my site Click the banner
"La reine des batailles, j'ai nommé l'infanterie"
Napoléon
Germany
Joined: September 07, 2005
KitMaker: 5,609 posts
Armorama: 264 posts
Posted: Wednesday, May 19, 2010 - 08:32 AM UTC
Many Thanks Olivier!
Honestly I think it looks even better in real life than on the pix, because it is so much enlarged on the pictures, the contrasts appear to be much harsher and the colour somehow greener (do not know if that makes sense).
Also I think the kit is o.k. - not Tamigawa but very good for eastern Europe standards .. but as you have it, you know yourself

all the best
Steffen
DULCE ET DECORUM EST PRO HOBBY MORI
Sachsen, Germany
Joined: November 28, 2007
KitMaker: 1,462 posts
Armorama: 1,289 posts
Posted: Wednesday, May 19, 2010 - 08:34 AM UTC
I agree, you made a good piece of this kit! The finished one looks good!
This scale is not my favourite one (except aircraft), but it looks much better than my bigger 1/35 kit! (not painted)
Also I didn´t seen a built and painted kit of a single ZU-23 gun.
greetings....
Soeren
progress:
- Venera-14-lander on Venus
- Dragon s.10cm K18 at the Atlantic-wall
completed:
- Venera-10 lander on Venus
Germany
Joined: September 07, 2005
KitMaker: 5,609 posts
Armorama: 264 posts
Posted: Wednesday, May 19, 2010 - 08:56 AM UTC
Danke Sören!
Für mich gibt's nur einen Maßstab, das macht vergleiche viel anschaulicher .. sicher werde ich aber nur seeeeehr wenige Schiffe bauen


OTOH wäre ein LSSC oder ein Pibber in 1/48 toll. Schreib gerade den Artikel für die IPMS Seite .. komme aber nicht so recht voran.
viele Grüße
Steffen
P.S. also posted some pix of my AB 41 in the AFV forum today, but sadly (again) I managed to screw it up and did not post it into 48 scale. Hope Keith can fix that when he has some time.
DULCE ET DECORUM EST PRO HOBBY MORI
 ) well I am nearing it as this is an Anti-aircraft gun. Somehow it reminds me on the German 2cm Flak 30 and 38 but I do not know enough about Soviet AAA to deduce any kind of heritage. Most quarterscale modellers will know the kit. If not, you can have a short look here (some pix of the kit parts and a German text).


