_GOTOBOTTOM
Armor/AFV: 48th Scale
1/48 scale discussion group hosted by Rob Gronovius
Hosted by Darren Baker
Tamiya Hetzer 1/48
tskross
Visit this Community
New York, United States
Joined: August 29, 2008
KitMaker: 160 posts
Armorama: 152 posts
Posted: Friday, May 21, 2010 - 10:27 AM UTC
Hi everyone,
Well after a very busy spring season at work things have finally settled down.
I'm still working on my M-10 project, still caught up on the base, but in the meantime I wanted a quick and fun project to complete, something that I could assemble relatively quickly and have some fun painting so...without further ado:


I've used an MR Modelbau Barrel and mantlet (if I remember correctly) although there is nothing wrong at all with the Tamiya mantlet, Hauler PE for the essential details (schurtzen to come later) and an aber MG barrel.
It was a great little build, Tamiya, as usual, did an outstanding job in engineering this kit (but please no more cast lower hulls!) Also as usual the Hauler instructions left a lot to be desired and required quite a bit of external research to figure out (for a Hetzer newbie like me)
It still needs some cleanup and the tracks are not affixed yet (and one link has broken since I last looked at them!), to aid in ease of painting.

I'm still deciding what kind of scheme to paint it in. I'm leaning towards the classic ambush scheme, but I'm not positive. I was also considering trying out a worn winter whitewash to try out the hairspray technique...and I'm always up for something a little unusual but I'm having a tough time finding good pics of wartime hetzers. Any suggestions are welcome!

Anyways, thanks for looking, its good to be back!
blackhawk77
Visit this Community
Tel Aviv-Yafo, Israel
Joined: October 25, 2007
KitMaker: 14 posts
Armorama: 13 posts
Posted: Saturday, May 22, 2010 - 03:09 AM UTC
Great work!!!
it's clean and right built, waiting for pictures after painting...

tskross
Visit this Community
New York, United States
Joined: August 29, 2008
KitMaker: 160 posts
Armorama: 152 posts
Posted: Friday, May 28, 2010 - 10:42 AM UTC
OKay got all the construction finished and the primer on...


I ended up re-adjusting the remote MG, I think it was sitting to far back in the mount. I also attached pins for the schurtzen to hang on (they are just fakey attached for the pics, so don't mind the wonky angles)

I think I'm going to go with the hard edge october BMM camo pattern as I have found several good reference pics to go by. I have also decided no whitewash this time, but I'm mulling doing a 1/35 early version to try out the hairspray technique... maybe.

Anyways I'm ready to get on with the paint!
thanks for looking!
modelpanzer
Visit this Community
Portugal
Joined: October 20, 2008
KitMaker: 109 posts
Armorama: 106 posts
Posted: Sunday, May 30, 2010 - 07:20 AM UTC
Looks good so far.

José César
tskross
Visit this Community
New York, United States
Joined: August 29, 2008
KitMaker: 160 posts
Armorama: 152 posts
Posted: Sunday, May 30, 2010 - 08:23 AM UTC
Thanks José!

Just a quick update,

I'm going out of town for the week but I managed to get the base color down. I was kind of doing 'monochromatc' modulation, using thinned dunkelgelb I built it up to represent the lighter areas and left it thinner in the darker areas. I wanted to take a kind of subtle approach with this one, a bit restrained so we'll see how it goes with the camo... here it is in my mini 'paint shop'!


and a closer shot


sorry for the quality of the pics, my shop doesn't have the best light.
Thanks again for looking!
tskross
Visit this Community
New York, United States
Joined: August 29, 2008
KitMaker: 160 posts
Armorama: 152 posts
Posted: Monday, September 06, 2010 - 08:34 AM UTC
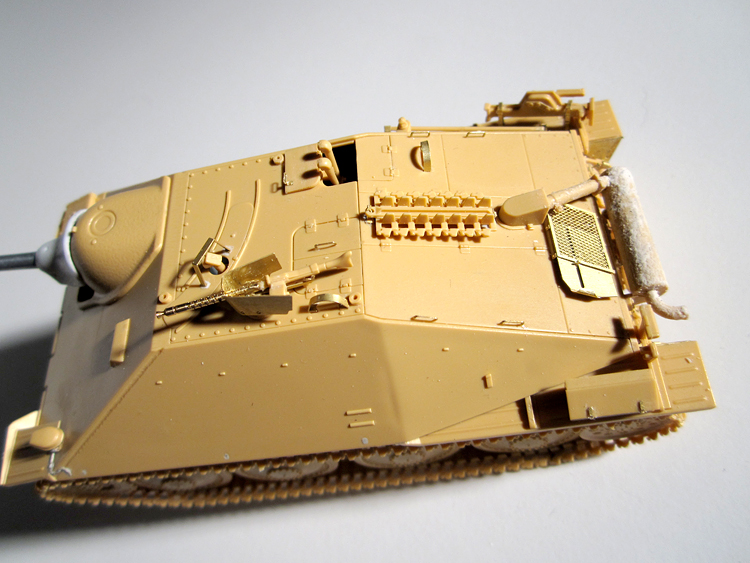
Summer is just about over and the itch to get back to the bench has struck again so I decided to pick up my little Hetzer and do the camo...

First off the reference pics
(For discussion only of course)


The first pic is well known and it is of the BMM factory, it was my main reference for tpainting, but I also used the second two to help me fill in gaps (even though the second pic is a slightly different pattern)
Because of the conditions during production of the Hetzer (expecially mid-late versions) and as I'm not after any particular vehicle I have decided to kind of pick what I like (within reason) from different sources to put together a vehicle that is fun for me to work with and will hopefully offer a satisfying solution

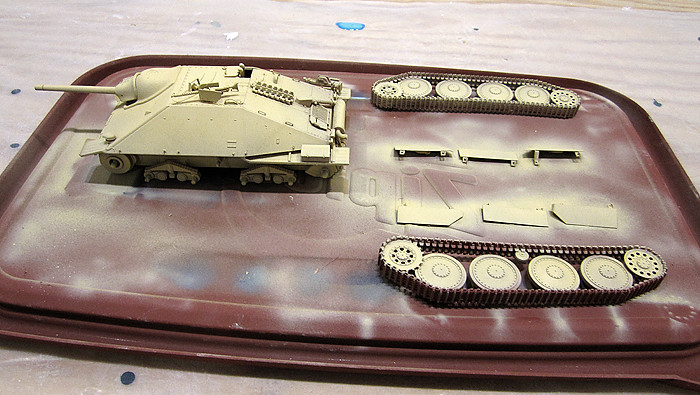
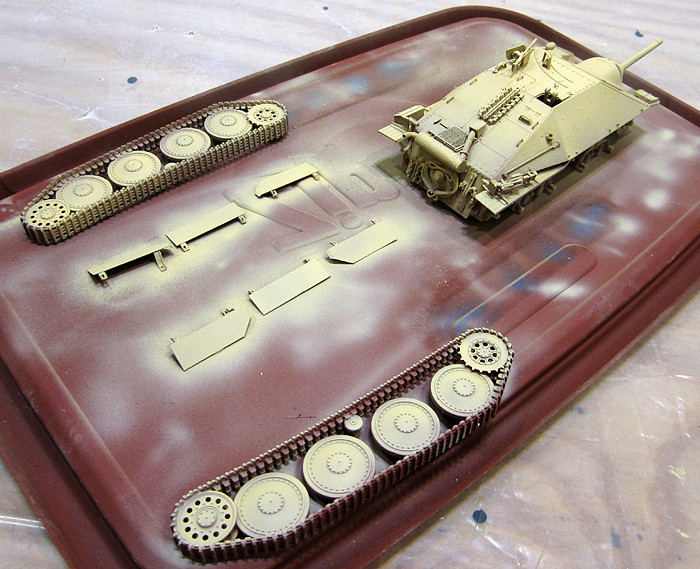
I decided I would try a liquid mask since its a hard edged pattern and I was planning to some modulation...
I used paasche liquid watercolor mask, and while it went on easily and built up a thick surface it was a lady to remove in the end. It took me several days to get the last remnants off and in the process I broke many of the small PE parts...
And to top it off i really wasn't satisfied with the color, the green was not nearly olive enough and the brown was way too cool...So I put it a way for a few weeks (sorry I don't have any pics of this part, I was in no mood to document it)

I took it out and decided to go with what I had, thinking a heavier burnt umber wash might tint the green appropriately and warm up the brown, but first the future and the decals. I decided to give it a quick wash of windex first since it had been sitting around so long, and guess what?


oops...it washed off the brown completely and most of the green... still not sure exactly why, I used tamiya thinned with their thinner as I normally would for the camo...
But I wasn't exactly heartbroken since i pretty much hated it to begin with. And also I quite liked the look of the dunklegelb (I may have discovered a new technique to use in the future...) So I decided all is not lost and went ahead, this time brush painting the camo...


I started with the green (its a bit dark in the pic above)...


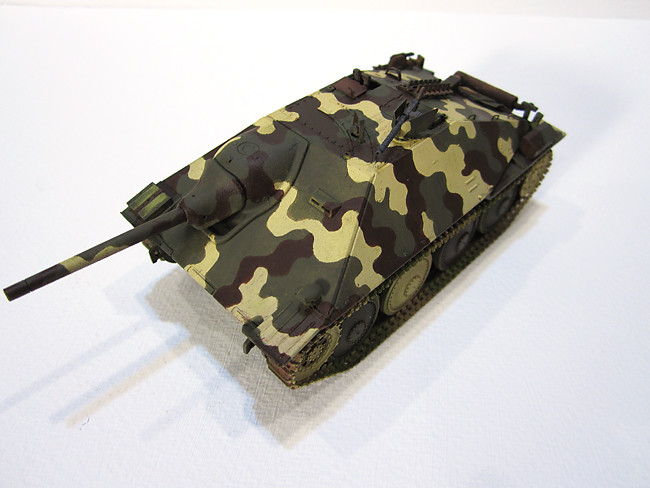
Then onto the brown...


This was done with various mixes of vallejo acrylics applied very thinly in many layers. One thing I like about this is how it allows the texture of the worn of original paint to show through giving the finish some depth already at this early stage. You can see some areas that might look a bit thin, but after washes and weathering I don't think this will be an issue.


And this is where it stands now, I liked the look of the black numbering on the hetzer in the second ref pic so I used the tamiya supplied decals to make a stencil for them. Its a little messy but again after weathering and washes I don't think it'll be too much of an issue...

I just sprayed a coat of future and the next step will be an oil wash

Anyways sorry for the novel length post, but if you made it this far thanks for looking!!
vonHengest
Visit this Community
Texas, United States
Joined: June 29, 2010
KitMaker: 5,854 posts
Armorama: 4,817 posts
Posted: Monday, September 06, 2010 - 02:35 PM UTC
Very nice! I'm looking forward to starting my Hetzer build for the 1/48 campaign. What material did you use to get the texture on the exhaust?
 _GOTOTOP