_GOTOBOTTOM
Armor/AFV: Axis - WWII
Armor and ground forces of the Axis forces during World War II.
Hosted by Darren Baker
Fiat 3000 - Dumpster Diving with PadrePete
PadrePete
Visit this Community
Ontario, Canada
Joined: May 18, 2010
KitMaker: 219 posts
Armorama: 213 posts
Posted: Tuesday, May 25, 2010 - 02:55 PM UTC
Hi everyone.

I love building good kits, but I'm also attracted to the forgotten underbelly of modelling. You know, those 40 year old kits badly detailed, little or no instructions... those kits you can't give away but sit in the closet like that childhood monster under the bed. Well, I learned to feed the monster carefully with sometimes passable results.

With my tongue squarely shoved in my cheek I want to drag you through the 'Dumpster' and share the 'fun'. My 'Dumpster Diving' will hopefully be humorous and informative, highlighting techniques I've cobbled together over the years. Also I hope to allow ourselves to have a few of those Oh yeah... been there! Type moments and laughs.

I'll begin with the latest abomination of nature from PadrePete's dumpster, a 1/35th scale Fiat 3000 kit, so bad I had to use an RPM FT-17 donor (lime green of course) to add any sort of detail. For those not familiar with the Fiat 3000, it was such a disaster that even the Ethiopians managed to pull down its pants and steal its lunch money.
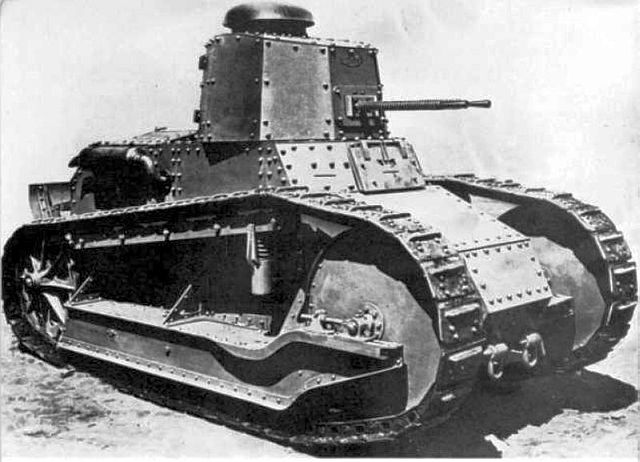


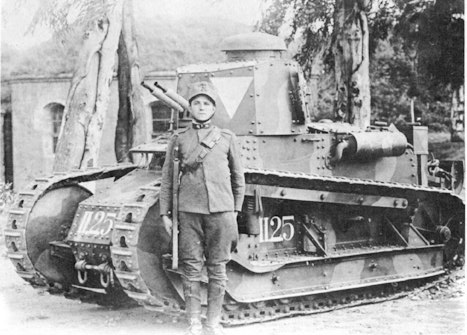
Notice in the picture below three happy tank crew for a two man tank... darn friendly bunch!
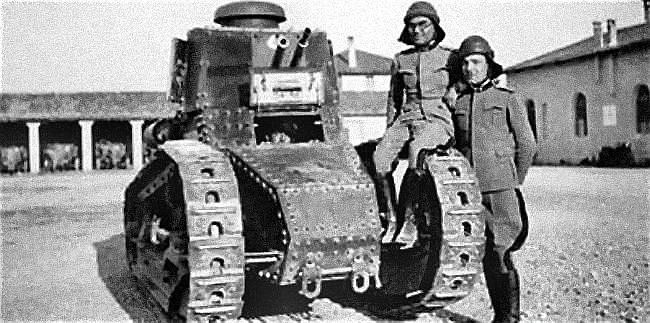


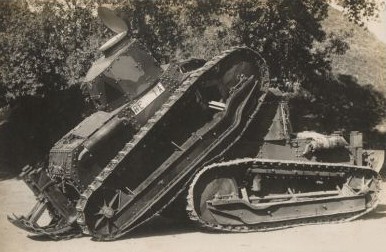
It goes without saying that these were staged pictures as the reality was even the Germans passed on these as booty.

In my next installment I'll go over the kits I used and the beginnings of trying to make things fit (hint: beer and AC/DC were required for the delicate parts). Brute force and ignorance for all the other bits.
cdharwins
Visit this Community
New Jersey, United States
Joined: October 28, 2006
KitMaker: 491 posts
Armorama: 462 posts
Posted: Tuesday, May 25, 2010 - 03:20 PM UTC
Hi Pete,

I feel yoour pain. Not only did I build a lime green RPM FT, but I built the Fiat kit, too. As I recall, the tacks were a real headscratcher. Do a piece on the AER/TVA T-18 kit. Now THAT'S painful. I'm a fan of "dumpster diving" too, I guess.

Chris
c5flies
Visit this Community
California, United States
Joined: October 21, 2007
KitMaker: 3,684 posts
Armorama: 2,938 posts
Posted: Tuesday, May 25, 2010 - 03:34 PM UTC
Ahhh, Padre....just what I needed after a looong day at work I'm looking forward to following along on the dumpster dive with you!
TheGreatPumpkin
Visit this Community
New Jersey, United States
Joined: April 20, 2009
KitMaker: 690 posts
Armorama: 672 posts
Posted: Tuesday, May 25, 2010 - 03:53 PM UTC
Padre Pete, et al.,
A man after my own heart! I too have a love for the "seedy underbelly of modeling" and make forays out there on a regular basis (I had an Emhar kit AND an Accurate Armour kit in competition for the last AMPS). I'm looking forward to seeing how that abomination comes out. Good luck!
Regards,
Georg

PS- Yea beer!
PadrePete
Visit this Community
Ontario, Canada
Joined: May 18, 2010
KitMaker: 219 posts
Armorama: 213 posts
Posted: Wednesday, May 26, 2010 - 02:18 PM UTC
Mommy, my eyes hurt! Make the bad man stop!!
Continuing the journey of discovery I decided to give this a 'go' because a friend of mine (John ) is my partner in crime with an interest in odd subjects. He's an excellent figure painter and we've been building together for about a year. John doesn't like making kits and I paint figures that... well... end up looking like the picture below.


So I build and he paints, and the modelling world is saved from figures that look... like those two. Back to the Fiat 3000.

I mentioned needing 2 kits to get one decent example. I can hear you now going "Pht! Amateur, I use 5 kits!" Given that this was after a gold medal (at least a lead one) I'd agree, but this is supposed to be fun!

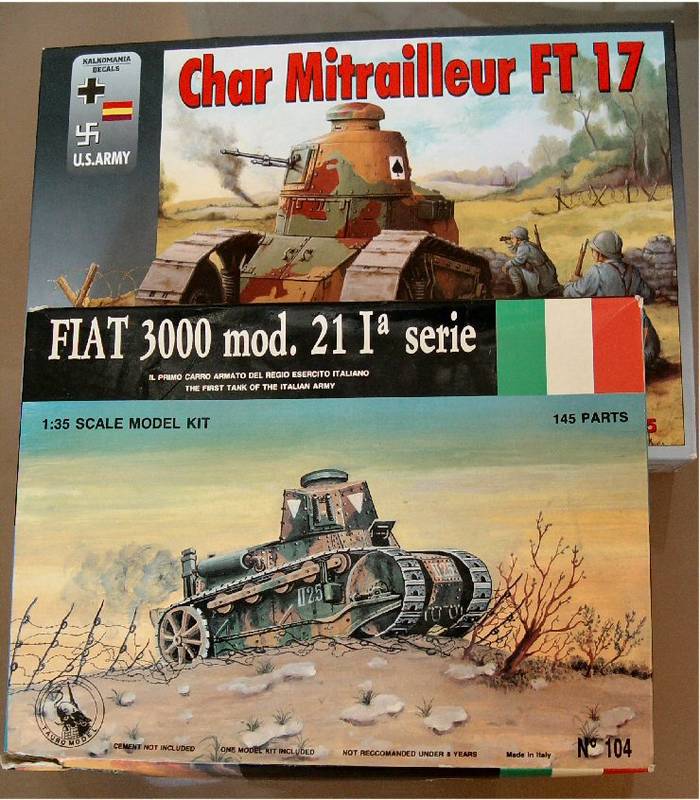
The two available are these pictured. Where I got them, or who cursed me with them is history now, but before you you have a Tauro kit No. 104, and an RPM kit, just chorkling behind their colorful box art.


Now, gentle readers, what you find upon opening brings to mind sink holes the size of Cleveland, and more flash than Gordon ever mustered.


The Tauro kit is the lower one as every poor soul exposed to the fluorescent lime green sprues know we have entered the RPM lair with the upper kit.


There isn't enough loin-girding can be done to get into this except that I heard the screeching chalkboard to fingernail siren calling me to venture on. As you'll notice, the RPM kit was started (by me... what was I thinking) and was well along with a partial suspension built, the tub and the turret near completion. By the way, Tamiya glue would not stick the RPM kit bits together even after washing. This proves the kit was so repellent that even glue avoided it. The Tauro kit on the other hand had never been opened, at least with any view to ever making it; so this means I can call it a New Kit Review! Nah, I can't get away with that one even if it did cost me $10 and a quart of fortified cooking wine for the guy under the bridge I purchased the kit from.

In the next installment I will begin the careful clean up (butchering) of the major Tauro bits to be used as the foundation. I think I'll go lie down now... oh the humanity...


The above picture says it all.
rfbaer
Visit this Community
Texas, United States
Joined: June 12, 2007
KitMaker: 1,866 posts
Armorama: 1,696 posts
Posted: Thursday, May 27, 2010 - 05:07 AM UTC
This is better than.......


well, this is really good. Real modeling, by gawd.
PadrePete
Visit this Community
Ontario, Canada
Joined: May 18, 2010
KitMaker: 219 posts
Armorama: 213 posts
Posted: Monday, May 31, 2010 - 07:15 AM UTC
If only armour were this thick!
Having shown you what the general lay of the land was, let's begin analysing the 'finer' detail and begin the clean up (who am I kidding... clean up is for Dragon, Tamyia, Tasca kits. This thing required sawing and hacking 10 minutes out of the box).

Below is a picture of the three central characters for this evening's foray.


As you can guess, detail is... sparse... okay... nonexistant. Now I was temped to start measuring for accuracy a la rivet counter syndrome, but then when you realise the thickness of the hull equates to 3 feet of steel, you acknowledge this is a losing game. Here I am doing calculations prior to grabbing another beer and going for brute force and ignorance.


My only concession to accuracy is Tauro got some of the rivets right which is a very good thing; you need them to try to line up parts that don't fit. Let's start with that game piece to the left that is supposed to help create the turret (or is that Tourettes?).


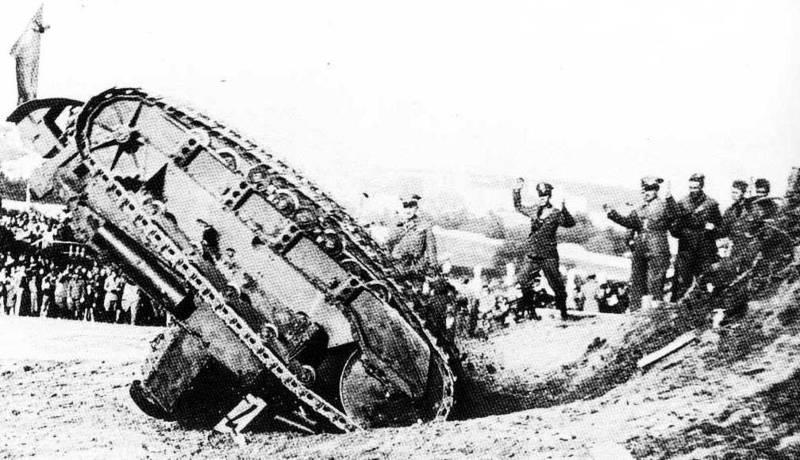
One can only imagine why the need for that much plastic for one part. With that one peice, Dragon would have given us yet another 900 peice kit WITH photoetch. The central column gives rise to some rather suggestive 'maneuvers', which might explain the photo below taken somewhere in Italy.


Upon test-fitting the turret floor to the hull, certain things became self-evident... such as these two chunks of plastic ain't gonna fit together... EVAR!


So surgery was performed...


...and it still would not go on. So here are the results of plan 'B'.


I'm sure this has happened to you; you get something started and then you start 'thinking'. Not a good combination when it comes to dumpster diving. My thinking? Well, let's open up the hull so I can seat Il Commendatore looking out over the battle field. I got started and then remembered the 3 feet of scale armour I have to cut.


20 minutes later and with a blister on my palm, this is what I got... roughly, very, very roughly.


In the next installment, I will begin modifying the hull and building the turret. My thinking took me too far and so I committed to placing a driver sticking his head out the driver's hatch. By the way, there is no driver's hatch... that's blister number 2.

Here's a driver who has escaped to show the folks that no pigeons had destroyed his vehicle, or maybe it's just out of gas.


See you gentle readers in a day or two. Time for another barley sandwich and self-doubting about my intelligence and sanity in starting this kit.

Pete
alanmac
Visit this Community
United Kingdom
Joined: February 25, 2007
KitMaker: 3,033 posts
Armorama: 2,953 posts
Posted: Monday, May 31, 2010 - 07:51 AM UTC
Hi

I think if it had been me I would have trimmed the figure down so he sat in the hatch rather than cut away the turret, as you've also lost the fixing position of the turret during the removal of plastic. After all judging by the size of hatch how much will you see past him to realise he's somewhat truncated.

I nearly purchased this kit some time ago on ebay but it went too high for my wallet, almost twice what I recently paid for when I won a all singing and dancing Dragon kit.

Seeing this I'm glad I passed.

Good luck with it.

Alan
PadrePete
Visit this Community
Ontario, Canada
Joined: May 18, 2010
KitMaker: 219 posts
Armorama: 213 posts
Posted: Monday, May 31, 2010 - 10:13 AM UTC

Quoted Text

Hi
I think if it had been me I would have trimmed the figure down so he sat in the hatch rather than cut away the turret, as you've also lost the fixing position of the turret during the removal of plastic. After all judging by the size of hatch how much will you see past him to realise he's somewhat truncated.... Good luck with it.
Alan


Hi Alan,
I agree, there were many approaches to take, but as I say this is with tongue squarely planted in cheek. I find perverse pleasure in getting these dogs at least presentable. I am always amazed when I see someone win with an RPM kit, or score acclaim with some abomination from Maquette; now that's modelling on a level I can never acheive! I use these kits to try things I dare not on my Dragon and Tamiya offerings (although wait for it, there is a dumpster dive with an obscure Tamiya kit to come in the following months).

Dumpster diving is something alot of us do in those moments when insanity doesn't just run in the family, but actually gallops!
PadrePete
Visit this Community
Ontario, Canada
Joined: May 18, 2010
KitMaker: 219 posts
Armorama: 213 posts
Posted: Sunday, June 06, 2010 - 06:13 AM UTC
To hull with this! (Or how I used CA glue to stop from bleeding out too much)

As mentioned earlier, I wanted to place a driver figure inside the Fiat 3000 like in the picture of the jaunty three man/two man tank crew above. So if I was going to draw attention (however slight) to the green block of plastic, I was going to have to put in the vision slots AND create the little 'peekaboo' driver's position. Below is the tabula rasa that taunted me on my bench.


I'm rather new to not seeing very well (I will get back some vision after some operations) and combining a slippery chunk of plastic and a new blade... well... let's say my fingers ended up looking like I had tried petting a bucket of broken glass.


I was successful in stopping the bleeding but now my typing stinks! Back to the build!

I decided because of the thickness I would approach it from two fronts. I would give shaving the hull down a try (soon abandoned because of the nicks and cuts I inflicted on myself). Here is a picture just before my son learned a new word relating to the suspect lineage of the Tauro Company.


I did manage to create holes almost where I wanted and was then able to 'rough' out their position and later I will use Mr. Surfacer 1200 in the vision ports along with a teflon coated thin sheet to get the scale dimensions correct.


While tamping the blood off my thumb, let's look at the 'bucket' that consitutes the hull assembly. By the way... you will notice a herring-bone pattern on the exterior panels. That is all over this kit where Tauro has not tried to create a cast surface! This, no doubt will add to the hours of enjoyment (heavy drinking) trying to smooth and re-surface the panels.


Later in the build, this will be acheived with sanding, Mr. Surfacer, more sanding and final texturing with Mr. Surfacer 500.

Next time, I'll look at the turret, build the hull bucket (no interior) and begin scavenging parts from the RPM kit to bring the Fiat 3000 more into scale. Right now I think I need therapy.


cdharwins
Visit this Community
New Jersey, United States
Joined: October 28, 2006
KitMaker: 491 posts
Armorama: 462 posts
Posted: Sunday, June 06, 2010 - 04:27 PM UTC
Be strong, Pete. We're all rootin'for ya!
research1
Visit this Community
United States
Joined: November 23, 2008
KitMaker: 86 posts
Armorama: 78 posts
Posted: Monday, June 07, 2010 - 03:42 PM UTC
I put that Tauro kit of this thing together years ago and came up with the treads being a good 3/8" short to make the complete loop. I thought I had done something really wrong assembling the running gear, like the instructions said to do. However, conversations with a few other modelers that build the damn thing revealed that they too had the same problem. One guy put the gap at the bottom of the treads and burried it in ground cover on a diorama base.

FWIW
rfbaer
Visit this Community
Texas, United States
Joined: June 12, 2007
KitMaker: 1,866 posts
Armorama: 1,696 posts
Posted: Tuesday, June 08, 2010 - 08:36 AM UTC
That hull texture is scary. Looks like Israeli anti-slip.....
md72
#439
Visit this Community
Washington, United States
Joined: November 05, 2005
KitMaker: 4,950 posts
Armorama: 289 posts
Posted: Tuesday, June 08, 2010 - 09:41 AM UTC
Via con Dios, Padre
PadrePete
Visit this Community
Ontario, Canada
Joined: May 18, 2010
KitMaker: 219 posts
Armorama: 213 posts
Posted: Sunday, June 13, 2010 - 07:44 AM UTC
Small Hiatus (not of the hernia kind).

Hi everyone. I'll be adding more to this thread in a couple of days. I just had eye surgery and have been told that sharp things and one good eye don't usually work out too well.

To whet the appetite, here is the hull bucket glued together.


Of course, the clean nature of those 4 pieces of Tauro nastiness are only there to mock me on my work bench. I'm going to try to find some really good figures (you know, the ones with the 40 cal. indentation in their chest) to compliment the finished product.


Should be a few in here.... And until next time...


At least the pills keep the voices away... for awhile...

Crossedrifles
Visit this Community
United States
Joined: January 27, 2009
KitMaker: 70 posts
Armorama: 65 posts
Posted: Monday, June 14, 2010 - 12:06 PM UTC
It's nice to see a little humor in a thread. That is one nasty kit isn't it?
PadrePete
Visit this Community
Ontario, Canada
Joined: May 18, 2010
KitMaker: 219 posts
Armorama: 213 posts
Posted: Friday, June 18, 2010 - 11:11 AM UTC
To Hull and Back... or How I developed "Turret's Syndrome!

Well, the doctor was happy with the eye (as am I as I can see better from the 'bad eye' than I have been able to for almost a year). So once again I open the "portal o' pain" known as the Tauro Fiat 3000. This time we'll have a look at the hull issues and the turret assembly.


The hull is a straight-forward slap and glue together like Tamiya... yeah... lying again...

Two dimensional directions not withstanding, each piece of plastic supposedly matched to its counterpart fits like the KKK at an NAACP rally. Edges line up in one dimension only to be off in another. Therefore, scraping, hacking, swearing and calling on Kali the God of Vengance and Pestilence (I know, not the right god-guy/gal, but he/she'll do in a pinch) were required to acheive the picture below.


And before we forget, Kali looks to be the Goddess of scale modelling as well by this picture (Exacto knife, blood and guts).


As mentioned earlier, the hull peices are covered in machine swirl marks which I will deal with using Mr. Surfacer 500. Symetrical fit was nearly impossible, so I ended up measuring every peice and trimming to an average fit. I will then have to adjust all other parts as I continue the build so I do not get too far off center. Thankfully this kit has few parts, and fewer ones that I will salvage in the end.


As mentioned by Ray Mehlberger, those rubber treads you spot in that box, really will not fit as they are far too short. The only honest way to use these tracks is to cheat. Cover them with mud, put the gap in the diorama plaster, pretend you have battle damage... whatever way you lie to yourself to hide some bonehead mistake you've made with a kit (battle damage is my all time favourite fallback for these).

So, much as the hull went together, the next section is the turret with its 9 peice puzzle and a roof of even greater thickness than any other part... see below if you dare.


Once put together another large mistake rears its head...


... The turret lid. It is over 20% out of scale and way too tall... but that is for our next installment when the RPM kit begins coughing up items that might do in a pinch. You may decide what pinch you use, but I'm going to use this one and stare endlessly at the workbench hoping it goes away.

kaysersose
Visit this Community
British Columbia, Canada
Joined: May 05, 2009
KitMaker: 86 posts
Armorama: 83 posts
Posted: Friday, June 18, 2010 - 12:01 PM UTC
Hey there Padre, I'm laughing my head off over your build thread... keep up the good work!

And good luck with the kit!
Fenrell
Visit this Community
United States
Joined: October 02, 2008
KitMaker: 5 posts
Armorama: 4 posts
Posted: Tuesday, June 29, 2010 - 07:26 AM UTC
A very entertaining build blog. I'm looking forward to your updates!
PadrePete
Visit this Community
Ontario, Canada
Joined: May 18, 2010
KitMaker: 219 posts
Armorama: 213 posts
Posted: Tuesday, June 29, 2010 - 02:54 PM UTC
You're right. I have to get back to that 'nag' in the stall. I got sidetracked by a Tristar 38(t), so now the Fiat is jealous... it demands blood!

CMOT
Staff MemberEditor-in-Chief
ARMORAMA
Visit this Community
England - South West, United Kingdom
Joined: May 14, 2006
KitMaker: 10,954 posts
Armorama: 8,571 posts
Posted: Tuesday, June 29, 2010 - 03:13 PM UTC
Pete I believe they have one of these top of the range Italian sports main battle tanks at Bovington, if I am correct do you want some pictures or shall I just pretend I sent you some so that you can say it has been thoroughly researched during the build.
PadrePete
Visit this Community
Ontario, Canada
Joined: May 18, 2010
KitMaker: 219 posts
Armorama: 213 posts
Posted: Tuesday, June 29, 2010 - 03:19 PM UTC

Quoted Text

Pete I believe they have one of these top of the range Italian sports tanks at Bovington, if I am correct do you want some pictures or shall I just pretend I sent you some so that you can say it has been thoroughly researched during the build.


If you have proof they existed.... BRING IT ON!!! But I'll know if you're 'funnin' me if there isn't an air freshner hanging from the mirror... (standard Italian issue).
PadrePete
Visit this Community
Ontario, Canada
Joined: May 18, 2010
KitMaker: 219 posts
Armorama: 213 posts
Posted: Sunday, July 11, 2010 - 01:45 PM UTC
Sorry for the lag guys. Had eye surgery and now see better (what the h*ll is that crap on my bench????... Oh... yeah... Fiat 3000...). More discussions on the abomintion that is the Tauro Fiat 3000 this coming week (although spelling that 'weak' might not be a bad 'eye'dea... I know puns are the lowest form of humor, but what do you think this kit is... DML 2010?!?!).

See you soon!
 _GOTOTOP