**edit: It should be noted that I incorrectly assumed that "MB" stood for Master Box, when it in fact stands for Mike(Michael?) Bishop. (Thanks for the correction Gerald!)
Ok, a friend just hooked me up with an old 1/35 MB resin Mk IV kit which I think has been out of production for some time now. I'm quite excited about it since I've wanted to build one of these tanks for some time, but have dreaded the poorly made Emhar kit (don't get me wrong, I've recently seen some of the builds you guys have done on here using the Emhar kits and I think they are inspiring, I just don't really have the time or experience to make the modifications you all have). Thankfully this is a pretty straight forward kit, so I am going to be building it alongside my DML Henschel Jagdtiger .
I am a big fan of the WWI landships, but my knowledge of them is very limited. Again, thankfully this looks to be a simple build, so I'm mostly going to be asking your guys' advice on painting and markings for this awesome beast.
*In box photos to come soon!
Constructive Feedback
For in-progress or completed build photos. Give and get contructive feedback!
For in-progress or completed build photos. Give and get contructive feedback!
Hosted by Darren Baker, Dave O'Meara
Master Box Mk IV Male Resin Build

vonHengest

Joined: June 29, 2010
KitMaker: 5,854 posts
Armorama: 4,817 posts

Posted: Monday, July 05, 2010 - 04:26 PM UTC

vonHengest

Joined: June 29, 2010
KitMaker: 5,854 posts
Armorama: 4,817 posts

Posted: Tuesday, July 06, 2010 - 12:59 PM UTC
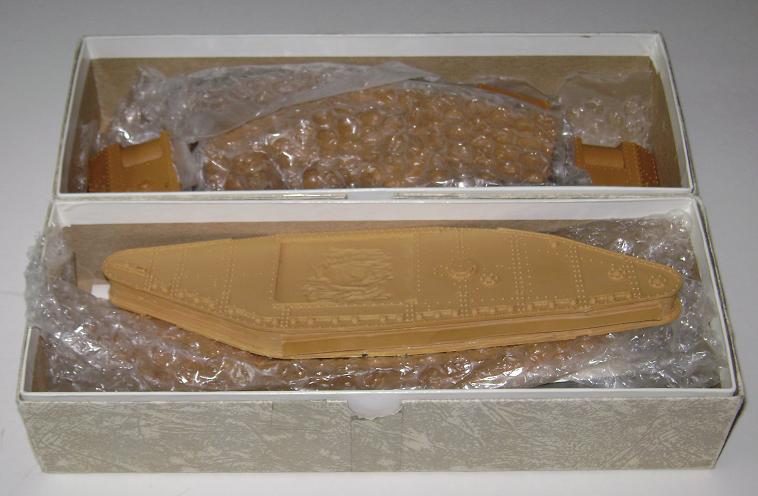
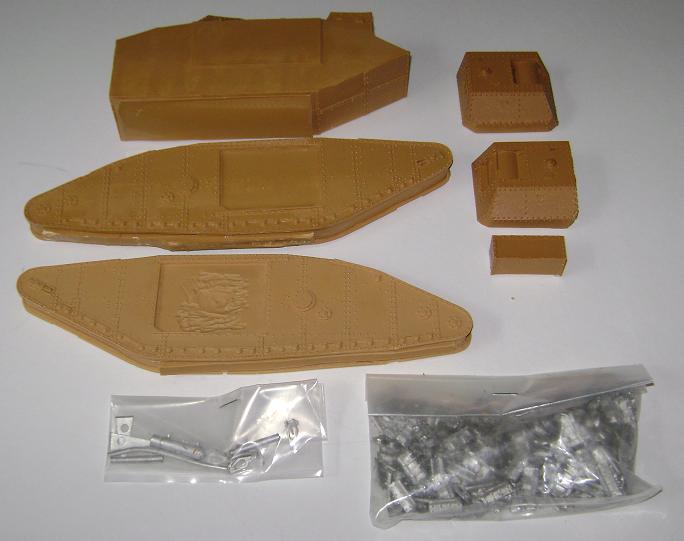
Here are the box contents. As you can see it is a very simple albeit nice looking model made of yellow **edit: brown (Thanks Gerald!) resin and white metal.

vonHengest

Joined: June 29, 2010
KitMaker: 5,854 posts
Armorama: 4,817 posts

Posted: Tuesday, July 06, 2010 - 01:04 PM UTC
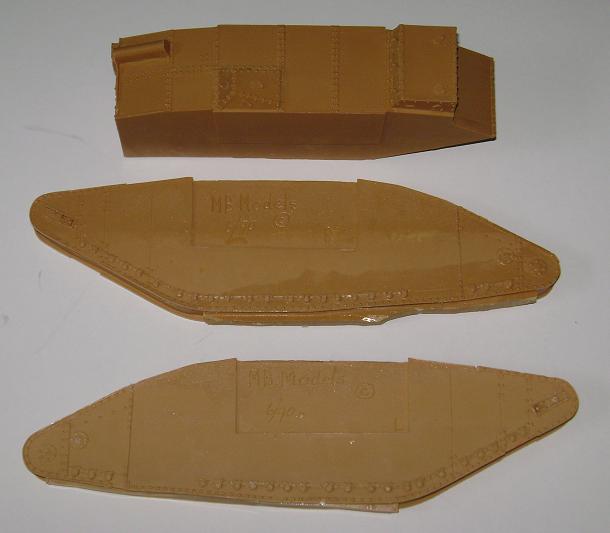
Here we have the insides of the LH and RH sponsons(?) **edit: these are not the sponsons. I do not know they appropriate terms for these sub assemblies (Thanks Tom!) and the single piece hull. As you can see, this kit dates back to 1990.
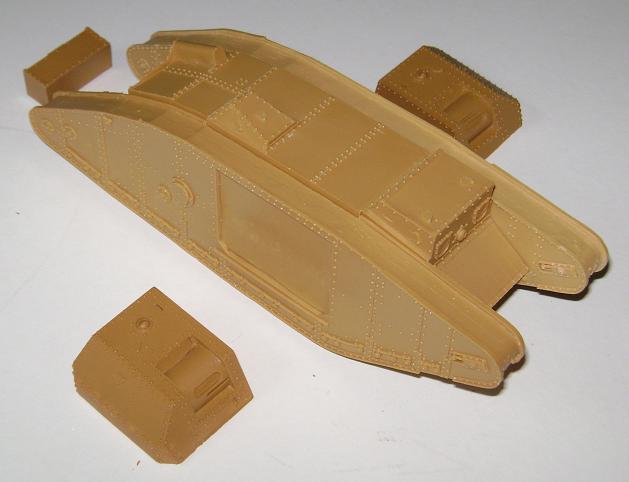
I did a quick mockup of the sponsons **edit: left and right hand track runs? with the hull to get an idea of how it will look when finished. There is nothing holding the parts together at this point.

vonHengest

Joined: June 29, 2010
KitMaker: 5,854 posts
Armorama: 4,817 posts

Posted: Tuesday, July 06, 2010 - 01:14 PM UTC
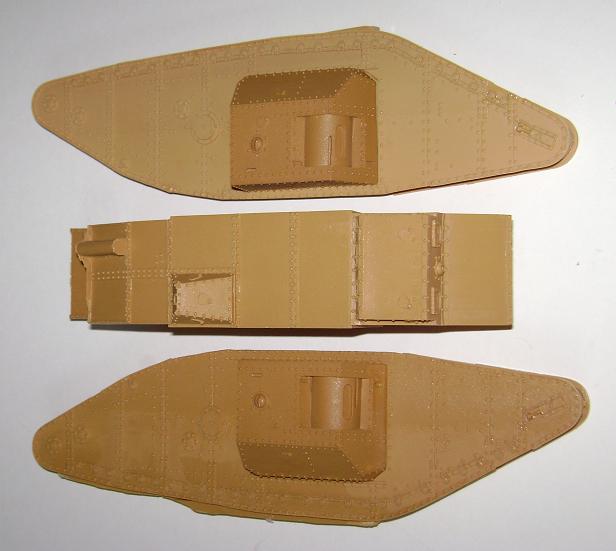
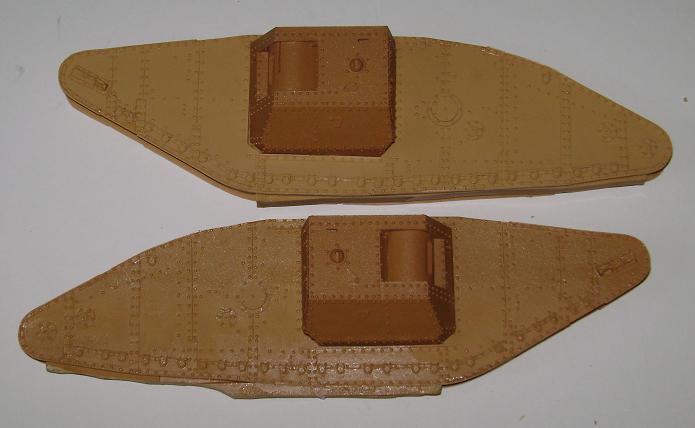
Here are the turret boxes (I have no idea what they are called..) **edit: the correct name for these assemblies are sponsons (thanks Tom!)set in place on the sponsoons **edit: left and right track runs?.
Unfortunately the turrets are molded into these boxes, so there isn't going to be any adjustability with them unless you are prepared to do some significant surgery. This puts a real limit on display potential..
The good news is that they are well detailed and are molded in a position perfect for static display, and right now I'm good with that

*note, the same is true for all three mg mounts
Posted: Tuesday, July 06, 2010 - 01:23 PM UTC
I look forward to the end of this project to see what it comes out like. Judging by the size of those resin blocks it must be scale weight as well.

vonHengest

Joined: June 29, 2010
KitMaker: 5,854 posts
Armorama: 4,817 posts

Posted: Tuesday, July 06, 2010 - 01:23 PM UTC
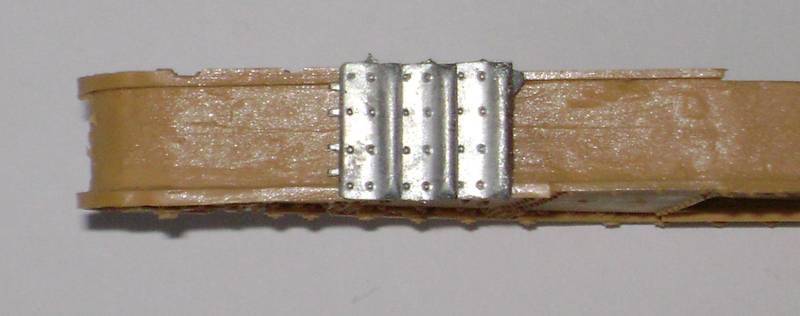
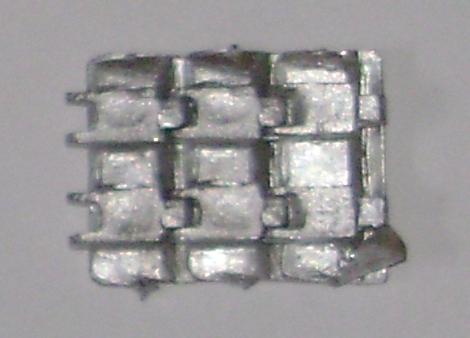
Ok, here's something I know you WWI buffs are really going to like.. INDIVIDUAL METAL TRACK LINKS!!!
They need a little clean up but are otherwise cast very nicely. I can't attest to the scale accuracy because I don't have any information regarding such things for these tanks. They fit a little loose in the runners, but I don't see it really being an issue as far as construction goes. The links fit quite snuggly which is very nice in my opinion

And yes with some careful drilling you can make them workable, but why would you when there is no suspension to begin with?


vonHengest

Joined: June 29, 2010
KitMaker: 5,854 posts
Armorama: 4,817 posts

Posted: Tuesday, July 06, 2010 - 01:26 PM UTC
Quoted Text
I look forward to the end of this project to see what it comes out like. Judging by the size of those resin blocks it must be scale weight as well.
Thanks Darren, and this kit is quite literally a brick. I almost dropped it when I first picked up the box because I wasn't expecting the sheer weight of the thing!
Posted: Wednesday, July 07, 2010 - 04:23 AM UTC
I suppose these WW1 tanks lend themselves to this method of construction. The only concern I have would be what you would get charged for that much resin, and the difficulty in preventing problems due to the heat generated as lumps of resin that thick cure.
Posted: Wednesday, July 07, 2010 - 05:12 AM UTC
And here I was going to say the biggest problem is building a shelf strong enough to hold it! 
(I assume the castings are solid lumps, and aren't hollow?...)
Jeremy, it's looking very interesting so far. The sponsons are actually those "box" things on the sides with the rotating gun shields in them - the term comes from naval architecture. I'm not sure what the track assemblies would be called, as the real ones are made up from the hull sides plus other bits that must have technical names I can't remember.
Did it come with markings?
Tom

GeraldOwens

Joined: March 30, 2006
KitMaker: 3,736 posts
Armorama: 3,697 posts

Posted: Wednesday, July 07, 2010 - 06:22 AM UTC
Quoted Text
Ok, a friend just hooked me up with an old 1/35 MB resin Mk IV kit which I think has been out of production for some time now. I'm quite excited about it since I've wanted to build one of these tanks for some time, but have dreaded the poorly made Emhar kit (don't get me wrong, I've recently seen some of the builds you guys have done on here using the Emhar kits and I think they are inspiring, I just don't really have the time or experience to make the modifications you all have). Thankfully this is a pretty straight forward kit, so I am going to be building it alongside my DML Henschel Jagdtiger.
I am a big fan of the WWI landships, but my knowledge of them is very limited. Again, thankfully this looks to be a simple build, so I'm mostly going to be asking your guys' advice on painting and markings for this awesome beast.
*In box photos to come soon!
Congratulations on finding this relic of a bygone era of modeling. I recall looking one over in the box at Orange Blossom Hobbies in Miami twenty years ago. I should mention in passing that MB does not stand for Master Box, it stands for Mike Bishop, the kit's designer and producer. Glad to see it doesn't suffer from any major warpage, as the old brown resin of the late '80's, early '90's was really resistant to reshaping with hot water. Good luck with your project!

vonHengest

Joined: June 29, 2010
KitMaker: 5,854 posts
Armorama: 4,817 posts

Posted: Wednesday, July 07, 2010 - 07:00 AM UTC
Darren: I don't know if it's so much that as it was the old casting techniques. Thankfully there isn't any visible warping that I can find, the only problem I have found is some chipping along the track guides.
Tom: So true! I'm going to have to set this thing in the corner where the shelf has the most support.
-(Yes, they are all solid lumps, and I'm not really sure how I feel about that but I'm going to live with it)
-Ok then, "sponsons" they are! Thanks for the correction and background info, I'll make sure to go back and correct this later.
-As you probably already have guessed, no it did not come with any marking, or any references of markings. I could really use some good/decent info regarding paint and markings if you know of any?
Gerald: Wow, thanks for the correction, I had no idea! And I don't think I would have touched it if it looked warped. I've heard stories about what you speak of regarding this old resin. Thanks for the support, I really look forward to painting this beast and trying out some fun looking weathering techniques

jabo6

Joined: September 24, 2005
KitMaker: 276 posts
Armorama: 152 posts

Posted: Wednesday, July 07, 2010 - 08:49 AM UTC
Hi Jeremy, If your looking for info, on marking and paint go to landships.com 

Posted: Wednesday, July 07, 2010 - 09:03 AM UTC
Jeremy,
Landships.com is a good place to look. The Mk IV was introduced in mid-1917 in time for the battle of Cambrai. By then most sources agree they would have been painted in "tank brown", a sort of khaki-brown colour similar to British uniforms of the time. Markings would include large numbers on the sides of the nose and probably a name starting with the letter of the Company (eg "Flirt" was in F Company). Of course, they drew loads of fire, so the front & sides should be heavily chipped with exposed steel from fresh MG bullet scars if the tank is "in action". (I doubt they rusted much, being repainted between major battles.) And they threw up loads of mud onto the top because of those wrap-around tracks! Lots of scope for weathering fun...
Tom
Posted: Wednesday, July 07, 2010 - 11:17 AM UTC
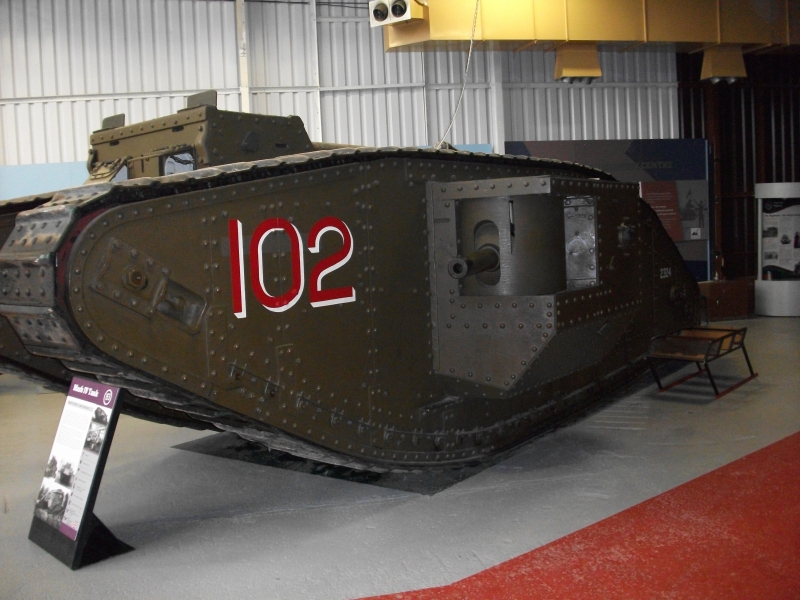
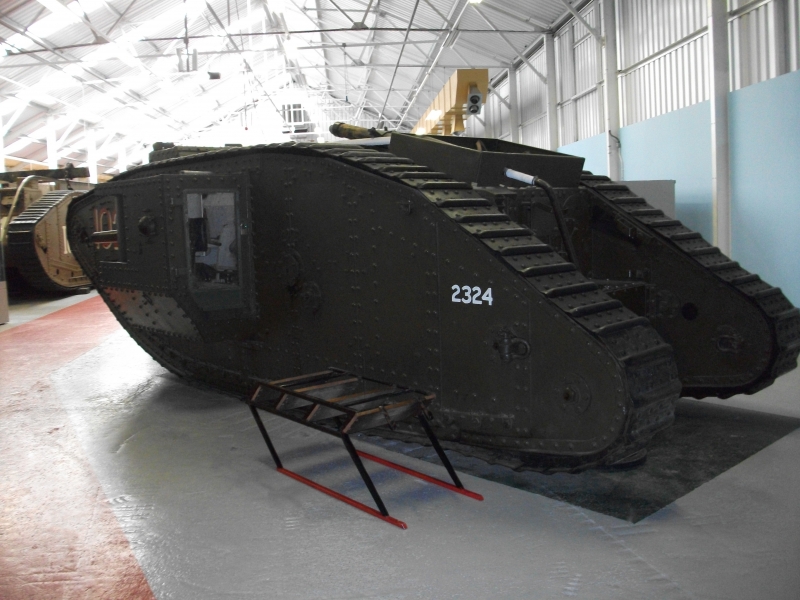
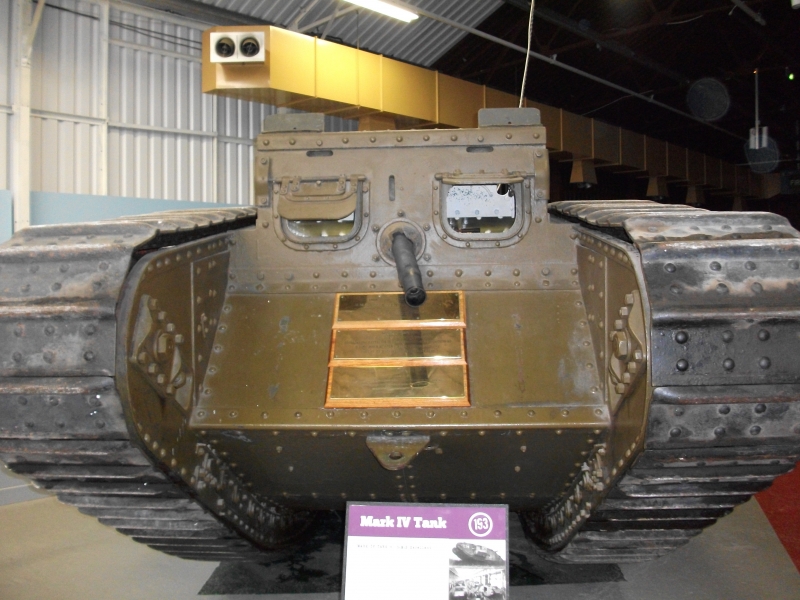
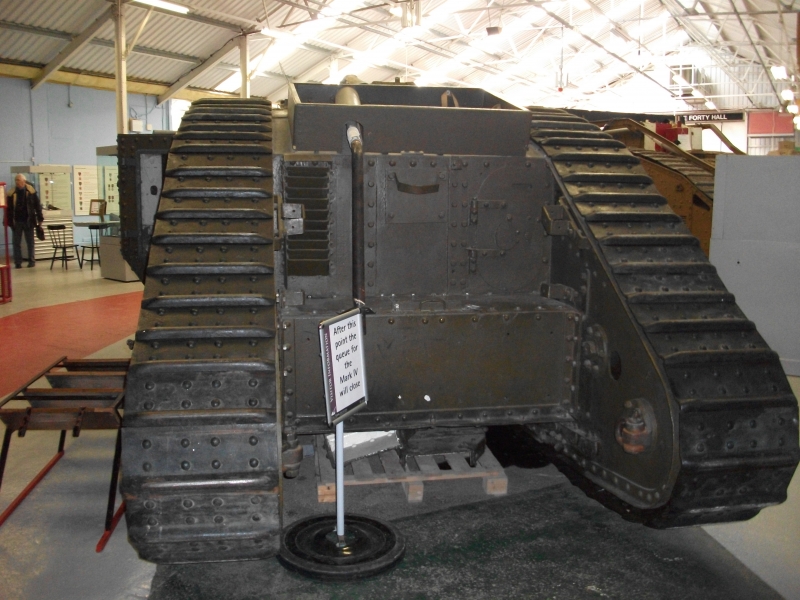
Jeremy I can help you there with these pictures from Bovington of a Mk IV. Picture 3 gives the best colour representation, and is the colour that is now believed to be the most commonly used. The markings are minimal on this one and I hope you find them of help.


vonHengest

Joined: June 29, 2010
KitMaker: 5,854 posts
Armorama: 4,817 posts

Posted: Wednesday, July 07, 2010 - 02:24 PM UTC
John & Tom: For whatever reason landships.com won't load for me. I've tried it in both firefox and internet explorer.
Tom: Thanks for the info, I'm inspired at the thought of weathering this thing now
Darren: Thanks! It always helps to know someone who is close to a museum or display grounds and can take pictures Your pictures also address something I was unaware of. I will need to add some strips of styrene under the tracks that are running along the top of the tank so that they sit out from the guides. I'm assuming that there are rollers lifting the tracks up in this area?
Tom: Thanks for the info, I'm inspired at the thought of weathering this thing now

Darren: Thanks! It always helps to know someone who is close to a museum or display grounds and can take pictures
 Your pictures also address something I was unaware of. I will need to add some strips of styrene under the tracks that are running along the top of the tank so that they sit out from the guides. I'm assuming that there are rollers lifting the tracks up in this area?
Posted: Wednesday, July 07, 2010 - 03:23 PM UTC
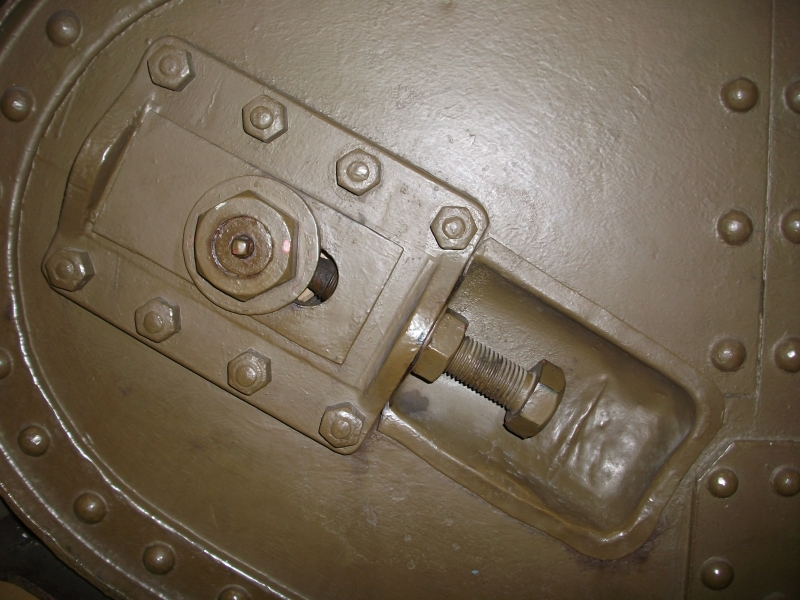
I have some more pictures if you have an E-mail address with a reasonable sized in-box. If you would like these do you have the ability to open RAR files? Lastly I can get you pictures of specific areas as long as you are not in to much of a hurry.
Two from the rear and a front tensioner
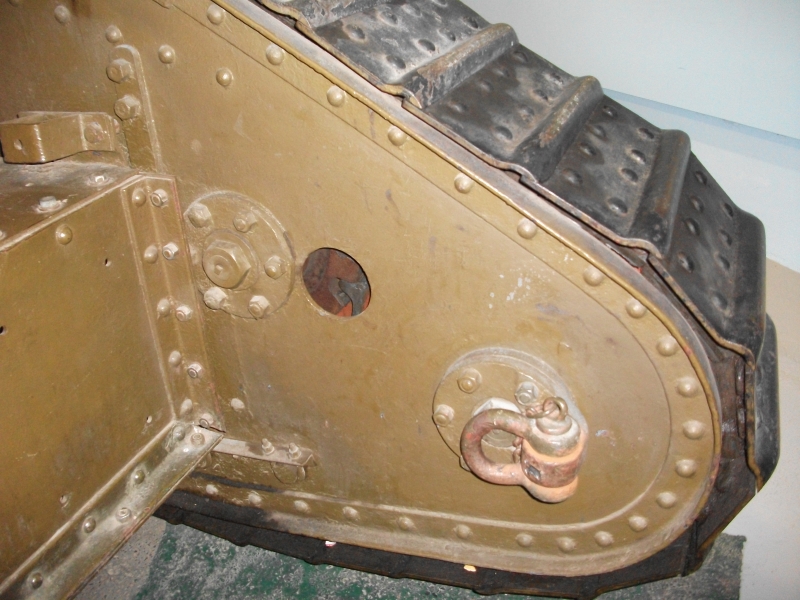
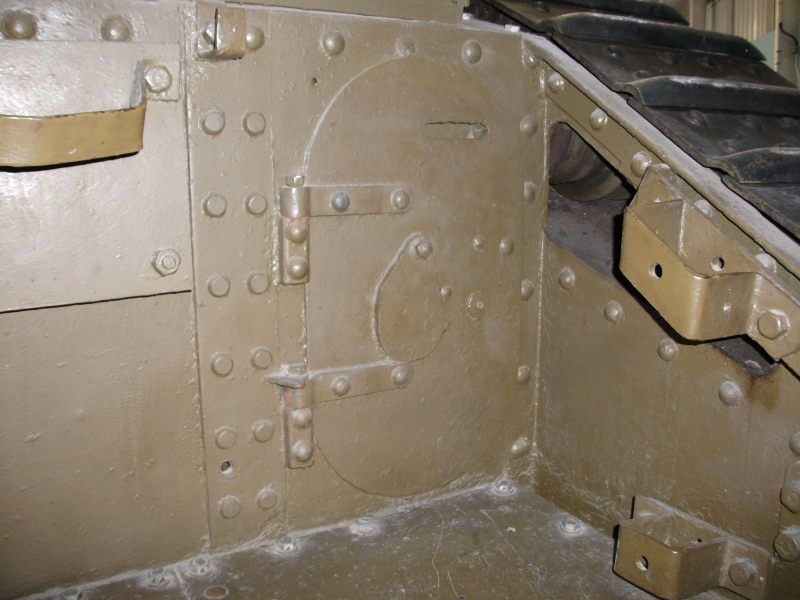
Two from the rear and a front tensioner


jabo6

Joined: September 24, 2005
KitMaker: 276 posts
Armorama: 152 posts

Posted: Thursday, July 08, 2010 - 03:15 AM UTC
Jeremy, try this www.landships.freeservers.com 


vonHengest

Joined: June 29, 2010
KitMaker: 5,854 posts
Armorama: 4,817 posts

Posted: Thursday, July 08, 2010 - 08:19 AM UTC
Darren: I'm already finding a wealth of information in your photos! I would definitely appreciate more pictures, and I'm not really in any hurry as my time at work really limits my time at the workbench. I'll send you my email in bit. And thanks again 
*edit: I believe I can open RAR files. Feel free to email me one and I'll try it out.
John: Worked like a charm!

*edit: I believe I can open RAR files. Feel free to email me one and I'll try it out.
John: Worked like a charm!

vonHengest

Joined: June 29, 2010
KitMaker: 5,854 posts
Armorama: 4,817 posts

Posted: Thursday, July 08, 2010 - 08:33 AM UTC
UPDATE
I am soaking the resin parts in some water with dishwashing detergent today. Will have to hold on grinding/cutting/sanding off the casting blocks until it stops raining.
Hope to start working on the tracks and other metal parts.
I am soaking the resin parts in some water with dishwashing detergent today. Will have to hold on grinding/cutting/sanding off the casting blocks until it stops raining.
Hope to start working on the tracks and other metal parts.
Posted: Thursday, July 08, 2010 - 07:33 PM UTC
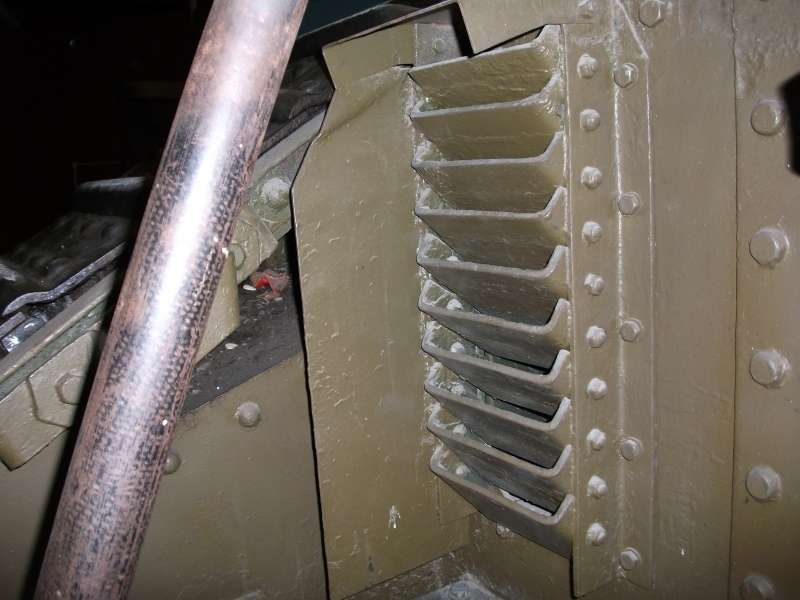
Here are a few more for you.
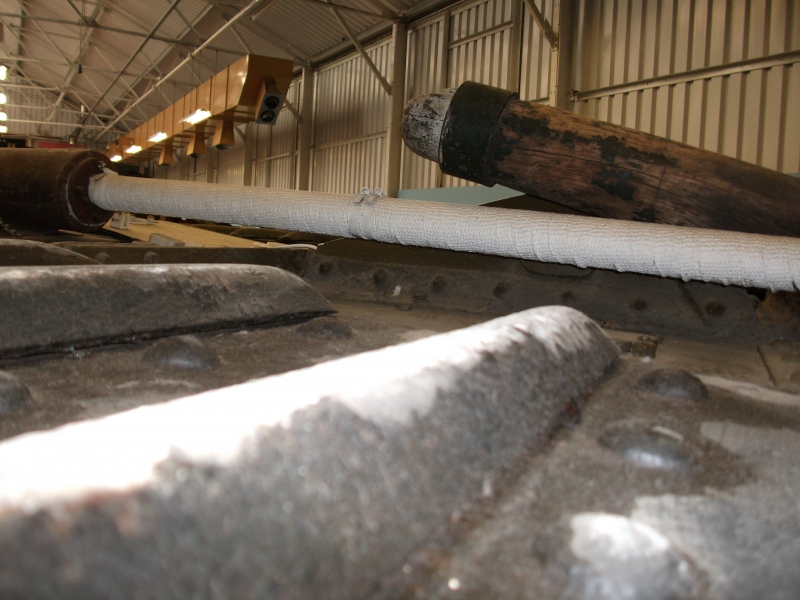
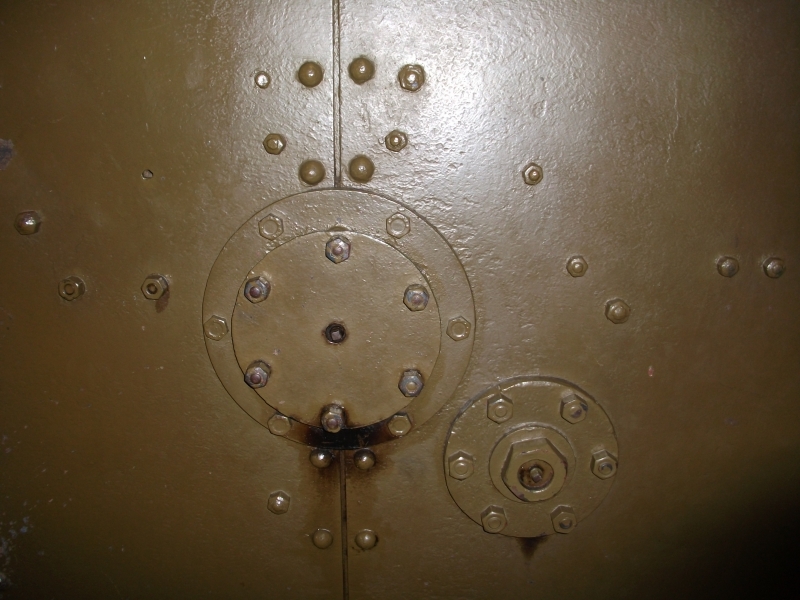


vonHengest

Joined: June 29, 2010
KitMaker: 5,854 posts
Armorama: 4,817 posts

Posted: Thursday, July 08, 2010 - 07:53 PM UTC
These pictures are great Darren, thanks a ton!
Would you know what the wrap around the exhaust pipe is? I'm taking a guess that this was not used in WWI, but rather was used after the tank was restored for protection of some form or another?
Would you know what the wrap around the exhaust pipe is? I'm taking a guess that this was not used in WWI, but rather was used after the tank was restored for protection of some form or another?
Posted: Friday, July 09, 2010 - 04:02 AM UTC
If Honest I expect it is the tape used to repair small holes in exhausts, and if I am correct is likely the reason it was used.

vonHengest

Joined: June 29, 2010
KitMaker: 5,854 posts
Armorama: 4,817 posts

Posted: Friday, July 09, 2010 - 05:34 AM UTC
Ok copy, so most likely scenario is that the people who refurbished that Mk IV used a wrap to seal the exhaust pipe in order to prevent the noxious fumes from escaping, and probably to help minimize the noise output. That would make a lot of sense to me.
Joker25

Joined: January 20, 2010
KitMaker: 4 posts
Armorama: 2 posts

Posted: Friday, July 09, 2010 - 07:34 AM UTC
Hi Jeremy,
I too was given this kit a number of years ago by a buddy and finished it the year before last. I ended up using Accurates track as I found the white metal wanted to wander and I could never get it straight. I ended up scratching the ditching rails and beam as well.
I'm currently finishing up an article on this monster.
Good fun though,
Any questions just ask
Pete
Posted: Friday, July 09, 2010 - 08:03 AM UTC
Quoted Text
Ok copy, so most likely scenario is that the people who refurbished that Mk IV used a wrap to seal the exhaust pipe in order to prevent the noxious fumes from escaping, and probably to help minimize the noise output. That would make a lot of sense to me.
That does make a lot of sense, but I am not qualified to answer one way or the other I will however ask and get you an answer one way or the other.
 |


