Dioramas: Buildings & Ruins
Ruined buildings and city scenes.
Hosted by Darren Baker
Jagdpanther Diorama
meaty_hellhound
Visit this Community
Alberta, Canada
Joined: July 23, 2010
KitMaker: 786 posts
Armorama: 753 posts
Posted: Sunday, August 29, 2010 - 09:49 AM UTC
UPDATE: Diorama Base Nearly Finished

old hellhound's been busy on the base for my Jagdpanther Dio now officially named "Never Abandoned." got the rubble glued down, washes applied and drybrushing done. still have to do the powder pigments to tie in the stones with how i finished the building which involves a light Mig powder coat applied slightly wet. here is where i'm after an active weekend:


the rubble was placed in a way that i liked and then white glue diluted with water was sprayed over it using an old Windex spray bottle.


various pieces were placed and buried with the rubble and a flat paintbrush was used to move small rubble around. i think i may be adding more pieces of wood now that things have finally dried. i still have many planks and feel it could use something more back here.


after drybrushing i also applied some white paint to the larger stones using a sea sponge.


this pic shows how the rubble is missing that light yellowish earth tone still... the pigments will bring that colour into play.


lots of little chips of terracotta plaster were added here and there to add some variety to the colour.


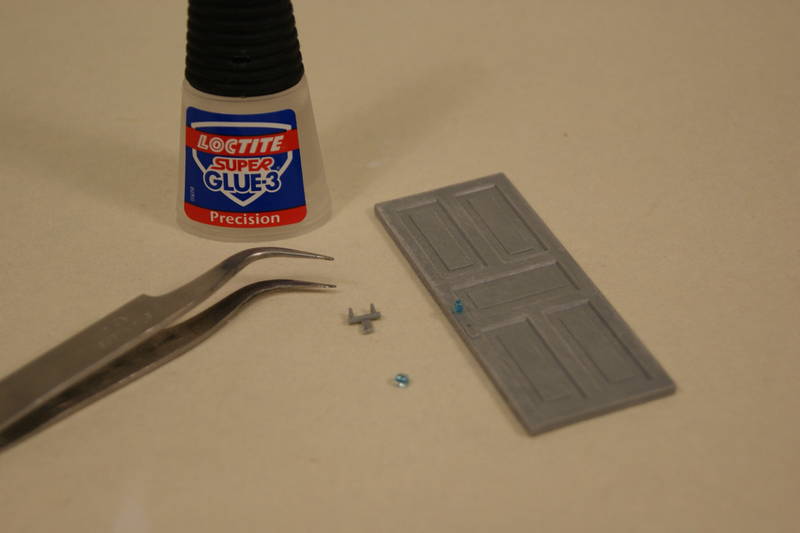
the Jagdpanther will have this piece of broken railing pinched under its tracks. besides the bits of plaster i also added the broken tiles and windows. once painting is done i will add some pieces of broken glass too.

that's where i am for today. have to let this dry a bit before i can add the pigments. i plan on have a bicycle added to this scene for something a little different, will see how things go as i want to scratchbuild the spokes on one wheel to get them more to scale.

next up i will be sculpting limbs and gear to turn a skinny, out of scale Dragon figure into a custom Medic for this diorama. fingers crossed that it goes well. as well, more build progress on the Jagdpanther as i get it ready for paint. thanks for checking out the project and look forward to all comments as i am always trying to improve.

cheers, mh.
panzerIV
Visit this Community
England - North West, United Kingdom
Joined: January 02, 2007
KitMaker: 781 posts
Armorama: 676 posts
Posted: Sunday, August 29, 2010 - 10:47 AM UTC
Hey Hellhound

great diorama!! i used to have the minart building your using in the diorama. and yours looks by far the best ive seen looks like youve shrunk down the actual building with its natural weathering !
cant wait to see the jagdpanther put in post more pics quickly please!!

blooming fantastic diorama

tony
meaty_hellhound
Visit this Community
Alberta, Canada
Joined: July 23, 2010
KitMaker: 786 posts
Armorama: 753 posts
Posted: Sunday, August 29, 2010 - 03:12 PM UTC
thanks Tony, your kind comments are much appreciated. those Miniart buildings are bit more than i expected time-wise but we modelers like a challenge, right?

haven't decided which camo i will paint the Jagdpanther, definitely three colour. i have lots of options and would like to do it a bit differently than what most people have already done. more updates and pics as soon as glue/putty/paint dries

cheers, mh.
davidmouser
Visit this Community
United States
Joined: August 30, 2010
KitMaker: 2 posts
Armorama: 1 posts
Posted: Monday, August 30, 2010 - 03:13 AM UTC
hi hellbound,

Need help, new beginner. I need 1/16 tank / army decorama, Found TankZone in England, but looking for something closer in US or Canada.

Need stuff like 1/16 camo, MG bullets, army helmets, etc. Can you help?

tks,
david mouser

[email protected]
Kuno-Von-Dodenburg
Visit this Community
England - North, United Kingdom
Joined: February 20, 2007
KitMaker: 1,453 posts
Armorama: 1,319 posts
Posted: Monday, August 30, 2010 - 04:50 AM UTC
Knockout job, mate.

That rubble-strewn base and the building is some of the best dio work I've seen on here in quite a while.

- Steve
meaty_hellhound
Visit this Community
Alberta, Canada
Joined: July 23, 2010
KitMaker: 786 posts
Armorama: 753 posts
Posted: Monday, August 30, 2010 - 08:16 AM UTC
wow guys, thanks so much for the nice words. i have received so much inspiration from your works and the efforts of others here at Armorama that your comments mean a lot.

Steve, your SS Officer is simply amazing and so well finished i wouldn't be surprised to see it in a magazine. it works like yours that you've taken the time to share that makes this community such a valuable asset.

a special thanks to Frank for sharing his great projects in cork that gave me the confidence to try that material out for myself.

PS: David, i fired a PM to you with some leads that might help.

cheers, mh.
sfctur1
Visit this Community
California, United States
Joined: December 12, 2007
KitMaker: 643 posts
Armorama: 497 posts
Posted: Tuesday, August 31, 2010 - 11:28 AM UTC
hellbound,
Your base looks more and more amazing with every detail you add. Looking foward to seeing the finished product, keep up the great work. What do you have planned after this one?
Tom
meaty_hellhound
Visit this Community
Alberta, Canada
Joined: July 23, 2010
KitMaker: 786 posts
Armorama: 753 posts
Posted: Tuesday, August 31, 2010 - 01:10 PM UTC
thanks Tom, you know like i do the details are where we get to be creative.

the only kit i have left in my stash is AFV Club's Stryker M1128 MGS with a pair of Alpine figures to go with it. I really like the look of the Stryker without the slat armour and even though they don't operate in theatre without the added upgrade i plan to build it "nude" with the wheels all raised and lowered for some crazily uneven terrain.

the idea i have for this diorama is have the vehicle encapsulated in a half destroyed industrial setting that forms a "cage" around it. the plan is to build the structure in a way that i can fit the vehicle inside the "cage" and then glue the roof parts over it so it has a "ship in a bottle" effect.

but i have been really good lately and haven't bought any new kits before i finish this dio. so, i can see myself getting something before i do the Stryker... any suggestions? i'd like to build a chaffee but the old Italeri kit is hard to find.

cheers, mh.
MrMox
Visit this Community
Aarhus, Denmark
Joined: July 18, 2003
KitMaker: 3,377 posts
Armorama: 1,088 posts
Posted: Wednesday, September 01, 2010 - 01:29 AM UTC
Awsome rubble - great work and composition!

Cheers/Jan
roudeleiw
Visit this Community
Luxembourg
Joined: January 19, 2004
KitMaker: 2,406 posts
Armorama: 2,224 posts
Posted: Wednesday, September 01, 2010 - 09:41 PM UTC
Superbe! really good work, the amount of effort put into the rubble really shows.
Great colors also.

I notice a lot of good diorama work over here the last weeks. Very good !

Cheers
Claude
durruti66
Visit this Community
Milano, Italy
Joined: August 30, 2010
KitMaker: 11 posts
Armorama: 10 posts
Posted: Thursday, September 02, 2010 - 06:14 AM UTC

That's great !!!

I really like what you did with the Miniart building, that are not easy to modify and detail....


Rambo44
Visit this Community
New Brunswick, Canada
Joined: November 27, 2008
KitMaker: 55 posts
Armorama: 54 posts
Posted: Thursday, September 02, 2010 - 09:23 AM UTC
Realy great work.Good ruble detail and placement of it,some people tend to over do it with ruble but you got it perfect.Your choice of color brings life to your dio as well.The "BEAST" is comming along nicely also.
Keep up the great work;looking foreward to your next update.
Ron.
bill1
Visit this Community
West-Vlaaderen, Belgium
Joined: August 14, 2005
KitMaker: 3,938 posts
Armorama: 520 posts
Posted: Friday, September 03, 2010 - 06:58 AM UTC
Yo Hellhound,

Very nice update.

That's really realistc rubble you have made!

This is indeed great work on the miniart house...I have build one also this summer...and it is no easy job to build them. But you did a great job...just replace the doorhandle with something smaller, they look to heavy for this scale.


Good work so far, yes Claude...there are a lot new dioramas on stage here...looks like it will be good winter

Greetz Nico
meaty_hellhound
Visit this Community
Alberta, Canada
Joined: July 23, 2010
KitMaker: 786 posts
Armorama: 753 posts
Posted: Wednesday, September 08, 2010 - 12:21 PM UTC
UPDATE: Jagdpanther Build Complete


though i have been busy with non-hobby things i have tried to put time aside to finish the Jagdpanther... and voila!

finally done and a beast is born. these Jagdpanthers sure have a serious look to them, no mistaking this for an ice cream truck. to recap, i used Griffon Model's detail set which was great to work with. any doubts i had about the instructions were sorted by checking the clear pics on their website.


road wheels and tracks are of course not glued yet for ease of painting. i annealed a few of the brass components to help them get their shape and/or battle damage.


the rear hatch hinges were glued but the hatch itself can swing up and down so i can paint around it. took the time to remove the track pin ends on the spare track links and then pin drilled where the track pins would go to make it a bit more real .. good times.


made a wood block for the jack out of planks of balsa glued together just like the real thing except very, very small. so many tiny little parts to this build many an evening was spent ensuring the floor didn't eat any.


i went recently to see in-service modern tanks and spoke to a few tank mechanics about how the rubber on the road wheels gets chewed up. doesn't take much with the weight on top of the rubber for stones and rubble caught between the guide teeth and the wheel to pock up the whole rim. 24 wheels to do on the Jagd was mind-numbing but rewarding.


lots of pics of Jagdpanthers showing off their armour by having glancing shell marks on them. had to have one on this beast to indicate it has seen plenty of action.

well, that's where i'm at for now. will prime the whole thing white, check it for blemishes and such then add base black coat followed by some colour modulation for three camo colours and lots of weathering. this model will be shear fun for me to paint and look forward to the final piece getting a decent finish.

thanks for checking my progress and as always all comments are welcome. cheers, mh.
sfctur1
Visit this Community
California, United States
Joined: December 12, 2007
KitMaker: 643 posts
Armorama: 497 posts
Posted: Wednesday, September 08, 2010 - 06:27 PM UTC
Can't wait to see this one finished. The tank looks great. Keep up the good work. Looking foward to your updates.
Tom
vonHengest
Visit this Community
Texas, United States
Joined: June 29, 2010
KitMaker: 5,854 posts
Armorama: 4,817 posts
Posted: Wednesday, September 08, 2010 - 06:56 PM UTC
Absolutely awesome MH, and I know whatever color scheme you pick for the Jagdpanther is really going to set things off with this dio. Looking forward to the end results mate.
Hwa-Rang
Visit this Community
Kobenhavn, Denmark
Joined: June 29, 2004
KitMaker: 6,760 posts
Armorama: 1,339 posts
Posted: Wednesday, September 08, 2010 - 11:06 PM UTC
Looks amazing.
meaty_hellhound
Visit this Community
Alberta, Canada
Joined: July 23, 2010
KitMaker: 786 posts
Armorama: 753 posts
Posted: Thursday, September 09, 2010 - 04:33 AM UTC
thanks guys for the great replies, had fun building this model.

Juan, you and i are both from the same book which some may call "old school." i do still drybrush my models with artist oils because that is something i enjoy and have developed over my many years of modeling. Colour Modulation is just the new term used for a very old Renaissance technique known as underpainting where artists would first paint in dark tones and then apply lighter hues in a thinned glaze over it to blend everything together. it allows for slight shifts in a monochromatic hue that would otherwise be difficult to create.

i have used this technique in the past using Raw Umber to some success. recently, i have learned that i can overcome the harshness of a black base coat sprayed over by a light tan colour to create even more dramatic results. it comes down to using thinned acrylics and layering on the paint until the black is barely visible to define the three dimensional shape of scale models.

the problem is this: though the model is reduced in scale to 1/35, the light source (the sun or a lamp) is still 1:1 scale, making the model look like a toy to the eyes. the idea is to enhance the contours of the model through painting to make it look more realistic.

JBA has a motto "too much colour distracts the viewer" which is true if not handled or controlled correctly. i have 4 years of colour theory from university and there are many things we should understand about colour and how it is processed by our brains so that we don't end up with a Jackson Pollock of a diorama.

i could go into some interesting diatribes about grey colour absorption by proximity (grey/neutrals will shift in colour warmth/coolness when placed adjacent to another colour) or how green is the hardest colour to remember (because green leaves usually don't come out of the jungle and kill us, it's the orange tiger we need to notice)... but most of us have seen dioramas where colours were used to create vibrant yet well balanced scenes (see any of Ian Hill's great works to get where i'm heading). there are some great books i have read on camouflage Dazzle Art techniques for navy ships that were quite eye-opening (pun intended).

so in the end, i use the term Colour Modulation but in reality i use underpainting and overspraying techniques. i have to clarify that i first prime in white primer (so much brass it is a good idea) so that i can review the model for poor sanding and/or glue blobs. this would be hard to do if i started right away with the black base coat.

if you guys want, i can post the paint stages as i go through them in order. i wasn't going to as there can be a lot of them and many others have done this and to a better effect. let me know. cheers, mh.
BBD468
Visit this Community
Texas, United States
Joined: March 08, 2010
KitMaker: 2,465 posts
Armorama: 2,383 posts
Posted: Thursday, September 09, 2010 - 06:51 AM UTC
hello,

ive been following this and i would love to see your painting steps. i love your build so far & i would not want to miss seeing your paint job bring that tank
killer to life. great job!

Gary
jba
Visit this Community
Rhone, France
Joined: November 04, 2005
KitMaker: 1,845 posts
Armorama: 777 posts
Posted: Thursday, September 09, 2010 - 07:53 AM UTC
man Hellhound what the heck of an answer above!! I sincerely hope your diorama will be as striking as such an answer deserves it to be!
exer
Visit this Community
Dublin, Ireland
Joined: November 27, 2004
KitMaker: 6,048 posts
Armorama: 4,619 posts
Posted: Thursday, September 09, 2010 - 09:55 AM UTC

Quoted Text

man Hellhound what the heck of an answer above!! I sincerely hope your diorama will be as striking as such an answer deserves it to be!


I'm sure it will be, I'd be really interested in seeing each painting step-if not in this thread then in a feature. I prime in white or light grey because i studied art and always primed my canvases in white. I sometimes prime the lower hull or suspension in Black or dark brown and in the end it is "Chacun à son goût"

I think the subtlety of a lot of painting effects is lost when you see models at shows under tungsten or fluorescent lighting.

Back on topic I'll be really interested in seeing how you approach the painting of the jagdpanther