

Hosted by Darren Baker
damaging Tamiya bricks

Fishhead

Joined: August 16, 2010
KitMaker: 6 posts
Armorama: 6 posts
Posted: Sunday, August 15, 2010 - 08:19 PM UTC
Can anyone out there tell me how to damage Tamiya bricks? I have tried a few things with no good results. I'm just getting back into modeling after 30 yours of "life" so I'm open to any ideas, Thanks

baggemats

Joined: October 10, 2005
KitMaker: 39 posts
Armorama: 36 posts
Posted: Sunday, August 15, 2010 - 08:42 PM UTC
Hi carving with a sharp knife but its hard to make it look good, try and make the brick wall with plaster and scribe the joints or use the cork method it is much better than tamiyas plastic bricks, hope this helps 

alanmac

Joined: February 25, 2007
KitMaker: 3,033 posts
Armorama: 2,953 posts
Posted: Sunday, August 15, 2010 - 11:32 PM UTC
Hi Kevin
I guess you are refering to this set

As these are made of plastic the usual methods of working plastic apply. Cutting with sharp blades, razor saws, drilling with bits attached to hobby drills, and of course using heat via hot screwdriver or similar tools, soldering iron etc.
Try not to breath any fumes when using heat, not good for you.
To be brutally honest the set is really not much up from toy soldier material, hence its cheapness in price.
You'd be better served by either creating your own as has been briefly described, there are articles here on armorama about making your own, or buying better commercially available products. This would mean spending more than you paid for the Tamiya set but would be far more realistic and probably involve less work if any before assembly and painting.
Look under dioramas both on web sites like here or Google search and find makers of such products. They come in either plaster type base material, use white pva glue to join or resin which you would stick with epoxy based glue rather than plastic model cement/glue
Alan
I guess you are refering to this set
As these are made of plastic the usual methods of working plastic apply. Cutting with sharp blades, razor saws, drilling with bits attached to hobby drills, and of course using heat via hot screwdriver or similar tools, soldering iron etc.
Try not to breath any fumes when using heat, not good for you.
To be brutally honest the set is really not much up from toy soldier material, hence its cheapness in price.
You'd be better served by either creating your own as has been briefly described, there are articles here on armorama about making your own, or buying better commercially available products. This would mean spending more than you paid for the Tamiya set but would be far more realistic and probably involve less work if any before assembly and painting.
Look under dioramas both on web sites like here or Google search and find makers of such products. They come in either plaster type base material, use white pva glue to join or resin which you would stick with epoxy based glue rather than plastic model cement/glue
Alan
Kuno-Von-Dodenburg

Joined: February 20, 2007
KitMaker: 1,453 posts
Armorama: 1,319 posts

Posted: Monday, August 16, 2010 - 09:13 PM UTC
Tamiya brick walls, sandbags and jerrycans should be avoided like the plague 
- Steve
- Steve

jimbrae

Joined: April 23, 2003
KitMaker: 12,927 posts
Armorama: 9,486 posts

Posted: Monday, August 16, 2010 - 10:45 PM UTC
Quoted Text
Tamiya brick walls, sandbags and jerrycans should be avoided like the plague
- Steve
Curiously enough, these three (very) nasty items are STILL Tamiya's top-sellers. Go figure ('cos I sure as hell can't)


DogEgg

Joined: October 04, 2006
KitMaker: 341 posts
Armorama: 293 posts

Posted: Monday, August 16, 2010 - 10:51 PM UTC
I have to say I've used the brick walls and they're fine in scale, but lack real detail. I've used them to show patches of brickwork underneath damaged render, it's quick and if they're painted properly, they look ok. The most effective brickworks I've seen are those scribed or pressed into softer sheet materials or plaster. I've got some soft plastic sheet, from advertising boards, about 3 - 4mm thick, which has a soft but resilient surface, and can be cut, carved, chopped, sanded... this has the benefit of taking the impression of a brick shaped tool to 'stamp' the brick shapes into the surface, much quicker than carving, and they're all the same shape and size, like real bricks. Change the tool and change the size - instant cobbles, concrete blocks, drystone walls (Bit more tricky that last one).
Once stamped, each brick can be picked at, sliced, textured, anything to make it look damaged or eroded.
The easiest way to make a stamping tool is to remove the bristles form an old paintbrush and clean out the ferrule - the metal bit at the end. Using thin nosed pliers, shape this metal end into a brick shape, and gently press into the plastic's surface. You can easily re-shape it if it bends.
I'll post pictures of my results in a short while.
Hope this helps
btw, my post of 'PBR x 3' has images of the brickwork by Tamiya...

slodder
Joined: February 22, 2002
KitMaker: 11,718 posts
Armorama: 7,138 posts
Posted: Monday, August 16, 2010 - 11:20 PM UTC
I would use them as a base set and build onto them with cork bricks. Cork is easy to use you can get it at lots of different places (Michaels, Target, WalMart Lowes.....)

DogEgg
Joined: October 04, 2006
KitMaker: 341 posts
Armorama: 293 posts
Posted: Tuesday, August 17, 2010 - 12:25 AM UTC
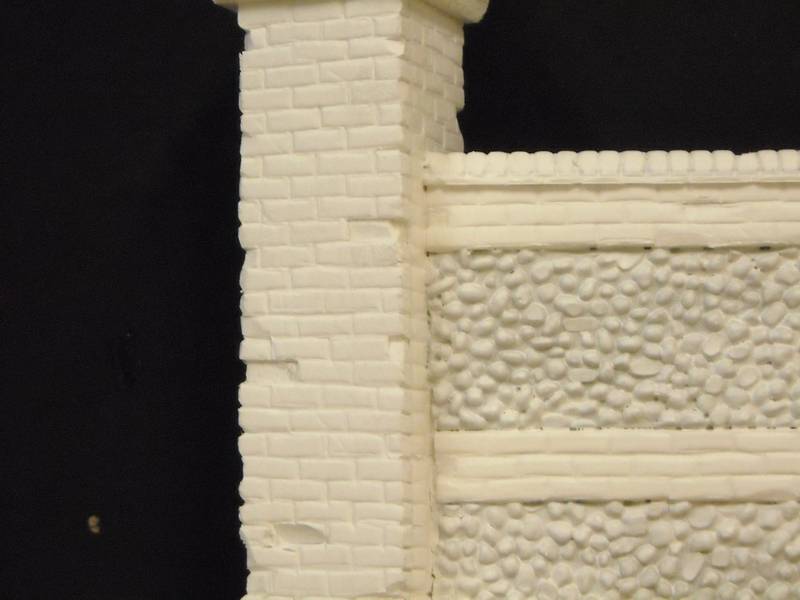
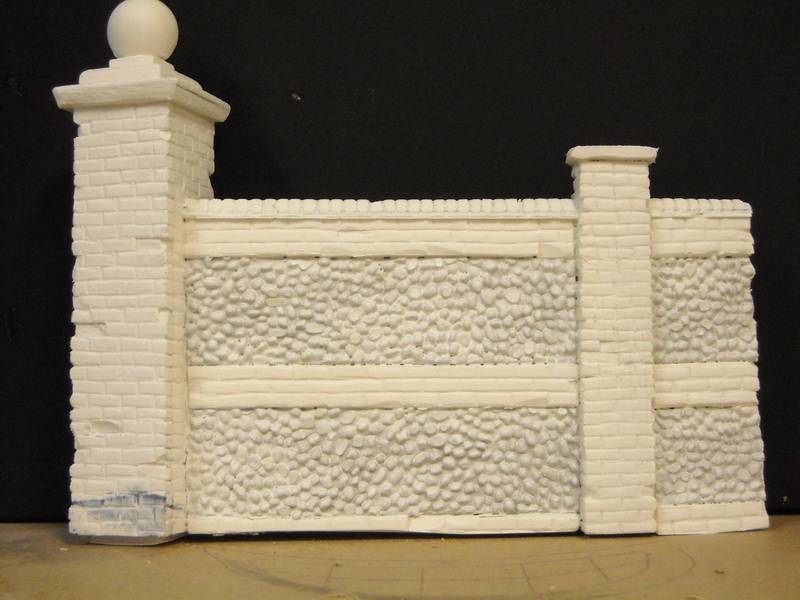
Here is the primed right hand section of a brick and flint wall for my Normandy diorama, 1/35 scale. Obviously it will come to life a bit more with some colour on it. It was made with plastic board, as mentioned above, and some HO/OO scale cobbles chopped about for the flints.
And this is a small section of a warehouse building made with Tamiya bricks, with a 'cement' render applied over the top...
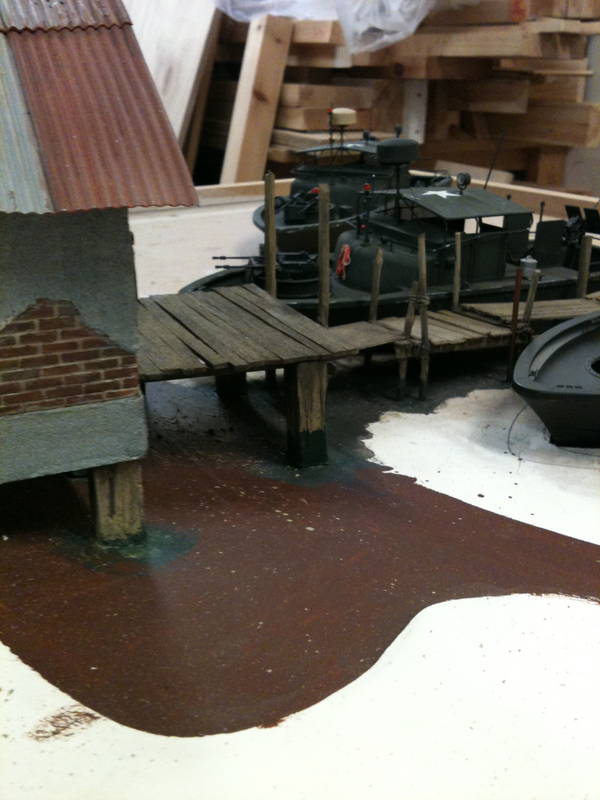
Hope this helps
And this is a small section of a warehouse building made with Tamiya bricks, with a 'cement' render applied over the top...
Hope this helps

dioman13
Joined: August 19, 2007
KitMaker: 2,184 posts
Armorama: 1,468 posts

Posted: Wednesday, August 18, 2010 - 02:25 PM UTC
Not to take his question elsewhere, but they do have use's. After 20 some odd years in the spare parts drawer I found a use for the sand bags. Glue old stocking material over them to use as bagged corn/wheat or rice. A good filler for my river barge.

Bullethead35
Joined: August 22, 2010
KitMaker: 14 posts
Armorama: 13 posts
Posted: Saturday, August 21, 2010 - 03:00 PM UTC
Richard: Interesting "stucco" over the Tamiya bricks, I've used the same method over Plastruct bricks. I'll try to take a couple pix, but I'm sure you get the idea.
Ditto on standard tools for working styrene, still tough to get realistic damage.
Ditto on standard tools for working styrene, still tough to get realistic damage.
Fishhead
Joined: August 16, 2010
KitMaker: 6 posts
Armorama: 6 posts
Posted: Wednesday, August 25, 2010 - 05:20 AM UTC
Thanks for the answer, I'll know better next time but I will use what I have and do the best I can.
Fishhead
Joined: August 16, 2010
KitMaker: 6 posts
Armorama: 6 posts
Posted: Wednesday, August 25, 2010 - 05:25 AM UTC
Thanks for the answer. I understand that these are not the best on the market but I'm trying to learn to walk before I run. I'll let all of you know how they turn out.
Fishhead
Joined: August 16, 2010
KitMaker: 6 posts
Armorama: 6 posts
Posted: Wednesday, August 25, 2010 - 05:26 AM UTC
Steve,
Thanks for the feedback. I'll keep your opinion in mind when buying things in the future.
Thanks for the feedback. I'll keep your opinion in mind when buying things in the future.
 |

WEB HOSTING BY


Copyright ©2021 Armorama and Kitmaker Network, a subsidiary of Silver Star Enterprises
All Rights Reserved. Please read our Conditions of Use and Privacy Policy.
All Rights Reserved. Please read our Conditions of Use and Privacy Policy.