Just wanted to share with you my latest project, based on a scenario during the Battle of the Bulge in December 1944. The German plan was to split the British & American Armies & strive towards the Belgian port of Antwerp, which was an invaluable supply port for the Allies. Of course the plan was far too ambitious, despite the initial first week or so of success.
The premise for this diorama is the suprise German advance has overrun an American position & suprised 2 of the occupants.One of the Fallschirmjager have stumbled upon a couple of packets of 'Lucky Strikes' & so he & his fellow victors are celebrating their most recent encounter.....

The base started off with a photo frame, the sides built up using thick card, & the 'filling' is a mixture of polystyrene & Oasis from a florist. On the right hand side I made 2 roundish holes to accomadate the 2 foxholes. Obviously to allow for these, the base needed to be high, to allow for the depth of the holes. With the inevitable hindsight, I would've made the front of the dio an inch or so higher, so the angle of the slope wouldn't have been quite so dramatic. Wonderful thing that hindsight.......


Once that was all done, the whole thing was plastered. I wanted to make some pine trees to try & simulate the Ardennes forest, so put in some dowels to allow for them later. Tank tracks, footprints, sand, scatter & tyre tracks were imprinted into the road whilst the plaster was still wet.


Tested the positioning of afew of the elements... Although theTiger was finished by the time I'd built up the groundwork, I hadn't really embedded it deep enough into the muddy road, as a result the 69 ton tank 'sits' ontop of the mud.... something to try & correct later..... that hindsight thing again!!!


Next I gave the entire base an initial coat of paint. Dark brown for the road, white for the snowy parts. For the 2 foxholes I wanted to simulate freshly dug ground, so I painted on a coat of very thin watered down PVA glue, & sprinkled in some sand with a little static grass. Tipped the base at an angle to make sure the hole was covered on all sides, and allowed it to dry. A coat of hairspray guaranteed it stayed put. Next I cut some small straght twigs to size & glued them in place for the rear store hole. The holes were later airbushed a light brown & they looked pretty realistic.

The Tiger tank & Fallschirmjager figures were all from a kit from 'Dragon #6254. Used all but one of the paratroopers. The tank commander was from 'Dragons' Panzer crew Russia 1943, & the 2 misfortunate Americans were 'Verlindens' US Airborne ww2 in overcoats. These 2 needed alittle adjusting in the limbs department, the right leg sticking up on the guy in the snow was a solid moulded resin piece, so I was worried that I couldn't really adjust it without making a hash of it.


The figures were great to build & paint. As always my painted faces are gradually improving, some turn out better than others, it all takes practise, even if that does mean 60/70+ faces later... I use oil paints, the graduation in colour change & slow drying process is always a benefit. I've heard many people say to avoid the 'whites of the eyes look', to just make the eyes dark. Many quality modellers achieve this effect to an exact standard, but I can't help thinking with my guys however thay just look dead & empty, the whites & pupils give them a little 'life'. I've learnt to avoid however the eyes wide open spaced out look, like a cartoon. That's when the oil paints work so effectively I find to make that white so small but effective.....


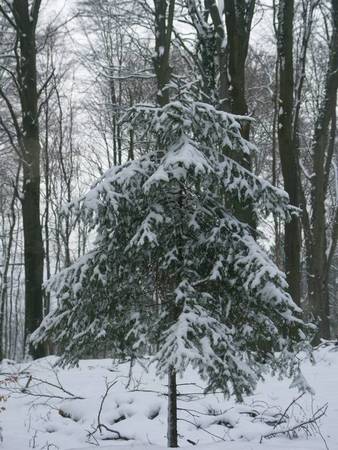
The pine trees were a challenge. Kind of happy with the way they turned out, but as always they could be better! The original tree was made as described somewhere on this site in a post about making pine trees. Cutting some dowel, distressing it on a grinding machine, and glueing 'treated' sprigs of fine ferns onto it randomly at different levels. I did this, but the effect looked alitle Christmas tree like, & upon looking at pics of pine trees there more bare up to a point, with all the green nearer the top of the tree. Naturally height restrictions meant I couldn't make the trees to scale, so made them as tall as storage would allow. The bark was achieved by painting onto the dowels a thin plaster paste, then running a blade along the length to achieve some grain effect. Once dry, the bark was painted with different shades of an oil wash. The forest floor was a mixture of brown scatter, small twigs, field grass, natural sprigs of some plant I found, & mushrooms made of milliput.


The muddy road was finished off with a coating of varnish to achieve that wet look, the Tiger was glued into position to allow for alittle more plaster to be added to cover the tracks, to make the tank look like it was 'in' the road, & not 'on' the road. I coloured some Scenics water & dropped them into the pre-formed puddles & tracks to simulate muddy water.


These 2 guys talking had 'Hornet Heads' replace their normal ones, so it looked as if they were having a conversation. Forgot to mention the snow is a mixture of 'Woodland Scenics' soft flake snow for the heavier ground stuff, & bicarbonate of soda is the lighter dusting over the tank, held down by painting on another thin coat of PVA glue/water mix.

Hope you like, as always any comments, critiques, suggestions much appreciated. Thanks for looking....
SIMON.