Campaigns
Where Armorama group builds can be discussed, organized, and updates posted.
The Desert Fox
vonHengest
Visit this Community
Texas, United States
Joined: June 29, 2010
KitMaker: 5,854 posts
Armorama: 4,817 posts
Posted: Wednesday, March 30, 2011 - 05:28 PM UTC
I agree, the progress is very impressive, Noel will be quite pleased if he gets a chance to check out what this crew has accomplished so far
trex10
Visit this Community
Upper Austria, Austria
Joined: January 17, 2011
KitMaker: 70 posts
Armorama: 69 posts
Posted: Wednesday, March 30, 2011 - 07:25 PM UTC
Wow, you guys are speed on, incredible.
Following my actuall status.:


Everything dry fitted, but Side hatch and one top hatch unit is missing on the pictures. Figure is even in "raw condition", only for test fit of position
So next step is painting.

As Tim is building an AB41, I would like to show his " brother" in bigger scale, I have build over the last months, with fully scratchbuild interiour and engine, which I will dislay within a maintanance scenery:


Erich
BobCard
Visit this Community
Florida, United States
Joined: August 09, 2006
KitMaker: 1,008 posts
Armorama: 847 posts
Posted: Thursday, March 31, 2011 - 02:59 AM UTC
Thanks everyone, sorry for the late start.Actually learning a few new things here, great work everyone.

Erich, very impressive work, nice details and interior. Not everyone notices the work involved so before it gets kind of covered, great work.

Bob
Tojo72
Visit this Community
North Carolina, United States
Joined: June 06, 2006
KitMaker: 4,691 posts
Armorama: 3,509 posts
Posted: Thursday, March 31, 2011 - 03:43 AM UTC
Erich !! That is really some cool stuff
vonHengest
Visit this Community
Texas, United States
Joined: June 29, 2010
KitMaker: 5,854 posts
Armorama: 4,817 posts
Posted: Thursday, March 31, 2011 - 03:55 AM UTC
Great work Erich!
zontar
Visit this Community
Hawaii, United States
Joined: August 27, 2006
KitMaker: 1,646 posts
Armorama: 1,557 posts
Posted: Thursday, March 31, 2011 - 11:06 AM UTC
Erich: Both look really good!!
AgentG
Visit this Community
Nevada, United States
Joined: December 21, 2008
KitMaker: 1,109 posts
Armorama: 1,095 posts
Posted: Thursday, March 31, 2011 - 12:53 PM UTC
Wow! There's some really fine work going on here!

For those who inquired, the base is manufactured by:

G & S Models
PO Box 1574
Wingate Park
0153
South Africa

There is no website listed on the box, or on the instruction sheet.

It is a well done 1/35 scale representation of an actual monument at Sidi Barrani. This is an Egyptian town 95k from the Libyan border. The actual monument was erected by the Italian 10th Army in September 1940.
It appears quite a bit of research, as well as sculpting skill, went into this.

I will be at the LHS tonight and will inquire from the owner where he got it. He has others by this company and I just might get another. I saw three, one depicting a street corner, a rubble strewn sidewalk, and a section of cobblestone road with a curb.

Are any of our modeling brothers/sisters from South Africa?

More to come.

G
SGTJKJ
#041
Visit this Community
Kobenhavn, Denmark
Joined: July 20, 2006
KitMaker: 10,069 posts
Armorama: 4,677 posts
Posted: Thursday, March 31, 2011 - 02:46 PM UTC
Great building, Erich. It looks great.

Looking forward to see more.
AgentG
Visit this Community
Nevada, United States
Joined: December 21, 2008
KitMaker: 1,109 posts
Armorama: 1,095 posts
Posted: Friday, April 01, 2011 - 12:14 PM UTC
Ok here's the scoop. These diorama bases and pieces were purchased as part of the total inventory of a defunct Hobby Town USA. My friend bought their entire inventory to start his shop. There are no source codes on the old Hobby Town labels, and nothing to indicate a web site.

That HT USA went out of business in '08, so I have no idea how long prior to that these were imported. I will continue the investigation.

G
Tojo72
Visit this Community
North Carolina, United States
Joined: June 06, 2006
KitMaker: 4,691 posts
Armorama: 3,509 posts
Posted: Saturday, April 02, 2011 - 01:24 AM UTC
90% donewith the vehicle.Still need some weathering and dust,must add some stowage items and a figure,her are a few progress shots:


vonHengest
Visit this Community
Texas, United States
Joined: June 29, 2010
KitMaker: 5,854 posts
Armorama: 4,817 posts
Posted: Saturday, April 02, 2011 - 05:34 AM UTC
Thanks G, I may have to source one of those from you if they have anything suitable for my Panzer build. I still think that's a bummer that HobbyTown went belly up..

Anthony: Looking good! I dig the chipping
AgentG
Visit this Community
Nevada, United States
Joined: December 21, 2008
KitMaker: 1,109 posts
Armorama: 1,095 posts
Posted: Saturday, April 02, 2011 - 07:20 AM UTC
Jeremy we lost one HT, but Ed opened his shop in the same neighborhood. The other HT moved about two blocks, and has a bigger place now. We keep hearing of the other HT re-opening, yet with the economy so bad here still, we have no idea when or if. We did finally get a Hobby Lobby here in Henderson . 40% off coupons can make a big difference for sure.

G


zontar
Visit this Community
Hawaii, United States
Joined: August 27, 2006
KitMaker: 1,646 posts
Armorama: 1,557 posts
Posted: Saturday, April 02, 2011 - 08:04 AM UTC
Anthony: that looks really good!! the grey coming through looks very convincing.

I totally botched my paint job on the 222 , so I will be giving it a windex bath next week with the hopes of salvaging the kit. Otherwise, I'll need to find something else to build. Perhaps a kubelwagen. So bummed...

Happy Modelliing, -zon
vonHengest
Visit this Community
Texas, United States
Joined: June 29, 2010
KitMaker: 5,854 posts
Armorama: 4,817 posts
Posted: Saturday, April 02, 2011 - 08:58 AM UTC
For sure G, unfortunately The Hobby Lobby's here usually only carry old Tamiya reissues and inaccurate Academy kits. Our Hobby Town is still around, but kind of neglect scale modelers and their prices seem to keep rising

Zon: That's always my biggest fear. Best of lug with stripping the paint!
zontar
Visit this Community
Hawaii, United States
Joined: August 27, 2006
KitMaker: 1,646 posts
Armorama: 1,557 posts
Posted: Saturday, April 02, 2011 - 10:20 AM UTC
Jeremy: Thanks for the encouragement. Painting is always my fear as well. I have so many kits built into sub-assemblies without a drop of paint on them, and more with only a bit of paint. I've really only finished a few so far, but I've been fortunate enough to not have had any major problems til now. Oh well, I suppose I needed to learn about stripping paint too.

Have a good one, -zon
vonHengest
Visit this Community
Texas, United States
Joined: June 29, 2010
KitMaker: 5,854 posts
Armorama: 4,817 posts
Posted: Saturday, April 02, 2011 - 10:37 AM UTC
I'm about in the same boat as you regarding my builds, LOL. Let us know how it turns out!
Firefly74
Visit this Community
Queensland, Australia
Joined: April 15, 2010
KitMaker: 224 posts
Armorama: 205 posts
Posted: Saturday, April 02, 2011 - 08:32 PM UTC
Hi all great work going on here.
Erich: Very nice! Looking forward to seeing the carro completed.The AB 41 will look great in a Dio, those figures will be perfect.
Anthony: Great work, they certainly are a big beast of an armoured car!
Zon: Good luck with the paint stripping! There should be plenty of info on the site about different ways of doing it successfully.

Heres the AB 41 primed,tyres are dry fitted and have left tools etc off for painting. Used Tamiya Fine surface primer,can ran out towards the end but pretty much got it done!
Glad the build stage is over, was not a good fit all round.The wheels were a terrible fit and were all in contact with the mud guards on one side of the wheelarch,had to sand down the mudguards (which was good as the they were to thick anyways) and slice of some of the connector pins so i could move the wheels over.
Drilled out the barrels and horn on the front and added some brass "steps" near the doors to replace the kit ones.
Bit of cleaning up to do and on with the first coat of paint.
Cheers,
Tim

trex10
Visit this Community
Upper Austria, Austria
Joined: January 17, 2011
KitMaker: 70 posts
Armorama: 69 posts
Posted: Saturday, April 02, 2011 - 09:57 PM UTC
First,
Thanks for all the compliments, which I have to give back to all of you, shareing their knowlegde in this and other forums.
Even I am personnaly surprised how my modelling skills has been improved after a year back to this hobby, especially compared with my level from more than 20 years ago, I have to thank all of you, who are present in this forums, giving my the chanche to “listen” and to learn.

So 1st paint step has been done:

On this model I have sprayed the red-oxide coloured metall corrosion primer, used in my company to paint truck components. Works perfect, “bits” in the plastic, giving a high connection to the material, without destroying (or melting) the plastic material.
I have discovered this possibilty by chanche, after became unsatisfied with both, the ModelMaster and Lifecolour Primer´s


The basic paint was made with Livecolour „Giallo Sabbia scuro“, lightened on the surface panels with 2 times mixed-in more „Giallo Sabbia chiaro“


And before anybody mention it:
Yes, the chicken-ladder is too short….
I was collecting infos for this project nearly half a year and than that:

My example picture is from theSquadron Signal „Afrikakorps in Action“ and on this picture the ladder (or better the picture) is cutted from the 5th step on. I have recalcutaled the height of the ladder for my model, according this picture and added a (as I assumed) 6th step.
The expample picture I have linked, which I have shortly found in the net, shows a much higher ladder, transfered to the model in fact 40 mm higher than my initial one.
But I have discovered this “new” picture after I painted the model, and than it even took some days till I realized the difference....

Fortunately I have made the ladder from an Evergreen profile, in which I drilled a hole on the top to simulate a tube. So now it was easy to add a 40 mm additional profile, drill holes in boths sides and connected the both parts with a short wire part to reinforce the connection surface.


For the track painting I will follow Bill Plunks´s method, which from my (personal) side is the most realistic way to paint tracks, especially as he is avoiding too much rust, which in fact is not so common in the desert.
I hope I will be able to get a similar finish as he shows in his build logs.

Erich
FAUST
#130
Visit this Community
Noord-Holland, Netherlands
Joined: June 07, 2002
KitMaker: 8,797 posts
Armorama: 4,190 posts
Posted: Sunday, April 03, 2011 - 04:16 AM UTC
Ola guys


I want to start off with saying that some really neat work is shown here. Good quality at impressive speeds as well. Have not been able to follow much the last few weeks but now I'm vatching up.

Love that Italian beasty with the ladder. And also the burnt out M13 from a few pages back is looking the part. And the other projects also are looking promising. Great load in the Blitz from Edo.

Another little textual update from me. I finally received the PE set for the Dingo from China. I have the Hornet heads in House so now I at least can start on my project for this campaign.
vonHengest
Visit this Community
Texas, United States
Joined: June 29, 2010
KitMaker: 5,854 posts
Armorama: 4,817 posts
Posted: Sunday, April 03, 2011 - 05:22 AM UTC
Tim: Wow, what an unexpected ordeal! Kudos on sticking with it and fixing the problems, I wouldn't have even known about any of the issues if you hadn't said anything

Erich: Your build is turning out great, and nice job lengthening the ladder! The primer looks like it was a good choice, is it something that a normal guy can buy from a paint shop or something?

Robert: That's going to be quite the detailed little project, we're looking forward to it
AgentG
Visit this Community
Nevada, United States
Joined: December 21, 2008
KitMaker: 1,109 posts
Armorama: 1,095 posts
Posted: Sunday, April 03, 2011 - 02:45 PM UTC
Ok, I'm calling the Panzer 99% finished!


I'm working on the base as we speak.

Here's some interesting comparison shots. Desert warriors from 1941 and 1991. It's amazing what changes in 50 years, and how much stays the same.


I finished the M60A1 today as well.

G
vonHengest
Visit this Community
Texas, United States
Joined: June 29, 2010
KitMaker: 5,854 posts
Armorama: 4,817 posts
Posted: Sunday, April 03, 2011 - 04:58 PM UTC
Nice work on both builds G, they look great! You may be our first finisher
AgentG
Visit this Community
Nevada, United States
Joined: December 21, 2008
KitMaker: 1,109 posts
Armorama: 1,095 posts
Posted: Sunday, April 03, 2011 - 06:10 PM UTC
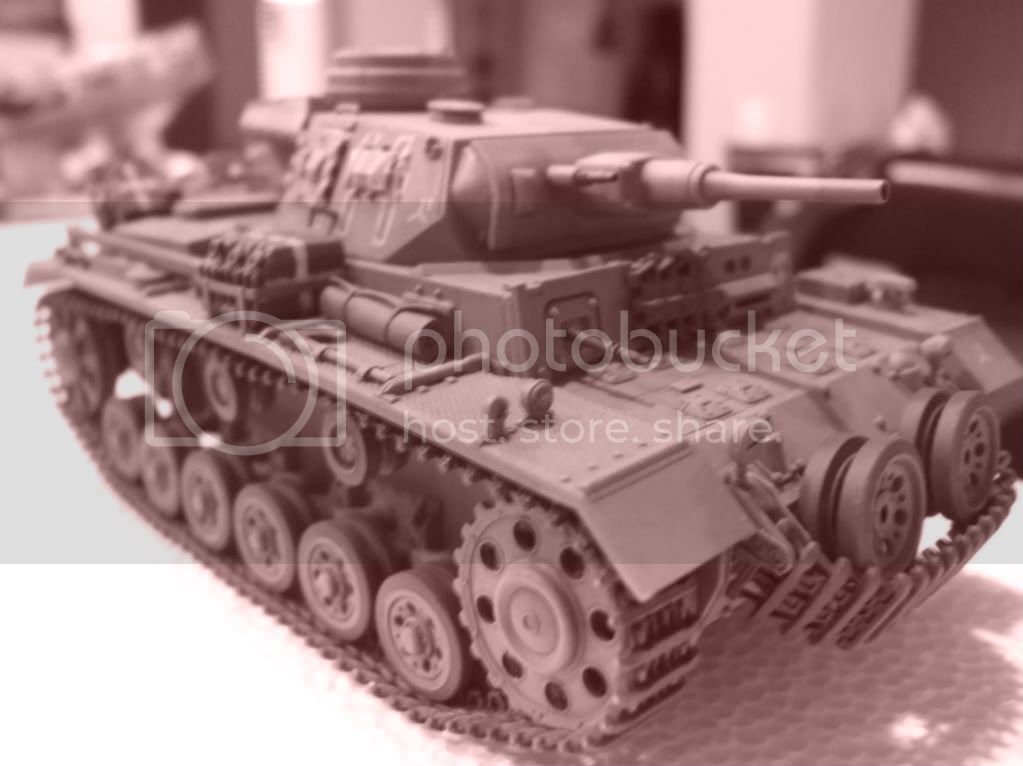
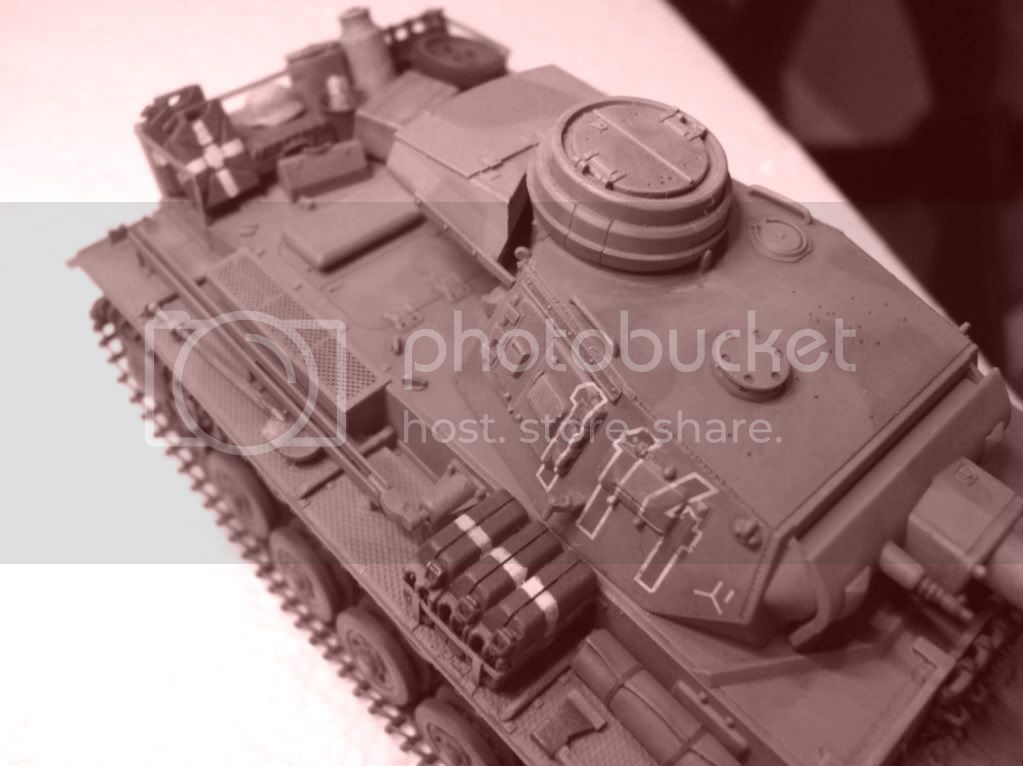
I want to take a minute and post some photos. We argue on the forums all the time as to what colors the real tanks were painted. Some specific areas we discuss are the Panzer Tropen colors, and the early war two tone gray and brown.

I began playing around with the Pz III.

Here's the modern digital color photo of closely matched hobby enamels.


Here's a grey scale, B & W, pic.


Next


Sepia toned.


and a color mod termed "old photo".


You can see where the two colors of the camo seem to blend into each other. Imagine now this covered with dust, a slightly out of foucs shot, and gasp, real film!!!
You can see where most would come to the conclusion the tank was only one color.

G
vonHengest
Visit this Community
Texas, United States
Joined: June 29, 2010
KitMaker: 5,854 posts
Armorama: 4,817 posts
Posted: Sunday, April 03, 2011 - 06:39 PM UTC
b&w photos are deceptive by nature which is why I believe they should only be used as a base reference. Older period photos were usually shot half-baked so to speak, which meant they were out of balance with hues, values, exposure, etc. and usually weren't shot in the best lighting conditions to begin with. Time and environmental damage don't help either. And as you pointed out G, add to this a dirty vehicle and you have one very deceptive piece of color research
BobCard
Visit this Community
Florida, United States
Joined: August 09, 2006
KitMaker: 1,008 posts
Armorama: 847 posts
Posted: Monday, April 04, 2011 - 02:22 AM UTC
Wow nice painting and weathering guys,
Anthony, what method did you use to get the chipping? I know the Greif shows a lot of this or plaine wearing down of certain parts so at some point I have to start experimenting.
Tim, if that’s the side you adjusted, the work looks great.
Erich, Great research, until you mentioned it I never would have known about the height of the ladder, I remember see a photo at some point so I thought I'd see if I could find it.
Wayne, interesting discussions concerning the painting, some have even mentioned how it changes at the different scales we model in. All I know is that your method came out very convincingly, interesting how they change in B&W.

Hopefully I can get more done this week, great work guys.
Bob