As some of you may be aware, Tank Rat's AFV depot started a separate forum through Armorama about a month ago. I thought that all of the posts were simultaneously being posted on this site but have realized this is not the case. Anyway, thought some of you would be interested in this build and input is much appreciated. Here is the link:
http://armorama.kitmaker.net/forums/163710&page=1#1395157
[ MODERATORS NOTE: This topic is now the 'active' topic for this blog. The link above may have some information not posted here however. That topic is locked. ]
Hosted by Darren Baker
Porsche Jagdtiger 305004 Build

panzerdoc

Joined: August 22, 2010
KitMaker: 147 posts
Armorama: 81 posts

Posted: Thursday, October 21, 2010 - 03:52 PM UTC

panzerdoc

Joined: August 22, 2010
KitMaker: 147 posts
Armorama: 81 posts

Posted: Monday, October 25, 2010 - 11:10 AM UTC
"fix" for Verlinden Jagdtiger fighting compartment added to above link if anyone interested.
Posted: Monday, October 25, 2010 - 11:29 AM UTC
Excellent work there Panzerdoc but you will likely get a lot more views and participation if it was posted in these forums as a Blog.

panzerdoc

Joined: August 22, 2010
KitMaker: 147 posts
Armorama: 81 posts

Posted: Monday, October 25, 2010 - 01:01 PM UTC
I would definitely like some input on this as I get further along. How would I go about moving the blog?
Posted: Monday, October 25, 2010 - 03:30 PM UTC
I suggest you contact Jim S as he may be able to move it for you.

vonHengest

Joined: June 29, 2010
KitMaker: 5,854 posts
Armorama: 4,817 posts

Posted: Monday, October 25, 2010 - 03:46 PM UTC
It's an awesome build, it is definitely worth sharing to everyone here 


panzerdoc

Joined: August 22, 2010
KitMaker: 147 posts
Armorama: 81 posts

Posted: Monday, October 25, 2010 - 03:57 PM UTC
Thanks Jeremy. Hopefully the build can generate some discussion of the wide range of techniques I am trying to work out and also an interesting subject. It has been a blast but trying of late as I try and get the pieces together. I've just made my 2nd generation flame cut stamp...this one even has a handle. If it works as planned, I will post the pics of the tool manufacture next. I realized that I was going to have to do this portion (the mortised joints) of the project before I start placing the delicate interior pieces along the superstructure wall.

vonHengest

Joined: June 29, 2010
KitMaker: 5,854 posts
Armorama: 4,817 posts

Posted: Monday, October 25, 2010 - 04:12 PM UTC
What you're doing really is awesome and very inspiring. I am learning a lot from your build because of all of the techniques you are trying out and tools you are making. I look forward to seeing your next stamp in action.

panzerdoc

Joined: August 22, 2010
KitMaker: 147 posts
Armorama: 81 posts

Posted: Monday, October 25, 2010 - 05:27 PM UTC
A brief explanation as to why I am redoing the flame cuts on the dml jagdtiger. First of all, the cuts are much more evident on the reference pics than the dainty ones in the dml kit. Second, the alignment of the superstructure with the mantle and rear wall provided by verlinden were not perfect and any gap filling would obscure the original cuts. Finally the verlinden cuts did not match the dml cuts.
I posted the work on the "practice" hull at the link above. On the original stamp, the surface area was too large and difficult to get a good imprint without a lot pressure. I also thought the original suture size was too large. The photo's below show the manufacture of the tool (patent pending) and a joint on the superstructure that will be mostly covered by zimmerit. Notice that the joint above has been chiseled out. This allows more clay and makes it easier to get a good impression.
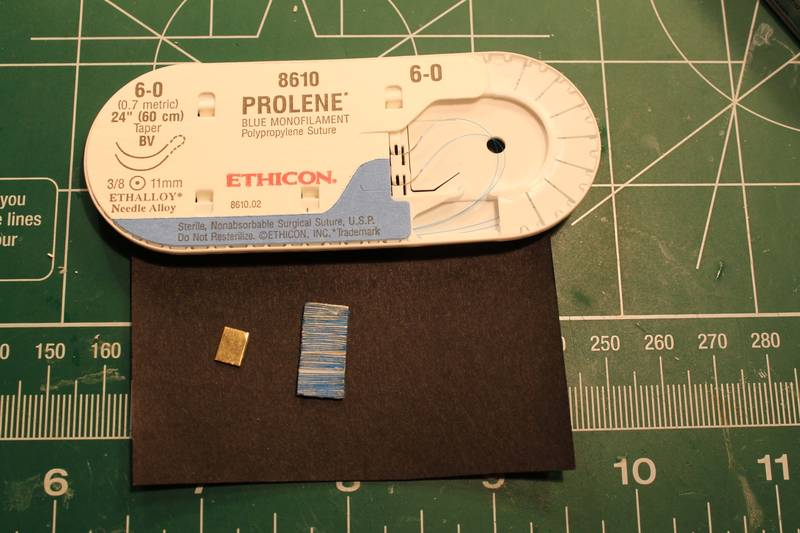
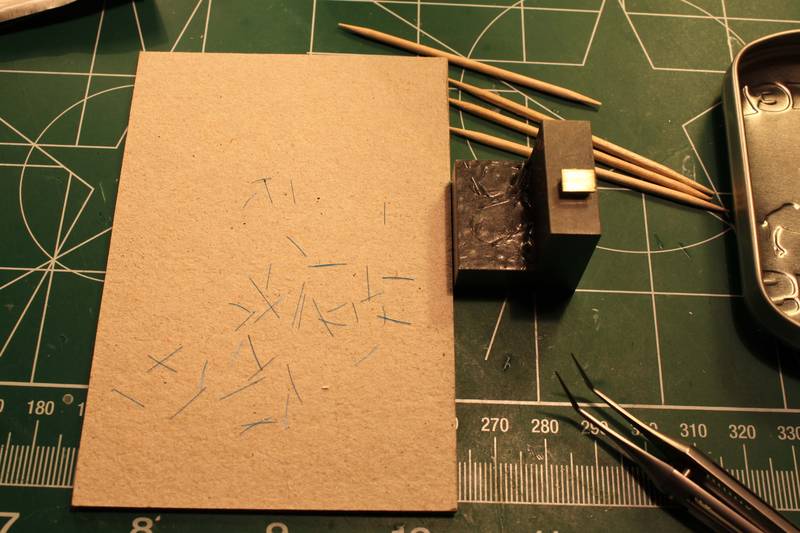
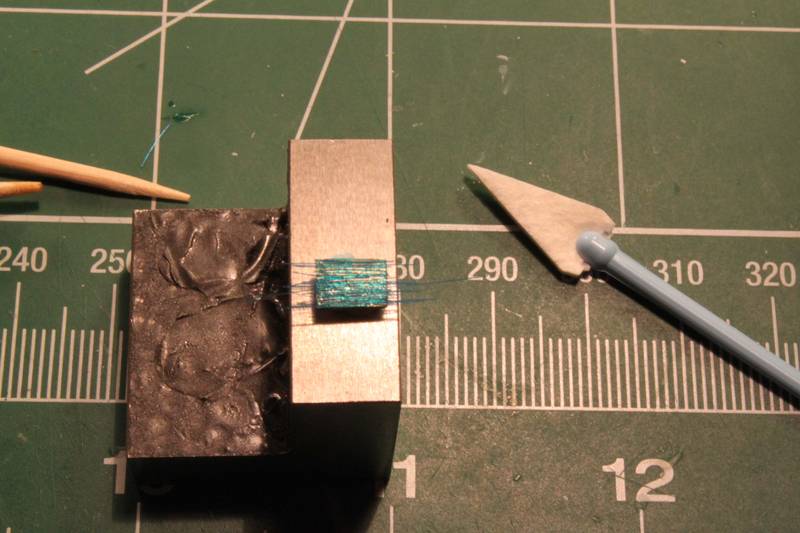
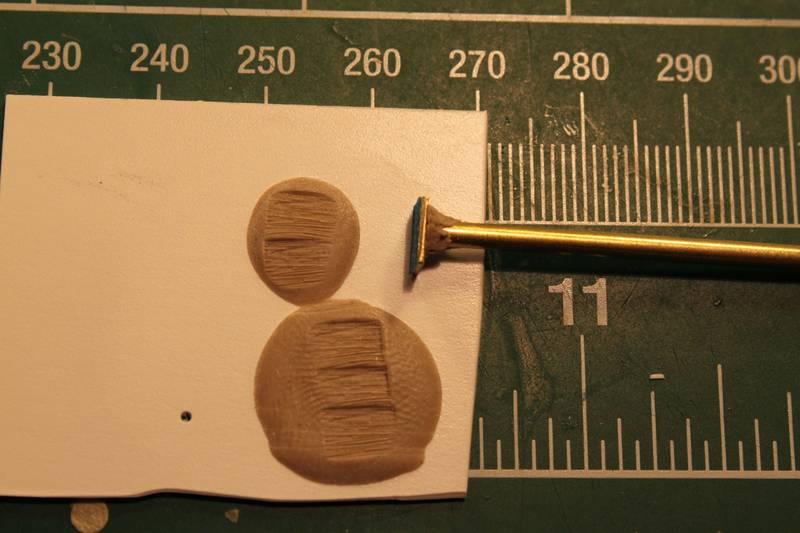
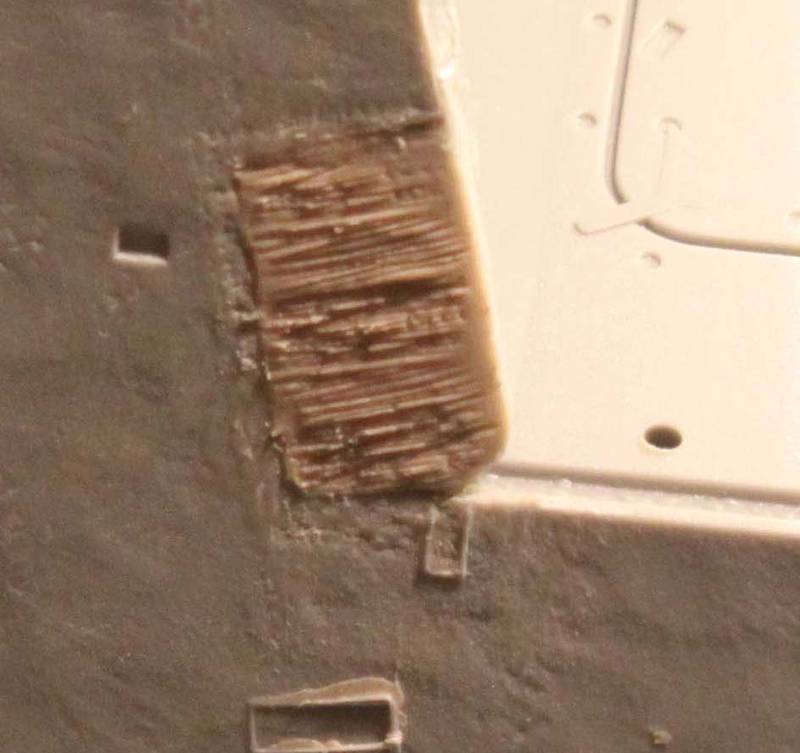
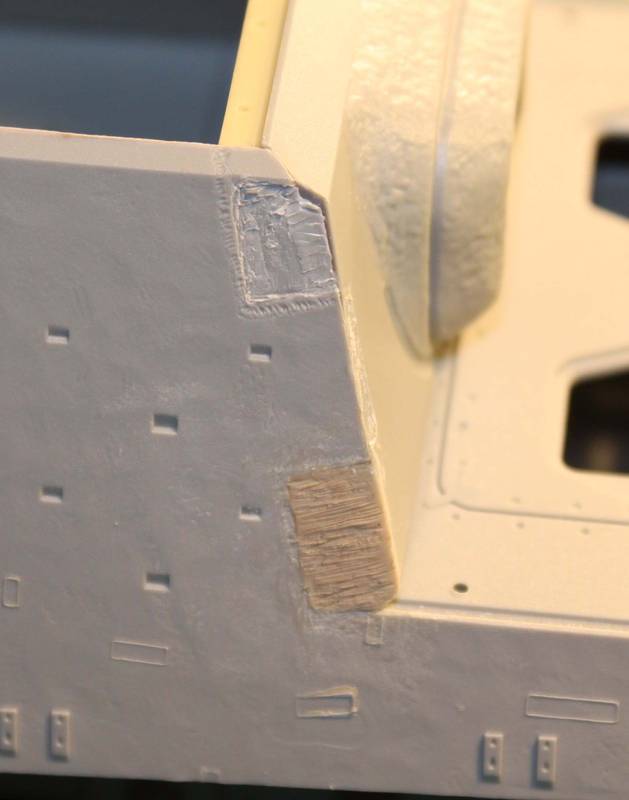
I posted the work on the "practice" hull at the link above. On the original stamp, the surface area was too large and difficult to get a good imprint without a lot pressure. I also thought the original suture size was too large. The photo's below show the manufacture of the tool (patent pending) and a joint on the superstructure that will be mostly covered by zimmerit. Notice that the joint above has been chiseled out. This allows more clay and makes it easier to get a good impression.


Posted: Monday, October 25, 2010 - 06:51 PM UTC
Very nice work and I am glad to see a move of location was sorted for you.

panzerdoc

Joined: August 22, 2010
KitMaker: 147 posts
Armorama: 81 posts

Posted: Wednesday, October 27, 2010 - 05:12 PM UTC
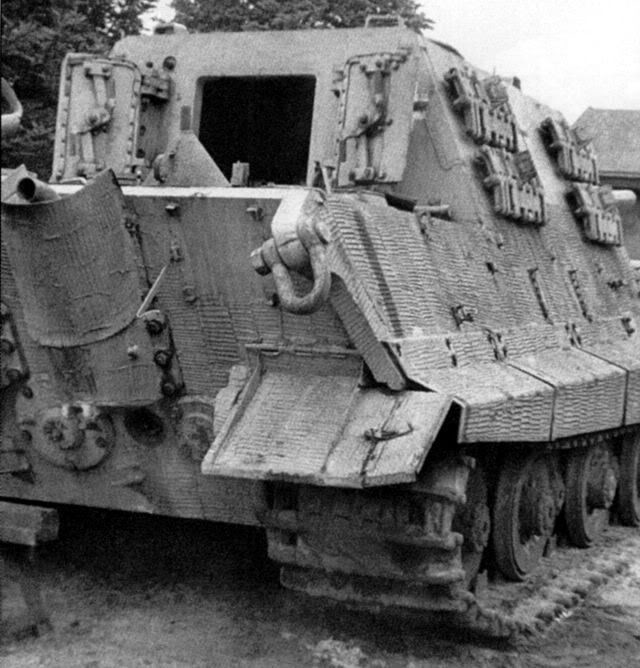
The flame cuts are coming along but tedious stuff. I am looking ahead to the rear hull and found these "holes" above the door on the left on the museum vehicle. Interestingly, the second pic shows they were also there in april of 1945. In other vehicles and in the kit there is a "fixture" there. What the heck is this? It's easy enough to reproduce but I'd like to know what it is! Thoughts?


Posted: Wednesday, October 27, 2010 - 06:46 PM UTC
I cannot tell you what it is but the 2 pictures here may help. My ref material shows Jagdtigers with the cover in the picture, with unblemished armour plate, and with the holes exposed as in the Bovington example.


I have included the first picture as I wonder if the holes are anything to do with the antenna. The example at Bovington is a Porsche version, the example at Aberdeen and Kublinka are Henschel.


I have included the first picture as I wonder if the holes are anything to do with the antenna. The example at Bovington is a Porsche version, the example at Aberdeen and Kublinka are Henschel.

panzerdoc

Joined: August 22, 2010
KitMaker: 147 posts
Armorama: 81 posts

Posted: Thursday, October 28, 2010 - 08:13 AM UTC
I can't recall seeing wiring for the antenna relay in this position in my photographic references. That being said, your schematic seems pretty convincing. I will delve deeper and see what I come up with. The two volume Devey set may address this. If not, I will do some detective work and go back through my photographic references.
Posted: Thursday, October 28, 2010 - 09:02 AM UTC
I will get you details of the book this came from, I cannot however quote text as I bought a stack of them in a second hand book shop for next to nothing as they are all in Polish.
ironpig

Joined: December 13, 2009
KitMaker: 4 posts
Armorama: 3 posts

Posted: Thursday, October 28, 2010 - 10:16 AM UTC
Howdy
I finally found your stuff, let me know what the big KV battle is about. Your KV looks great, on this "flame cut" do you have a photo of the actual cut up close? What was the purpose of the cut?
By the way the top link does not seem to function.
Ed
I finally found your stuff, let me know what the big KV battle is about. Your KV looks great, on this "flame cut" do you have a photo of the actual cut up close? What was the purpose of the cut?
By the way the top link does not seem to function.
Ed


panzerdoc

Joined: August 22, 2010
KitMaker: 147 posts
Armorama: 81 posts

Posted: Thursday, October 28, 2010 - 10:21 AM UTC
That link is dead but the original thread is somewhere behind. Maybe the armorama folks could merge the two. The torchcuts are on the edges of the plates of the mantle/superstructure where the they were welded together at the joints.

panzerdoc

Joined: August 22, 2010
KitMaker: 147 posts
Armorama: 81 posts

Posted: Thursday, October 28, 2010 - 11:01 AM UTC
So looking at the Devey book there are no pictures of an antenna in that position but in the section on "wireless" it says that in command vehicles an additional receiver unit with the star antenna was in the left rear of the vehicle which is where the holes in question are. Based on your drawing and this reference, I think it is a safe assumption that this was an antenna mount. I am still looking for confirmatory photographs. 

Posted: Thursday, October 28, 2010 - 07:55 PM UTC
This is the only image I could find that looks to show what you are after.


panzerdoc

Joined: August 22, 2010
KitMaker: 147 posts
Armorama: 81 posts

Posted: Friday, October 29, 2010 - 10:27 AM UTC
Thanks, Great picture. What reference is this from...I don't have it and I thought I had everything out there. I went back through all of my references last night and ironically, I can't even find a picture of a jagdtiger with an antenna in the position adjacent to the commanders hatch, only drawings. I have confirmed that the 3 "holes" for the antenna mount were present when 305004 was captured in April of 1945. There is a bracket on the rear wall under these holes on a Henschel vehicle interior that may have been for an antenna relay. I will keep digging.... 

Posted: Friday, October 29, 2010 - 07:12 PM UTC
Doc this was sent to me many years ago now in amongst a batch of Jagdtiger pictures.
Posted: Friday, October 29, 2010 - 07:17 PM UTC
Here is the original picture, I hope it helps.


panzerdoc

Joined: August 22, 2010
KitMaker: 147 posts
Armorama: 81 posts

Posted: Saturday, October 30, 2010 - 09:30 AM UTC
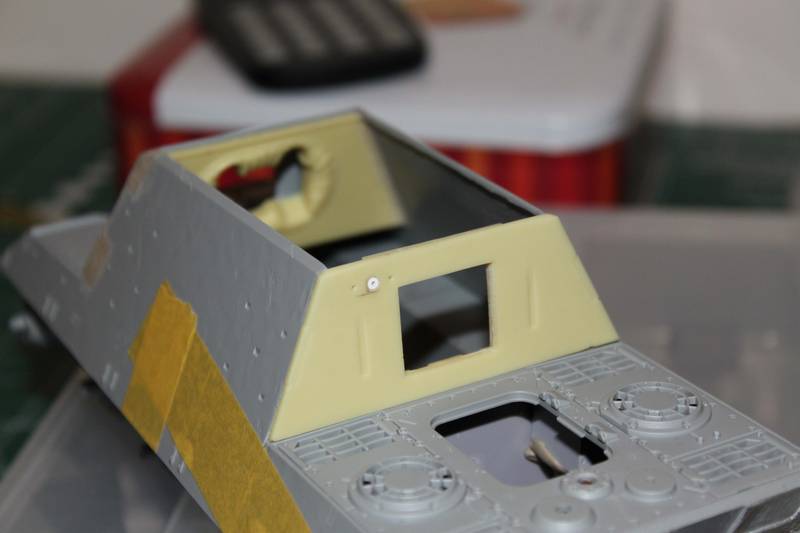
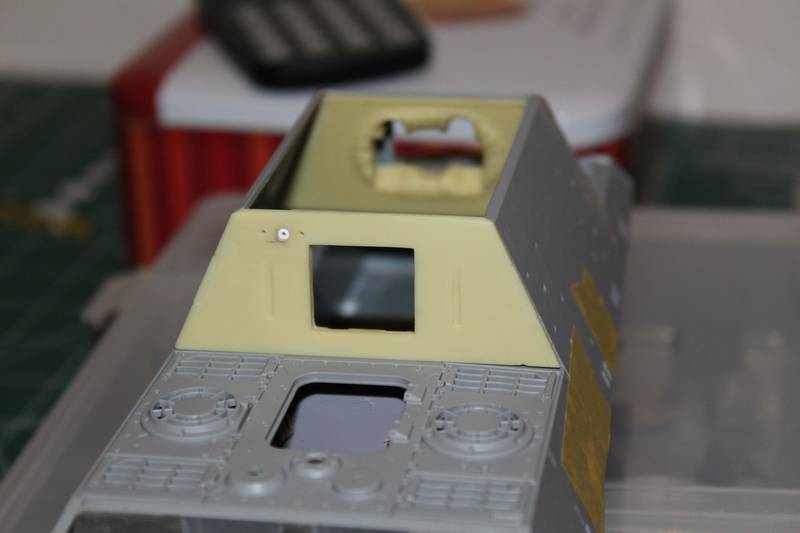
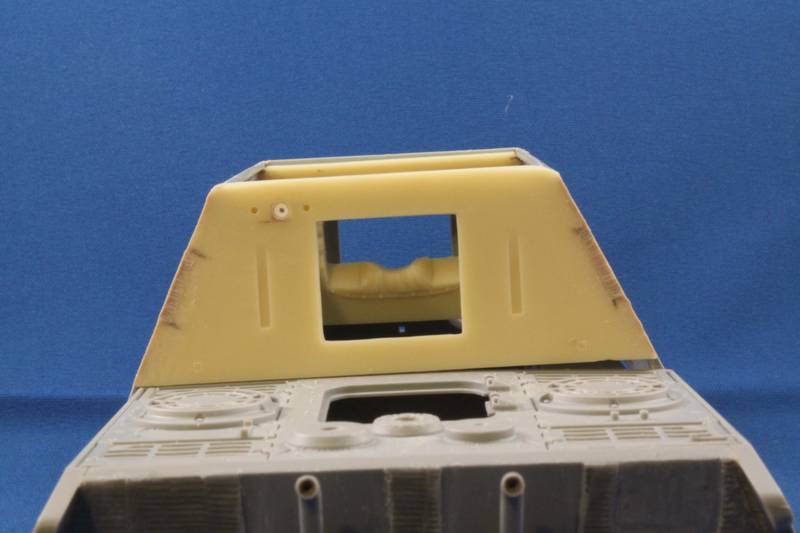
Mystery holes (presumed antenna mount at this point) made and superstructure back together. As you can see the fit of the verlinden piece is not quite perfect with the DML kit. The joints and corners will need to be reworked with apoxy clay.

Teaker11

Joined: July 02, 2009
KitMaker: 962 posts
Armorama: 786 posts

Posted: Monday, November 01, 2010 - 10:56 AM UTC
Ah now I find you, looking good can't wait for more pictures. I am going to start a build for the M911 Probably tomorrow I have all my pictures just have to restart. Jim offered to move them but Ill just start a new thread. any luck on other issues?
JIm
JIm

panzerdoc

Joined: August 22, 2010
KitMaker: 147 posts
Armorama: 81 posts

Posted: Wednesday, November 03, 2010 - 03:16 AM UTC
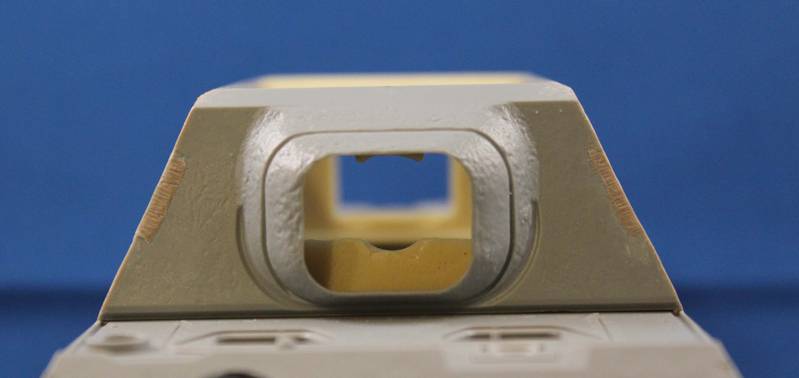
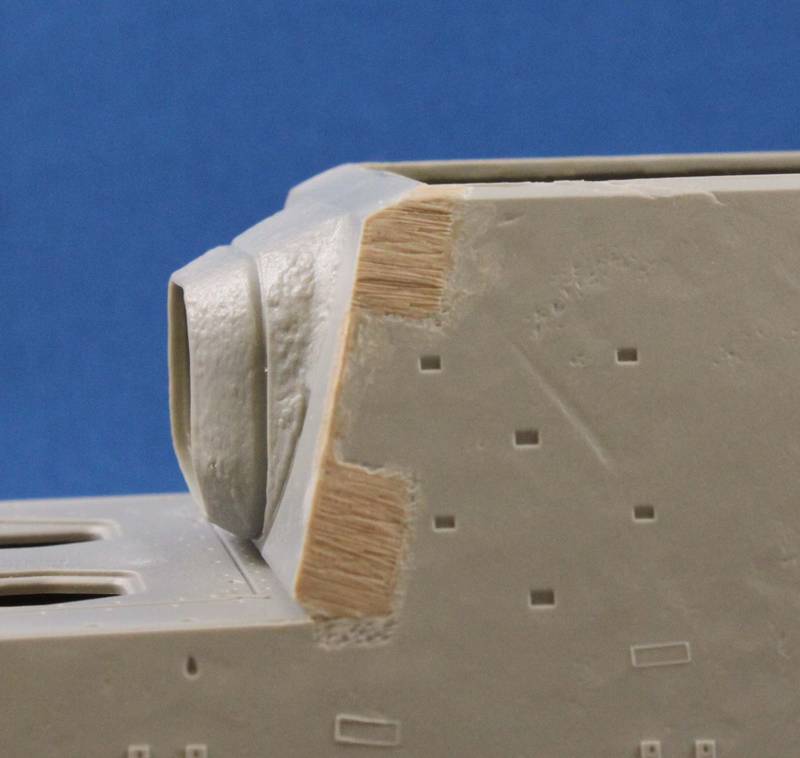
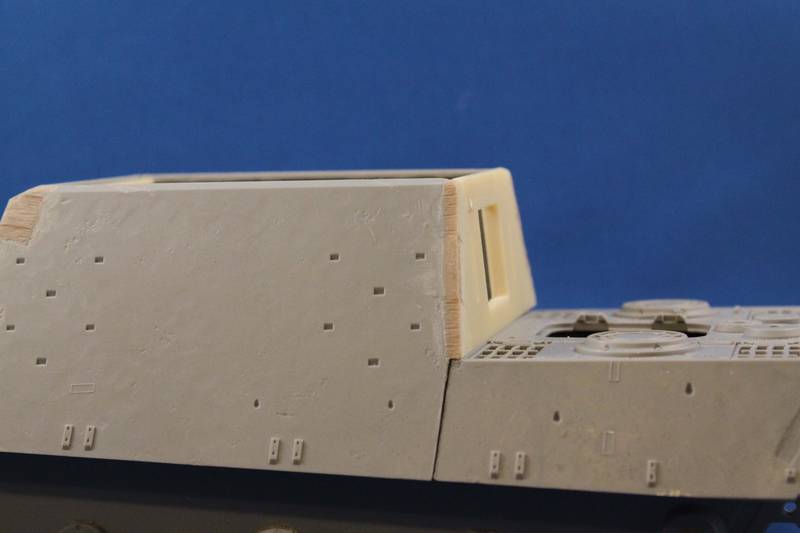
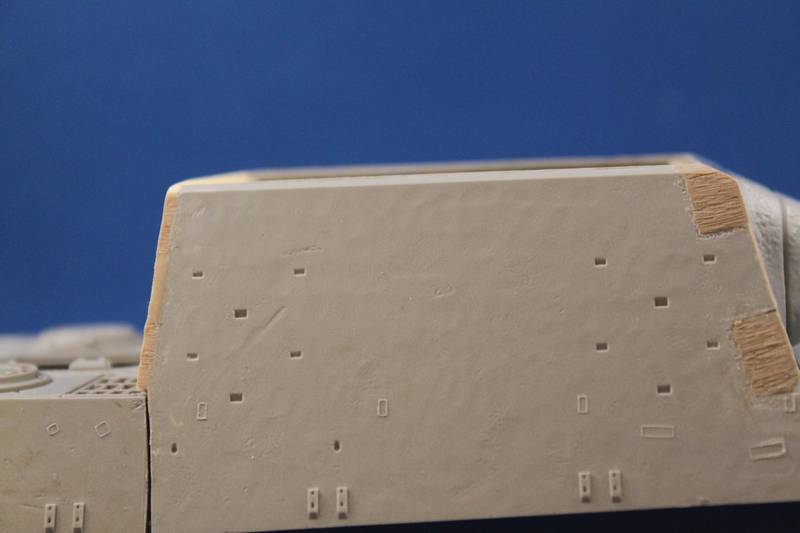
The flame cuts and corners have been reworked. A little sanding and weld seams to go. It turns out the Verlinden roof does not fit correctly so more work to do.


 |


