_GOTOBOTTOM
Armor/AFV: Axis - WWII
Armor and ground forces of the Axis forces during World War II.
Hosted by Darren Baker
StuG III Ausf.G
Altered82
Visit this Community
Texas, United States
Joined: January 03, 2006
KitMaker: 24 posts
Armorama: 23 posts
Posted: Monday, November 22, 2010 - 06:02 AM UTC
Hello gentlemen,

Have another build for your approval, critique, impressions. Just to kinda show I'm not only building softskin Opel's

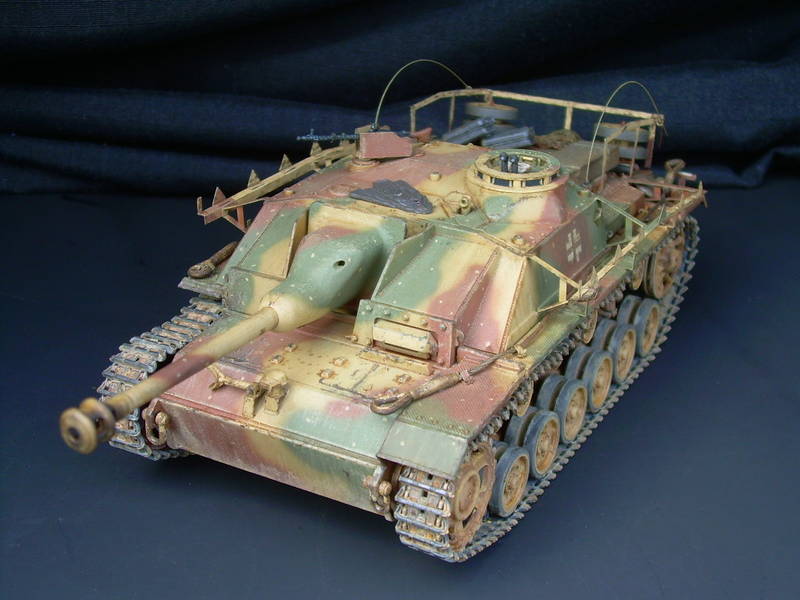
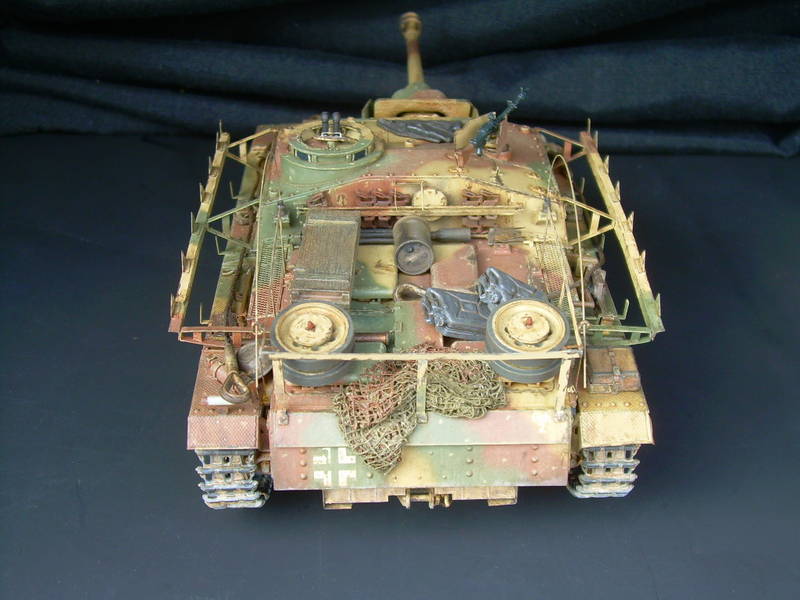
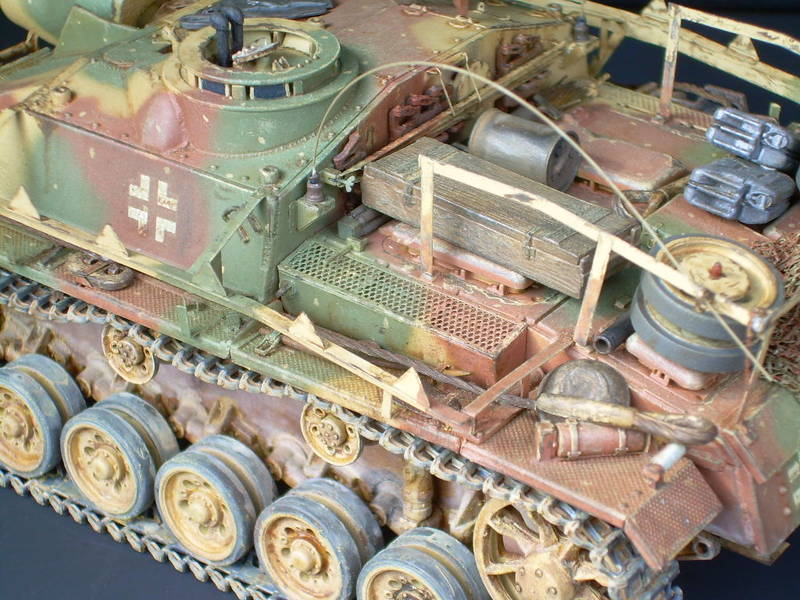
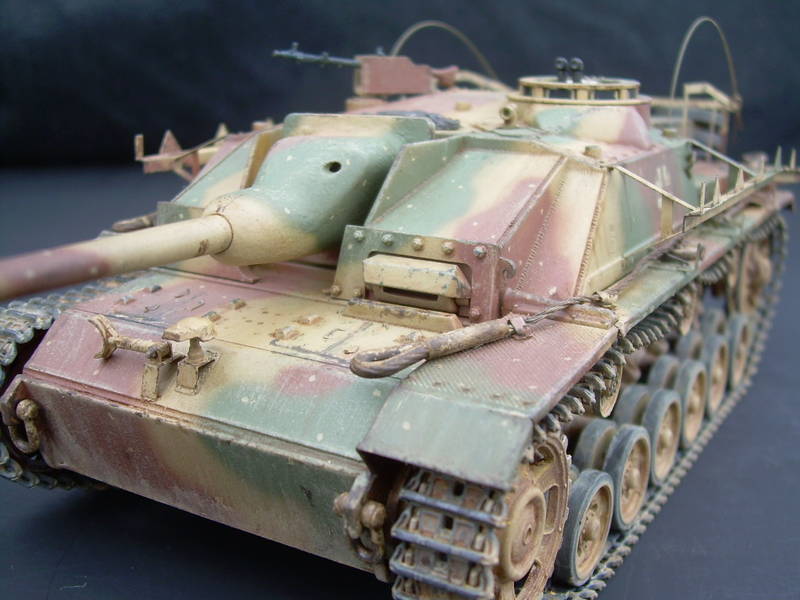
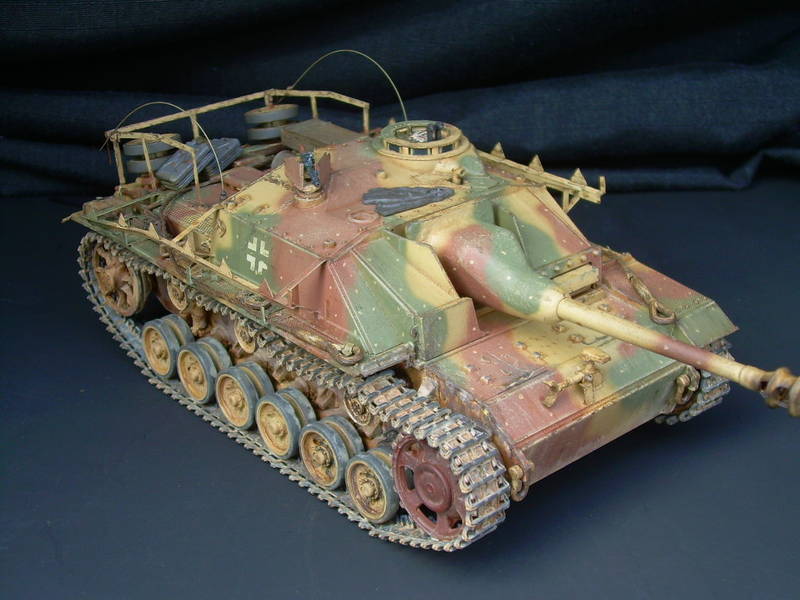
This is the 1/35 Dragon Imperial series StuG III G. It's also the first full PE set I used on a build. So, it was an education. PE is the Eduard set which was great to work with.
Hope ya enjoy, all comments are always welcome
Thank you

Dale


bill_c
Staff MemberCampaigns Administrator
MODEL SHIPWRIGHTS
Visit this Community
New Jersey, United States
Joined: January 09, 2008
KitMaker: 10,553 posts
Armorama: 8,109 posts
Posted: Monday, November 22, 2010 - 06:05 AM UTC
Very nice work.
ericadeane
Visit this Community
Michigan, United States
Joined: October 28, 2002
KitMaker: 4,021 posts
Armorama: 3,947 posts
Posted: Monday, November 22, 2010 - 08:27 AM UTC
Looks very nice! May I point out two items, though?

1) German antennae were not "whip" type that you could see on US equipment. German antennae were hollow rods -- they wouldn't bend like that.

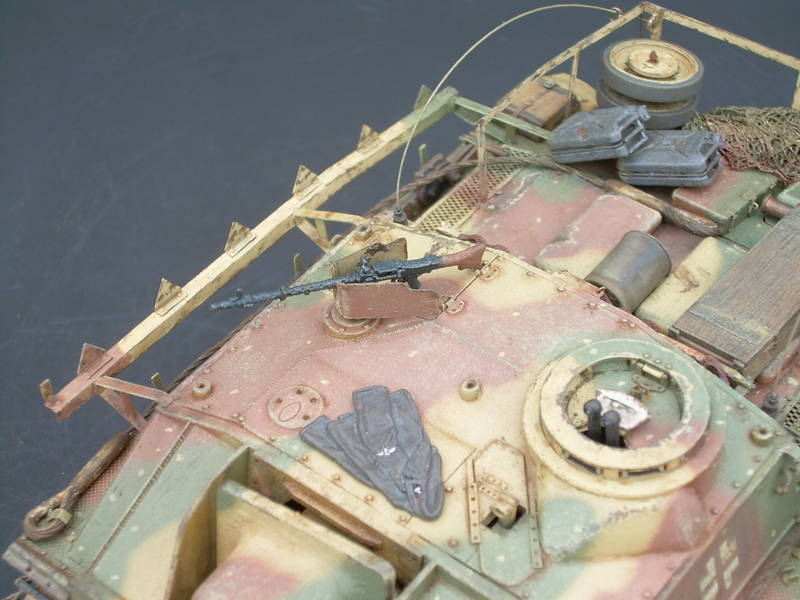
2) I could be wrong but I don't ever recall seeing the remote mounted MG with the butt stock in place. I would think the crew would keep it secured as it needlessly lengthened the MG, possibly being an obstruction for the loader's hatches' opening.

Kuno-Von-Dodenburg
Visit this Community
England - North, United Kingdom
Joined: February 20, 2007
KitMaker: 1,453 posts
Armorama: 1,319 posts
Posted: Monday, November 22, 2010 - 10:10 AM UTC
Very good camo job, nice subtle weathering not overdone. I like it.

- Steve
Altered82
Visit this Community
Texas, United States
Joined: January 03, 2006
KitMaker: 24 posts
Armorama: 23 posts
Posted: Monday, November 22, 2010 - 10:44 AM UTC
Thanks for looking in and taking the time to post guys

Roy, I had no idea of those two facts, thank you. The remote MG was put in place as Dragons instructions.... well, instructed, but that doesn't mean they were accurate at all.

You wouldn't happen to have a pic of how the tail of the MG would look do you? I'd imagine right at the separation between the stock and MG body there would be a collar of some sort? So that tail should be drilled/ hollowed out?

Appreciate everything guys


Dale
ericadeane
Visit this Community
Michigan, United States
Joined: October 28, 2002
KitMaker: 4,021 posts
Armorama: 3,947 posts
Posted: Monday, November 22, 2010 - 11:52 AM UTC
Hi Dale: I don't know the exact method but there seems to be some type of screw-on cap. To alter the 1/35 MG, I would just cut it off and round the edges. I'll try to find an image for you.
Altered82
Visit this Community
Texas, United States
Joined: January 03, 2006
KitMaker: 24 posts
Armorama: 23 posts
Posted: Monday, November 22, 2010 - 02:43 PM UTC
I think I found it Roy

Went through some other posts elsewhere and found one you had posted in.
GregCloseCombat
Visit this Community
California, United States
Joined: June 30, 2008
KitMaker: 2,408 posts
Armorama: 2,394 posts
Posted: Monday, November 22, 2010 - 06:43 PM UTC
Sweeeeeeet build. Glad the fixes weren't serious.
Oddball007
Visit this Community
Queensland, Australia
Joined: July 17, 2009
KitMaker: 76 posts
Armorama: 70 posts
Posted: Monday, November 22, 2010 - 06:50 PM UTC
Great camo scheme nice build.
BLACKWATER
Visit this Community
Yunnan, China / 简体
Joined: August 05, 2010
KitMaker: 449 posts
Armorama: 441 posts
Posted: Monday, November 22, 2010 - 07:55 PM UTC
Hello Dale
This is a very good work, thanks for sharing.
Blackwater
dropshot
Visit this Community
Provincia de Pontevedra, Spain / Espaņa
Joined: October 23, 2006
KitMaker: 300 posts
Armorama: 214 posts
Posted: Monday, November 22, 2010 - 09:13 PM UTC
Great work Dale & great photography too. What sort of base are you going to put it on ,because I think it deserves something that does it justice but something that is simple would make it even more outstanding ?
wedgetail53
Visit this Community
Queensland, Australia
Joined: October 02, 2008
KitMaker: 658 posts
Armorama: 629 posts
Posted: Monday, November 22, 2010 - 10:35 PM UTC
Dale

Looks great - you might, however, like to check which colour "spots" were adjacent to which camo colours (they weren't all yellow) - there was a definite pattern. However, having said that, yours could well be a field applied application for which the rules may well not apply.

Regards

Rob
Biggles2
Visit this Community
Quebec, Canada
Joined: January 01, 2004
KitMaker: 7,600 posts
Armorama: 6,110 posts
Posted: Wednesday, November 24, 2010 - 08:14 AM UTC
Nice painting and weathering, but you stuck on the MG shields upside-down! The cut-outs should be on the lower edge, not the top. Little late to fix that now!
 _GOTOTOP