Decals are on...all six of them 
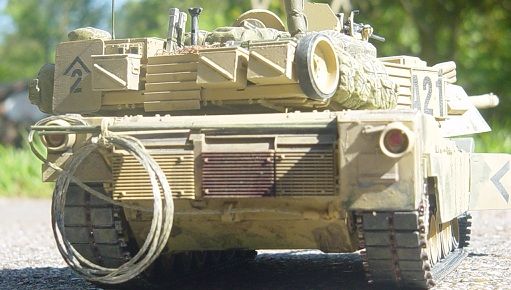
A wash has been applied and is drying. Once dry I'll keep on with the weathering. Will probably keep this one on the light side as the track issues have put me off going above and beyond with it... More to follow soon. Thanks, "Q"
Posted: Wednesday, December 01, 2010 - 03:06 AM UTC
Thanks for the kudos Shane, but this one is done and won't be re-tweaked. It was a review piece so all the gems and warts I encountered will be spoke of. I'm putting a fork in this one and calling it done. The decals went on with a wee bit of silvering, but that was dealt with using a new #11 blade to slice the offending area and a drop or two of Micro Sol being applied over the decal. I mentioned that I was not going to go all out in regards to weathering and I didn't. I kept it simple with a wash of Raw Umber and a light dry brushing....that's it. I was less than thrilled when all was said and done, but it does look like an M-50. The full review will be submitted shortly. Thanks for following along. "Q"
"Don't fear the night, fear what hunts at night"
Red4
California, United States Joined: April 01, 2002
KitMaker: 4,287 posts
Armorama: 1,867 posts
Thanks for sharing you stunning work. I'll be starting a scratchbuild of one of the early IDF M4s as well at this same kit. So I can look to your grate build for pointers.
Thanks
Building the impossible is my main goal. Build baby build never sleep!!
tankrou
Attica, Greece / Ελλάδα Joined: November 25, 2009
KitMaker: 55 posts
Armorama: 53 posts
Dear Matt: I would like to say very nice! I'm currently at this stage right now. the wheel tracks (6 of them) to the sides of the tank body. I did not cut on pin off the side like you did; however I filed the grooves in the body.
I'm sorry I'm not up to speed on tank parts yet. I'm new to building tanks. I build mostly WWII planes and Sci-Fi stuff like Battlestar. If you have images of how you glued the wheels to the tank sides this would really help out. I need to see how you glued them in further detail.