_GOTOBOTTOM
Constructive Feedback
For in-progress or completed build photos. Give and get contructive feedback!
M4A3E8 ETO ~ Battlewagon
errains
#045
Visit this Community
South Carolina, United States
Joined: September 23, 2005
KitMaker: 362 posts
Armorama: 350 posts
Posted: Sunday, February 27, 2011 - 07:37 AM UTC
Battlewagon M4A3E8 ETO: Part 9-Grabbing a Hand Full

Greetings to All!!

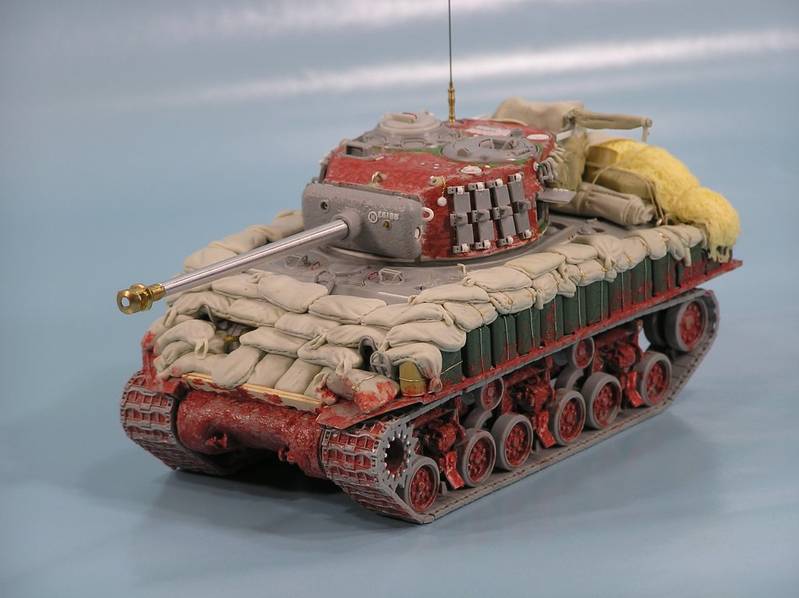
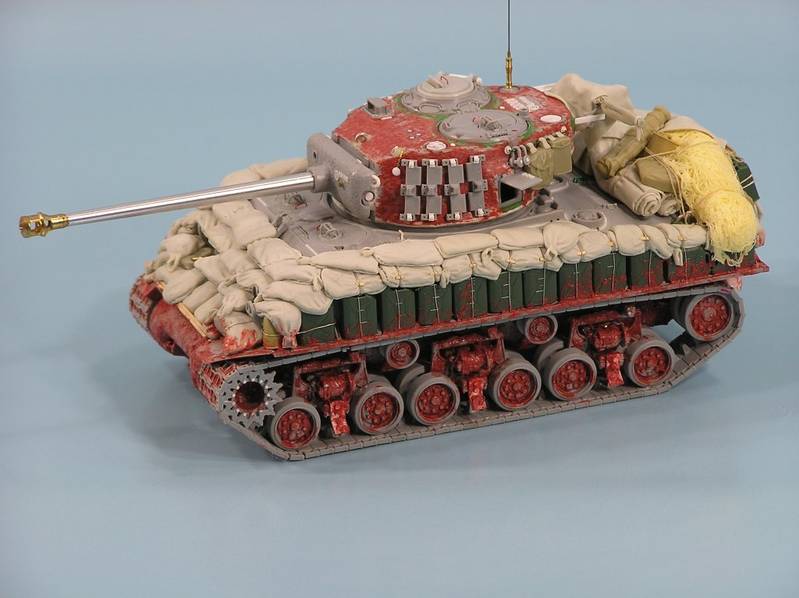
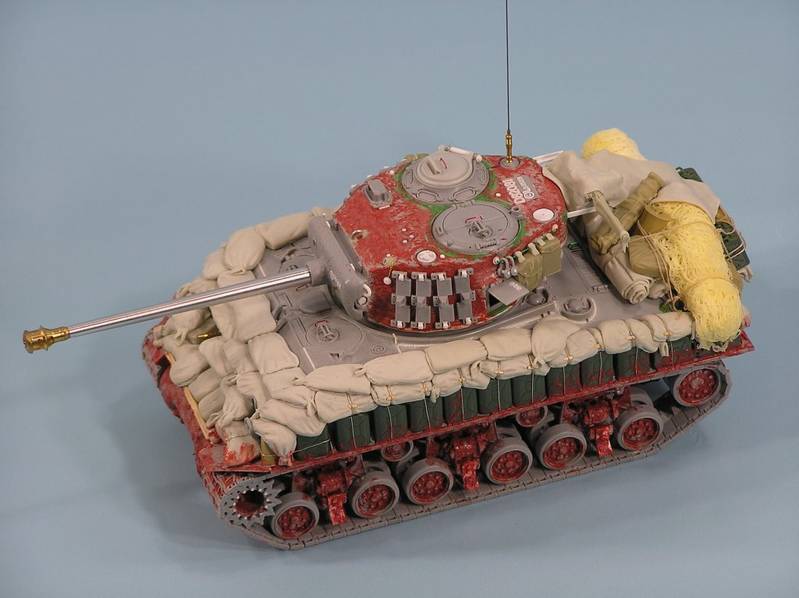
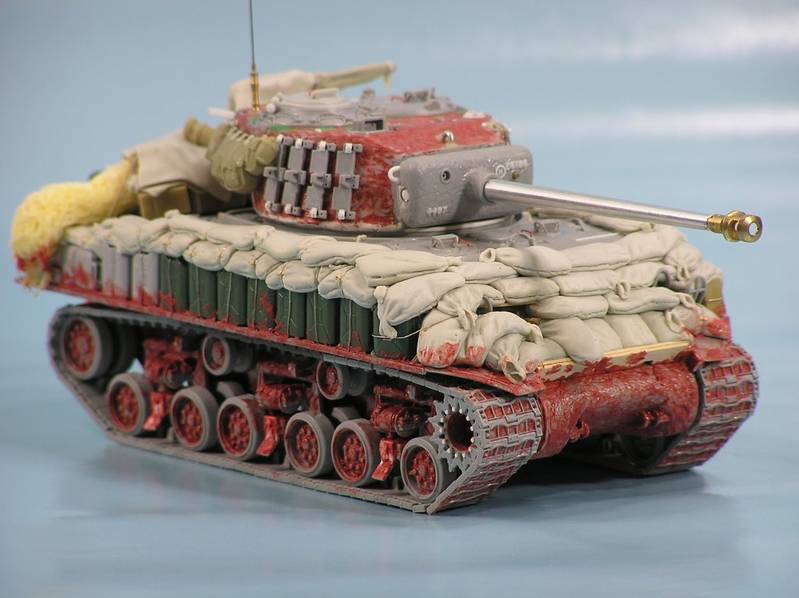
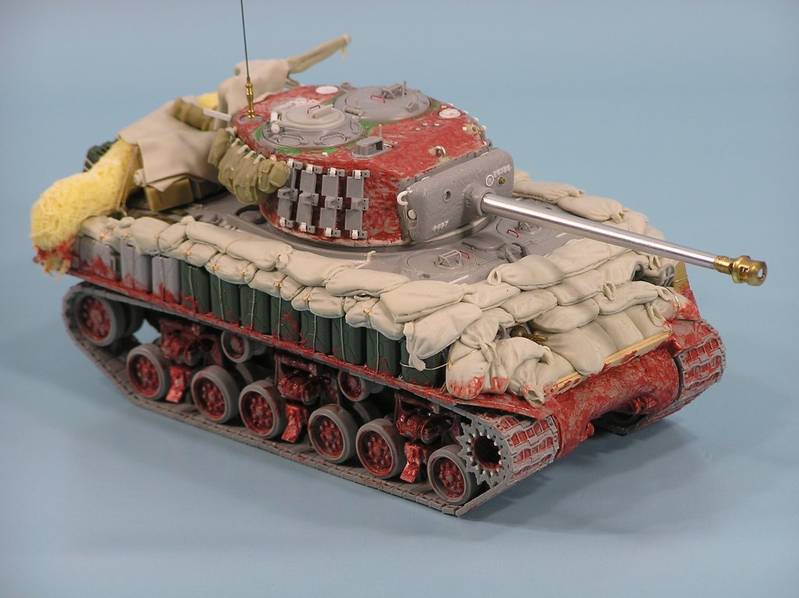
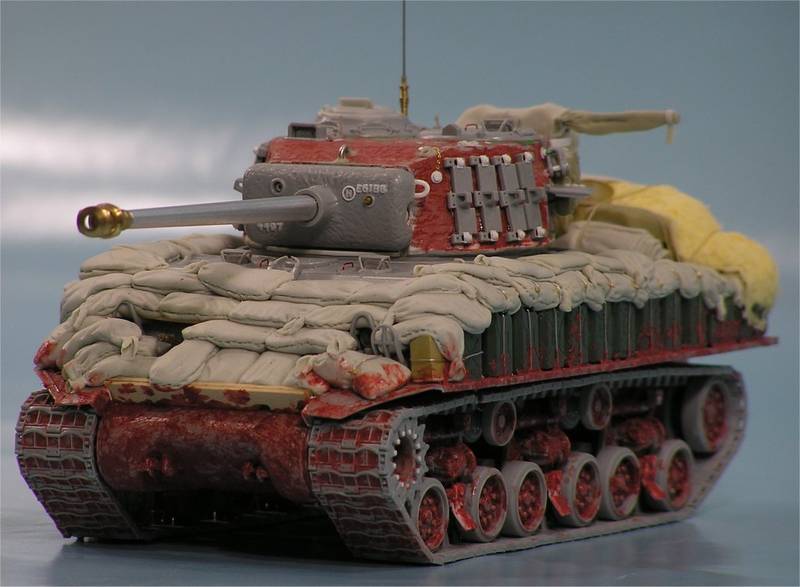
While this is the first post for this build log it is actually part 9 in an on going project for the Sherman Campaign. I decided to start this build log as recent events have accrued that may impact my ability to complete the campaign by the end date. But I’m hoping to finish on time.

Below are links to the pervious posts for this build if you wish to review the progress up to this point.

Part 1-Concept
Part 2-Upper/Lower Hull Fitting & Assembly
Part 3-HVSS Suspension Assemblies
Part 4-Welding
Part 5-What a Bloody Mess!!
Part 6-How About A Lift?
Part 7-Making Tracks
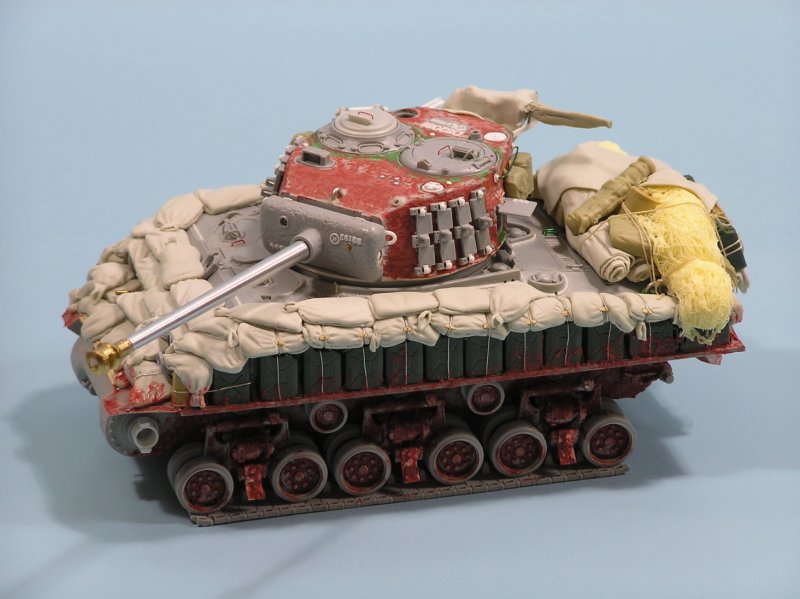
Part 8-Basic Upper Hull Completed
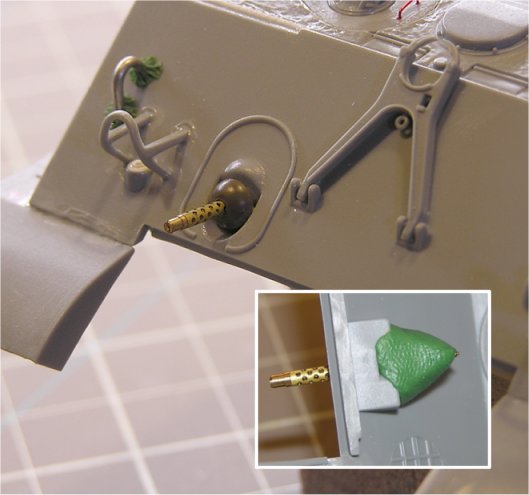
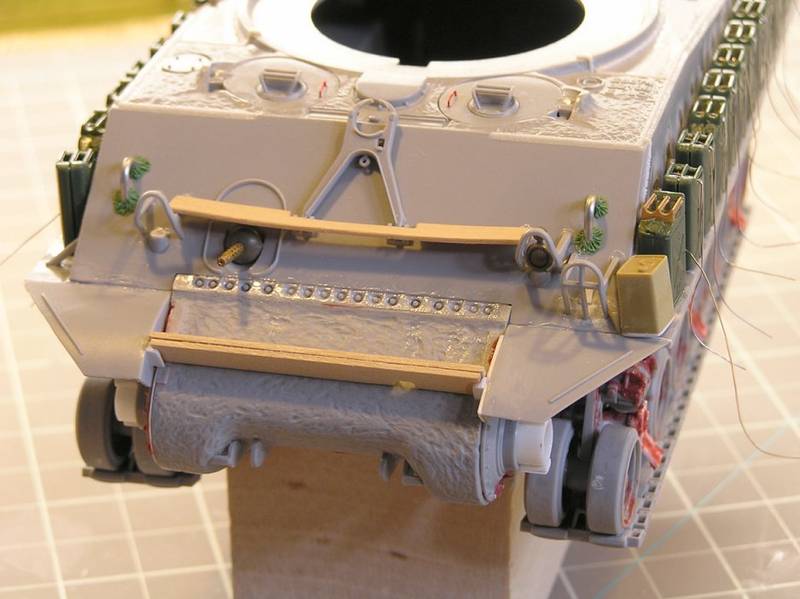
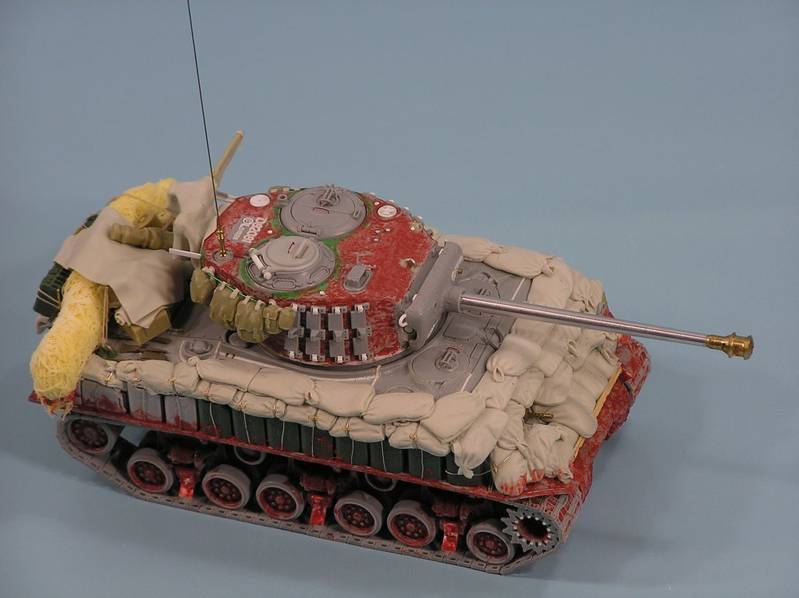
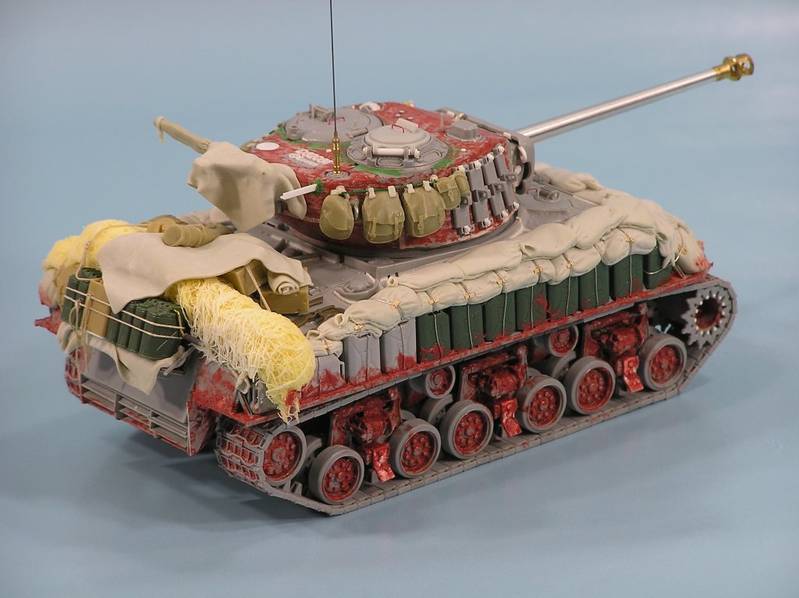
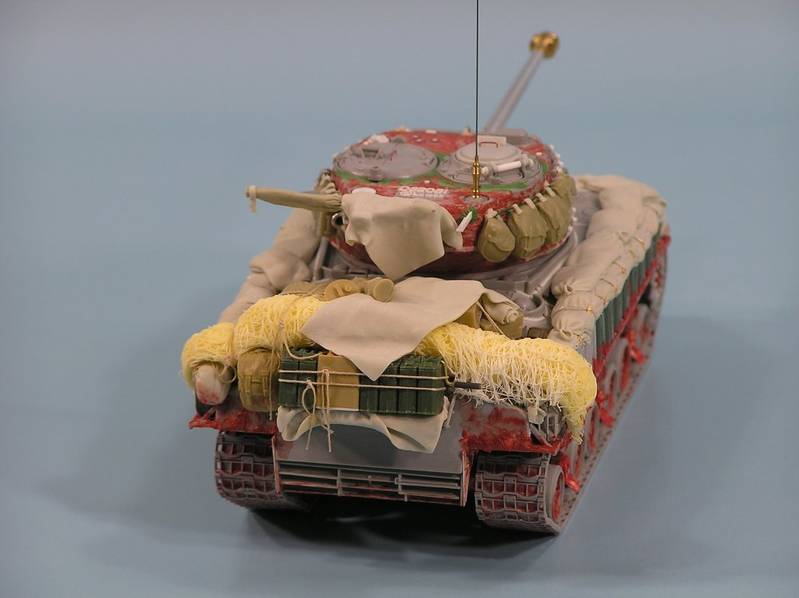
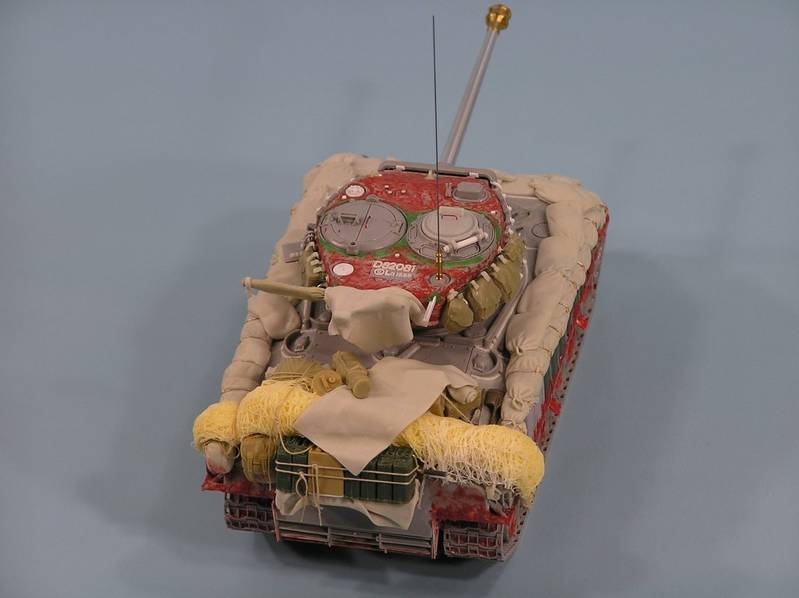
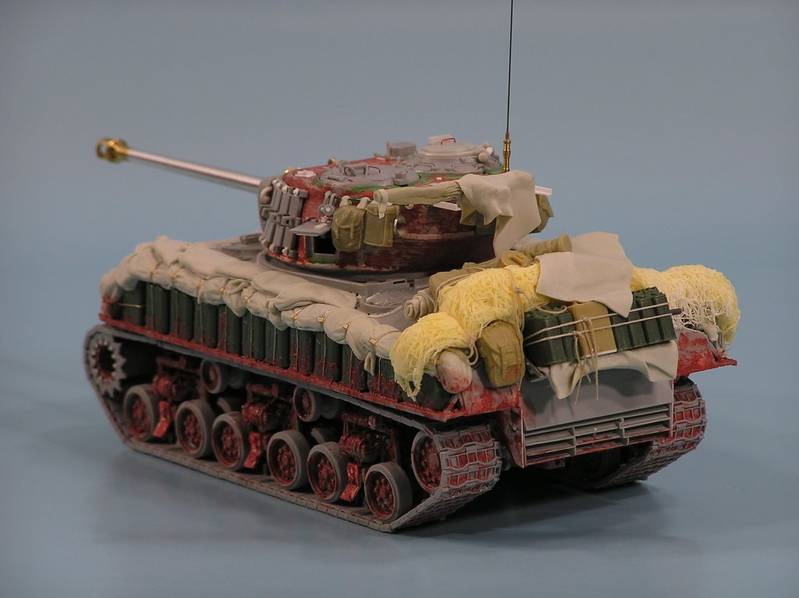
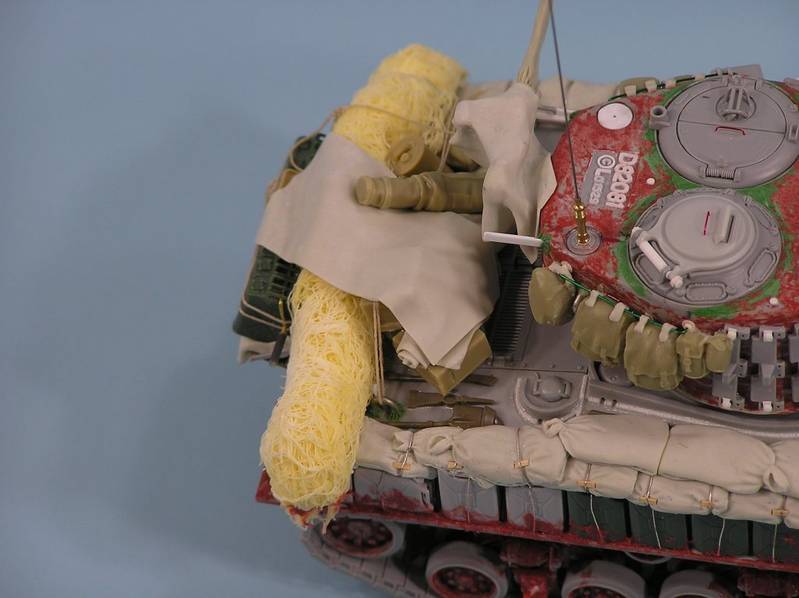
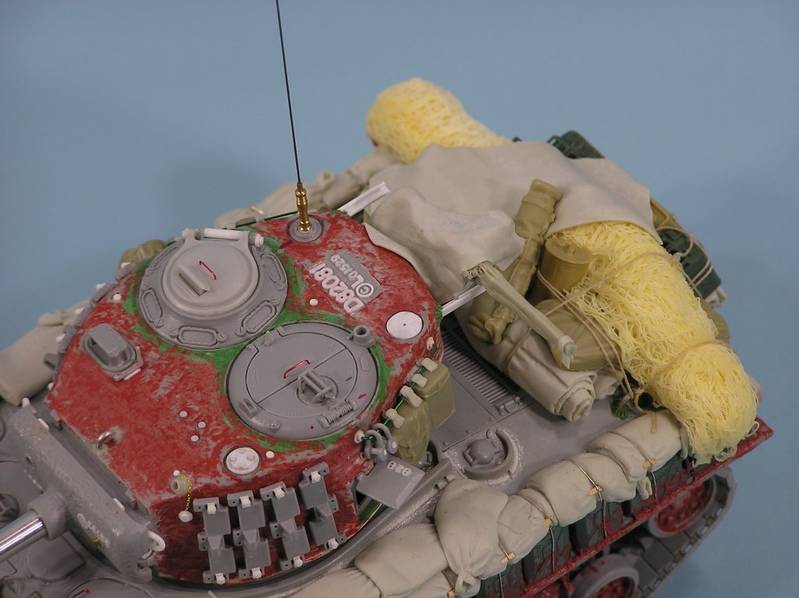
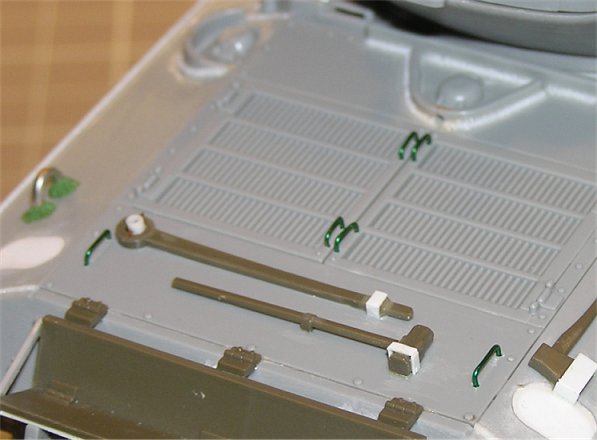
Now on to the current post, I’ll be covering the constructing of handles for hatches, power plant access doors and this can even be use for tie downs.

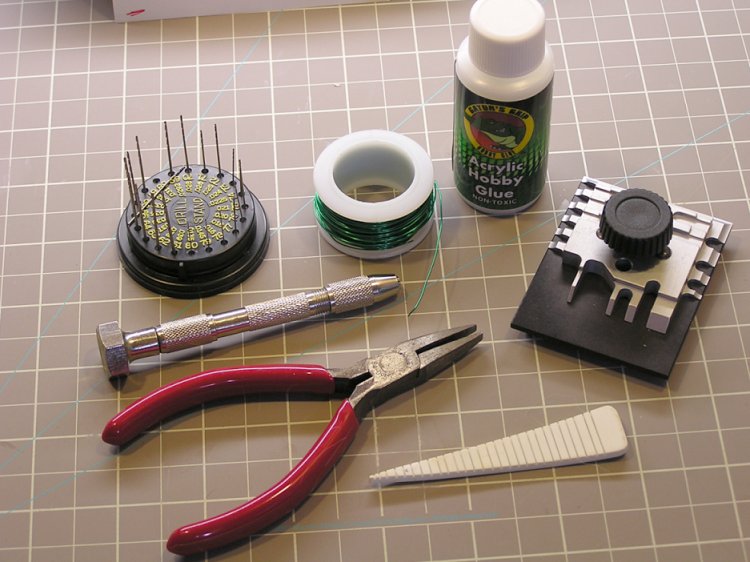
Below you see the tools that are utilized. Holes are drilled for the appropriate size wire being used at the location where the handles will be applied. The pliers will help squire the handles after the basic shape is set using the jig.


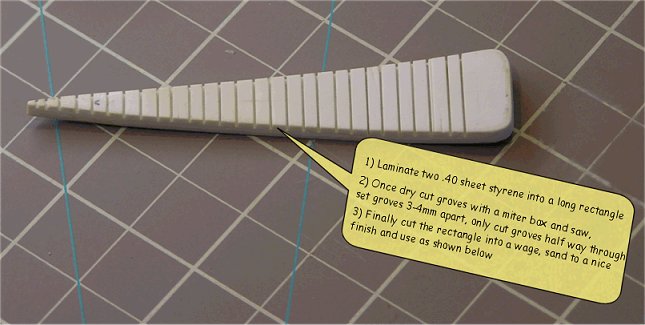
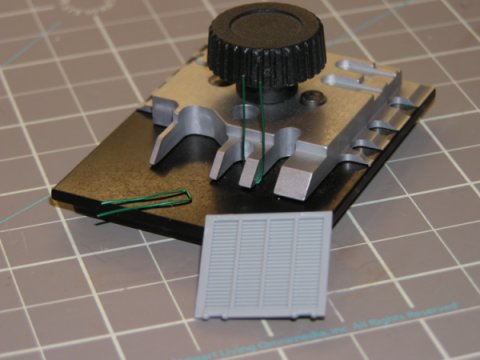
The Jig below helps form the handles into the basic shape. The best part of this jig is that it’s free with the only cost being in materials used to build it. I built this one about 15 years ago!!


Another option for forming the handles is to use a PE folder if you own one already. Just use an appropriate sized “finger” on the folder to set the width of the handle and finish squiring it off with your handy pliers.


The following illustration steps you through the process of using the jig to form the shape of handle, not hard to do but does need a little practice.


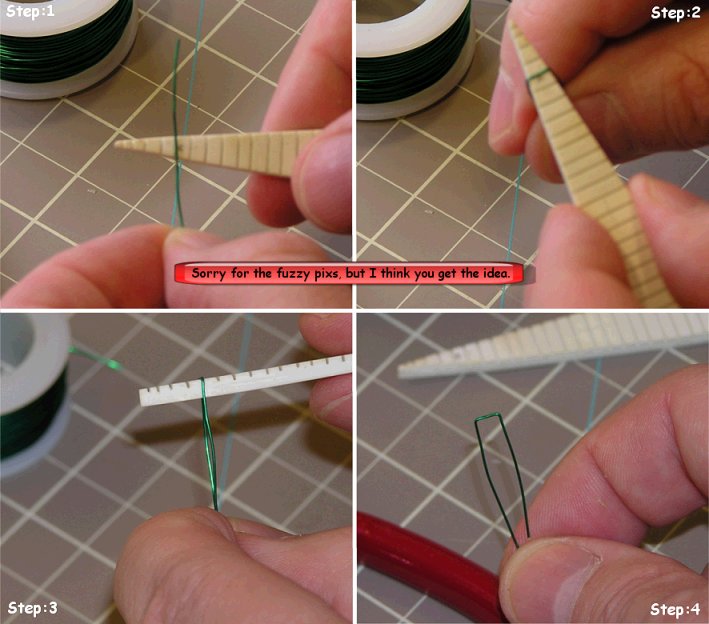
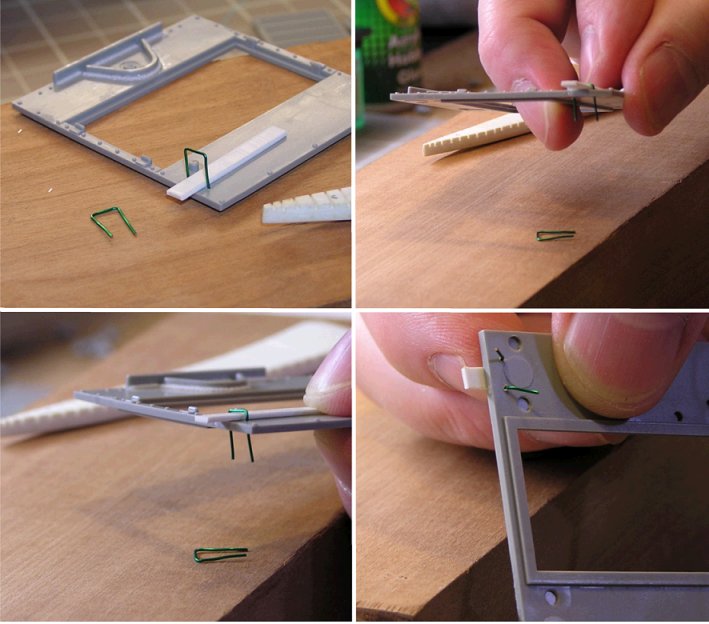
Next is to attach the handles to the location. Use a spacer to help set the height of handle. On the backside bend the wire in to help hold the handle in place. Use whatever glue you like and allow to dry.


That’s it your handles are basically done. If you like add a little epoxy putty for welds at the base of the handles.


I hope many of you found these helpful and provide ideas that you can apply to your future modeling projects!!
Precious_rob
Visit this Community
United States
Joined: March 09, 2009
KitMaker: 206 posts
Armorama: 183 posts
Posted: Sunday, February 27, 2011 - 08:54 AM UTC
Eric, that is an ingenious idea for a handle jig, thanks a ton for sharing.
210cav
Visit this Community
Virginia, United States
Joined: February 05, 2002
KitMaker: 6,149 posts
Armorama: 4,573 posts
Posted: Sunday, February 27, 2011 - 08:57 AM UTC
Eric-- absolutely brilliant! It takes someone from Virginia to come up with this process.......well done!
DJ
tankglasgow
Visit this Community
Scotland, United Kingdom
Joined: October 04, 2010
KitMaker: 275 posts
Armorama: 260 posts
Posted: Sunday, February 27, 2011 - 10:12 AM UTC
Handle jig is clever,should get a patent on it ! Thanks for sharing.
ProfessorP
Visit this Community
Minnesota, United States
Joined: February 20, 2007
KitMaker: 339 posts
Armorama: 325 posts
Posted: Sunday, February 27, 2011 - 12:25 PM UTC
That's absolutely brilliant. And to think i was about to drop $40 on a handle bending jig from Micro-Mark!

I've enjoyed reading the rest of your blog. Hope you finish up before having to shuffle everything to a new home.

Now...where the heck's my sheet styrene and miter box?...

retiredyank
Visit this Community
Arkansas, United States
Joined: June 29, 2009
KitMaker: 11,610 posts
Armorama: 7,843 posts
Posted: Sunday, February 27, 2011 - 12:45 PM UTC
Scratch built jig just put $40 back in my pocket. Is that florist's wire you are using?
errains
#045
Visit this Community
South Carolina, United States
Joined: September 23, 2005
KitMaker: 362 posts
Armorama: 350 posts
Posted: Sunday, February 27, 2011 - 01:18 PM UTC
Thanks to everyone.

I guess I should have gotten a patent on this 15 years ago. But I like the idea of sharing this to the modeling community for free, and who doesn’t like saving 40 clams!


@ Don: I’ve been following your 761st Sherman in the campaign. You’ve done great work. I like your sand bags. I’m currently work the same on mine and will post the results soon.

@Matt: The wire in the pictures is from a 3 pack of different sizes I got from Radio Shack or “The Shack” as they are called now. But florist wire would work just as well.

Everybody keep up the great work!

warreni
Visit this Community
South Australia, Australia
Joined: August 14, 2007
KitMaker: 5,926 posts
Armorama: 712 posts
Posted: Sunday, February 27, 2011 - 02:18 PM UTC
I think the idea was patented many years ago. The same type of tool is used to produce links of wire for circuit boards. The one I used has two metal rods that the forming tools can slide along and allows you to make a large variety of sizes. Wish I could remember the brand.. All I remember is that it was black with silver fittings.
210cav
Visit this Community
Virginia, United States
Joined: February 05, 2002
KitMaker: 6,149 posts
Armorama: 4,573 posts
Posted: Monday, February 28, 2011 - 03:24 AM UTC

Quoted Text

I think the idea was patented many years ago. The same type of tool is used to produce links of wire for circuit boards. The one I used has two metal rods that the forming tools can slide along and allows you to make a large variety of sizes. Wish I could remember the brand.. All I remember is that it was black with silver fittings.


Warren-- there was one that a model store on the West coast was selling. I recall it was rather pricey (But what is not these days). Basically did what you describe although it came with no instructions nor ideas for the size wire to be used. I am going to check with the local florist store for the type Eric describes.
Good ideas!
DJ
errains
#045
Visit this Community
South Carolina, United States
Joined: September 23, 2005
KitMaker: 362 posts
Armorama: 350 posts
Posted: Saturday, March 05, 2011 - 01:23 PM UTC
Battlewagon M4A3E8 ETO: Part 10-Rad-a-tat-tat….ka-boom


Greetings everyone!

In this installment the RB Models 76mm main gun tube and muzzle break and 30cal MGs will be added to the build.


First step was to rework the mantlet using a Dremel engraving cutting bit to give it a cast texture.
The engraving bit is lightly passed over the plastic in a random pattern. This produces a heavy texture, which is more at home on Russian type castings. I always wanted to try this and am happy with the result, but not really appropriate for American castings. However this same method has been used on the transmission cover and will be also used on the turret to maintain consistency throughout the subject. Next I replaced the lifting rings with plastic rod that was thermoformed around an appropriate sized drill bit and submerged into boiling water. Small diameter plastic tube was use for the 30cal coaxial…not really happy with the way it turned out. Finally the foundry marking are of course from Archer 3D casting symbols.


Once the muzzle break was assembled the gun tube was then attached to the mantlet using a simple jig. Plastic strips run through the muzzle break help insure that it is square with the mantlet.


Lastly the bow mounted 30cal MG was assembled and placed into the hull. Epoxy putty was used to secure it from the inside.


More to come soon I’ll see you all then!
ProfessorP
Visit this Community
Minnesota, United States
Joined: February 20, 2007
KitMaker: 339 posts
Armorama: 325 posts
Posted: Saturday, March 05, 2011 - 04:21 PM UTC
As usual, great work Eric. You are a brave man going after your mantlet and turret with a Dremel to get the casting texture! I was nervous enough doing mine with Mr. Surfacer. Oh, well, I suppose a bad enough slip up just means ordering up a nice resin turret.

I also like the jig you built to make sure the barrel and muzzle brake were square. Again, it was a nerve-wracking experience for me trying to find the right selection of paint bottles, styrene blocks and storage tubs to get my mantlet and barrel to rest in the right drying position once I'd gotten it together and applied the Duro epoxy. It worked out but I suppose had I planned better, I would have built something like you did.

I'm really interested to find out how you are going to paint the mud you've applied to the bogies and hull. Seems like a good technique but a bit out of sequence given that you will have to paint the OD color over it first and then go back and paint the mud color.

Anyway, great work. Really liking this blog. Keep up the good work.

Cheers!
errains
#045
Visit this Community
South Carolina, United States
Joined: September 23, 2005
KitMaker: 362 posts
Armorama: 350 posts
Posted: Monday, March 07, 2011 - 12:12 PM UTC
Battlewagon M4A3E8 ETO: Part 11- Patton’s Aggravation


As has been well documented Gen. Patton had, shall we say had definite opinions regarding the use of supplemental armor, notably sandbags. Despite his efforts to discourage the practice tankers had other ideas. The supplemental armor arrangements used by tanker during World War II makes modeling this era one of the major enjoyments. Finally I got to the point where it was time to add on the sandbags, oh the fun. However at the sometime I realized that if not properly done it could also severely distract from the over all finish. With excitement and apprehension I proceed with caution. The entire process took three weeks not wanting to rush the results.


Had to use spacers, the white blocks, so that the jerry can would sit at the edge of the fenders.


The wood planking to support the sandbags. The wire as shown in the inspirational photo to secure the sandbags.


I feel the results are satisfactory and capture the essence of the photograph. If anything the sandbags are bit on the large size.

Let me know what you think.

This will be the last update for a while as my wife and I will be moving to a new residence. If all goes as planned I will have my work space back up and running by the middle of April, if not sooner.
ProfessorP
Visit this Community
Minnesota, United States
Joined: February 20, 2007
KitMaker: 339 posts
Armorama: 325 posts
Posted: Monday, March 07, 2011 - 01:27 PM UTC
NICE!

Great work as usual. You really got the "sag" just right on these, especially on the open ends. What did you end up using to make these and how much "sculpting" versus just mashing them into place did you have to do?

Also, in your research, did you find anything that indicated why the tankers used Jerry cans to support the sandbags? Doesn't seem like those would offer much ballistic protection unless they were filled with concrete or something.

Good luck on your move...better pack this baby away safely for the trip otherwise your next entry will be "Part 12: Fixin' what's Broke!"


Cheers.
Dangeroo
#023
Visit this Community
Zurich, Switzerland
Joined: March 13, 2009
KitMaker: 2,058 posts
Armorama: 1,656 posts
Posted: Monday, March 07, 2011 - 08:09 PM UTC
Eric, impressive work so far! Your sandbags look very convincing. Make mine look like pieces of gunk on a model...

Keep up the great work and good luck with the move!

Cheers!
Stefan
chefchris
Visit this Community
North Carolina, United States
Joined: February 06, 2006
KitMaker: 1,544 posts
Armorama: 1,464 posts
Posted: Friday, March 11, 2011 - 04:44 AM UTC
Eric,
Your sandbags are really nice - they almost look like Aftermarket stuff....

The cast texturing however is WAY overdone.....

Are you adding the engine bay door supports? It might help you line up the tools better- that axe haed shouldn't be so close to the grouser box cover.

Chris
errains
#045
Visit this Community
South Carolina, United States
Joined: September 23, 2005
KitMaker: 362 posts
Armorama: 350 posts
Posted: Monday, April 11, 2011 - 02:10 PM UTC
Movement Complete!

Just a quick update, just completed the move into the new house this past weekend and now its time to unpack all the boxes!! Battlewagon arrived intact.

So Don Part 12 will not be named “Fixin what’s broke!” thank goodness!!

Also managed to sneak out of work last Friday and made the 10 minute drive to Fredericksburg, Va for a day at the 2011 AMPS International Show! Very nice stuff and a bit humbling see all the awesome models. And as a bonus I scored a nice new shiny airbrush…very nice.

Will as soon as I get the house unpack and the work area set up I’ll get back to the Battlewagon!!

BTW Chris I’ll be reworking the casting texture, thanks for the sanity check.
ProfessorP
Visit this Community
Minnesota, United States
Joined: February 20, 2007
KitMaker: 339 posts
Armorama: 325 posts
Posted: Tuesday, April 12, 2011 - 06:41 AM UTC
Congratulations on a successful move Eric! Looking forward to more updates on the Battlewagon.
Totalize
Visit this Community
Ontario, Canada
Joined: February 04, 2009
KitMaker: 743 posts
Armorama: 549 posts
Posted: Tuesday, April 12, 2011 - 11:24 AM UTC
Eric,

Great work thus far. Your Battlewagon is really coming together. Love the sandbag work. Did you use an epoxy like apoxie sculpt to make them?

Big-John
Visit this Community
Ohio, United States
Joined: August 12, 2010
KitMaker: 731 posts
Armorama: 711 posts
Posted: Thursday, April 14, 2011 - 02:59 PM UTC
Nice work Eric,

I really love the sand bags, They look great!
errains
#045
Visit this Community
South Carolina, United States
Joined: September 23, 2005
KitMaker: 362 posts
Armorama: 350 posts
Posted: Friday, May 13, 2011 - 09:35 AM UTC
Battlewagon M4A3E8 ETO: Part 12- Everything but the Kitchen Sink - Stowage

Greetings everyone!


Finally got moved into the new house I was able to get back to work on the old Battlewagon.

Working up the stowage arrangement for the rear deck I followed the basic steps as laid out by ScaleModelMedic’s YouTube vid on Modelling Stowage as I wanted to try my hand at modeling tarp material using magic sculpt epoxy putty.

In order to paint and weather the stowage I wanted to make it so that I could remove the stowage from the tank once it was built. However I wanted to maintain a good attachment point when I was finished so I use a small block of basswood and a piece of sprue from the kit and drilled a hole into top of the engine deck. I also cut out some of tools that interfered with the placement of the stowage arrangement.

So that the stowage would not adhere to the kit I used cooking foil as a barrier. Using the basswood as an anchor I attached aftermarket stowage accessories to it and ran pieces of doubled folded tape underneath for putting indents from the strapping after making the tarp rolls. Once the first layer of stowage was dry I add the camouflage netting made from first aid gauze (cheese cloth) and wood glue and formed it to fit. Lastly using epoxy putty once more I made the air–identification panel and draped it over the stowage.

I think the results are not too awful for the first time using this method.


Let me know what you think and thanks for stopping by for a look see.
exer
Visit this Community
Dublin, Ireland
Joined: November 27, 2004
KitMaker: 6,048 posts
Armorama: 4,619 posts
Posted: Friday, May 13, 2011 - 10:19 AM UTC

Quoted Text

I wanted to maintain a good attachment point when I was finished so I use a small block of basswood and a piece of sprue from the kit and drilled a hole into top of the engine deck. I also cut out some of tools that interfered with the placement of the stowage arrangement.


That's a really smart idea. Stowage looks very good to me.
ProfessorP
Visit this Community
Minnesota, United States
Joined: February 20, 2007
KitMaker: 339 posts
Armorama: 325 posts
Posted: Sunday, May 15, 2011 - 03:34 AM UTC
Ingenious! That's a really neat idea to locate the stowage with a block of wood and a piece of sprue Eric. Looks like you are getting pretty close to paintin' time with this thing!
errains
#045
Visit this Community
South Carolina, United States
Joined: September 23, 2005
KitMaker: 362 posts
Armorama: 350 posts
Posted: Sunday, June 12, 2011 - 08:24 AM UTC
Getting Close

Just wanted to post a real quick up-date since it has been awhile. Starting to put the finishing touches on the construction phase and testing out a photo set-up.

Enjoy

errains
#045
Visit this Community
South Carolina, United States
Joined: September 23, 2005
KitMaker: 362 posts
Armorama: 350 posts
Posted: Thursday, July 07, 2011 - 12:52 PM UTC
Battlewagon M4A3E8 ETO: Part 13- Construction Complete Ready for Paint....But not to soon

It took longer then I planed but the first half of this build is done....more like 99.8% done.

The plan was to have this old wagon finished for the recently concluded Sherman Campaign. But once I really got into this I didn't want to rush it.

Overall I'm quit happy with the results. While not a perfect Sherman (since there is no such thing), I think it's ok. But building it is the easy part. Now come the make or break point...Applying the finish. No matter how good your build is a poor finish will detract from the overall impression of the finished model.


But enough of me blabbing...on to the pictures. Hope you enjoy them and as always constructive comments are welcome!


That's for Now!!
ppawlak1
Visit this Community
Victoria, Australia
Joined: March 14, 2006
KitMaker: 1,973 posts
Armorama: 1,843 posts
Posted: Thursday, July 07, 2011 - 06:16 PM UTC
This is a brilliant Sherman Eric.

LOVE IT !!!

Time for paint

Cheers

Paul
 _GOTOTOP