Istanbul, Turkey / Türkçe
Joined: February 06, 2011
KitMaker: 41 posts
Armorama: 41 posts
Posted: Sunday, March 20, 2011 - 10:16 PM UTC
Hi guys;
My name is Gokce and I am a plastic modeller from Turkey.
As an aircraft modeller , I decided to build also 1/48 AFV models for my experiences and new tastes...
When I started to modeling about 3 years ago , I were crazy about all scale dioramas but I hesitated to create somethings.Finally I started to my AFV journey with my small armored car.
(By the way sorry about some little mistakes in my English)
Kit is everybody knows as Tamiya's 1/48 Sd.Kfz. 222 (ICM Mould).I thinking also 1/48 German Infantry on marching pos. for create little dio.
Haulers # 48251 PE set will support for aditional detals.
Lets get it started.

Istanbul, Turkey / Türkçe
Joined: February 06, 2011
KitMaker: 41 posts
Armorama: 41 posts
Posted: Sunday, March 20, 2011 - 10:26 PM UTC
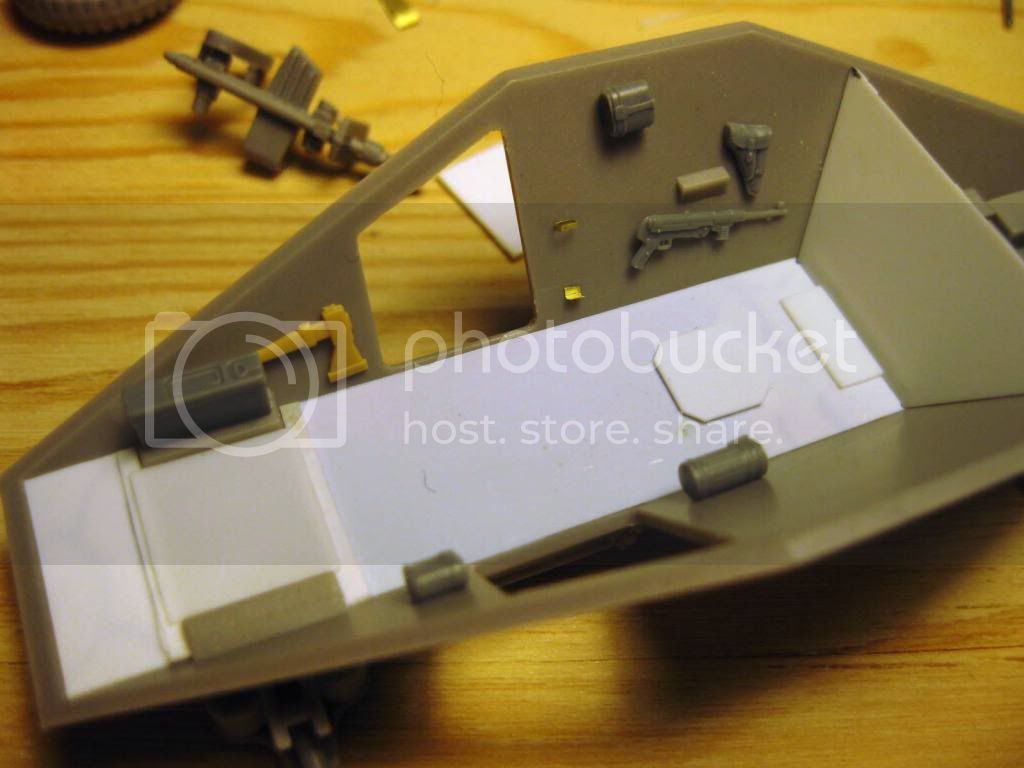
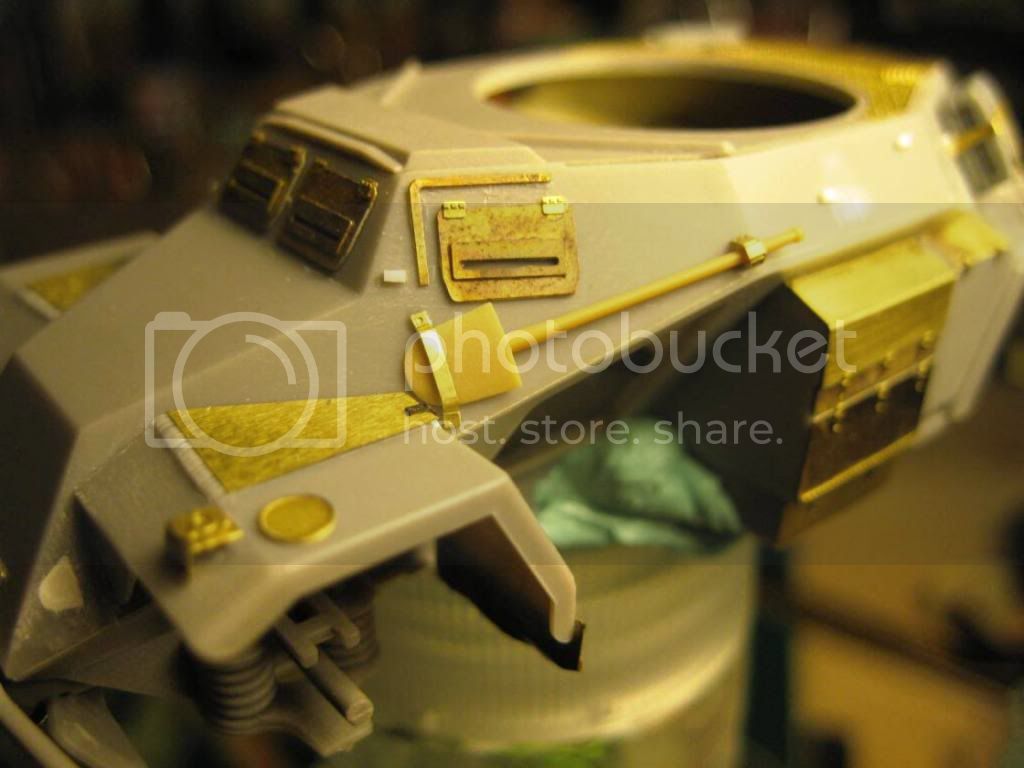
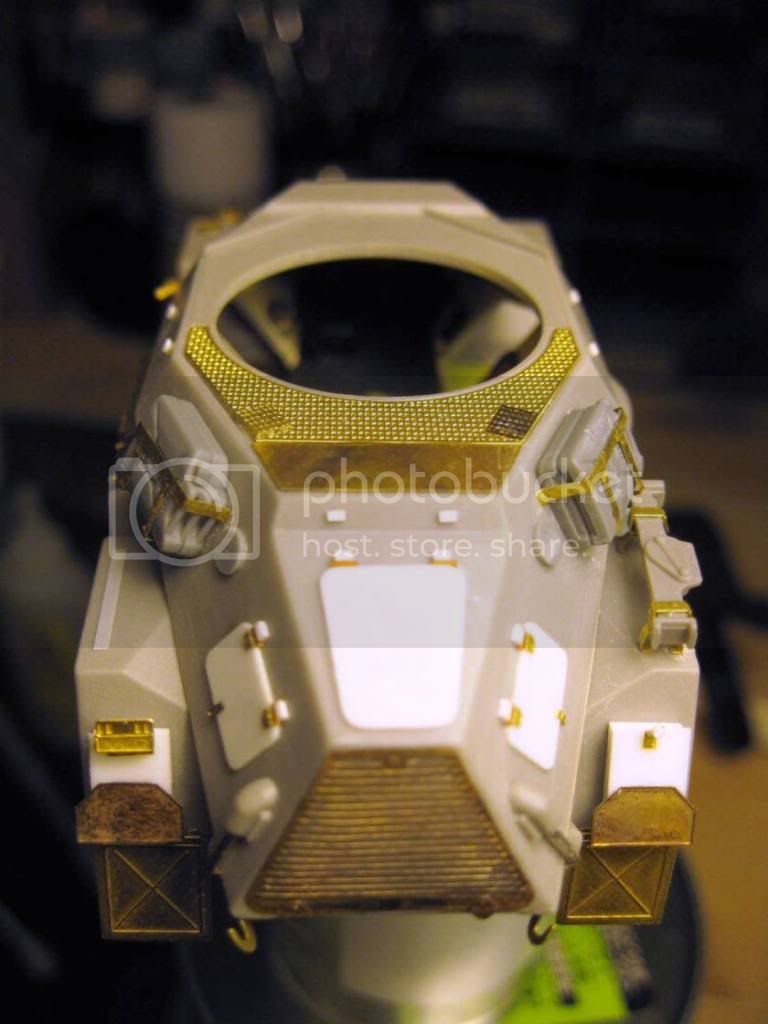
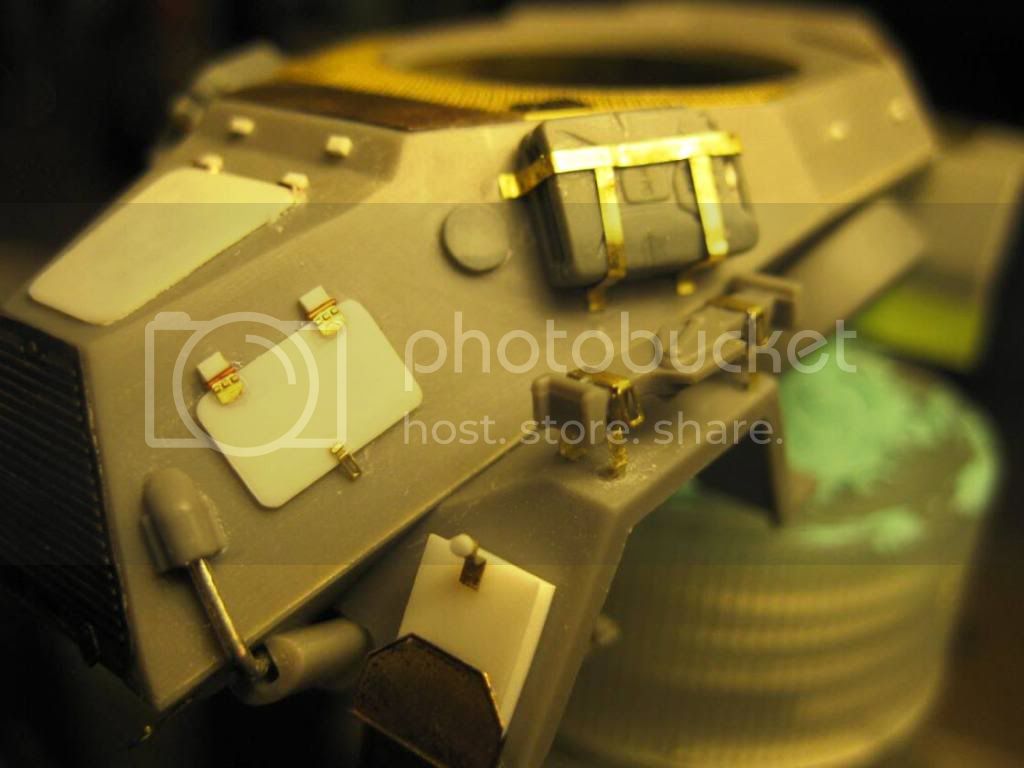
Tool boxes , turret nets, and compartment doors wer built.
Little things...

England - South West, United Kingdom
Joined: January 06, 2007
KitMaker: 3,661 posts
Armorama: 2,764 posts
Posted: Sunday, March 20, 2011 - 10:33 PM UTC
i'm really looking forward to your progress on this, i love 1/48, and the 222,
one thing is the figures, the tamiya ones really arent fantastic, im looking forward to how you paint them up.
lpj out
Support Our Troops! Hit the Yes button If you find reviews or features helpful.
Istanbul, Turkey / Türkçe
Joined: February 06, 2011
KitMaker: 41 posts
Armorama: 41 posts
Posted: Sunday, March 20, 2011 - 10:39 PM UTC
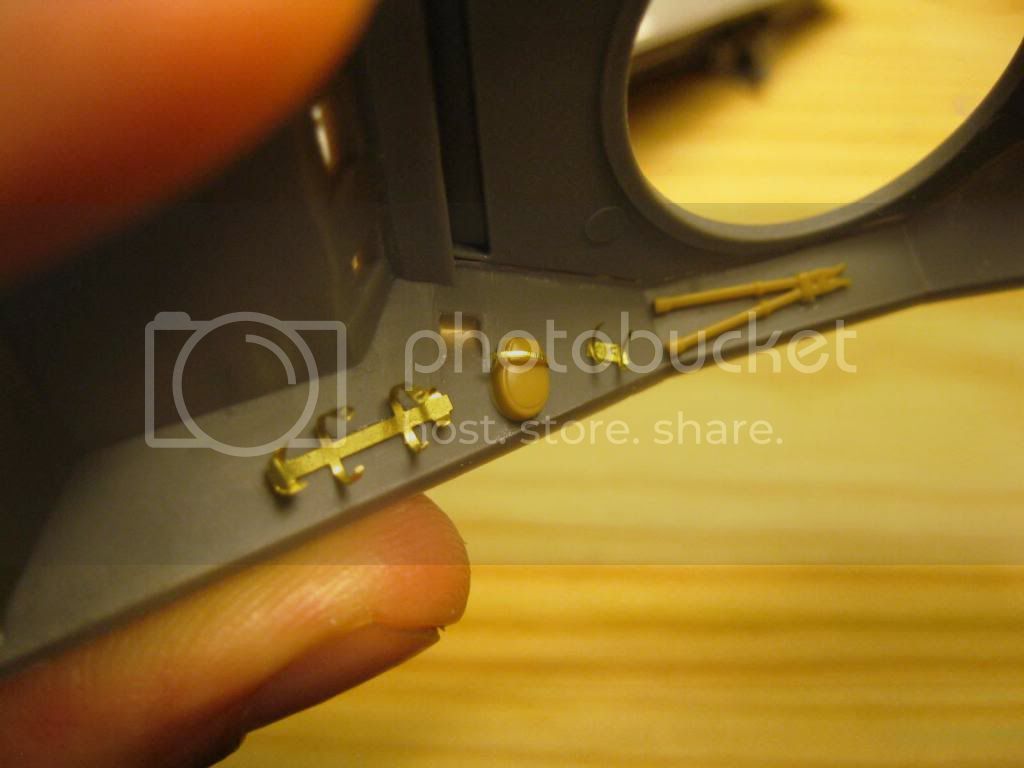
I believe to funniest way of building AFVs or Aircraft adding on scrtechbuilding details and master changes...
Basement built with styrene parts and walls getting detail from Infantry Equipment from Tamiya.
A shot from below o upper chasee...
I used for these details , yellow metal sheet and Haule PE parts holder for FireExtinguisher.
Istanbul, Turkey / Türkçe
Joined: February 06, 2011
KitMaker: 41 posts
Armorama: 41 posts
Posted: Sunday, March 20, 2011 - 10:44 PM UTC
Hi James
thank u for your advice , I really didnt think for how I will paint of figures.As u know quality of figures arent satisfy.I also started to cleaning up surface of figures.Photos coming soon...

Istanbul, Turkey / Türkçe
Joined: February 06, 2011
KitMaker: 41 posts
Armorama: 41 posts
Posted: Sunday, March 20, 2011 - 10:50 PM UTC
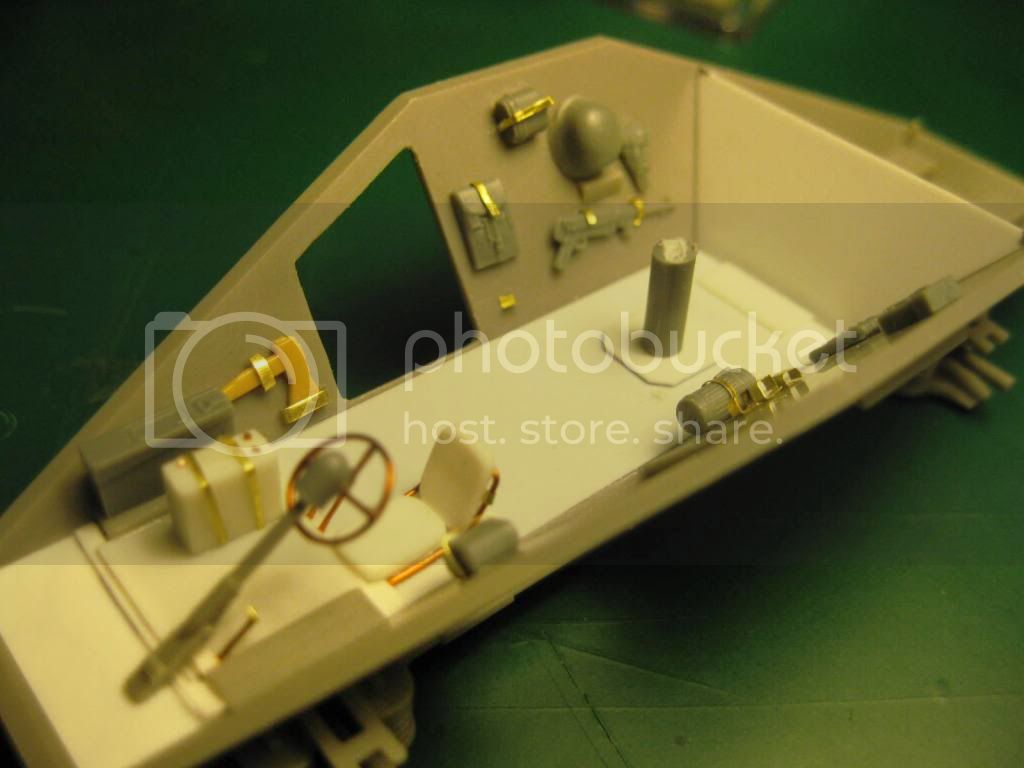
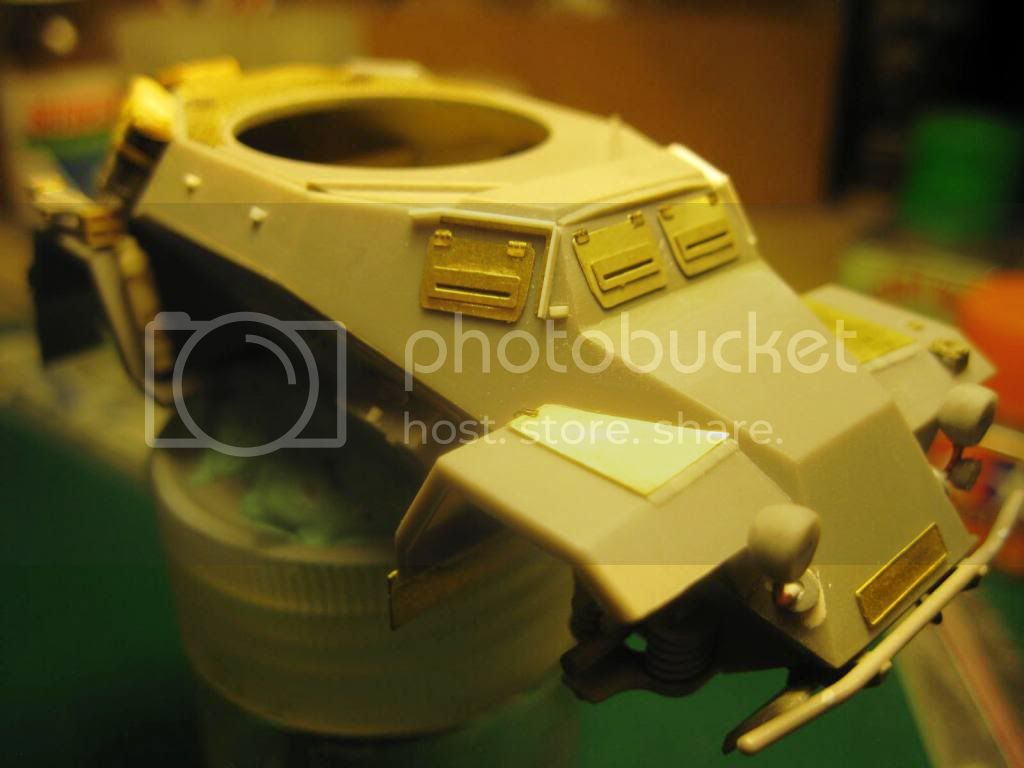
And the final situatin of compartment;
Added drivers seat and wheel made from wire and styrene.Thanks to referenced photos I finnaly finished inside.It took about 1 month to complete.

Texas, United States
Joined: June 29, 2010
KitMaker: 5,854 posts
Armorama: 4,817 posts
Posted: Monday, March 21, 2011 - 06:02 AM UTC
Nice job on the little brass bits, look forward to seeing more.
Istanbul, Turkey / Türkçe
Joined: February 06, 2011
KitMaker: 41 posts
Armorama: 41 posts
Posted: Monday, March 21, 2011 - 10:24 AM UTC
Thank you for your nice commends Jeremy , keepin postin it...
Interior painting has finished with mixed colours from Tamiya...
Small equipments painted with LifeColour acrylics.

Istanbul, Turkey / Türkçe
Joined: February 06, 2011
KitMaker: 41 posts
Armorama: 41 posts
Posted: Monday, March 21, 2011 - 10:26 AM UTC
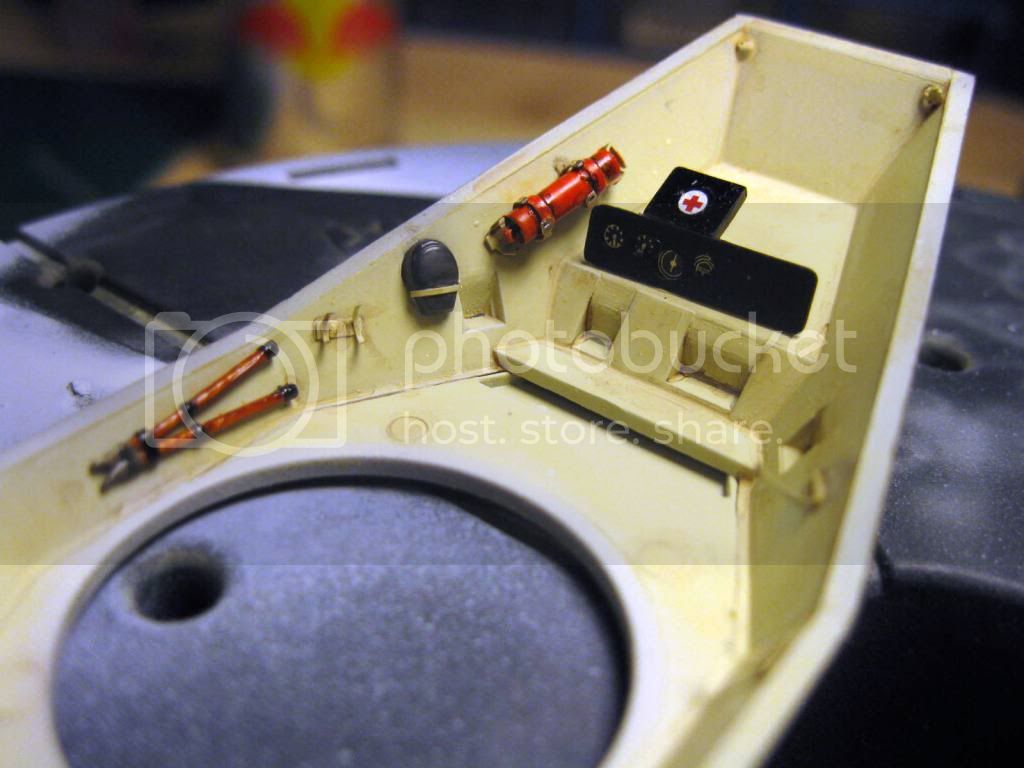
A reference photo taken from inside;

Istanbul, Turkey / Türkçe
Joined: February 06, 2011
KitMaker: 41 posts
Armorama: 41 posts
Posted: Monday, March 21, 2011 - 10:31 AM UTC
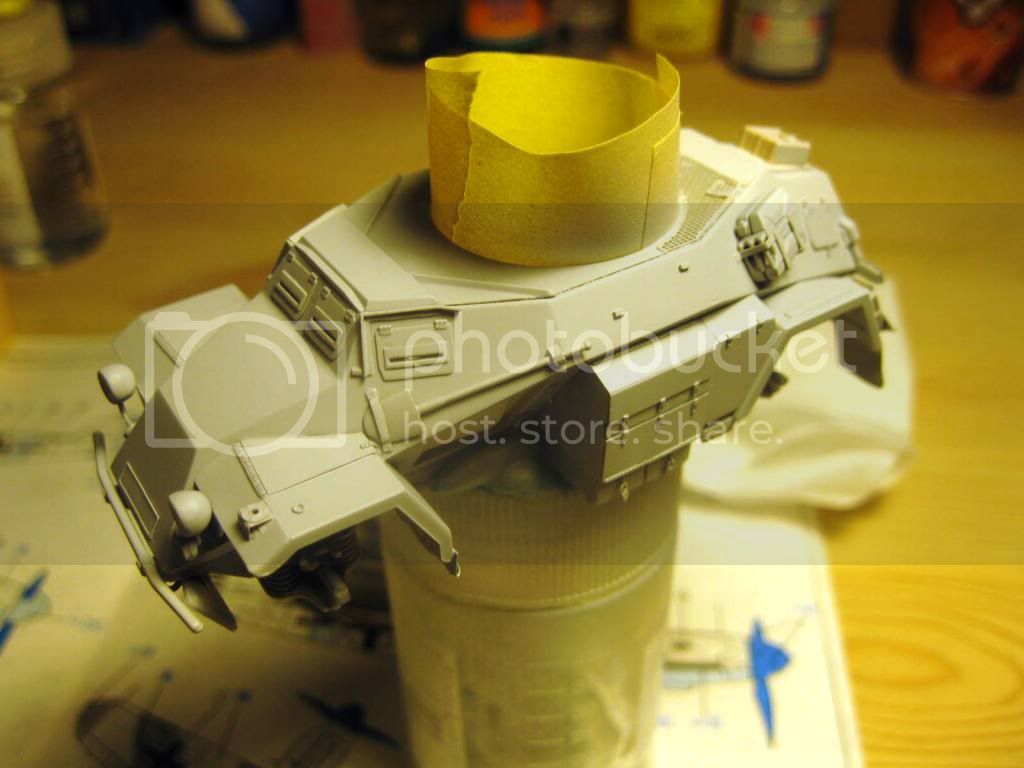
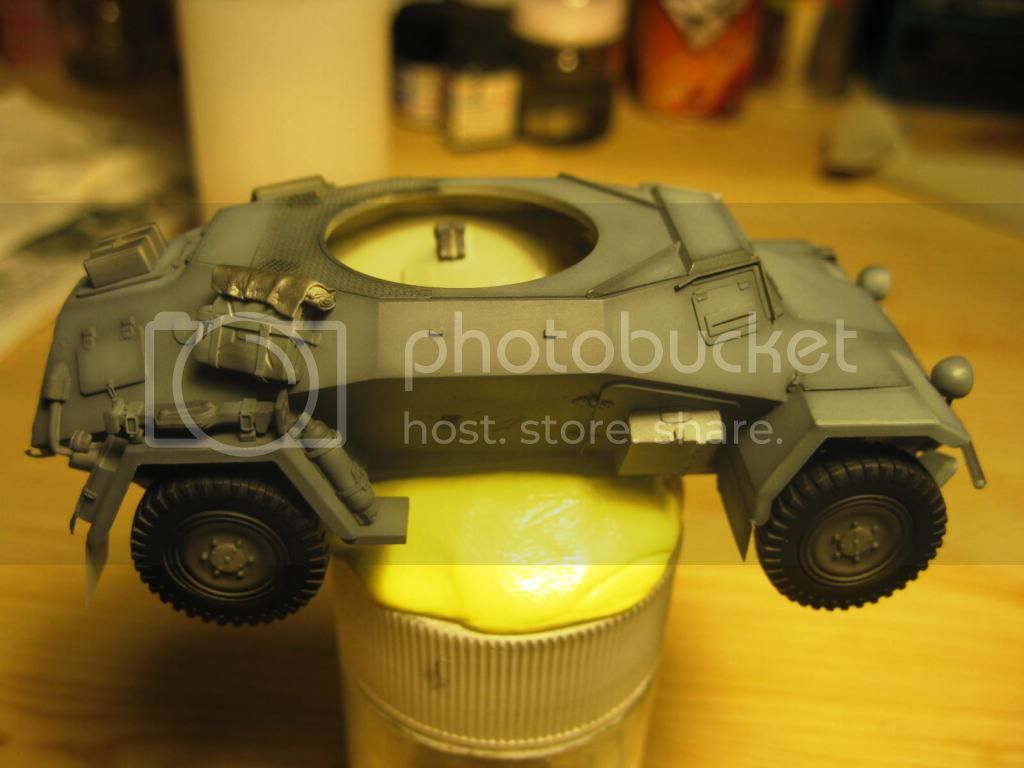
Main parts and chasee getting to gether...
Hauler's parts and extra brass pieces started to fitt.

Istanbul, Turkey / Türkçe
Joined: February 06, 2011
KitMaker: 41 posts
Armorama: 41 posts
Posted: Monday, March 21, 2011 - 10:41 AM UTC
California, United States
Joined: December 02, 2007
KitMaker: 32 posts
Armorama: 30 posts
Posted: Monday, March 21, 2011 - 11:37 AM UTC
Wow. Looking good! I really like all the extra bits you've added, especially to the interior.
North Carolina, United States
Joined: June 06, 2006
KitMaker: 4,691 posts
Armorama: 3,509 posts
Posted: Monday, March 21, 2011 - 11:48 AM UTC
That sir is some fantastic PE work on a small vehicle,the interior is fantastic,great work,keep posting
Ontario, Canada
Joined: January 12, 2011
KitMaker: 219 posts
Armorama: 158 posts
Posted: Monday, March 21, 2011 - 12:03 PM UTC
This looks awesome! I contemplated buying a 1/48 scale last time I was at the LHS. Do you also do 1/35, which do you like better?
Istanbul, Turkey / Türkçe
Joined: February 06, 2011
KitMaker: 41 posts
Armorama: 41 posts
Posted: Monday, March 21, 2011 - 06:55 PM UTC
Quoted Text
This looks awesome! I contemplated buying a 1/48 scale last time I was at the LHS. Do you also do 1/35, which do you like better?
hello again;
Thx for your nice comments.
Jaredt ; realy I dont have any idea to compare this kit with another ones.

I dont interesting any 1/35 scale AFV's or any scale models.Normally I am an aircraft model builder for 48th scale only , I just trying my chance for new experiencec for AFV's.So I dont have background compare this kit to any 1/35 scale.This kits quality is not so good.Strange kind of plastic used by ICM.Not sanding easyly and any cutting process having diffuculties.But,When I searching for details for this car I found also Hobby Boss's New Sd.Kfz. 222 1/35 photos at 1999.co.jp . They realy create fantastic details for that kit , so highly recom.By the way , you dont have any choice for , this 222 in 1/48th
scale if u want to buy.Tamiya (ICM) is the only 1.May be u can find a resin casting from Gasoline ??? (I am not sure)
See u at next postes...
California, United States
Joined: June 30, 2008
KitMaker: 2,408 posts
Armorama: 2,394 posts
Posted: Monday, March 21, 2011 - 07:14 PM UTC
This is looking really good! I may need to try that Hauler set next time I build that kit. Maybe try a real Tamiya kit next time like the little half track 250/3, or full AFV club 251 half track. Keep posting
Istanbul, Turkey / Türkçe
Joined: February 06, 2011
KitMaker: 41 posts
Armorama: 41 posts
Posted: Tuesday, March 22, 2011 - 08:06 AM UTC
Quoted Text
This is looking really good! I may need to try that Hauler set next time I build that kit. Maybe try a real Tamiya kit next time like the little half track 250/3, or full AFV club 251 half track. Keep posting
Hi Greg;
If u wanna build that kit in your future project , let me remember to me for explane some important detail for Haulers constraction guide.I saw some mistakes about parts number and etc.
Actually I did a mistake for chooce that kind of AFV.I realize , I have to chooce for closed interior any tank for first building experience.I hade many difficulties to create interior details and paintings.
Any way I had started...
Istanbul, Turkey / Türkçe
Joined: February 06, 2011
KitMaker: 41 posts
Armorama: 41 posts
Posted: Thursday, March 24, 2011 - 09:44 AM UTC
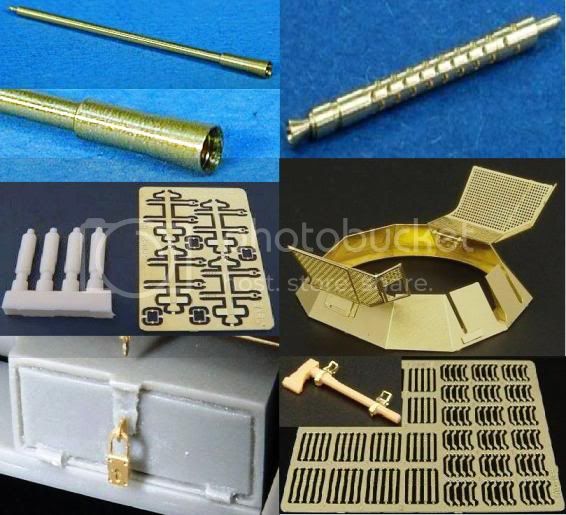
Little update;
Following aftermarket products listed at below...
1- 20mm Cannon Barrel for flak38
2- mg34 barrel
3- early period fire extingushier
4- metal turret fo 222
5- pad lock sets for equip. stowages
6- equipment clips
Istanbul, Turkey / Türkçe
Joined: February 06, 2011
KitMaker: 41 posts
Armorama: 41 posts
Posted: Thursday, March 24, 2011 - 09:48 AM UTC
I forgot photos

Istanbul, Turkey / Türkçe
Joined: February 06, 2011
KitMaker: 41 posts
Armorama: 41 posts
Posted: Thursday, March 24, 2011 - 11:52 PM UTC
And here is most interesting process for this model.I used tamiya epoxy putty covered to whell of tamiya's Flak 38 towing troleys.Than I cut a little place to show inside of whell.
Result is attractive;

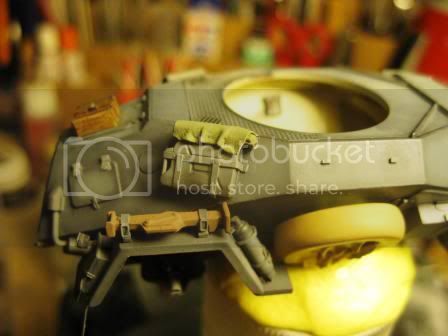
Attached to side wall ;

Test painting for equipment;
Istanbul, Turkey / Türkçe
Joined: February 06, 2011
KitMaker: 41 posts
Armorama: 41 posts
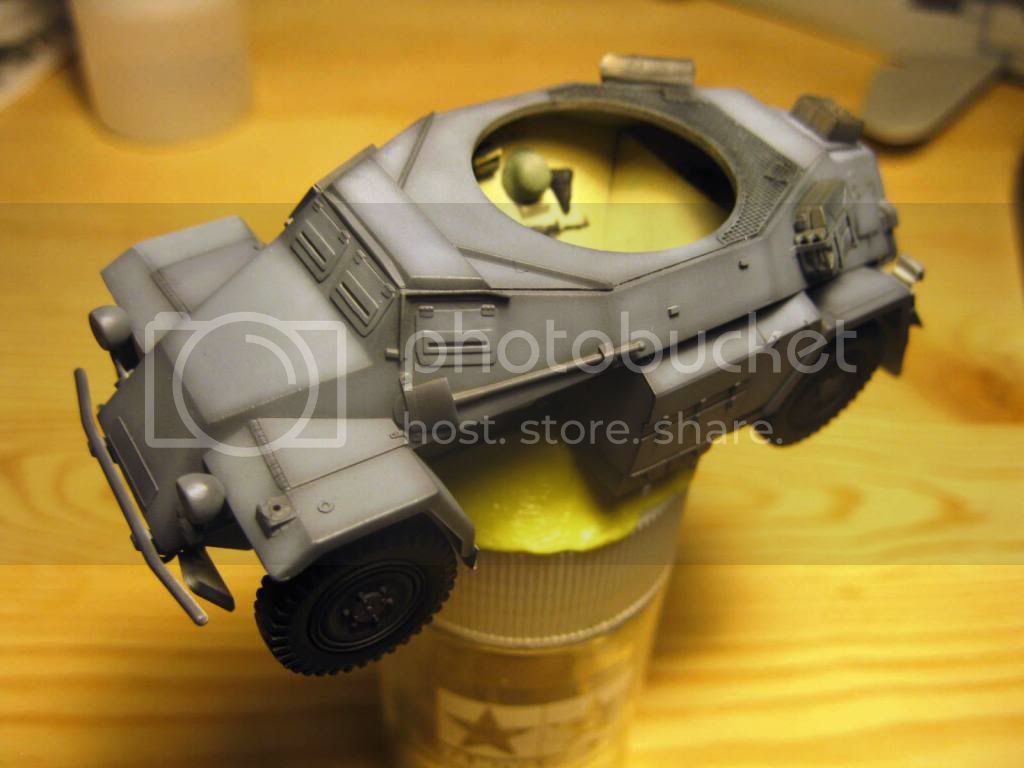
Posted: Tuesday, March 29, 2011 - 11:27 PM UTC
I started to painting steps...
As does it everytime starts with Mr.Surfacer 1200 applied overall.
After it dried I checkied some mistakes about fitting and sanding steps and started to paint first coat of gray..But before this , I painted with gloss-black
of each corner of panels.And filled up centers with light gray.
England - South West, United Kingdom
Joined: January 06, 2007
KitMaker: 3,661 posts
Armorama: 2,764 posts
Posted: Tuesday, March 29, 2011 - 11:31 PM UTC
real outstanding work, i love the torn trye cover. well done
Support Our Troops! Hit the Yes button If you find reviews or features helpful.
Istanbul, Turkey / Türkçe
Joined: February 06, 2011
KitMaker: 41 posts
Armorama: 41 posts
Posted: Tuesday, March 29, 2011 - 11:34 PM UTC
Shots from different positions...


Istanbul, Turkey / Türkçe
Joined: February 06, 2011
KitMaker: 41 posts
Armorama: 41 posts
Posted: Tuesday, March 29, 2011 - 11:38 PM UTC
Istanbul, Turkey / Türkçe
Joined: February 06, 2011
KitMaker: 41 posts
Armorama: 41 posts
Posted: Tuesday, March 29, 2011 - 11:44 PM UTC
Quoted Text
real outstanding work, i love the torn trye cover. well done
Thanks buddy, covering tire is not a hard process.Hard side of application is , to makes all tire treads must be fillied with C/A and turned for sanding , filiing and sanding again and again....


