Hi,
I'm hoping someone out there can help me with a Bailey bridge question. I am usually an aircraft modeler so I'm in almost over my head with this. Problem: On page 3 building the 12 main truss components it clearly shows gluing the clamping mechanism (pt I 13) in the closed position...conceivably glued to both the vertical section and the bracket at the base.
On page 5, the upper diagram with "actual postion" pointing to it, shows these locking clamps NOT attached to the bracket, but levered into an open postion. What am I missing?
Help!! Not a fan of Bronco instrucions.
Thanks,
Mike
Hosted by Darren Baker
Bronco Bailey Bridge
snobrd13

Joined: June 29, 2006
KitMaker: 4 posts
Armorama: 4 posts

Posted: Saturday, April 09, 2011 - 11:24 AM UTC
jon_a_its

Joined: April 29, 2004
KitMaker: 1,336 posts
Armorama: 1,137 posts

Posted: Sunday, April 10, 2011 - 01:47 AM UTC
Hi got 3 of these for a 'project' haven't started it yet though.
Here's a build for your info, by Perry Rowe, Loads of info & links on the modern bridge & a scratched US Bailey here: SWBB/Bailey
Here's a build for your info, by Perry Rowe, Loads of info & links on the modern bridge & a scratched US Bailey here: SWBB/Bailey
snobrd13

Joined: June 29, 2006
KitMaker: 4 posts
Armorama: 4 posts

Posted: Friday, April 15, 2011 - 07:18 AM UTC
Hi,
First, my thanks to Jon who sent me the link to those great photos. They didn't answer my questions directly but certainly provided motivation.
I am now a little deeper into the bridge build and though I would provide a couple of "heads ups" regarding my adventures.
As I get into the build I find the repetition not as odious as at first expected. I made a couple of simple jigs to help the operation along and have finished the 12 main segments as seen on p. 3, left side, wiht the exception of leaving parts I 13 until I actually start assembling the bridge. I don't think you can slide the girders into place if you have already glued parts I 13.
The jigs are just matte board , one to make sure the main structure of each segment unit is square (top picture on p. 3) and the second is to make the angle of the diagonal braces consistent. ( The angle is greater than 90 degrees, by the way.)
The instructions don't mention that it is critical that parts I 11 (which do not have any positive placement guidance) are located exactly to match the pegs on parts I 4 AND each of the 12 bridge sections or you will not be able to attach the sections together later in the build.
This is a far as I have gotten so far. If I make any other discoveries of hidden hitches in the build, I will communicate them.
Mike
dukw

Joined: March 18, 2003
KitMaker: 263 posts
Armorama: 228 posts

Posted: Tuesday, April 19, 2011 - 10:11 AM UTC
Hi Mike,
looks like the guys of Bronco didn't had a Bailey bridge or a manual on hand when they did the kit. The parts I9 and I13 aren't masterpieces and have to be modified to match the original.
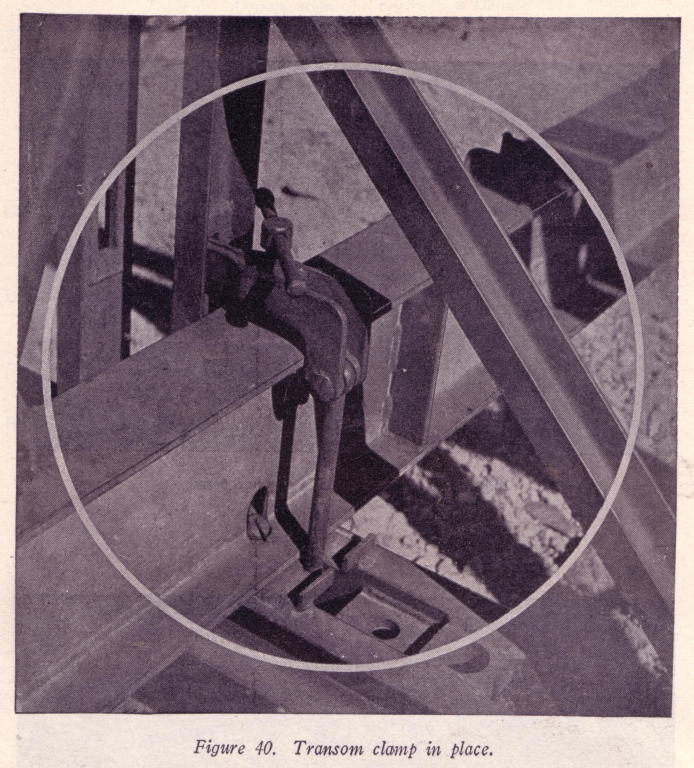
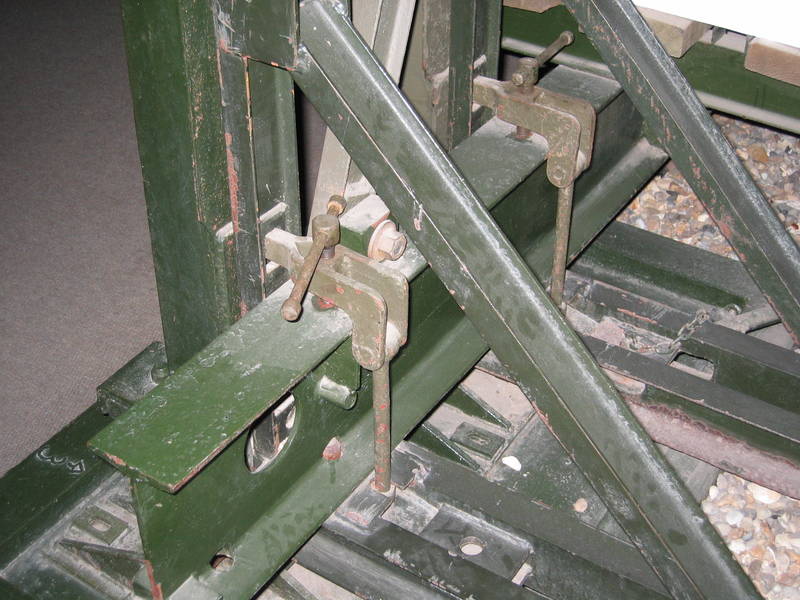
The Part I13 is the transom clamp. This part fixed the transom (kit part J) with the panel.
So you better place I13 after connecting the road section to the panels.
I hope this answers your question.
Cheers Harald
looks like the guys of Bronco didn't had a Bailey bridge or a manual on hand when they did the kit. The parts I9 and I13 aren't masterpieces and have to be modified to match the original.
The Part I13 is the transom clamp. This part fixed the transom (kit part J) with the panel.
So you better place I13 after connecting the road section to the panels.

I hope this answers your question.
Cheers Harald
snobrd13

Joined: June 29, 2006
KitMaker: 4 posts
Armorama: 4 posts

Posted: Tuesday, April 19, 2011 - 11:15 AM UTC
Thanks Harald. Excellent pictures. Yes, I had concluded that I couldn't add parts I 13 until later in the build.
I now have another "heads up" concerning the bridge sections on the right of P.3. Bronco gives you a clue that is, once again, time for some careful observation by indicating that there is a K3-1 as well as a K3 even though they are not identified on the sprue. What they are telling us is that there is a difference that is, again, crucial to getting it right. There is a subtle difference in the upper and lower K3. Make sure the notch to accept the tab on K5 is on the top stringer and that there is no notch on the bottom stringer.
That's as far as I've gotten in the build so far. I'll update when I find other "challenges".
Mike
dukw

Joined: March 18, 2003
KitMaker: 263 posts
Armorama: 228 posts

Posted: Tuesday, April 19, 2011 - 10:55 PM UTC
Hi Mike,
thank you for pointing that out. I will keep it in mind for my build.
But there is an other problem with the kit. There was only one type of Panel used.
That means you have to do 18 like P3 left. The 6 on P3 right are pure fantasy.
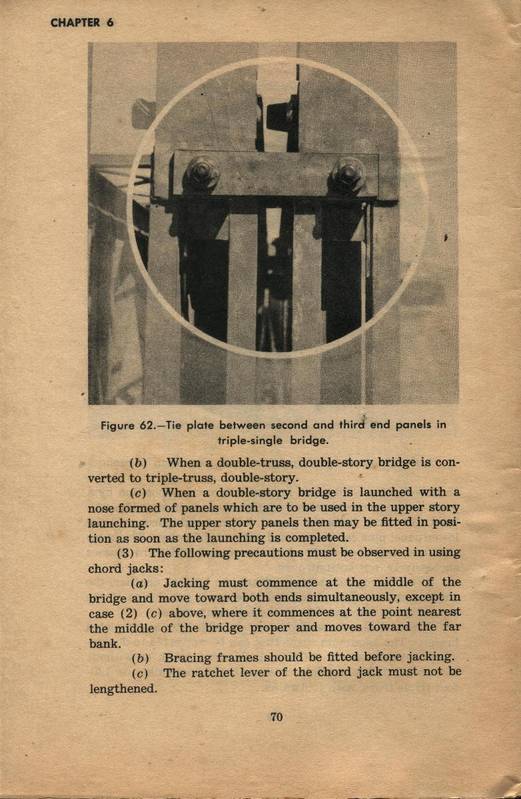
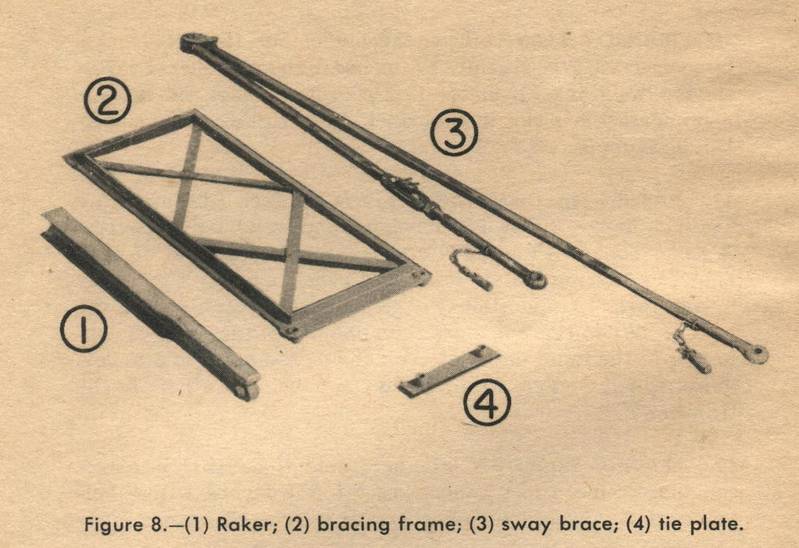
So you have to scratch build the necessary parts I9 and I13. In addition there are tie-plates and rackers needed. The tie-plate is a piece of flat steel 21/2 by 3/8 by 10 inches. It connected the second and third thruss in triple-singel bridges using the unoccupied racker holes in the panels in each joint and at the end of the bridge.
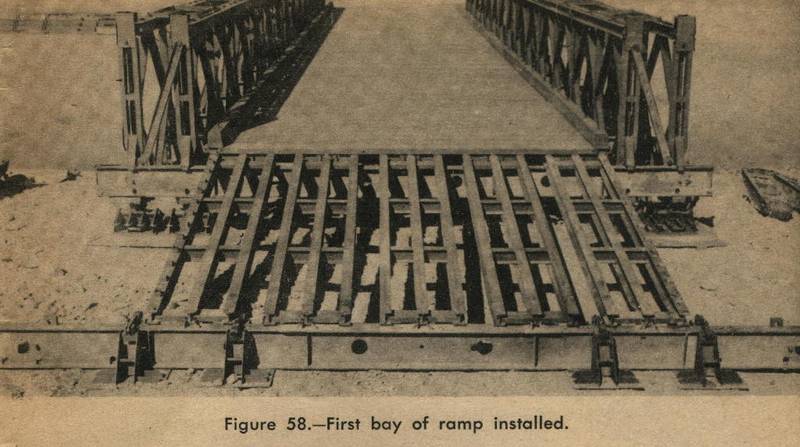
The raker is a 3-inch I-beam with a 11/2-inch flange and 3 feet 6 inches long. A raker connects the panel and transom at one end of each panel. It secures panels against a tendency to overturn.
One raker is clearly visible on the box art of the kit or have look at the pics.
Happy modelling
Harald
thank you for pointing that out. I will keep it in mind for my build.
But there is an other problem with the kit. There was only one type of Panel used.
That means you have to do 18 like P3 left. The 6 on P3 right are pure fantasy.
So you have to scratch build the necessary parts I9 and I13. In addition there are tie-plates and rackers needed. The tie-plate is a piece of flat steel 21/2 by 3/8 by 10 inches. It connected the second and third thruss in triple-singel bridges using the unoccupied racker holes in the panels in each joint and at the end of the bridge.

The raker is a 3-inch I-beam with a 11/2-inch flange and 3 feet 6 inches long. A raker connects the panel and transom at one end of each panel. It secures panels against a tendency to overturn.
One raker is clearly visible on the box art of the kit or have look at the pics.


Happy modelling
Harald
ropeynz

Joined: April 15, 2011
KitMaker: 134 posts
Armorama: 102 posts

Posted: Monday, April 25, 2011 - 08:55 AM UTC
Good luck with your build Mike. That's my dio linked to above. Bronco should be ashamed of this kit... 

 |


