Below is a parts list of components I got from Menard's and Target but most of which is probably available at Home Depot, Lowes or any other building center:
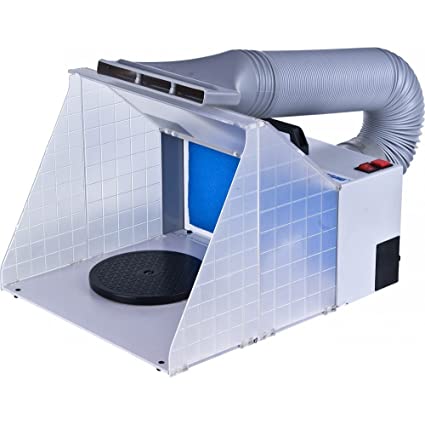
62 Liter Sterilite clear plastic storage tub (model 1758 available only at Target, chosen specifically for its very flat bottom and ability to accommodate a 14"x 20" filter, $9. However, just about any plastic storage tub would work for this if you mount the fan differently and use a different size/shape air filter.
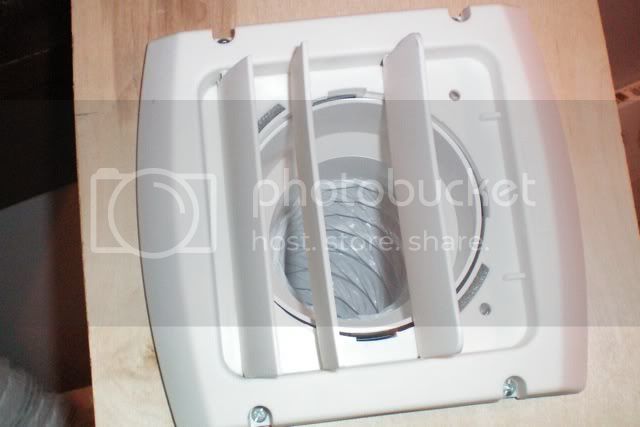
General Electric 70CFM Bathroom Fan, Model BF85A ($20)
6 ft grounded power supply cord ($4)
Components to assemble a switch, housing and cover + wiring (about $5)
Flexible 3" vinyl dryer exhaust tubing and hose clamps (about $5)
Sheet of 1/8" plywood for window panel ($8)
Roll of foam Insulating tape ($4)
14" x 20" x 1" fiberglass furnace filter (58¢)
* Various and sundry screws, washers, wire nuts, etc. (free)
I started by cutting a hole in the bottom of the tub that's just large enough to fit the fan snugly. This will cut down on the work you will have to do to seal up the hole so that you get a good draw through the fan.
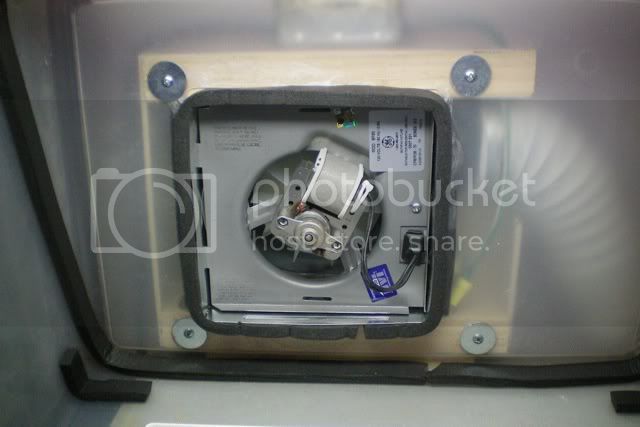
The fan itself is mounted between two foot-long pieces of two-by-four with wood screws, which in turn, are secured to the bottom of the tub with screws and washers.
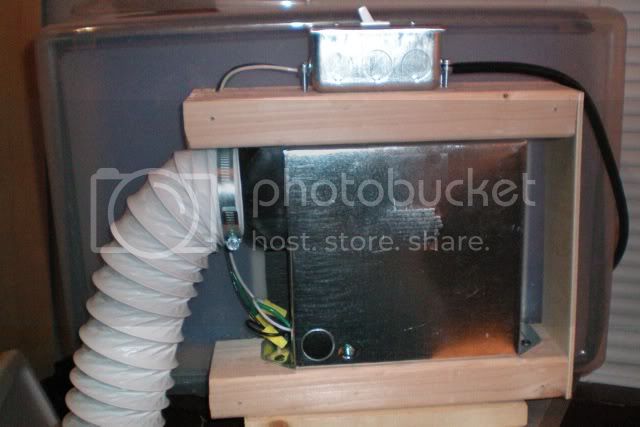
I boxed in the outside of the fan with plywood just to make it look nicer and ostensibly to provide a bit more sound insulation, but of course that's totally optional.
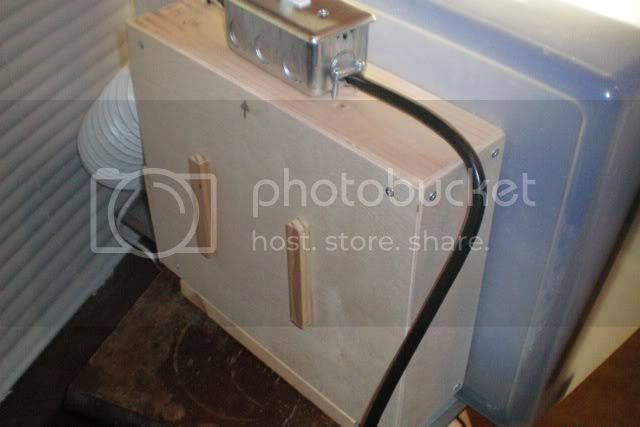
Once the fan was securely mounted to the tub, I wired it to a standard on/off switch. Or, you could wire it directly to the power cord if you just want to plug it in only when you need it. I've since toyed with the idea of replacing the on/off switch with a timer switch so I can turn it on, spray my models and leave it running for 30 minutes or so, but haven't gotten around to looking into this.
IMPORTANT WORD OF CAUTION: If you don't know anything about electrical wiring, make sure you ask someone with electrical knowledge before trying to wire up an on/off switch! I plugged this thing in and blew my house's electrical main circuit (twice!) before I realized that my "simple" wiring scheme was not even close to correct. Please don't be a
 like me...make sure you know the RIGHT way to wire a switch so you don't set your house on fire...
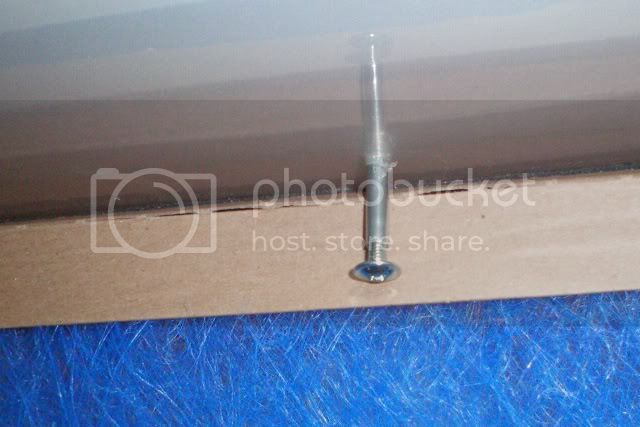
As you can see in one of the photos above, I used foam insulating tape to seal up the inside of the tub where the fan fits into the hole. This also had the added benefit of sealing the gap where the fan cover meets the fan housing which created a bit more of a venturi effect so that the air is drawn straight through the fan cover and not in around the edges. I had enough insulating tape to create a sealed channel all the way around the inside of the tub into which the fiberglass filter fits. I mounted a small shaft/screw through the top of the tub to hold the filter in place...I just pull it up out of the way to allow for quick removal of the filter. This is needed because the filter is mounted at a pretty extreme angle to allow more room for models in the spray area. Without a pin, it won't stay in place when your are spraying.
To protect the fan itself from paint, I had planned to use a good quality paper furnace filter but I quickly discovered that the fan didn't pull enough air through it to draw the overspray into the tub. So I switched to a cheaper, "breezier" fiberglass type filter. It's just there to keep the largest paint particles out of the fan so I think it is working well enough. After a few uses, I'll check the fan cover for paint to see how much, if any, is actually getting through. As an aside, the type of fan employed here is a "sparkless" design where the electrical current simply activates an electromagnet ,which spins the fan. There is no electric "fan motor" per se, so there's no sparks and little if any danger of paint fumes igniting. My guess is that most household bathroom fans are of this design but it'd be a good idea to double check before you buy one if you can't find the specific GE model listed above.
Finally, for the window panel, I cut a piece of plywood just wide enough to fit into my window with a 4" hole in it to accommodate a standard dryer vent hood mounted on the outside of the panel.
The 3" exhaust tube connects to the 4" vent hood but I needed a 3" to 4" adapter for this ($2). You could probably just cut a 3" hole in the panel and hose clamp the tube on the other side if you don't care about backdraft when the fan is off. I also found out on the first use that it is essential to make sure you have a good seal all the way around the window panel where it meets the window frame and around the hole where the tube exits. This is so that the fumes don't sneak back in either around the edges or around the mounting hole for the tube.
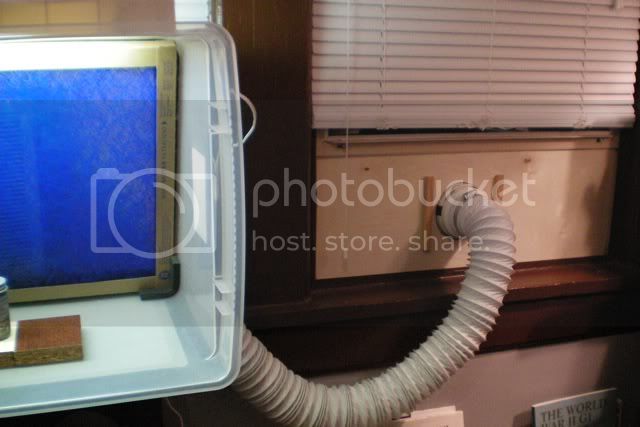
Bonus: I happened to have an 18" florescent work lamp that I just lay onto the top of the tub to provide some direct lighting. Because it's on the outside of the tub, there's no chance of it getting paint overspray on it.
If needed, I can easily detach the hose and window panel, put them inside the tub, stick on the lid and store the whole thing in the closet between projects.
Hope you find this useful!
Cheers.