Hello to all,
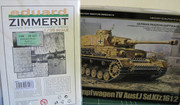
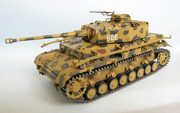
I'm starting project to build german tank Panzerkampfwagen IV Ausf.J n 1/48 scale by TAMIYA:
also going to use Eduard PE Zimmerit for Tamiya kit, which looks great.
I want to build Tank which served in Normandy in 1944...
so Hope to have any help from you (pictures, ideas, tips)
Hosted by Darren Baker
My Project : Panzerkampfwagen IV Ausf.J
richtlv3
Tel Aviv-Yafo, Israel
Joined: April 10, 2011
KitMaker: 95 posts
Armorama: 94 posts
Joined: April 10, 2011
KitMaker: 95 posts
Armorama: 94 posts
Posted: Sunday, May 01, 2011 - 08:53 AM UTC
richtlv3
Tel Aviv-Yafo, Israel
Joined: April 10, 2011
KitMaker: 95 posts
Armorama: 94 posts
Joined: April 10, 2011
KitMaker: 95 posts
Armorama: 94 posts
Posted: Friday, May 06, 2011 - 09:39 PM UTC
staff which I'm using :
image uploader
first steps:
image hosting
wordpress image upload
image host
image hosting service
as usual I enjoy much to build in 1/48 scale
image uploader
first steps:
image hosting
wordpress image upload
image host
image hosting service
as usual I enjoy much to build in 1/48 scale
Bizarre
Akershus, Norway
Joined: July 20, 2010
KitMaker: 1,709 posts
Armorama: 1,581 posts
Joined: July 20, 2010
KitMaker: 1,709 posts
Armorama: 1,581 posts
Posted: Friday, May 06, 2011 - 10:43 PM UTC
Looks really good! Making zimm from putty would be a real pain in that scale!
GregCloseCombat
California, United States
Joined: June 30, 2008
KitMaker: 2,408 posts
Armorama: 2,394 posts
Joined: June 30, 2008
KitMaker: 2,408 posts
Armorama: 2,394 posts
Posted: Saturday, May 07, 2011 - 04:46 AM UTC
Nice start - very clean work. Will be watching with interest
Belt_Fed
New Jersey, United States
Joined: February 02, 2008
KitMaker: 1,388 posts
Armorama: 1,325 posts
Joined: February 02, 2008
KitMaker: 1,388 posts
Armorama: 1,325 posts
Posted: Saturday, May 07, 2011 - 05:03 AM UTC
One tip i read on using zimmerit sets is to stipple on some Mr.Surfacer once the zimmerit is applied. Not only will this help your paint adhere to the metal, but it will give the zimeirit a more "paste-like" texture. Keep the pics coming
richtlv3
Tel Aviv-Yafo, Israel
Joined: April 10, 2011
KitMaker: 95 posts
Armorama: 94 posts
Joined: April 10, 2011
KitMaker: 95 posts
Armorama: 94 posts
Posted: Saturday, May 07, 2011 - 08:21 AM UTC
Belt_Fed (Jon Murphy) thanks for a tip but if I don't have a |Mr.Surfacer| is there somthing else to use?
I' going to use TAMIYA's acrylic paint, so warring about it much
didiumus
Utah, United States
Joined: March 18, 2003
KitMaker: 564 posts
Armorama: 312 posts
Joined: March 18, 2003
KitMaker: 564 posts
Armorama: 312 posts
Posted: Sunday, May 08, 2011 - 04:24 AM UTC
Sabian - good tip but I am wondering if in 1/48 scale it might be too much? Perhaps around the edges to "blend" the PE sections to the plastic, but I think I would avoid adding any stippled putty to the pe plates themselves as they could be well overscale. I do like this tip for 1/35 PE zimmerit. I have never used PE zimm before - I really like the Atak resin zimmerit. Perhaps the Mr Surfacer 1200 airbrushed or from a can rather than stippled?
Richard - My Surfacer is liquified putty - basically putty/filler that is thinned heavily with lacquer thinner and other solvents until it is a thick, primer based "paint." It comes in several grades, 500, 1000, and 1200. The 500 is the thickest, the 1200 the thinnest. (that I know of - there might be more grades available)
Tamiya also makes the same kind of stuff - they call it surface filler I believe. I actually like the Tamiya stuff better for all but the heaviest uses. You could also make your own by getting some Tamiya or Squadron putty, and then thinning it with lacquer thinner until you can paint it on like a primer. Again, I would encourage you to do it with restraint.
Keep up the good work - can't wait to see the result. I didn't even know Eduard was doing 1/48 zimmerit. Very cool.
Best regards to all.
Scott Gentry
GregCloseCombat
California, United States
Joined: June 30, 2008
KitMaker: 2,408 posts
Armorama: 2,394 posts
Joined: June 30, 2008
KitMaker: 2,408 posts
Armorama: 2,394 posts
Posted: Sunday, May 08, 2011 - 04:26 PM UTC
Hi again, I used primer on the Voyager PE set for my 1/48 panzer IV before painting. I agree with Scott that some putty on the edges and joins would be enough. It's harder to damage the pe zim versus say the Cavalier sets and is it's main disadvantage.
richtlv3
Tel Aviv-Yafo, Israel
Joined: April 10, 2011
KitMaker: 95 posts
Armorama: 94 posts
Joined: April 10, 2011
KitMaker: 95 posts
Armorama: 94 posts
Posted: Monday, May 09, 2011 - 01:58 AM UTC
I see zimmerit on the top around a turret , but in some reale photos I don't see such thing
post image wordpress
GregCloseCombat
California, United States
Joined: June 30, 2008
KitMaker: 2,408 posts
Armorama: 2,394 posts
Joined: June 30, 2008
KitMaker: 2,408 posts
Armorama: 2,394 posts
Posted: Monday, May 09, 2011 - 03:28 AM UTC
Sometimes they did, sometimes they didn't
didiumus
Utah, United States
Joined: March 18, 2003
KitMaker: 564 posts
Armorama: 312 posts
Joined: March 18, 2003
KitMaker: 564 posts
Armorama: 312 posts
Posted: Monday, May 09, 2011 - 04:02 AM UTC
Greg,
Great photo! I have a question - in looking closely at the skirt armor around the turret - is there zimmerit paste there - or is the "texture" of the photograph? If you look above the tank into the "sky" - or at the cupola - there appears to be some texture there as well. Almost looks like this photograph was mounted on some kind of canvas. It is hard for me to tell on my computer, but it looks like it might be zimmerit free?
Anyway - great photo either way.
Scott
richtlv3
Tel Aviv-Yafo, Israel
Joined: April 10, 2011
KitMaker: 95 posts
Armorama: 94 posts
Joined: April 10, 2011
KitMaker: 95 posts
Armorama: 94 posts
Posted: Monday, May 09, 2011 - 06:30 AM UTC
Dear GregCloseCombat, thanks for a picture!
GregCloseCombat
California, United States
Joined: June 30, 2008
KitMaker: 2,408 posts
Armorama: 2,394 posts
Joined: June 30, 2008
KitMaker: 2,408 posts
Armorama: 2,394 posts
Posted: Monday, May 09, 2011 - 02:12 PM UTC
How about hundreds of pictures ?
Look at panzer #125 close up and you can see it. There are more in here but the site doesn't let you copy a link so you have to look around.
http://jtrowbridge5.smugmug.com/Complete-albums-from/panzer4-albums/Panzer4/14569529_XQi6L#1083042700_K6u8z
Look at panzer #125 close up and you can see it. There are more in here but the site doesn't let you copy a link so you have to look around.
http://jtrowbridge5.smugmug.com/Complete-albums-from/panzer4-albums/Panzer4/14569529_XQi6L#1083042700_K6u8z
richtlv3
Tel Aviv-Yafo, Israel
Joined: April 10, 2011
KitMaker: 95 posts
Armorama: 94 posts
Joined: April 10, 2011
KitMaker: 95 posts
Armorama: 94 posts
Posted: Friday, May 13, 2011 - 05:42 AM UTC
Hello everybody and have a nice weekend
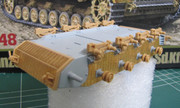
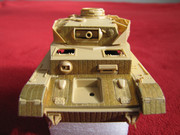
so there are some pictures with my next steps:
image host
image host
image hosting
really it's too hard to work with PE parts, but it's too late to change something and too early to see final look
today I also bought Tamiya's PANZER GRENADIERS set in 1/48 scale, but still have no ideas for future small diorama, but I must to choose if cupola be opened or close...
so again have a nice weekend
firstcircle
England - South East, United Kingdom
Joined: November 19, 2008
KitMaker: 2,249 posts
Armorama: 2,007 posts
Joined: November 19, 2008
KitMaker: 2,249 posts
Armorama: 2,007 posts
Posted: Friday, May 13, 2011 - 10:51 AM UTC
Richard, like the look of your build, very neat and the zimmerit does look good for all your hard work. Certainly is true that photos can be found to show all sorts of variations in the extent to which it was applied - usually does seem to be on the vertical and near-vertical surfaces of the armoured body, and as you have it, on the track guard ends, and while rarely on the main side skirts (I think the photo in this thread is one of the few examples there is), it is quite common for it to be on the turret spaced armour.
On your hatch open / closed dilemma, I think it depends on whether you have tank crew that can sit in the hatch. I seem to remember the Tamiya set you have has some tank crew, but are they in the right sort of positions to use in the tank?
You may be interested in or take some inspiration from the build I did of the old Bandai 1/48 kit , for which I bought some Art of War figures. Unfortunately from what I can make out these seem to no longer be available, but there are others, such as Squad 48, that look quite good, and no doubt there are others.
Maybe for some further inspiration for your diorama, try getting hold of the Squadron / Signal In Action book.
Edit: in fact it seems to me that those same figures are now branded as Squad 48 - not sure why that is, but here they are on ebay:
1/48 Squad 48 - WWII German Tank Crew
lespauljames
England - South West, United Kingdom
Joined: January 06, 2007
KitMaker: 3,661 posts
Armorama: 2,764 posts
Joined: January 06, 2007
KitMaker: 3,661 posts
Armorama: 2,764 posts
Posted: Friday, May 20, 2011 - 06:03 AM UTC
This is coming along REALLY nicely, although, im not too convinced by PE Zimm overall, but it will all come down to how the paint look slike when its down i guess, a stage that i am very much looking forward too. !
richtlv3
Tel Aviv-Yafo, Israel
Joined: April 10, 2011
KitMaker: 95 posts
Armorama: 94 posts
Joined: April 10, 2011
KitMaker: 95 posts
Armorama: 94 posts
Posted: Saturday, May 21, 2011 - 05:59 AM UTC
Hello dear friends;
There is lot's off work at my office so hard to find free time to continue work on my PANZER but I try to find some time....
So the construction phase is over, let's start the painting phase.
As usual I'm going to use acrylic paints of "TAMYIA" and regular brush.
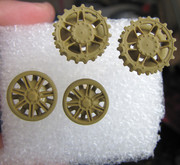
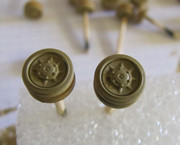
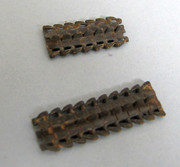
First I painted all road wheels, drive sprocket and tracks Separately.
After all tank but just first Lay after I did some shading effect with black paint.
For base color I used Dark Yellow XF60
Cupola will stay opend because I'm going to use tank commander
By the way: it's very easy to use acrylic paint on PE detals
rl=http://www.postimage.org/][/url]
image upload
free image hosting
image hosting service
image hosting
So... have a nice weekend dear friends
GregCloseCombat
California, United States
Joined: June 30, 2008
KitMaker: 2,408 posts
Armorama: 2,394 posts
Joined: June 30, 2008
KitMaker: 2,408 posts
Armorama: 2,394 posts
Posted: Monday, May 23, 2011 - 03:15 AM UTC
I really love the zim on the front. Now you're at the fun part of creating the details and weathering
richtlv3
Tel Aviv-Yafo, Israel
Joined: April 10, 2011
KitMaker: 95 posts
Armorama: 94 posts
Joined: April 10, 2011
KitMaker: 95 posts
Armorama: 94 posts
Posted: Tuesday, May 24, 2011 - 03:50 AM UTC
After few days in my Reserve service I'm back home and found into my Mailbox nice surprise it's Tamyia's new model in 1/48 scale "German Panzer II A/B/C French Campaign" for my next project....
free image hosting
free image hosting
richtlv3
Tel Aviv-Yafo, Israel
Joined: April 10, 2011
KitMaker: 95 posts
Armorama: 94 posts
Joined: April 10, 2011
KitMaker: 95 posts
Armorama: 94 posts
Posted: Sunday, June 19, 2011 - 05:57 AM UTC
Hello
there is some new steps in my project, I finished painting a camouflage
after a added decals like in instruction
made light wash with brown oil paint, and some work with "MIG" pigments on Exhaust and spare tracks.
for diorama I made two figures and already made base from free which I painted with Lace.
so there are some new pictures:
image uploader
post image wordpress
png upload
wordpress image hosting
image uploader
richtlv3
Tel Aviv-Yafo, Israel
Joined: April 10, 2011
KitMaker: 95 posts
Armorama: 94 posts
Joined: April 10, 2011
KitMaker: 95 posts
Armorama: 94 posts
Posted: Saturday, June 25, 2011 - 07:06 PM UTC
GregCloseCombat
California, United States
Joined: June 30, 2008
KitMaker: 2,408 posts
Armorama: 2,394 posts
Joined: June 30, 2008
KitMaker: 2,408 posts
Armorama: 2,394 posts
Posted: Sunday, June 26, 2011 - 06:13 AM UTC
Hey! Congrats - looks great. If you have a little energy left for it, with white glue, add a little sand /or cat litter / or road dirt /or plaster and paint it. A model will always look better on a base.
richtlv3
Tel Aviv-Yafo, Israel
Joined: April 10, 2011
KitMaker: 95 posts
Armorama: 94 posts
Joined: April 10, 2011
KitMaker: 95 posts
Armorama: 94 posts
Posted: Sunday, June 26, 2011 - 07:54 AM UTC
Thanks GregCloseCombat , but I specialy did a base like this...
I'd like to make some unusual diorama
vonHengest
Texas, United States
Joined: June 29, 2010
KitMaker: 5,854 posts
Armorama: 4,817 posts
Joined: June 29, 2010
KitMaker: 5,854 posts
Armorama: 4,817 posts
Posted: Monday, June 27, 2011 - 04:49 AM UTC
This came out really nice Richard, I can't even tell that the zimm is comprised of seperate PE sheets! The vegetation doesn't do your build justice, we need to find you some better materials to use in place of that spongy WS stuff.
I really like how the base turned out and was wondering how you got it too look the way it does now?
richtlv3
Tel Aviv-Yafo, Israel
Joined: April 10, 2011
KitMaker: 95 posts
Armorama: 94 posts
Joined: April 10, 2011
KitMaker: 95 posts
Armorama: 94 posts
Posted: Monday, June 27, 2011 - 05:55 AM UTC
thanks vonHengest (Jeremy H) for your warm words
about Painting a base: I just bought a wood paint with Laca. I don't know if you can find same paint in your shop...
image uploader
about bushes, you are right, I must find somthing better...
also I'm going to add one more soldier
about Painting a base: I just bought a wood paint with Laca. I don't know if you can find same paint in your shop...
image uploader
about bushes, you are right, I must find somthing better...
also I'm going to add one more soldier