_GOTOBOTTOM
Armor/AFV: Softskins
Softskins group discussions.
Hosted by Darren Baker
WIP: 1/35 VLRA, French Commandos
Frenchy
Visit this Community
Rhone, France
Joined: December 02, 2002
KitMaker: 12,719 posts
Armorama: 12,507 posts
Posted: Sunday, July 31, 2011 - 05:49 AM UTC
Nice work Jiri. It seems you already knew about the Ivory Coast pics BTW did you finally receive those I've sent ?
Frenchy
skarik
Visit this Community
Praha, Czech Republic
Joined: February 08, 2005
KitMaker: 324 posts
Armorama: 295 posts
Posted: Sunday, July 31, 2011 - 06:07 AM UTC
Hi Frenchy,

actually I didn´t know about them. Some of those pics were also on maquettegarden, but definately not the one with the close look on the radio rack.
Here the weather is just crazy today, so I spent the whole morning scratchbuilding it. Still have do the radio kit anyway

Jiri

Mano_BR
Visit this Community
Brazil
Joined: December 24, 2009
KitMaker: 132 posts
Armorama: 132 posts
Posted: Thursday, August 04, 2011 - 06:57 AM UTC
Jiri,

Incredible what you're doing, I found your fantastic work.
The cargo bed, I can not describe ...

Sérgio

bison126
Visit this Community
Correze, France
Joined: June 10, 2004
KitMaker: 5,329 posts
Armorama: 5,204 posts
Posted: Thursday, August 04, 2011 - 08:47 PM UTC
Hi Jiri,
it's a really cool model you'll get there. I always wonder how you can bend such thick styrene rods ?
skarik
Visit this Community
Praha, Czech Republic
Joined: February 08, 2005
KitMaker: 324 posts
Armorama: 295 posts
Posted: Thursday, August 04, 2011 - 11:36 PM UTC
Hi guys,

thanks a lot for your nice comments. I just finished the construction work and will focus on the paint job now.

Both the Land Rover DPV and the VLRA have frames made of Evergreen´s (2,5 mm I think) plastic rods. With a little bit of effort you can shape if very well without breaking it. However, in case of VLRA I was only satisfied with the 4th attempt... so it took some time anyway.

Sudzonic
Visit this Community
Scotland, United Kingdom
Joined: December 07, 2007
KitMaker: 2,096 posts
Armorama: 1,983 posts
Posted: Friday, August 05, 2011 - 01:03 AM UTC
Looking very good Jiri.
skarik
Visit this Community
Praha, Czech Republic
Joined: February 08, 2005
KitMaker: 324 posts
Armorama: 295 posts
Posted: Friday, August 05, 2011 - 05:32 AM UTC
Thank you all for your support and positive comments


Quoted Text

Jiri,

Incredible what you're doing, I found your fantastic work.
The cargo bed, I can not describe ...

Sérgio


Sergio, compared to yours it´s just a WARPIGGY
skarik
Visit this Community
Praha, Czech Republic
Joined: February 08, 2005
KitMaker: 324 posts
Armorama: 295 posts
Posted: Friday, August 05, 2011 - 12:18 PM UTC
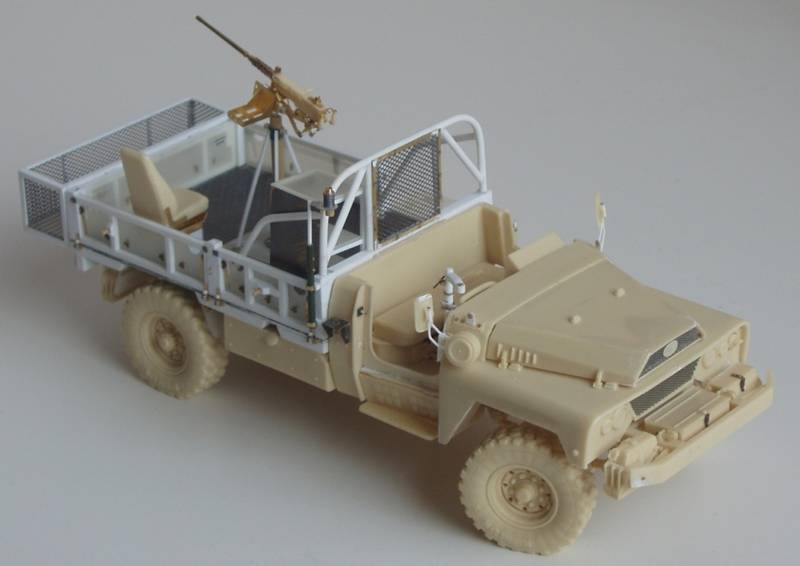
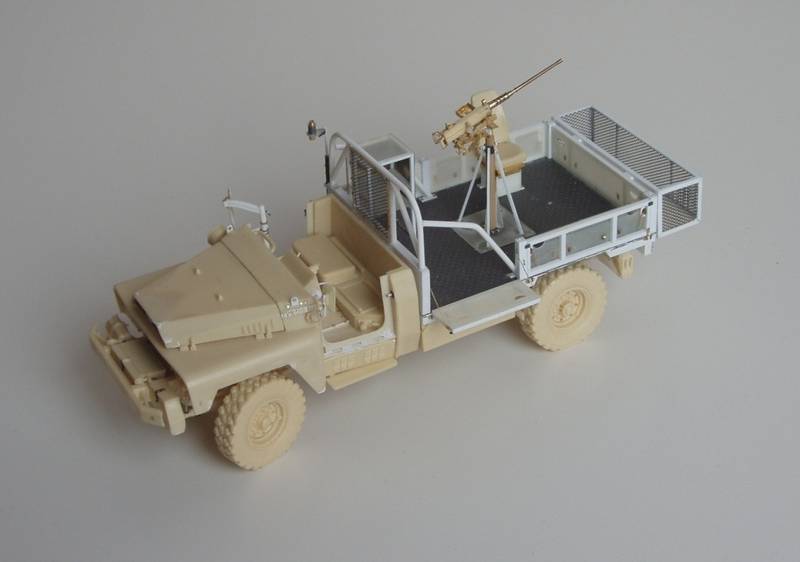
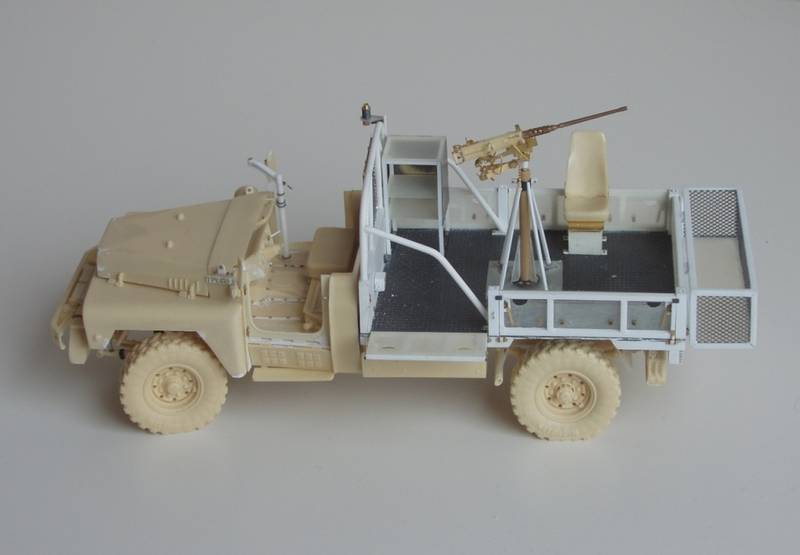
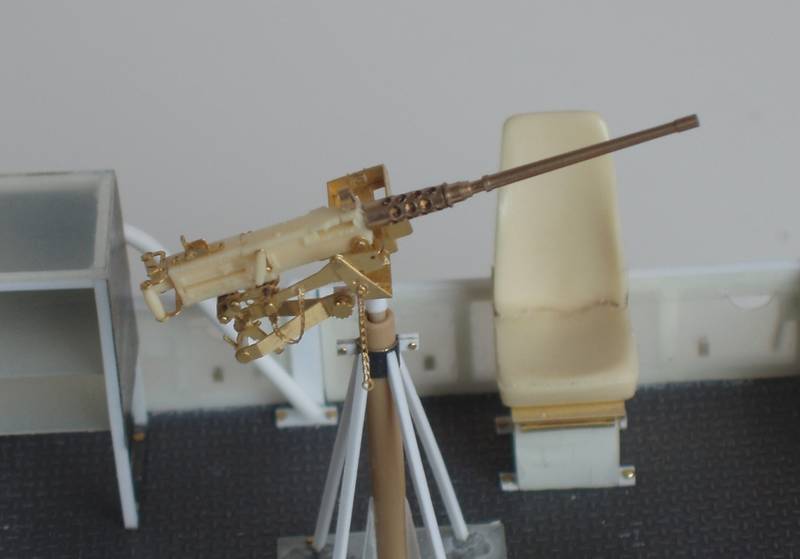
This is last post and pictures before she goes to paint.

A real master piece is the 0.5 MG. Congratulations E.T. Model!!! With so many pieces I spent two evenings on it but it definately worth the work.

Thanks for looking


skarik
Visit this Community
Praha, Czech Republic
Joined: February 08, 2005
KitMaker: 324 posts
Armorama: 295 posts
Posted: Sunday, October 09, 2011 - 06:49 AM UTC
OK, here´s some progress since the last post. As the primer I used Surfacer 1200


skarik
Visit this Community
Praha, Czech Republic
Joined: February 08, 2005
KitMaker: 324 posts
Armorama: 295 posts
Posted: Sunday, October 09, 2011 - 06:56 AM UTC
Camouflage colours are Tamiya Acrylics. The tan colour is a mix of XF-60 + XF-3 together with some white while the brown fields are XF-64 + white


seb43
Visit this Community
Paris, France
Joined: August 30, 2005
KitMaker: 2,315 posts
Armorama: 2,158 posts
Posted: Sunday, October 09, 2011 - 07:04 AM UTC
Youpie Jiri
Nice job on the painting, on the build, etc....

I hope to see the rest
Heavy paint chipping and a lot of stuff on the flat bed

Congrats
Cheers
Seb

skarik
Visit this Community
Praha, Czech Republic
Joined: February 08, 2005
KitMaker: 324 posts
Armorama: 295 posts
Posted: Sunday, October 09, 2011 - 07:18 AM UTC
And this is current status, the base colour is blended with artist oils. I used three different tones... burnt umber, light ochre and light tan. Today, I sprayed the gloss coat all over the kit and will continue with washes.


skarik
Visit this Community
Praha, Czech Republic
Joined: February 08, 2005
KitMaker: 324 posts
Armorama: 295 posts
Posted: Sunday, October 09, 2011 - 07:22 AM UTC
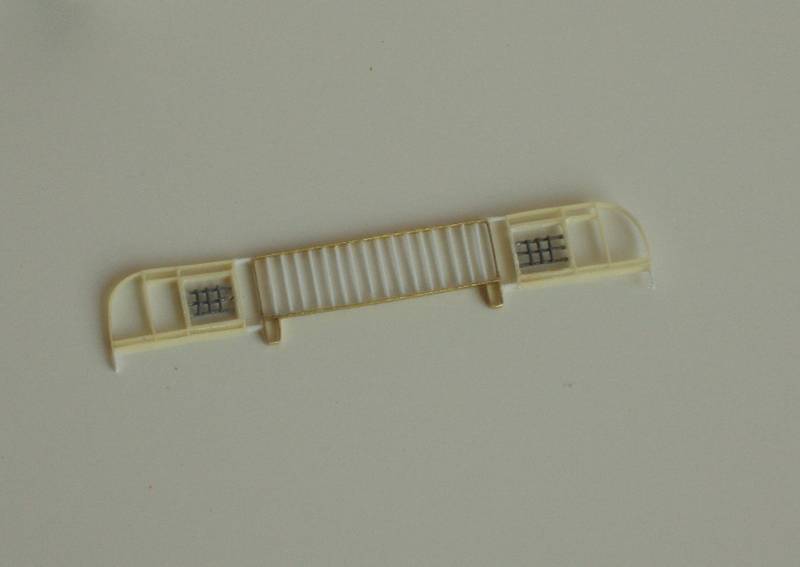
And the last one for today. I had to redone the front grill and kept only the side parts...

Sudzonic
Visit this Community
Scotland, United Kingdom
Joined: December 07, 2007
KitMaker: 2,096 posts
Armorama: 1,983 posts
Posted: Sunday, October 09, 2011 - 07:23 AM UTC
Looking good.
skarik
Visit this Community
Praha, Czech Republic
Joined: February 08, 2005
KitMaker: 324 posts
Armorama: 295 posts
Posted: Sunday, October 09, 2011 - 07:30 AM UTC

Quoted Text

Youpie Jiri
Nice job on the painting, on the build, etc....

I hope to see the rest
Heavy paint chipping and a lot of stuff on the flat bed

Congrats
Cheers
Seb


Thanks Seb, I also hope to see the rest Lots of plans and ideas, but not so much time for modelling

Actually, I think I´ll be carefull with chipping on this one. It´s true I saw some real VLRAs heavily scratched, but I also saw many pictures from Afghanistan with not even one single scratch. Dirt and mud is a must.

The cargo bed will indeed overloaded. Even the Hugo´s beast will envy
seb43
Visit this Community
Paris, France
Joined: August 30, 2005
KitMaker: 2,315 posts
Armorama: 2,158 posts
Posted: Sunday, October 09, 2011 - 07:32 AM UTC

Quoted Text


The cargo bed will indeed overloaded. Even the Hugo´s beast will envy


YES that's the one you need to aim at

I keep an eye on your build Man.

Good luck
Cheers
Seb
 _GOTOTOP