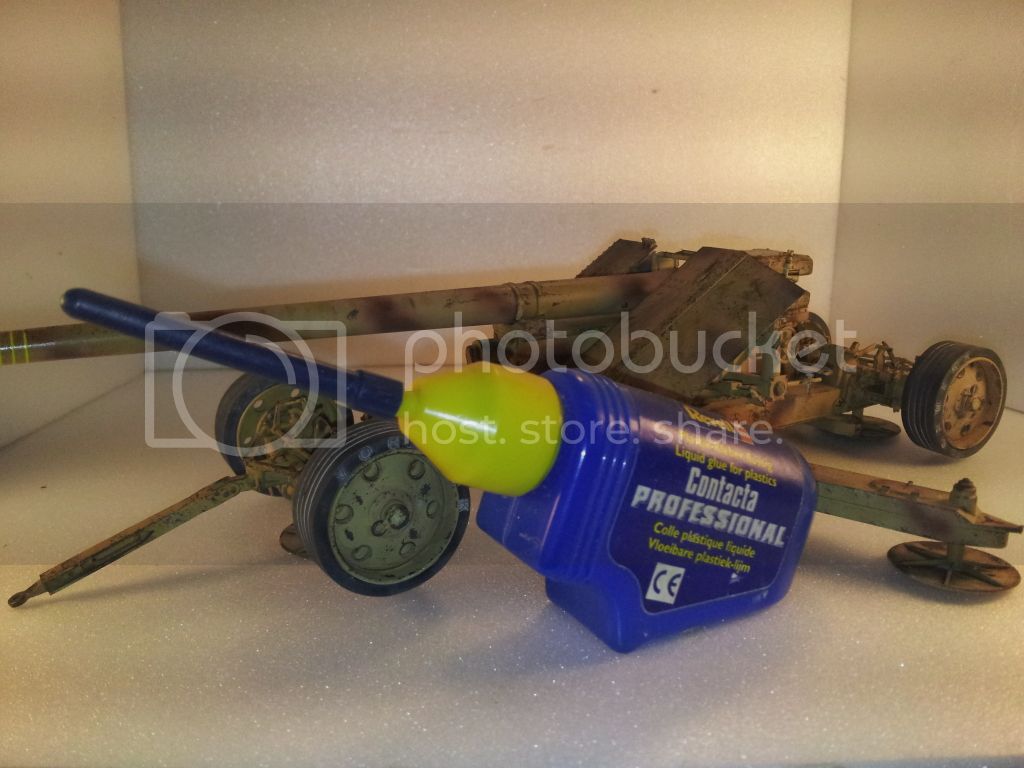
this is my recent build. LHS threw a good bargain on this kit. I was planning to get the greatwall kit but they never reach our shores so on with mr trumpeter.
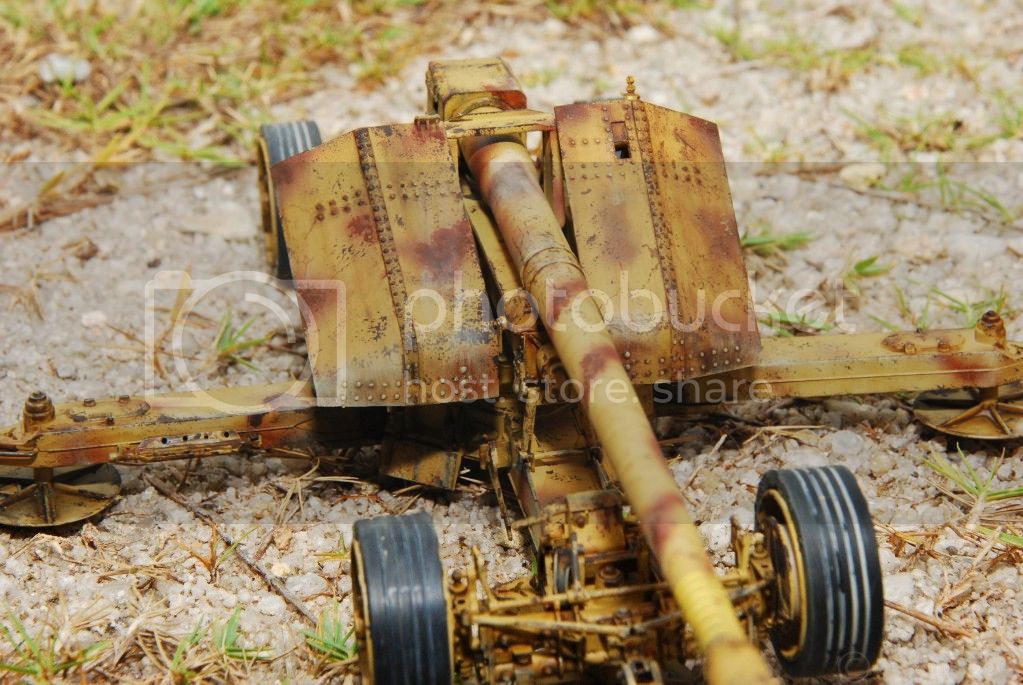
the kit in question is Trumpeter 1/35 German 12.8cm Kanone 43 bzw. (KRUPP) [kit # 02317] was released on Dec 2010.
since there is no build review for the kit, i thought i might make one.
Here's to you all

History Data :
The 12.8 cm Pak 44, (Panzerabwehrkanone) was a German heavy anti-tank gun used during World War II. It was designed as a result of experiences on the Eastern front in 1943. The German army had encountered the Russian 122 mm guns and had issued a requirement for a similar weapon. Development initially concentrated on a field gun known as the Kanone K 44. However once heavier Russian armour such as the IS-2 started to appear the design requirements were altered to include an anti-armour role. Contrary to some claims this design had nothing in common with the 128 mm Flak gun.
The choice of 128 mm was made because of the availability of tooling due to the use of this caliber on naval weapons, design contracts being awarded to Rheinmetall Borsig and Krupp, the first prototype guns were delivered for testing in late 1944. After initial tests the Rheinmetall design was dropped and development continued with the Krupp design. However the service tests showed that a towed anti-tank gun weighing nearly 11 tonnes was impractical so the towed design was terminated.
Approximately 50 barrels and breeches were used on existing carriages. The weapon that used the ex-French GPF-T carriage was known as the K 81/1 while the K 81/2 used the ex-Russian carriage. Both of these designs were rushed, and were too heavy, making them cumbersome to deploy. In 1943 the design was started for a gun to mount on the Jagdtiger (Sd.Kfz. 186) and the Maus super-heavy tank was started using the Pak 44 as its starting point. This weapon of which approximately 100 were made was known both as the Pak 44 and Pak 80 / Pjk 80. Performance was identical to the initial design.
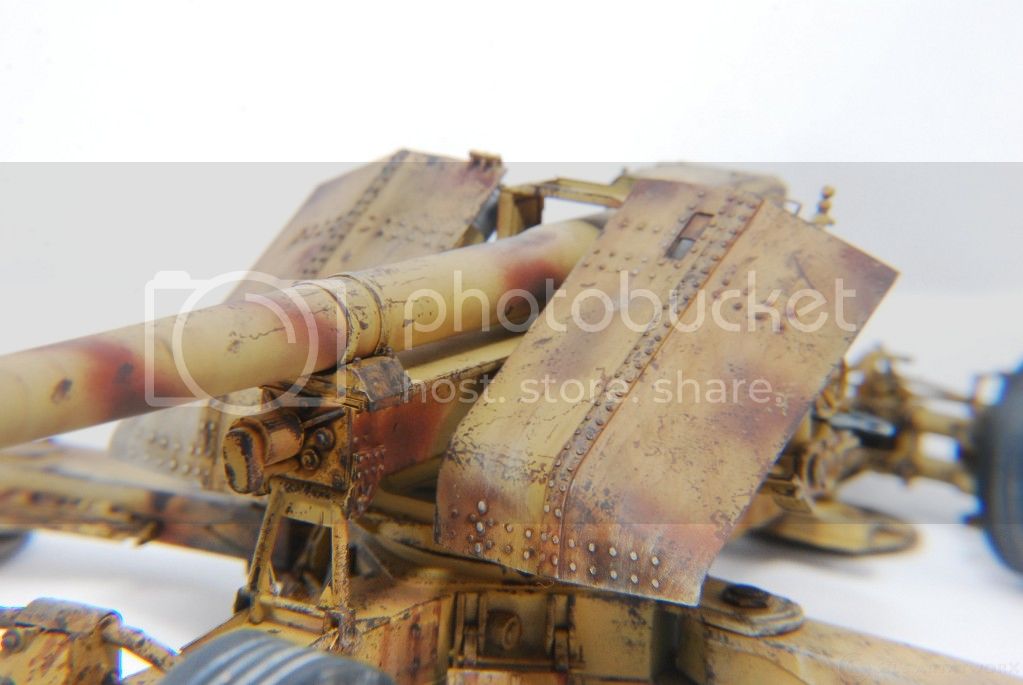
The gun was fed with two-piece ammunition, the projectile and cartridge making up separate pieces. Because of this the gun could be fired using three different sized propellant charges, a light, medium and heavy charge. The light and medium charges were normally used when the gun was fulfilling the role of an artillery piece, where they would launch the ~28 kg projectiles to a muzzle velocity of 845 m/s and 880 m/s respectively. Finally the heavy charge was used when the gun was fulfilling its intended role as an anti-tank gun, where it fired a 28.3 kg APCBC-HE projectile (PzGr.43) at a muzzle velocity of 935 m/s. With the heavy charge, and using the PzGr.43 projectile, the PaK44 was capable of penetrating just over 200 millimetres (7.9 in) of 30 degree sloped armor at 1000 meters, and 148 millimetres (5.8 in) at 2,000 metres (2,200 yd) range. But although its short-range performance was similar to the 8.8 cm PaK 43, the 12.8cm PaK 44 better maintained its performance over longer ranges.
The 12.8cm PaK44 ended up becoming the standard main armament for the Jagdtiger heavy tank destroyer, as well as being the planned main armament for most of the future heavy tank designs in development during the dying months of World War II, including the Maus and E-100. [from wikipedia]
About the kit:
The kit comes in smaller box than average AFV kit but the goodies inside is so well packed.
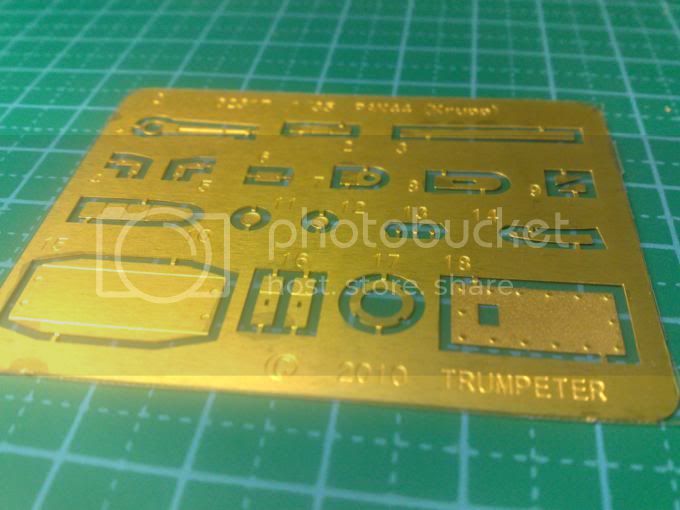
There are 10 sprues molded in light beige color something unusual for trumpeter. 3 PE frets are included as well as 4 vinyls tyres, one metal tuned metal barrel, 4 pieces of brass tubes for the hydraulic arms.
There are over 270 parts with 47 pieces of PE parts.

the instruction is very straight forward and there is a separated color and marking sheet which was printed on glossy and colored paper.

Construction
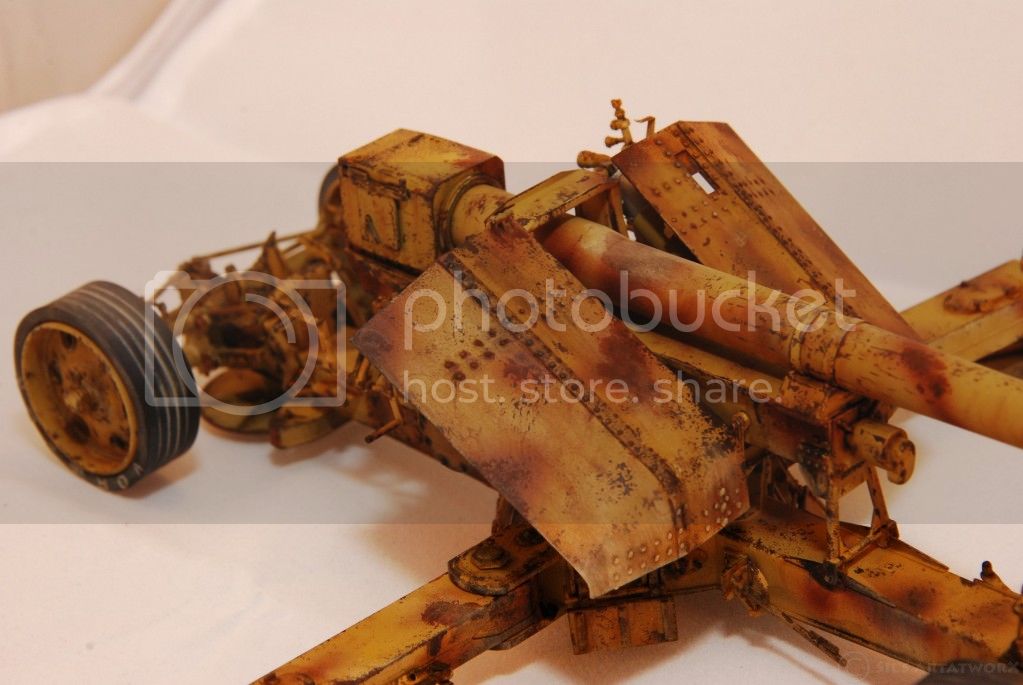
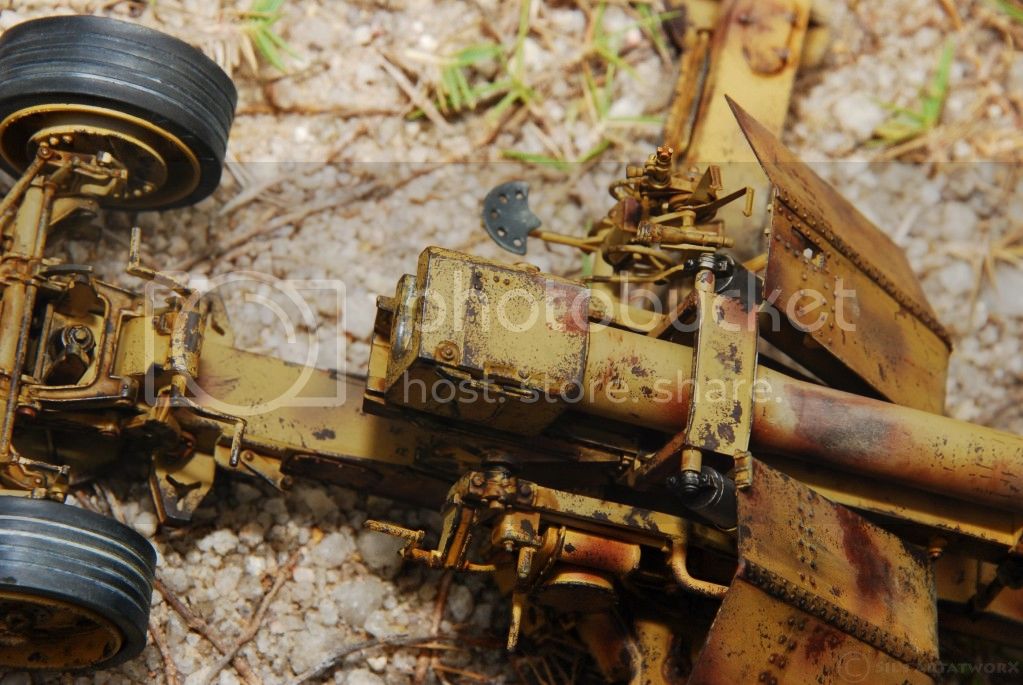
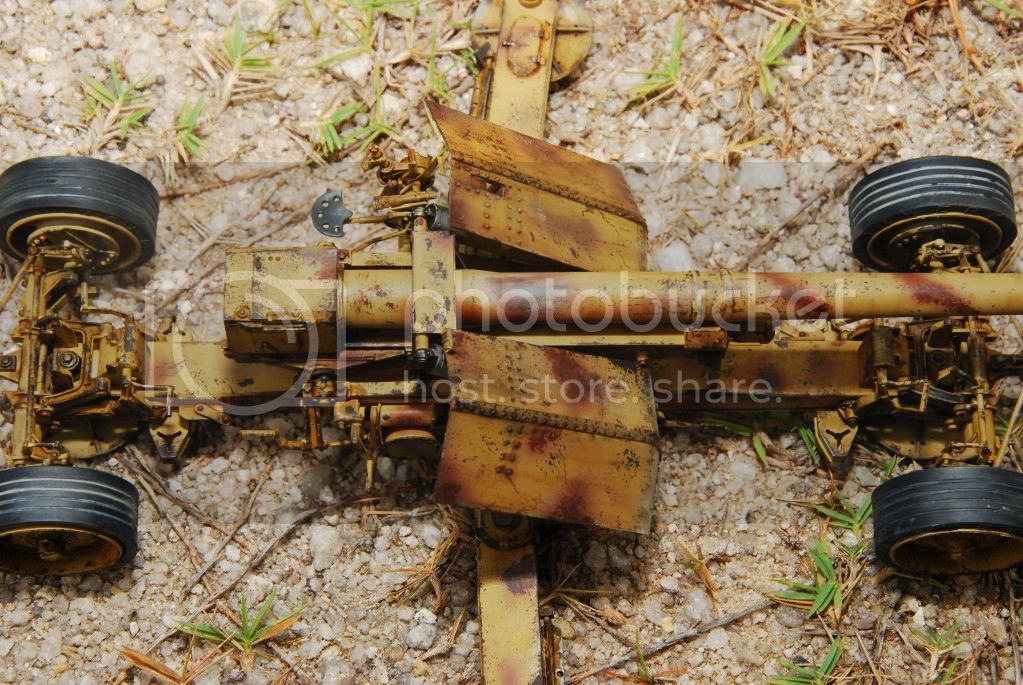
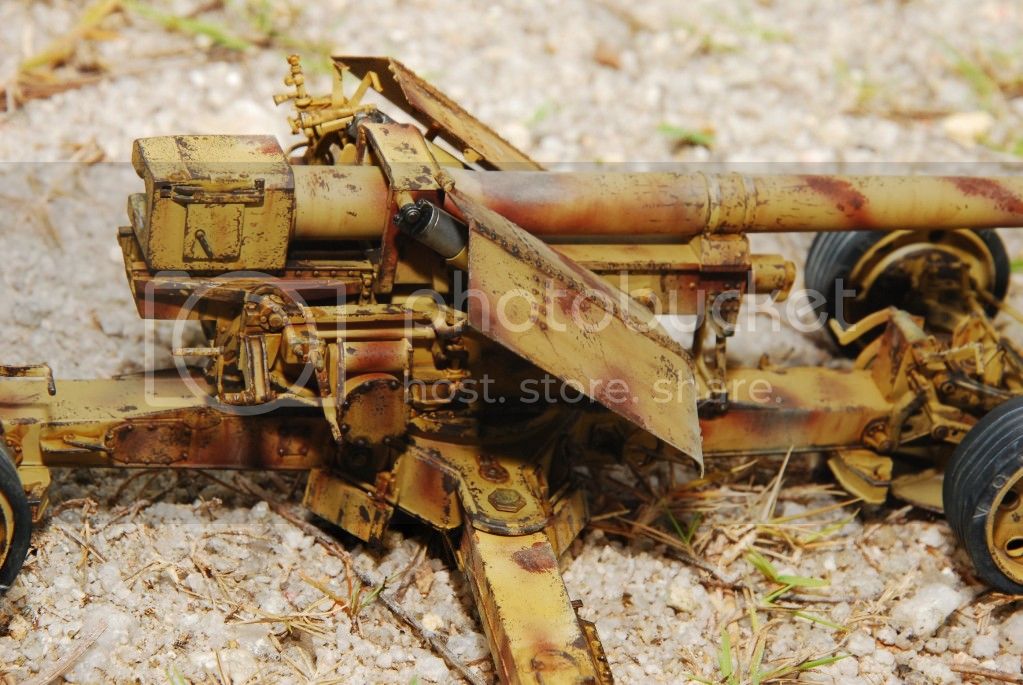
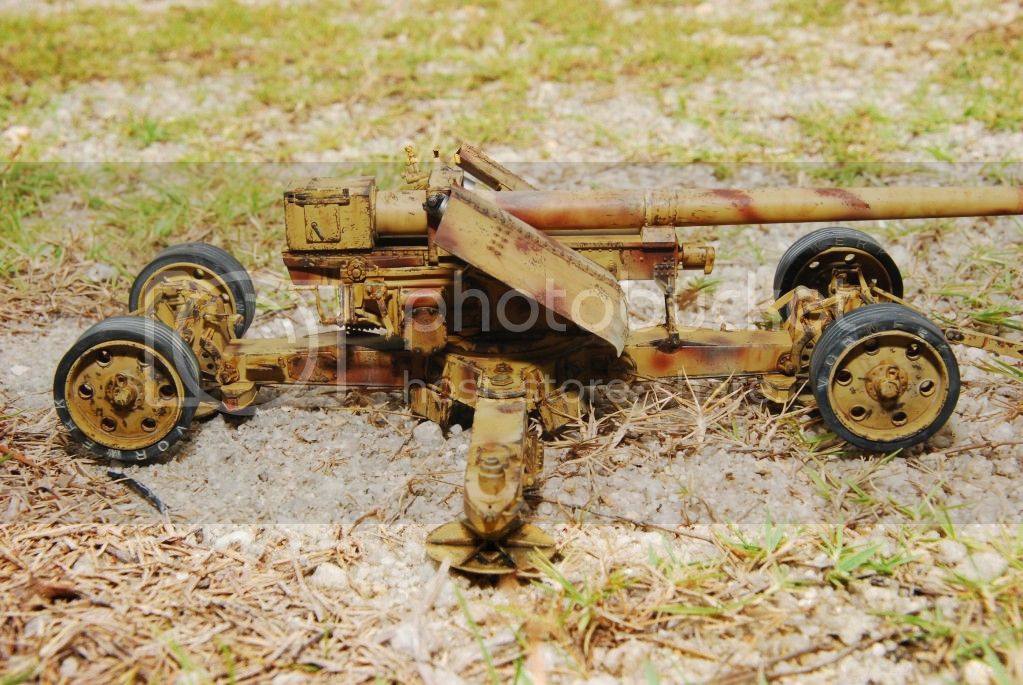
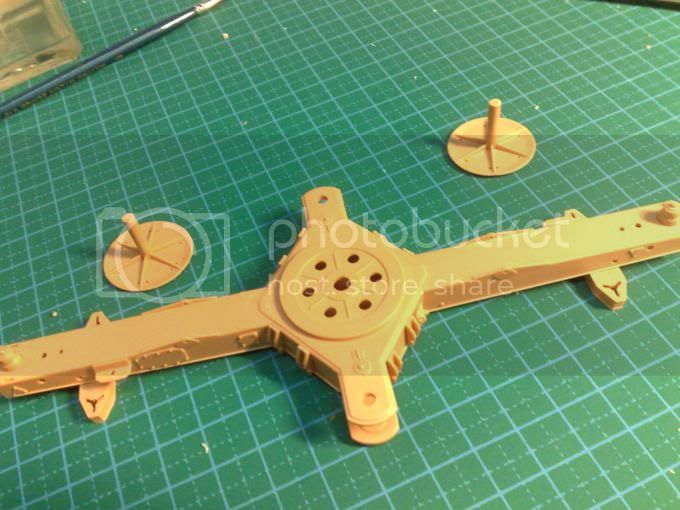
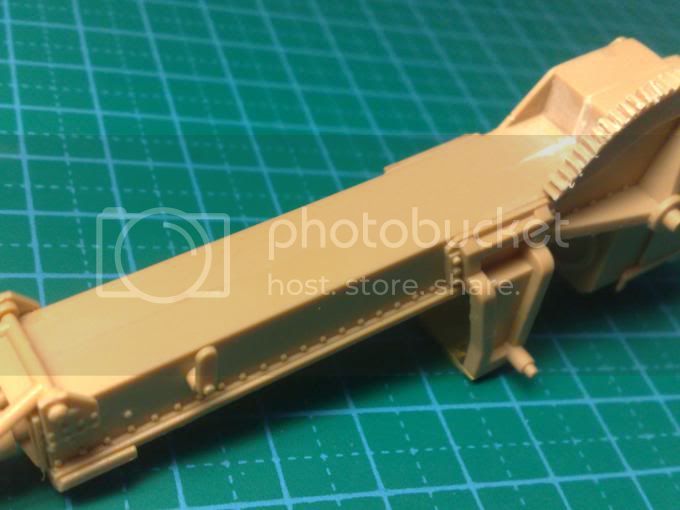
I follow every step in the instruction sheet. So Page 1 begins with the construction of the gun base. There are lots of small parts here. The fitting on the these are superb and no filler is required. Post of Sprue C and E are used for the base.
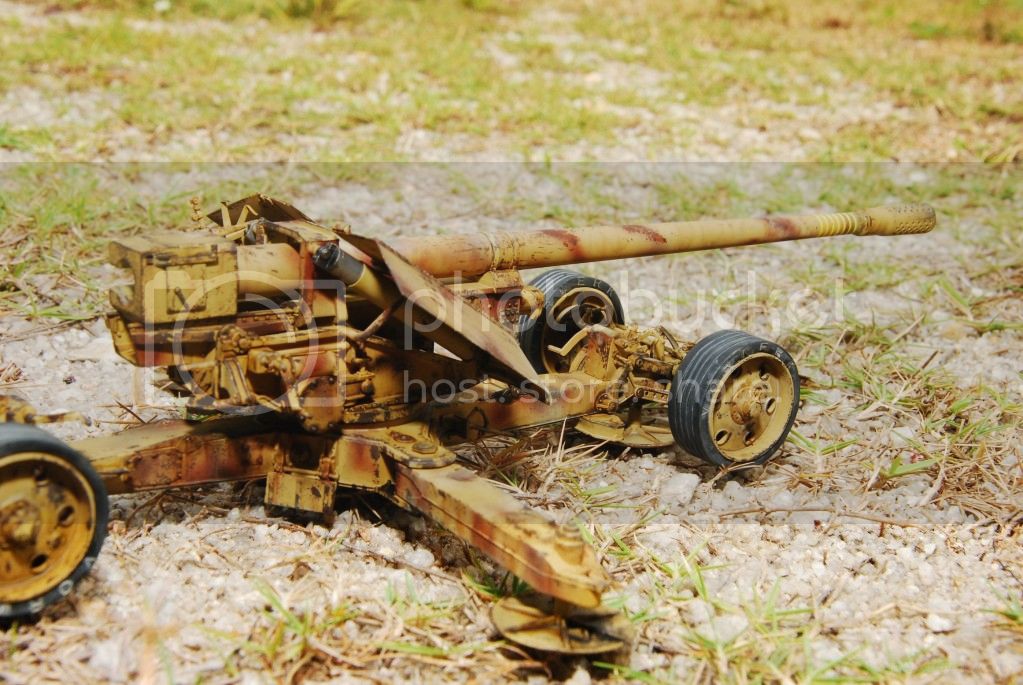
base completed

Next page is the construction of the wheels dolly and bogies. The instruction is very step forward but the construction is a bit tricky and many small parts are involved here. Fitting is good but there is a small gap between the shaft. This took more about 3 hours to complete the 2 set. Small PE part are glued to the dollies.
You can see the gap between the shaft. This is very hard to get it right at first...after several dry fit and sanding, there are still gap...so i decided to live on and fill the gap later with green putty.
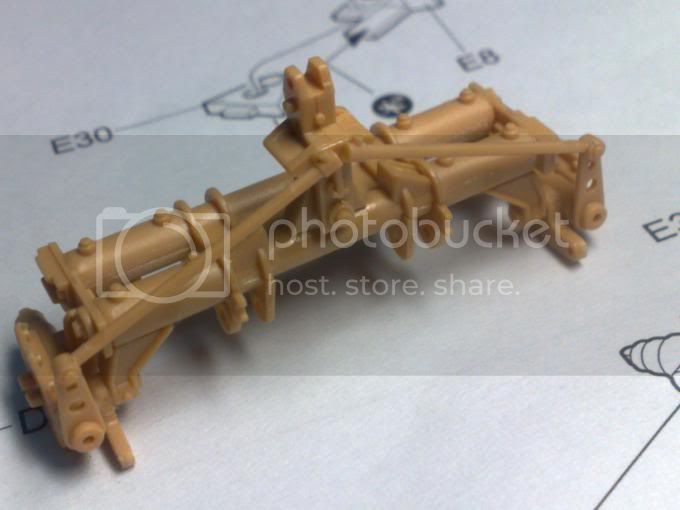

completed:

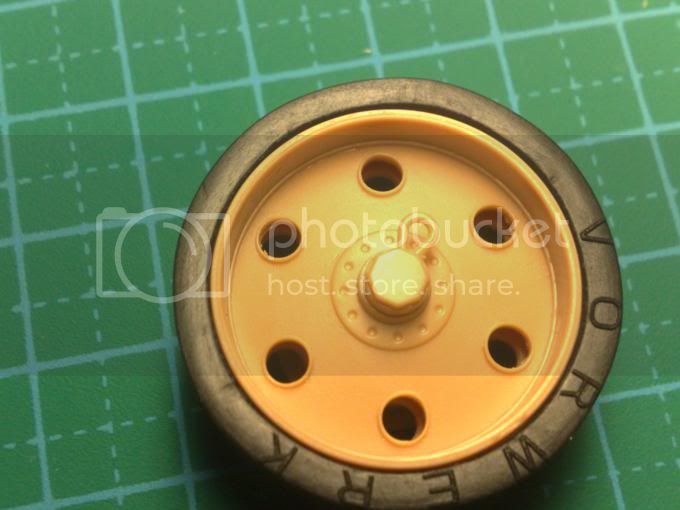
Next is the wheels.
The wheels consist of 6 parts each with one vinly tyre with a good impression of the tyre brand.
The PE frets is heavy than usual but i was so surprise that they are easy to work with. The PE also came in a plastic and a thin film.
Most of the PE in fret B are for the gun cradle and wheels dolly. One example:

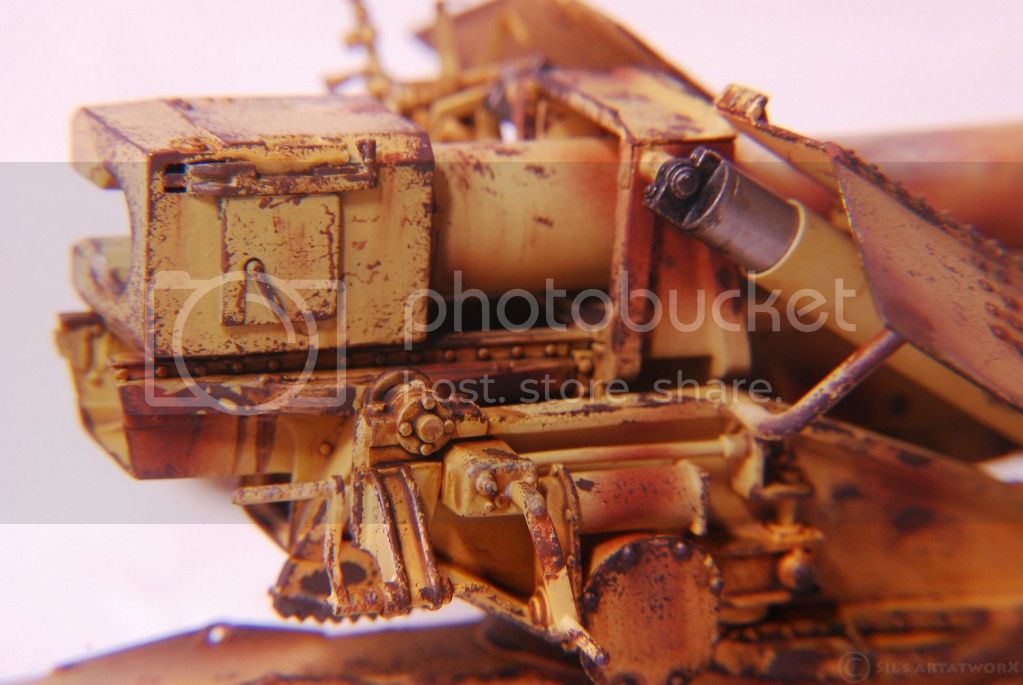
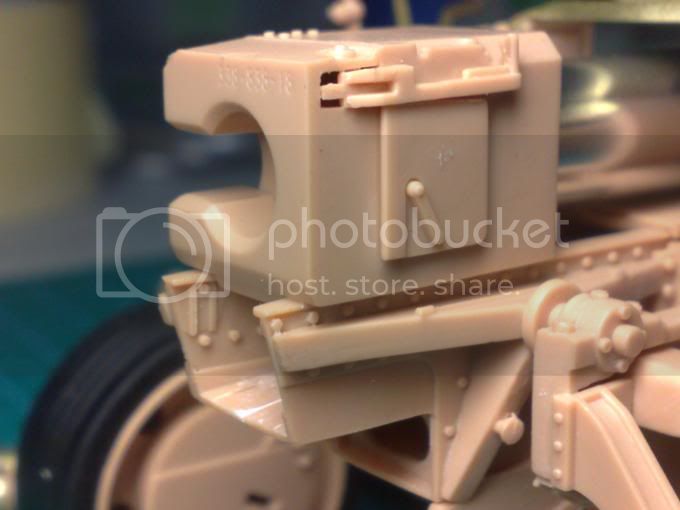
Next is the assembly of the gun cradle. There are lots of pin holes on the inside wall so i fill and sand away with green putty.


This is a very straight forward build.
The 4 pieces brass rod are excellent and fit just nice.

These part are a bit hard to match. SO i fill and sand these join.

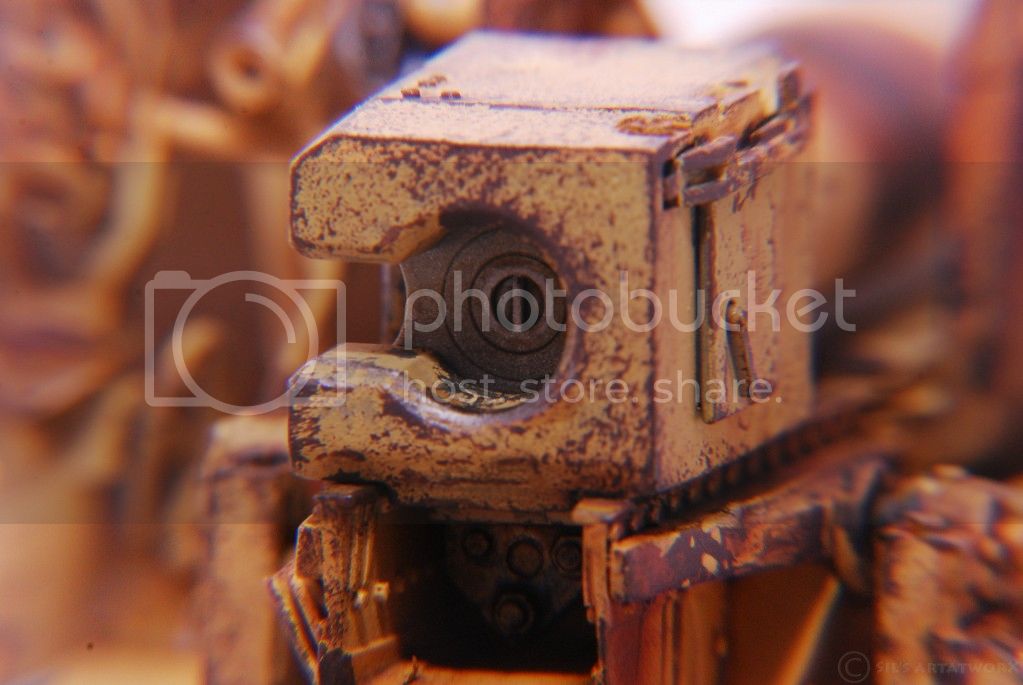
Next is the main gun assembly. The main gun consist of a metal tuned rod and plastic muzzle brake. Mr Trumpeter gives two options for the muzzle brake. First is the 2 part plastic and second a brass PE. I chose the first coz it will be lot easier than rolling the 2 part PE.
The instruction called all the dimple on the muzzle brake to be drilled out.
here how is look. The bottom is after i drill the holes.

then i glued them and add PE to the front.
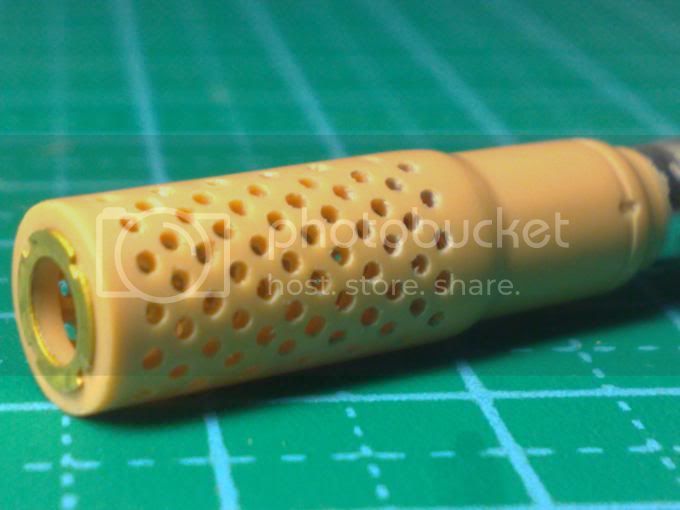
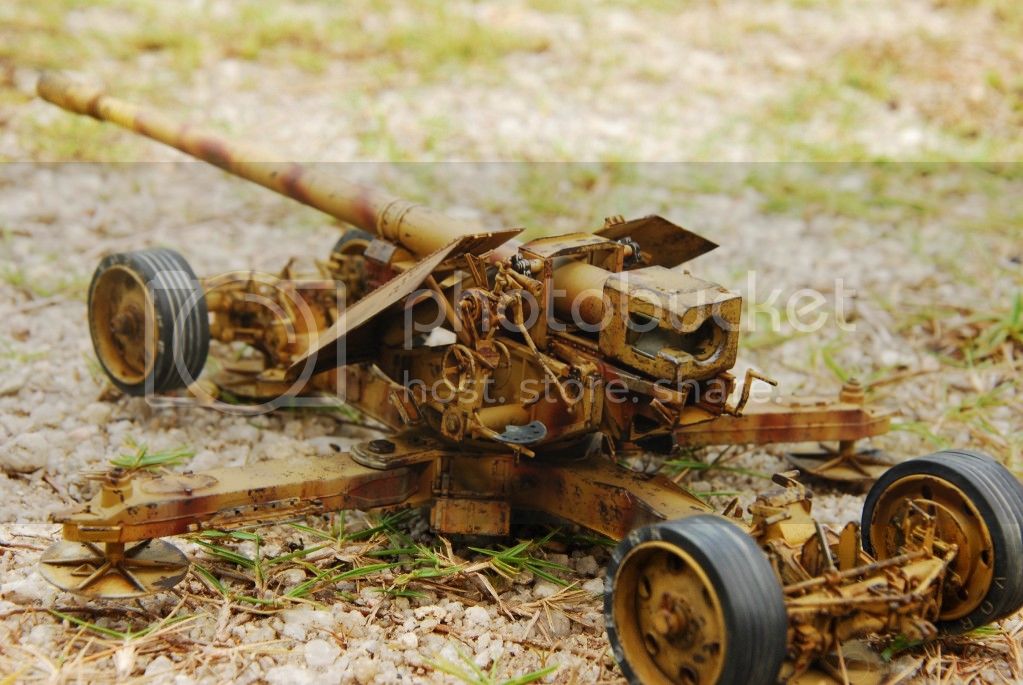
the whole gun:

Trumpeter also gives two options for the gun breech block. I chose the first one.

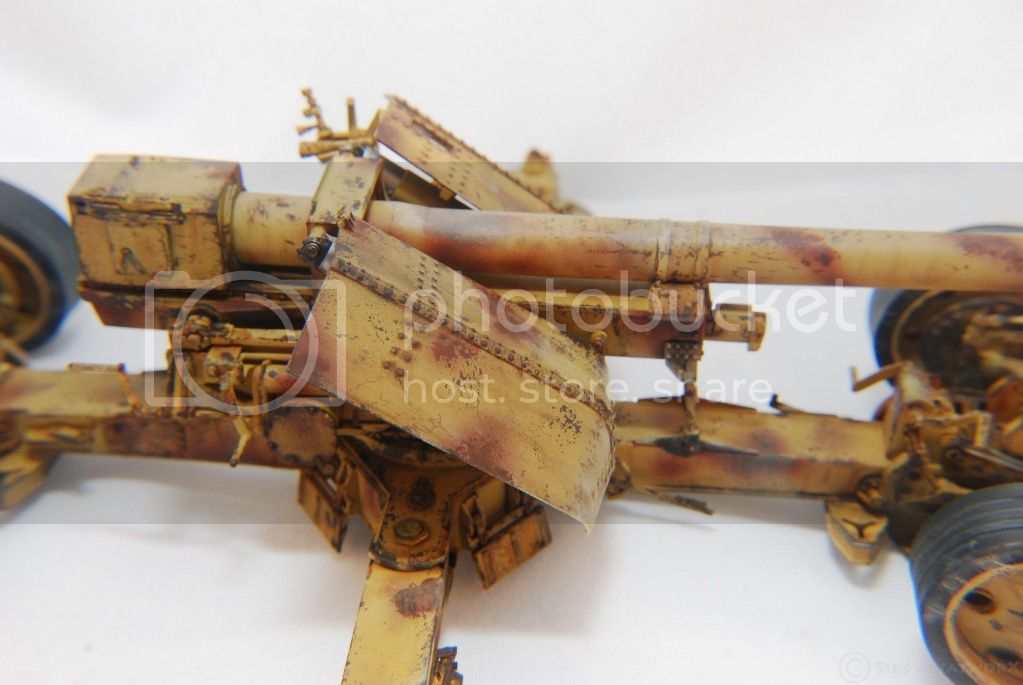
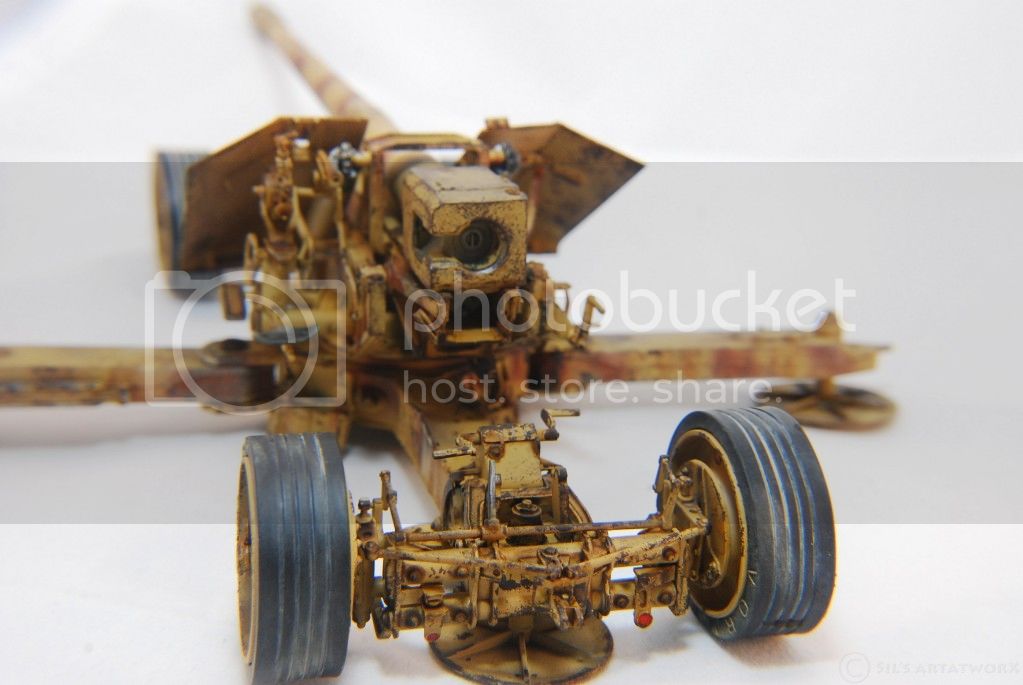
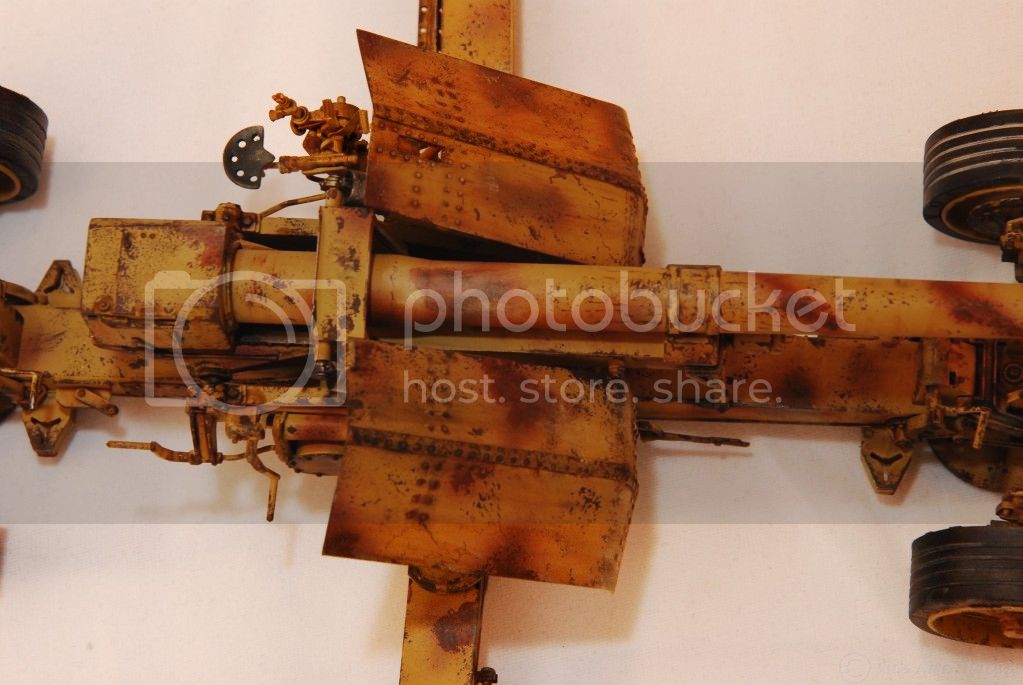
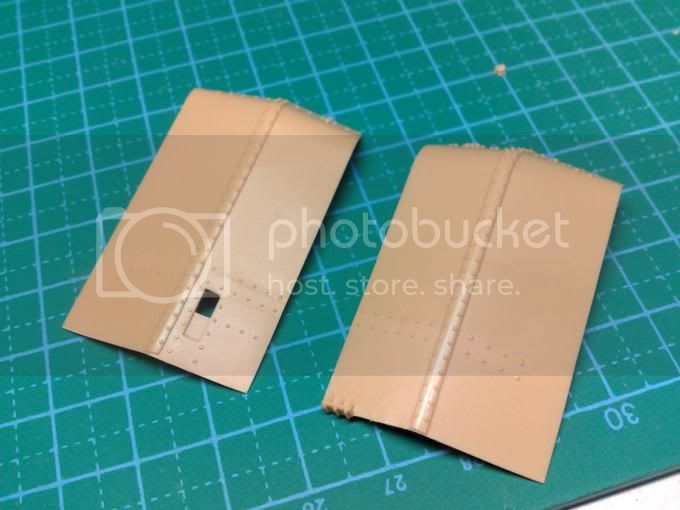
The gun shield consist of 5 part each and the thickness of the plastic is quite reasonable with the scale.
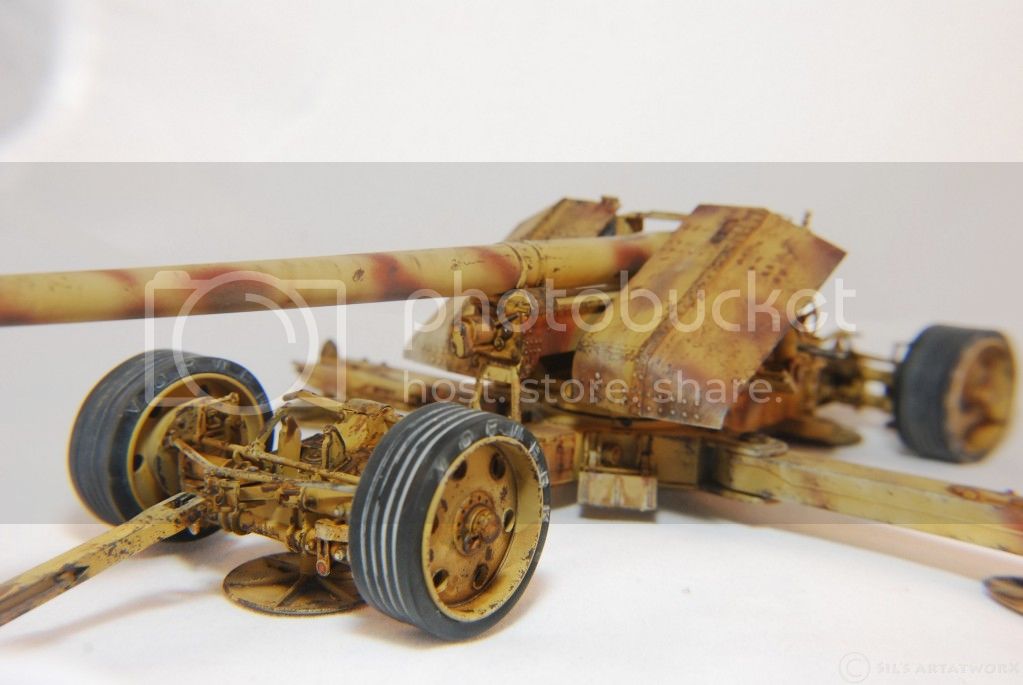
Test fitting the whole assemblies. The main gun is very heavy but i think the main structure is sturdy enough to hold the weight.
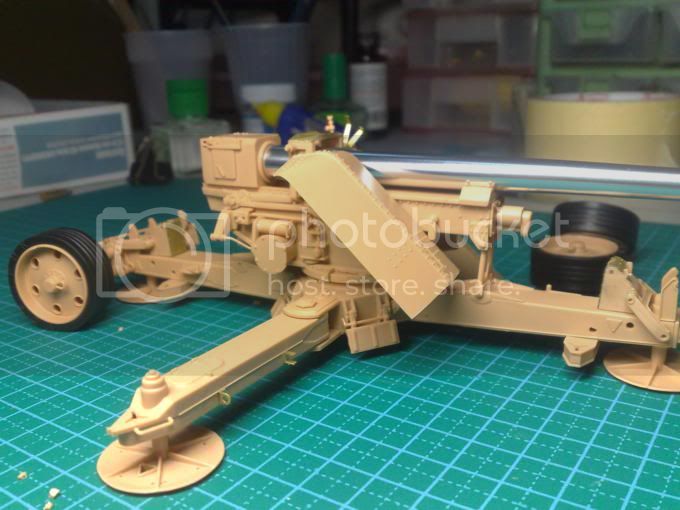


This completed the construction process, although some small part are not glued yet.
will update next.
Thanks for looking.
Zaidi