_GOTOBOTTOM
AFV Painting & Weathering
Answers to questions about the right paint scheme or tips for the right effect.
shadows and highlights with enamels?
stansmith
Visit this Community
England - North West, United Kingdom
Joined: July 18, 2010
KitMaker: 611 posts
Armorama: 584 posts
Posted: Wednesday, August 03, 2011 - 09:17 AM UTC
its the first time i've ever painted figures with enamels (i usually use acrylics), and don't really know the first thing about painting highlights and shadows with enamels, so could someone please help me out?
much appreciated stan
FAUST
#130
Visit this Community
Noord-Holland, Netherlands
Joined: June 07, 2002
KitMaker: 8,797 posts
Armorama: 4,190 posts
Posted: Wednesday, August 03, 2011 - 09:53 AM UTC
Ola Stan

First of all I want to start off with that I am by no means an expert painter. I'm far out of the range of the big guns here on the site.

But I only paint figures with enamel and have been doing so for years. So I kinda managed to get a technique that worked for me.
Basically I follow a few rules which i don't doubt will be very different with acrylics.
1. Thin your paint well.
2. thin layers at a time. and built up shadows and highlights out of several strokes and layers

Normally I set up the basecoat of what I want to paint in a little darker shade then it should be. Holding the figure under a desktop lamp will immediately show you where shadows and highlights should come. The shadows I built up taking the darker basecoat and adding black to it. First a little. Do the first shadowlayer, Then a bit more. Painting the area where the shadow is darkest etc.etc. till I'm satisfied. Same goes with the Highlights. But then I take the color that the basecoat should actually be. That will be the first highlight layer and then I usually add a sand color to the mix. Every lighter layer from that point goes on a ever increasing stroke towards the outer point of the crease (I hope that makes sense) till I'm satisfied. In some colors you can dilute with white but that quickly becomes too strong and looks out of place. Keep in mind that the whole proces minus the basecoat of the figure is done with paint that mostly resembles a filter and some of my highlights can consist of some 7 layers

Here are some examples of my working with enamels on figures Bit of a mix up there are some older figures among them and looking back at them I can see how much I have learned through the years


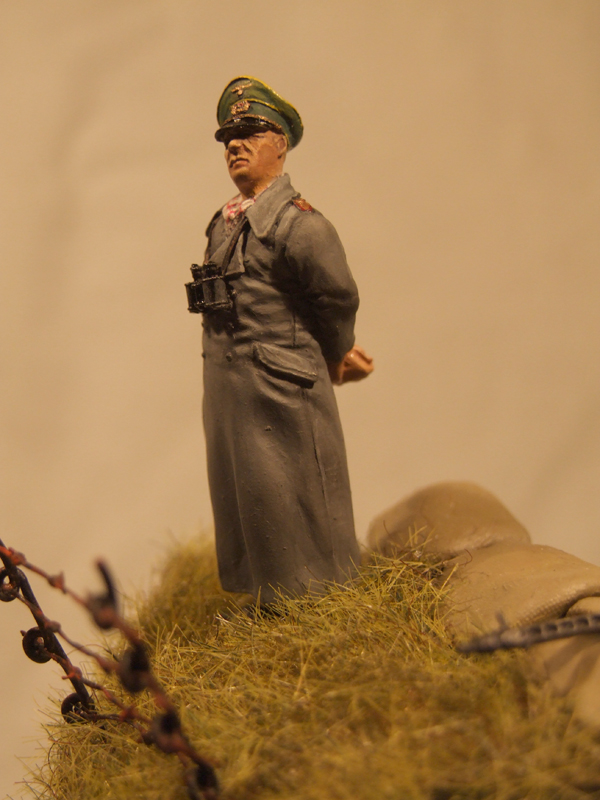
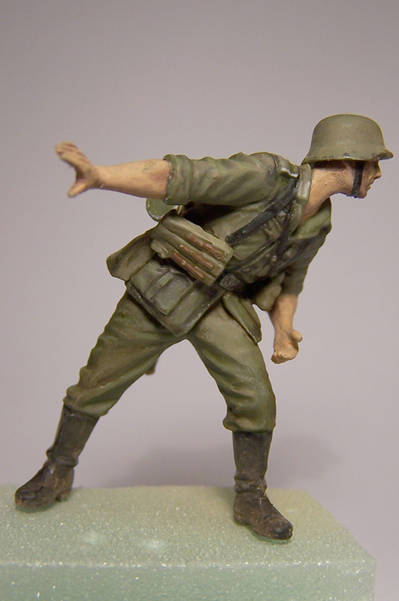
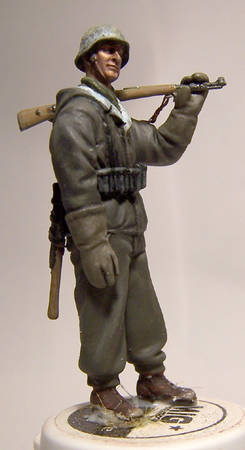
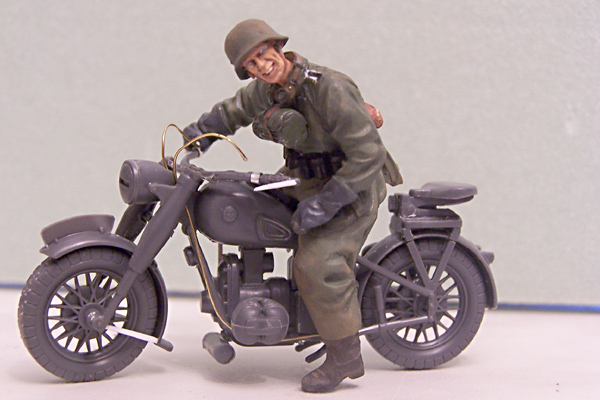

Hope this helps you a bit

Greetz

Robert
stansmith
Visit this Community
England - North West, United Kingdom
Joined: July 18, 2010
KitMaker: 611 posts
Armorama: 584 posts
Posted: Wednesday, August 03, 2011 - 10:42 AM UTC
thanks for the help rob, i'll try that tommorrow!
Plasticbattle
#003
Visit this Community
Donegal, Ireland
Joined: May 14, 2002
KitMaker: 9,763 posts
Armorama: 7,444 posts
Posted: Wednesday, August 03, 2011 - 12:16 PM UTC
My method would be very similar to that of Roberts. Very thinned colours ... and as far as I know, this is how the highlights and shadows are made using acrylics as well. One very important thing to remember is to let the different layers cure between each new sitting ... 24 hours! Painting all the shadows and highlights will maix the paint and it will look like one pass-over instead of several sittings.
This is why many choose to use acrylics, but it suits me as I have a very limited time each evening.
Why change to enamels if you normally paint with acrylics? Not that its wrong to do so .. just wondering.
stansmith
Visit this Community
England - North West, United Kingdom
Joined: July 18, 2010
KitMaker: 611 posts
Armorama: 584 posts
Posted: Wednesday, August 03, 2011 - 12:49 PM UTC
hi Frank, thanks for the help, I just thought I'd give enamels a go really and just see how things would turn out
melonhead
Visit this Community
Wisconsin, United States
Joined: July 29, 2010
KitMaker: 662 posts
Armorama: 457 posts
Posted: Friday, August 05, 2011 - 12:30 PM UTC
ive begun testing a new way of doing my highlights and shadows to get away from oils.

what i normally do is take the base color in enamel. whatever color you would use for the whole thing regardless of highlights and shadows. once that has cured, i would then do shadows and highlights within in the same sitting. doing shadows first by mixing the base color with a tiny bit of black and also the base color with white.
i would do the darkened base color first in any creases or other areas that would require shadow and the lightened color for the places that would require a highlight. i wouldnt let those sit too long before using a thinner dampened brush to blend the hard edges of the highlights/shadows.

with this, i get a turnout like this-==


pictures arent the best, but gives you an idea
stansmith
Visit this Community
England - North West, United Kingdom
Joined: July 18, 2010
KitMaker: 611 posts
Armorama: 584 posts
Posted: Friday, August 05, 2011 - 10:46 PM UTC
hi jesse, thanks for the help i will give it a go!
Paul-H
Visit this Community
United Kingdom
Joined: April 02, 2010
KitMaker: 234 posts
Armorama: 207 posts
Posted: Saturday, August 06, 2011 - 09:14 AM UTC
Hi Robert

Can I ask what you use for painting the flesh on your models, is it an out of the tin colour or a custom mix or do you just do what others do and use oil paints for the flesh.

Could you share what you use.

Thanks

Paul
 _GOTOTOP