_GOTOBOTTOM
Armor/AFV: Allied - WWII
Armor and ground forces of the Allied forces during World War II.
Hosted by Darren Baker
1/6th scale M4A3(105) Sherman project
armourguy
Visit this Community
Pennsylvania, United States
Joined: March 12, 2008
KitMaker: 464 posts
Armorama: 371 posts
Posted: Monday, August 15, 2011 - 09:24 AM UTC
Hi Guys with the jumbo out of the way I have started on my next project. Continuing with this summer's Sherman theme my next project will be a M4A3(105). For this build I mostly have all of the details parts and molds on hand, which will save a lot of time. I will need to fabricate the tank's 105mm gun and mantlet, as well as the other 105mm fittings.

For the base kit I will be using this old rotomold JD M4A3 that I acquired in a trade.


For those who are unaware of the kit, these kits were offered by the action figure collector James Desommine back in early 2004. The kit is made entirely out of rotomolded plastic.


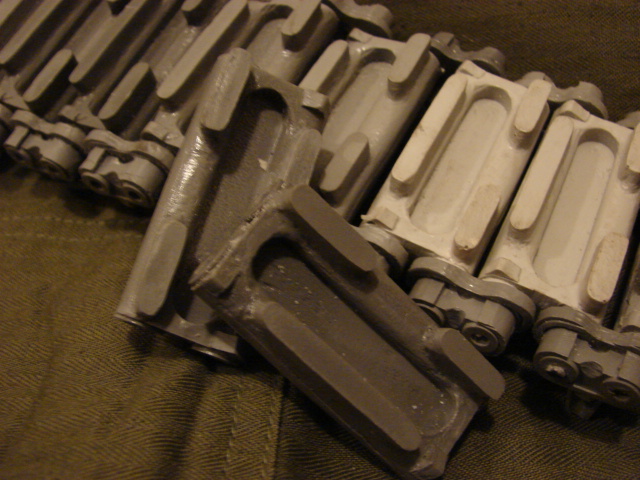
These kits first came with a solid set of VVSS suspension, rubber length tracks, and two sprockets and roller wheels. The details that came on these parts were very poorly detailed and all needed to be replaced.

On the hull itself most of the hull fittings and details were molded onto the bottom portion of the tank's hull panel. This panel would be removed leaving a large hole on the tank's bottom resembling the Flintstones mobile.


On the tank's sides there would be three slots molded in that would indicate where to mount the suspension. and on the tank's rear plate two large plastic blocks were molded in to the wall that would be to affix the idler mount shafts.


The rest of the tank's details were very basic, which will all be removed and replaced. once the build begins


Back when these kits were released almost all of the detail components that are currently on the market didn't exist. So these kits became unpopular.

One of these Sherman kits was my first rotomold vehicle kit,
http://eastcoastarmory.com/forumPic/Mvc-058s.jpg
http://eastcoastarmory.com/forumPic/MVC-028S.JPG
http://eastcoastarmory.com/forumPic/MVC-013S.JPG

and after building one I saw the potential that they have to offer. I always found these kits to be very workable and adaptable. The hull of my last M4A3E2 Jumbo build started as one of these hulls


Today Plastic Panzers offers a reworked version of this kit.

To first start this model I had to first remove all of the molded in details as I mentioned above.


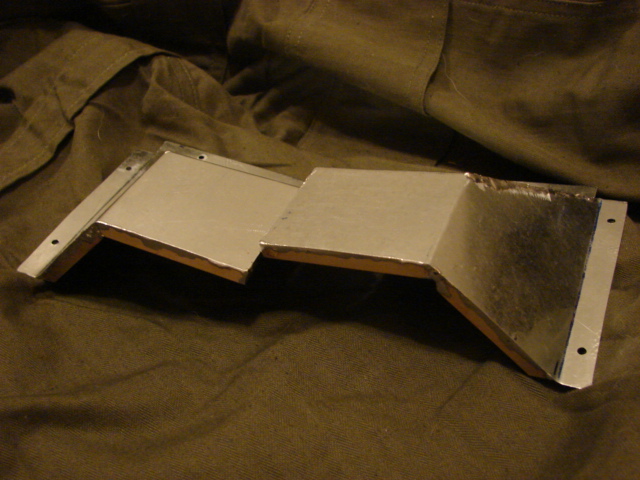
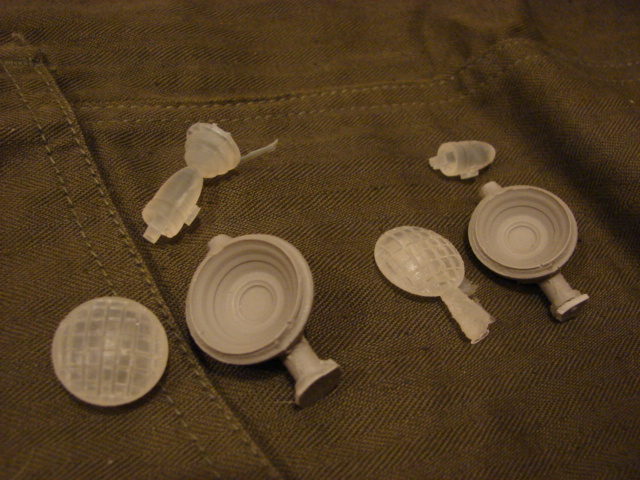
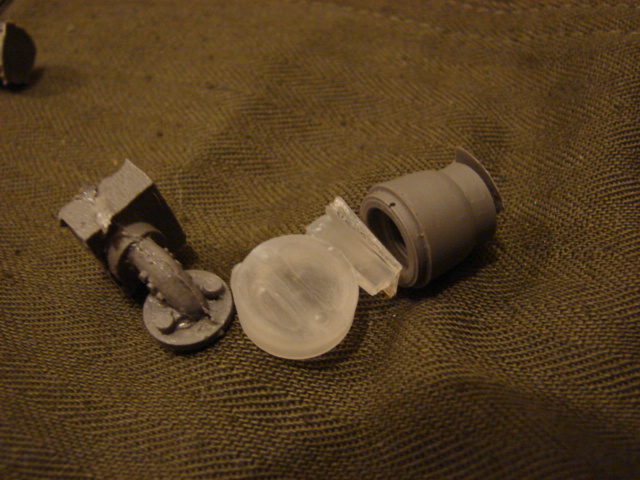
Like on the jumbo the kit's molded in grills were removed and will be reworked and made to be functional. They will be reattached later in the build. The fuel caps will also be functional so the molded in versions were removed as well.


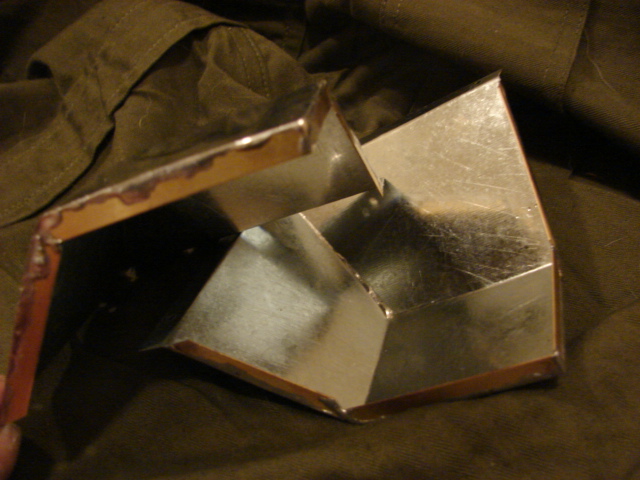
The entire rear wall panel was removed and will be replaced.


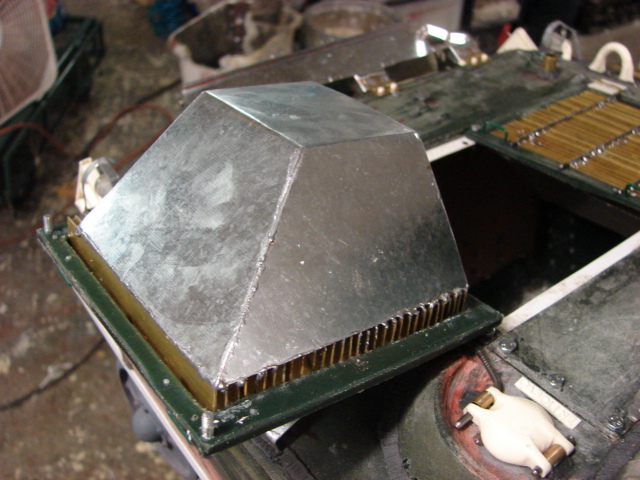
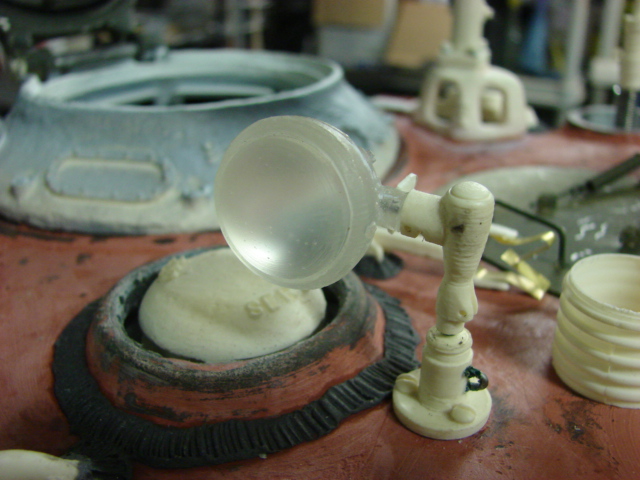
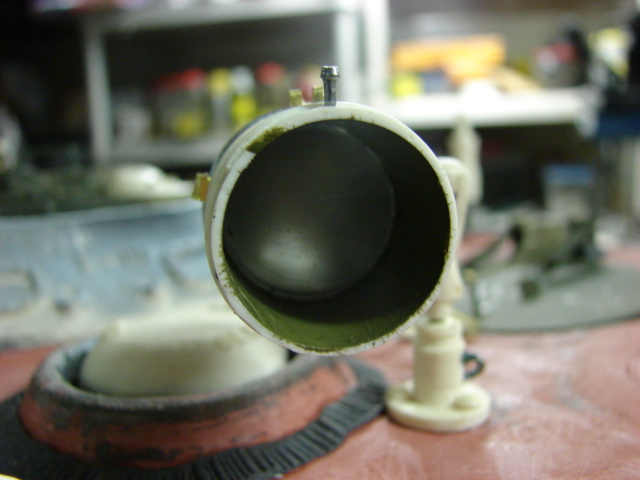
On the tank's turret the molded in split copula was removed and one of my late war copulas will be added later in the build.


After the hull was gutted I began to replate the missing portions of the hull. To do this I use 1/4 inch thick plywood. After the plywood is added the wood panels are soaked in fiberglass resin which removes the wood grain, makes them stronger and weather proof., After this step the wood becomes like plastic.


Before I replace the floor board the lower hull has bulk head strips added. These strips help to give the hull more structure, these strips also received the fiberglass treatment. All panels are mounted to the hull via counter sunk bolts, which will vanish after the body work is complete. The added ¼ inch to the lower hull will also give the tank a better fit with the functional suspension when added.


The rear plate is now a clean plate and will be an easy base to add the details.


The three molded in side strips were removed and the entire lower hull was plated over up to the transmission cover. I did this to not only cover up the gaps left behind from the strips but to also give the transmission cover the proper indent that it requires.


The tank's front armored plate was also plated over for the tank's transmission cover recess.


Once the weather clears up I can sand down the panels and perform the body work on the rear deck and the transmission cover.
A project start video was also posted on youtube, http://youtu.be/Fe6wNn0--eA

More to follow

CMOT
Staff MemberEditor-in-Chief
ARMORAMA
Visit this Community
England - South West, United Kingdom
Joined: May 14, 2006
KitMaker: 10,954 posts
Armorama: 8,571 posts
Posted: Monday, August 15, 2011 - 12:55 PM UTC
John I enjoy following your builds but I have one question. Do you own a barn or a whole farm to keep all these large scale builds in?
armourguy
Visit this Community
Pennsylvania, United States
Joined: March 12, 2008
KitMaker: 464 posts
Armorama: 371 posts
Posted: Saturday, August 20, 2011 - 03:25 PM UTC
Thanks CMOT, I mostly keep the models in my shop area. on top of large display cases, or on waggons for mobility.

I have made some progress on the build.


All of the fiberglassed panels have been sanded down smooth, and the under hull lower plate detailing has been added. The lower hull is now ready for the VVSS suspension.


The tank's transmission cover has also been reworked with the blister fastener mounts, bolt strips, tow hook mounts and cast texture. The transmission is now ready for the Panzerwerk final drives and sprockets which will be mounted once they arrive.


All of the lower rear wall detailing (engine hatch, exhausts, tow hitch mounts, idler mounts, hull extender bulkhead, sponson access plate, and little Joe generator exhaust conduit) has been added, The tank's flip grill will be added after the suspension.


The little Joe exhaust conduit is all brass construction and has the idler cover plate mounted. I have seen this plate mounted on several shermans to prevent damage to the exhaust from debris kicked up from the idler and track.


I will now be assembling the tank's functional VVSS suspension. Once ready they will be added and I can then focus on the tank's rear exhaust deflector grill. More to come.
armourguy
Visit this Community
Pennsylvania, United States
Joined: March 12, 2008
KitMaker: 464 posts
Armorama: 371 posts
Posted: Tuesday, August 23, 2011 - 01:07 PM UTC
I have made some more progress on the tank installing the VVSS suspension.


For the tank's suspension I used a set of my own functional VVSS suspension.


For the tank's wheels I used the late spoke wheels along with the plated over spoke wheels. The wheels are casted in an experimental grey tinted resin. If successful I will look into using this kind of material on my other parts.


After the suspension was assembled they were primed and mounted, once mounted the whole lower hull received a base coat of OD.


After the paint dried I painted the inner portions of the road wheel tires black. This was done now because this area will be difficult to get to once the tank is fully detailed.


Along with the suspension the tank's rear idler wheels were also added. Like on the Jumbo the wheels are mounted to the idler swing plates with a lock pin which secures the wheel to the axel, and also allows the wheel to spin freely.


After the addition of the lock pin the detail resin hub was added concealing the locking mechanism.


A youtube video was made that also describes the progress that was made to the model.
http://youtu.be/d6uEV4W6txs

I will now be focusing on the tank's exhaust deflector grill and the side skirt mounts. More progress to follow!
armourguy
Visit this Community
Pennsylvania, United States
Joined: March 12, 2008
KitMaker: 464 posts
Armorama: 371 posts
Posted: Friday, September 02, 2011 - 02:48 PM UTC
I have made a lot of progress on the model completing most of the tank's front detailing.


For the tank's front hull detailing, I added all of the same details as a standard M4A3. these would include the head lights, brush guards, lift hooks, Bow MG ball mount, side view mirror mounts, and main gun travel lock.


As with my other shermans the travel lock is full function.


The lower bow details were also added. These would include the sheet metal fenders, Panzerwerk final drive and sprockets, functional tow cable lock, and retracting comb track locking device.


One bit of information that was recently brought to my attention was the purpose of the comb device. For the longest time it was unclear to what the purpose of this component was for. It was speculated that it purpose was for to cut low hanging wires, but recently it was discovered that the purpose of the comb was for to lock the track control levers while the tank was in transit on a ship, or train. More information can be found at the following link. http://web.inter.nl.net/users/spoelstra/g104/comb_brakelock.htm


On the hull's sides and rear the fender mounts were fabricated and mounted. Weld beads were added as well.


On the tank's rear hull the metal retracting exhaust deflector grill was constructed and added.


I will now be focusing on the tank's folding rear rack, and spare track racks. More progress to follow!


armourguy
Visit this Community
Pennsylvania, United States
Joined: March 12, 2008
KitMaker: 464 posts
Armorama: 371 posts
Posted: Wednesday, September 14, 2011 - 01:23 PM UTC
More progress has been made to the model.


The tank's functional metal rear storage rack and resin functional track racks have been added.


All of the tank's tool posts, hatch stops, and tail lights have been added along with their weld beads.


The tank's rear air intake cover, fire extinguisher box, and armored fuel cap cover were also mounted. The actual fuel caps will be machined out of aluminum and will be added after the tank is painted.


Finally I have added the tank's 105mm range pole rack. This component is an exclusive to the M4105 series. The purpose for the rack is to hold the ranging poles. The rack is all fabricated out of brass and steel, which is all soldered together.


I will now be focusing on the tank's grill work, once complete I will be focusing on the tank's bow hatches, which will complete the tank's hull so I can then proceed onto the turret!

GregCloseCombat
Visit this Community
California, United States
Joined: June 30, 2008
KitMaker: 2,408 posts
Armorama: 2,394 posts
Posted: Wednesday, September 14, 2011 - 07:49 PM UTC
You just blew my mind - very awesome work. My dad will drool when I show him this
armourguy
Visit this Community
Pennsylvania, United States
Joined: March 12, 2008
KitMaker: 464 posts
Armorama: 371 posts
Posted: Wednesday, September 21, 2011 - 04:37 PM UTC
More progress has been made to the model


The tank's functional rear engine hatches have been reworked and added to the model.


The grills started out as the stock JD molded in grills. To rework the grills the grills were first removed off the upper hull, the center grill sections were then cut out and new brass grill slats were added.


the grill interior detailing was also added. This includes the sheet metal air intake duct.


Once the grill work was added I then moved towards the tank's bow hatches.


This area needed the most work of the whole hull. The original kit hatches were designed to open incorrectly by opening to the rear, On the real Sherman the hatches are supposed to open towards the front and to the front.


The whole bow area was reworked to make the appearance more accurate. A set of my resin replacement hatches were mounted along with a set of Panzerwerks interior periscopes. Casting numbers and brass periscope guards will be added later.


In addition to the hatches I added the tank's front air intake guard, bow antenna cover plate, and the two back up bow periscopes.


I have also made a youtube video describing the updates in more detail.
http://youtu.be/F-JJwU7Ox4U

With the hull now mostly complete I will now be focusing on the tank's turret and 105mm conversion set. More to follow!

armourguy
Visit this Community
Pennsylvania, United States
Joined: March 12, 2008
KitMaker: 464 posts
Armorama: 371 posts
Posted: Friday, September 30, 2011 - 06:09 PM UTC
I have made some progress on the turret and the 105 conversion kit.


As mentioned earlier the stock turret is a good overall starting point for revisions. Some of the more noteworthy alterations that were made was the addition of the integral turret cheek armor on the commander's copula side, and the lowering of the rear bustle.


To lower the tank's bustle to the proper height I first cut a 1/4 - 1/2 inch slit into the rear bustle via an angle grinder.


After the slit was cut two brass braces were mounted to the top portion of the bustle and lower portion of the bustle to force the gap shut and lowering the bustle in the process. To mount the braces I used 4 counter sunk bolts and nuts. epoxy body work will eliminate the remaining seam.


The molded in antenna base well and alternate antenna base mount were both removed and were replaced.


To create the cheek armor I first built up several layers of styrene strips.


Like the bustle mods the armor was flared seamlessly into the turret via the body work.


The tank's gunner's scope mount and replacement pistol port was built into the body work aswell.


The tank's copula overhang blister was also added. The blister is not only found on some vehicles. and adds a nice touch to the turret. The blister was all sculpted from epoxy.


After the epoxy sculpt was dry cast texture was added to the entire turret. This texture is still a little rough and still needs to be sanded.


In addition to the turret's revisions I also started on the tank's 105mm mantlet. Currently I have the rotor drum mostly wrapped up and I'm now working on the main mantlet. Below is a sneak peek of the rotor drum.


Once all masters are complete they will be mounted to the tank, and added to the product line. More updates to follow!


armourguy
Visit this Community
Pennsylvania, United States
Joined: March 12, 2008
KitMaker: 464 posts
Armorama: 371 posts
Posted: Friday, October 07, 2011 - 03:57 PM UTC
I have some more progress on the tank's 105 conversion master.


The outer mantlet master is complete. After the addition of cast numbers this part will now be going into molding.


The barrel master has also been machined and will also go into molding. The 105mm barrel will be included into the kit. (*note, the mantlet will have a better realistic fit once more material is removed off the turret.)


The 105mm tank turret castings differed from the standard 75mm turrets with the addition of an extra air blower located on the rear bustle portion of the turret. This part has also been machined and will be included in the conversion kit.


Currently these parts will be now be going into mold. To complete the set I will now need to finish the master for the tank's 105mm turret 50.cal shorty pintle mount. More parts and progress to follow.
PantherF
Visit this Community
Indiana, United States
Joined: June 10, 2005
KitMaker: 6,188 posts
Armorama: 5,960 posts
Posted: Friday, October 07, 2011 - 07:36 PM UTC
This is really starting to come to life now! I've always been more fond of the M52 mantlet over the later M34A1, I guess because my first 1/16 RC tank was the Sherman.

Nice work so far!


~ Jeff
armourguy
Visit this Community
Pennsylvania, United States
Joined: March 12, 2008
KitMaker: 464 posts
Armorama: 371 posts
Posted: Wednesday, October 12, 2011 - 05:15 PM UTC
Thanks Jeff, my old Tamiya was one of my favorites too. In fact I wouldn't mind building a HVSS version in 1/6th scale down the road.

I have completed the 105mm gun components.


Along with the 105mm conversion I will be adding several more m4 turret components to the product line.

M4 sherman turret lift hooks set, Set contains three lift hooks, two for the rear portion, one curved for the front hump.


Turret air intake center insert. This insert is deigned to replace the molded in blower cover cap that is molded in on most 1/6th scale sherman tank turrets on the market. The set is designed to keep the kit armored blower ring.


Turret air intake complete set. Set includes the center insert and also the outer armored ring.


Last but not least, the M4 105mm early production conversion set. This set comes with the mantlet, rotor housing, 105mm barrel, M1919 MG barrel stub, PVC locks, rear bustle air filter blower and fasteners.


I will be releasing two versions of the 105 conversion, these would be the early and mid production sets. The two sets will contain identical parts, but will differ in the addition of the shorty 50.cal pintle mount in the mid production sets. The early production sets are designed for the shermans that are equipped with the early split hatch commander's copula. Because of the built in 50cal pintle mount on the early copula the shorty pintle mount is not needed. The tank's with the late single hatch copula received the shorty pintle mount.


On the real turret the mantlet bolts to the turret via recessed mounts. This leaves a flush appearance. To mount the new gun to the JD turret properly I had to enlarge the rotor hole and add the mantlet mounts to the turret's interior. I bolted two sections of scrap rotomold plastic to the turret's interior. The gun assembly is then bolted to these plastic strips. This set up will give you the proper inset look of the gun. This procedure needs to be performed to this model regardless of which gun is mounted (75mm or 105mm) to the turret.


The exposed fasteners will be covered up with putty next.


In addition to the tanks gun being mounted the tank's extra air blowers and shell ejection port have been added.


The tank's turret locking bolt has also been completed. The turret mounts to the hull via a single bolt and nut. This system allows the turret to be kept on securely and still allows the turret to spin freely.


All of the parts that I listed above are currently not yet on the product line due to a software issue, Once resolved they will all be posted. More progress to follow.
armourguy
Visit this Community
Pennsylvania, United States
Joined: March 12, 2008
KitMaker: 464 posts
Armorama: 371 posts
Posted: Sunday, October 23, 2011 - 03:46 AM UTC
I have added the last bits and the model is now ready for painting!.


All of the last components have been casted and all of the parts that I listed in my last update post have been added to the product line. In addition to the last parts, I have also added more new additions.

http://www.eastcoastarmory.com/m4.htm

Mid Production M4 105 conversion set. This set is designed for tanks which are equipped with the late style single hatch copula. This set has all of the same parts as the early production set, but includes the 105 shortly retracting pintle mount.


Because of the extra rear bustle air blower was added to the 105 turrets the standard tall pintle mount had to be altered. The mount was shortened, and an extender base plate was created. The mount was still designed to retract for transport purposes. This feature was built into the resin counterpart.


Re tooled metal M4A3 engine hatch air ducts.


Clear Resin searchlight kit. With this kit the entire searchlight bulb housing is casted in clear resin. With this version you only paint the outside of the searchlight. By doing this you leave the clear unpainted bulb untouched which gives you a realistic lens appearance.

This set is designed for static tanks, for RC tanks or tanks which will have a functional searchlight, the hollow searchight set would be a better choice.


On my light I first masked the bulb's lens, then I spray painted the bulb with silver spray paint. The silver paint gives you a good color for the bulb's interior, The silver paint on the exterior will be covered by the tank's primer and base coats.


All of the tank's brass periscope brush guards were added along with the last of the casting numbers.


The tank's MP-48 spring antenna base was added, and for the antenna I went with the smaller segmented type. The connectors have their knurling (but they didn't photograph well)


All of the tank's rear bustle 50.cal storage equipment was added.


The tank's top turret detailing was also completed. This would include the loader's hatch, copula, rangefinder, gunner's scope / guard, searchlight, and 50.cal travel lock.


The tank's side view mirror mounts were also added. The lenses will be added after the tank is painted.


A update video as also created and has been uploaded to youtube.
http://youtu.be/F2CNdXNyNL4

The model will now go into painting. More progress to follow!
armourguy
Visit this Community
Pennsylvania, United States
Joined: March 12, 2008
KitMaker: 464 posts
Armorama: 371 posts
Posted: Sunday, October 23, 2011 - 01:32 PM UTC
The model was painted today.

Final Prime


Base Coat of OD


The tank will now go going into it's next step. More to come.
armourguy
Visit this Community
Pennsylvania, United States
Joined: March 12, 2008
KitMaker: 464 posts
Armorama: 371 posts
Posted: Sunday, November 06, 2011 - 02:14 AM UTC
The tank is now about 95% complete.


All of the tanks markings were added. Like my other builds for the markings they are painted on with custom stencils.


After the markings were added the model was weathered.


All Zerk fittings and the fire extinguisher handles were painted red.


On the tank's front hull the M1919, clear resin headlight inserts, real mirror inserts, and head light cover cap chains were added.


The tank's fuel caps were added. The cover cap handles were also added with their chains.


The Panzerwerk periscope inserts were painted and mounted.


For the tank's track I wanted to do something different. Rather than use what is currently on the market I decided to scratch build and tool up the Sherman's T49 cast steel VVSS Track. The track masters are all machined and the track is designed to fit the Panzerwerk Sprocket. I always liked the look of the T49, and the new track adds a little diversity in the build and the T49's appearance has a more rugged claw like appearance.


These tracks have been in development now for a little while, and alot of time was spent on making the track as detailed as possible, as well as making them articulate properly with the correct timing.


I have been casting links for about a week and I have enough links to finish off this tank. Once the tank is complete I will be listing them on the product line.


Six of these links were added as spares on the tank's rear track racks.


After the tracks are completed and mounted All that remains is the tools, and the M2 HB. Once complete this tank is Finished! More to come.
armourguy
Visit this Community
Pennsylvania, United States
Joined: March 12, 2008
KitMaker: 464 posts
Armorama: 371 posts
Posted: Monday, November 07, 2011 - 04:50 PM UTC
As a quick update the tank now sits on its suspension. and the tank is now ever more closer to the finish line.


The tracks have been assembled, painted / weathered and mounted.


Prior to mounting the tracks the rubber tires were weathered.


In addition to the track installation The loaders hatch, engine hatch intakes and little joe exhaust conduit were weathered.


The tank's coax M1919 was mounted as well. This barrel stub is included with the 105 conversion kits.


The only parts that remain to add are the tools and the M2HB. I have started the tools and have completed / mounted the engine starter crank.


More to follow!
warreni
Visit this Community
South Australia, Australia
Joined: August 14, 2007
KitMaker: 5,926 posts
Armorama: 712 posts
Posted: Monday, November 07, 2011 - 05:23 PM UTC
And now Dragon are releasing a 1/6 Sherman...
armourguy
Visit this Community
Pennsylvania, United States
Joined: March 12, 2008
KitMaker: 464 posts
Armorama: 371 posts
Posted: Sunday, November 13, 2011 - 06:16 AM UTC

Quoted Text

And now Dragon are releasing a 1/6 Sherman...


They sure are, and I'm eagerly awaiting the kit release. Knowing myself and all of the A3 variants in mind I will probably be needing about 10 of kits !!!

The last bits have been added and the model is now complete!.


The tanks tools, gun cleaning kit, and ranging poles were added


The tank's M2HB was also added. For the 50.cal I used the dragon plastic kit. and the Armorpax M23 Cradle mount. On the M2 I added my usual mods. On the M23 I added all of the chain work.


The cover caps, and chains were added to the pintle mount and the searchlight.


A youtube project update video was also created.

1/6th scale M4A3 105 project video #5 (model fully painted and weathered and is 99% complete) - YouTube

Hopfully this week I can get the tank out doors and take some nice outdoor shots.

For now I will be giving the shop a good cleaning in preparation for my next projects .
armourguy
Visit this Community
Pennsylvania, United States
Joined: March 12, 2008
KitMaker: 464 posts
Armorama: 371 posts
Posted: Sunday, November 27, 2011 - 01:38 PM UTC
I took advantage of this weekend's mild climate and took some outdoor shots of the tank.


I was also able to add the last of the parts to the product line http://www.eastcoastarmory.com/m4.htm

T44 Track


Hollow Head lights / Tail lights set. Sets are hollow with clear resin lenses. The set is deigned for RC tanks that will have functional lighting. These are also the versions that I used on this build.


I have some more images and aged versions that will be posted once the web gallery is complete.

I have also started my next project that I will be posting very soon
jashby
Visit this Community
Queensland, Australia
Joined: July 01, 2009
KitMaker: 278 posts
Armorama: 248 posts
Posted: Sunday, November 27, 2011 - 10:56 PM UTC
Nice work as usual John.

It'll be interesting to see if your ECM products can be retrofitted to the Dragon kit when it comes out.

Cheers, John
armourguy
Visit this Community
Pennsylvania, United States
Joined: March 12, 2008
KitMaker: 464 posts
Armorama: 371 posts
Posted: Monday, November 28, 2011 - 11:16 AM UTC

Quoted Text

Nice work as usual John.

It'll be interesting to see if your ECM products can be retrofitted to the Dragon kit when it comes out.

Cheers, John


Thanks John, All of my parts are designed to be used on any 1/6th scale M4 sherman tank, the DML one included. Once the kit is released I will be building a several with these detail parts.

After seeing the previews I know a lot of my parts will be needed to make the model shine.
 _GOTOTOP