_GOTOBOTTOM
Яusso-Soviэt Forum: Cold War Soviet Armor
For discussions related to cold war era Russo-Soviet armor.
Sa-6 Upgrade
juge75
Visit this Community
Jasz-Nagkyun-Szolnok, Hungary
Joined: May 02, 2009
KitMaker: 843 posts
Armorama: 841 posts
Posted: Tuesday, August 30, 2011 - 06:28 AM UTC


afv_rob
Visit this Community
England - East Anglia, United Kingdom
Joined: October 09, 2005
KitMaker: 2,556 posts
Armorama: 2,199 posts
Posted: Tuesday, August 30, 2011 - 09:37 AM UTC
Looks nice! Is this your work?

I guess as well from the instruction sheet i see in the background that this is a Balaton model release?
juge75
Visit this Community
Jasz-Nagkyun-Szolnok, Hungary
Joined: May 02, 2009
KitMaker: 843 posts
Armorama: 841 posts
Posted: Tuesday, August 30, 2011 - 04:20 PM UTC
This is fact, but it is no longer manufactured.
For now looking for manufacturer, will soon be available again.
This kit I made (the master).
jointhepit
Visit this Community
Oost-Vlaanderen, Belgium
Joined: May 14, 2006
KitMaker: 3,829 posts
Armorama: 881 posts
Posted: Thursday, September 01, 2011 - 11:28 AM UTC
hope to hear soon, I've got it build 90 procent, just the rockets seem to be a major problem for my brain/hand coordination

greetz
juge75
Visit this Community
Jasz-Nagkyun-Szolnok, Hungary
Joined: May 02, 2009
KitMaker: 843 posts
Armorama: 841 posts
Posted: Thursday, September 01, 2011 - 09:25 PM UTC
Recent actions: The Missiles feet were copper wire, 0.6 mm in diameter, drilled through the rails in place, and location of the cable cutter.
Assemble a cable cutter.
Missiles set the location of wiring, then there will be up to touch the head of the cutter.
The front rails U-shaped channel, evergreen.


juge75
Visit this Community
Jasz-Nagkyun-Szolnok, Hungary
Joined: May 02, 2009
KitMaker: 843 posts
Armorama: 841 posts
Posted: Monday, September 05, 2011 - 10:27 PM UTC
Continuing the upgrading construction of Sa-6, the cables are completed, the shear-cutting equipment, recording and transmission wiring, upgrade.
Painting occurs, then come to the decals.


Teaker11
Visit this Community
California, United States
Joined: July 02, 2009
KitMaker: 962 posts
Armorama: 786 posts
Posted: Monday, September 12, 2011 - 01:54 PM UTC
Very good, now how do I get the cutters?
Jim
juge75
Visit this Community
Jasz-Nagkyun-Szolnok, Hungary
Joined: May 02, 2009
KitMaker: 843 posts
Armorama: 841 posts
Posted: Monday, September 12, 2011 - 05:03 PM UTC
The cutters: see the pictures.
The master club rivet, made ​​of 0.5-0.6-mm in size, but other materials may be used (copper wire), the point is to be moved (I stuck the final, the top position after completion of the cable connecting the rocket place.

Towing cables were in place.
The only pre-set eyes and give a tow cable from the back but does not mention.
These brackets attach to either the manufacturer, the etching by Eduard allocation holders, cable EUREKA XXL 0.75 towing cable, pulling the eyes of the other three kits from one of the top bracket 0.8 evergreen rod and sheet.
It's advisable to set the PT_76 towing cable set-up to obtain (SKP, Karaya, T-72 or Eureka 3537).
Since then I access hardly worth the lamp shade and above them, behind them in a pre-painted (in this case will be green).
The two external IR lamp black glass, the two inner, silvery color will be painted in light disguise, a green frame.


juge75
Visit this Community
Jasz-Nagkyun-Szolnok, Hungary
Joined: May 02, 2009
KitMaker: 843 posts
Armorama: 841 posts
Posted: Thursday, September 15, 2011 - 07:40 AM UTC
Paint 1.


juge75
Visit this Community
Jasz-Nagkyun-Szolnok, Hungary
Joined: May 02, 2009
KitMaker: 843 posts
Armorama: 841 posts
Posted: Saturday, September 17, 2011 - 07:17 AM UTC
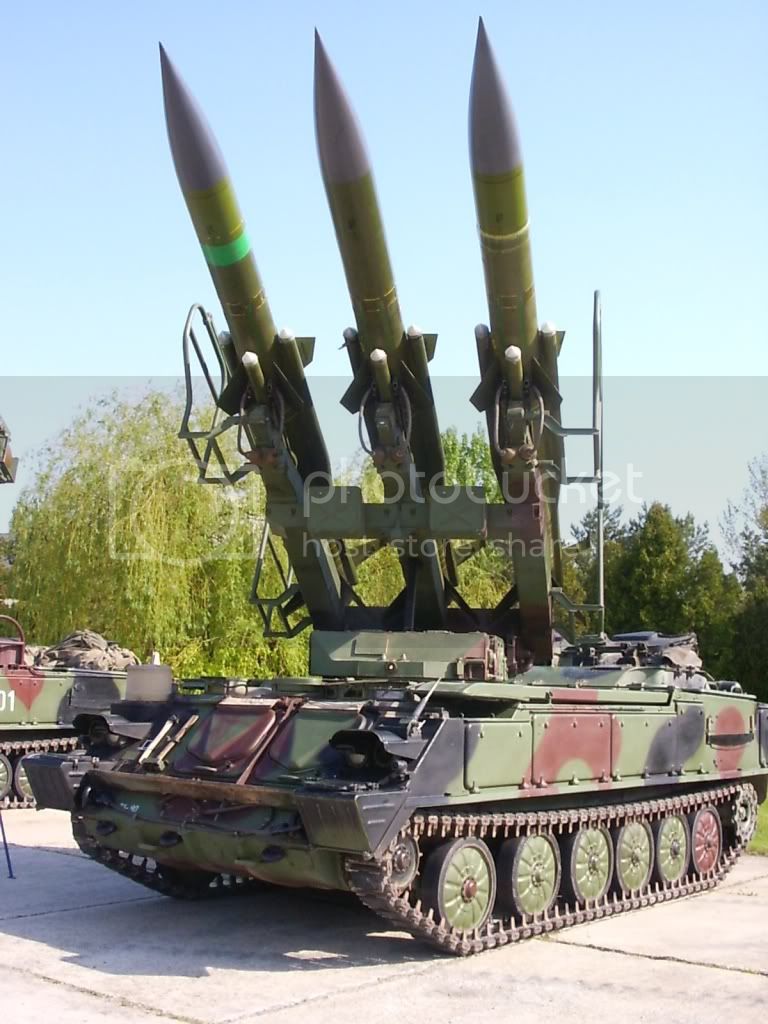
Paint2 , ME version nose grey (Revell M 57), M3 version white (Revell M 5).


Decals


And the original ME


The decals and upgrade set produced by H.A.D.
http://www.had.hu/hadecals_hu.html

CMOT
Staff MemberEditor-in-Chief
ARMORAMA
Visit this Community
England - South West, United Kingdom
Joined: May 14, 2006
KitMaker: 10,954 posts
Armorama: 8,571 posts
Posted: Saturday, September 17, 2011 - 08:04 AM UTC
Nice job on this Juhász perhaps you will consider sending a build feature when you are happy it is complete.
juge75
Visit this Community
Jasz-Nagkyun-Szolnok, Hungary
Joined: May 02, 2009
KitMaker: 843 posts
Armorama: 841 posts
Posted: Saturday, September 17, 2011 - 10:05 AM UTC
Finish?


Teaker11
Visit this Community
California, United States
Joined: July 02, 2009
KitMaker: 962 posts
Armorama: 786 posts
Posted: Sunday, September 18, 2011 - 04:52 AM UTC
why is there a white tiped rocket in the middle? is it a different type?
juge75
Visit this Community
Jasz-Nagkyun-Szolnok, Hungary
Joined: May 02, 2009
KitMaker: 843 posts
Armorama: 841 posts
Posted: Sunday, September 18, 2011 - 07:19 AM UTC
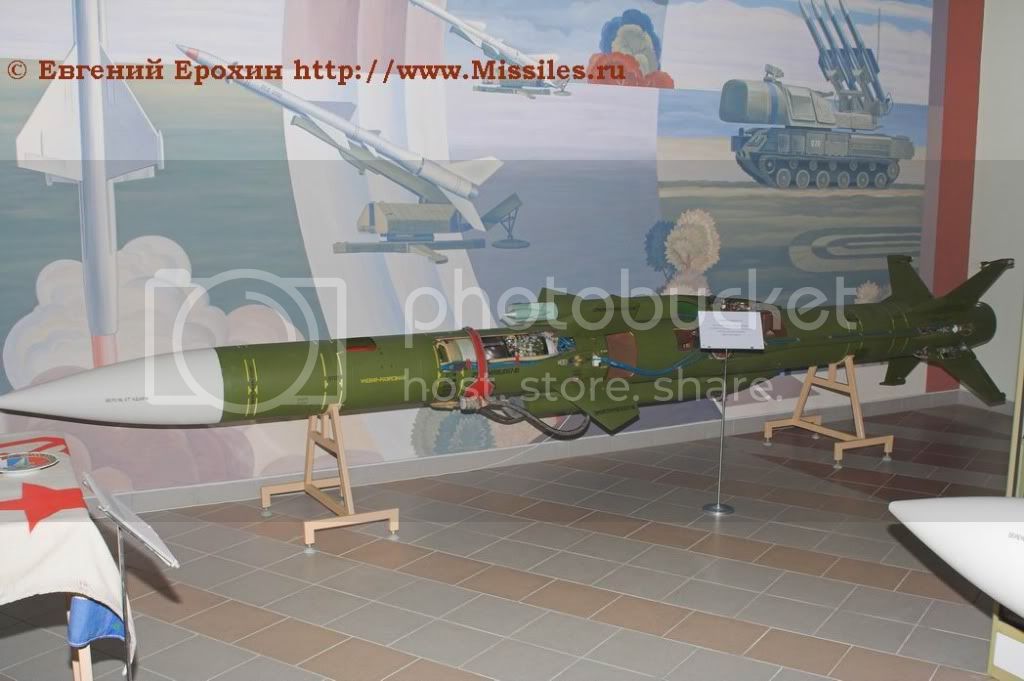
There are two main export versions of the 3M9 Missile: 3M9ME, it's the former, this nose is gray, each aerodynamic element separately be fitted, as well as advanced, modern and new M3 (M3E), its white nose assembly is easy, because the back-off aerodynamic elements enforceable.
The two versions can be used in combination.
The two types of models is the version of the painting and wanted to show.

3M9ME Missile:


3M9M3 (M3E) Missile:

 _GOTOTOP