Hessen, Germany
Joined: February 27, 2006
KitMaker: 81 posts
Armorama: 76 posts
Posted: Saturday, October 15, 2011 - 10:17 PM UTC
Hello,
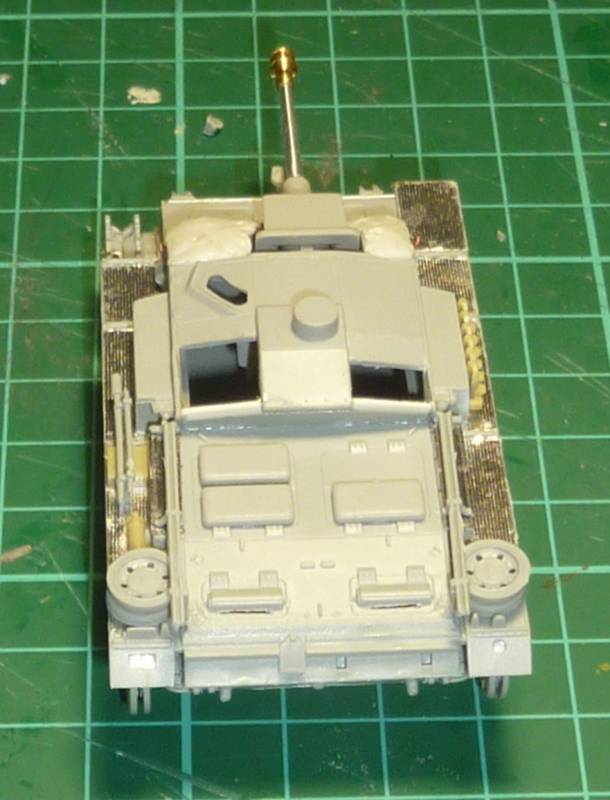
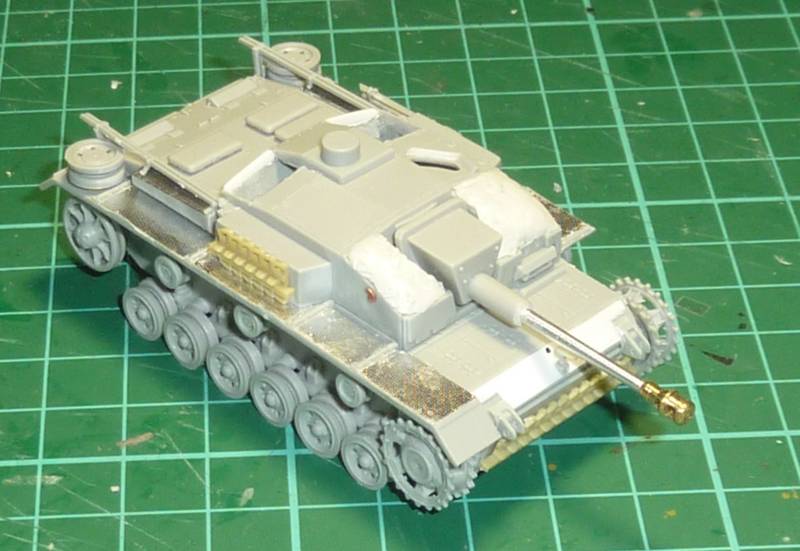
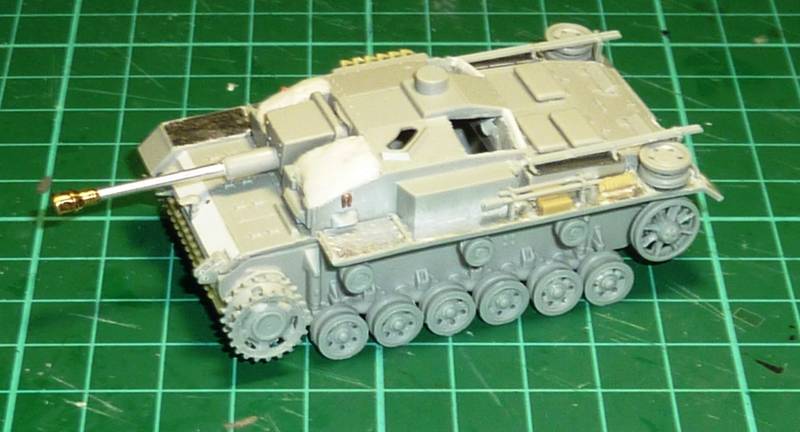
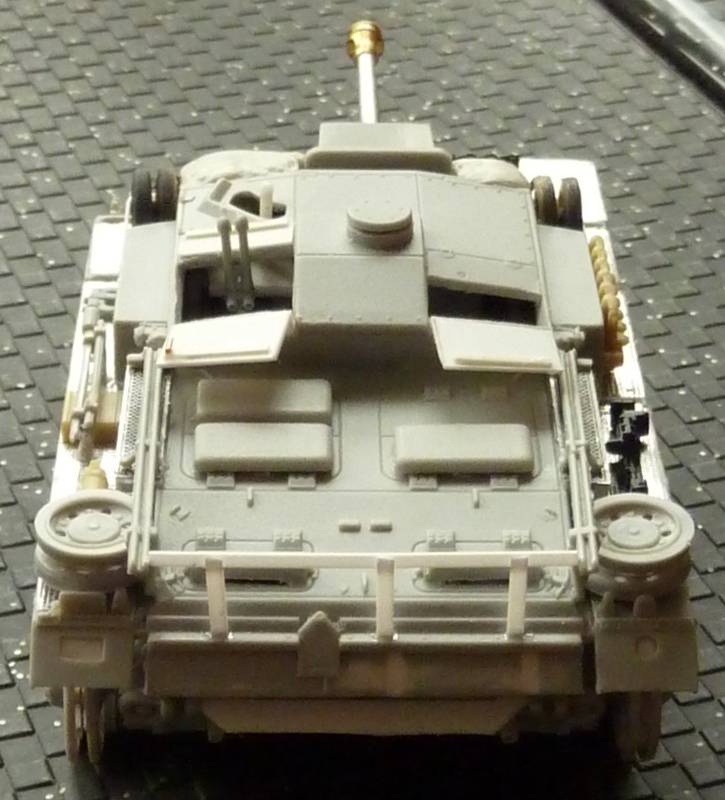
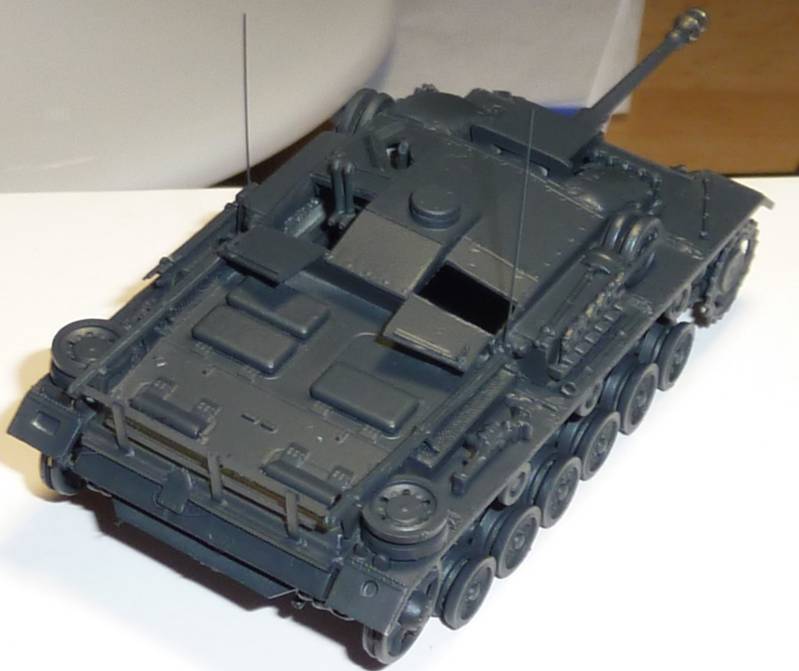
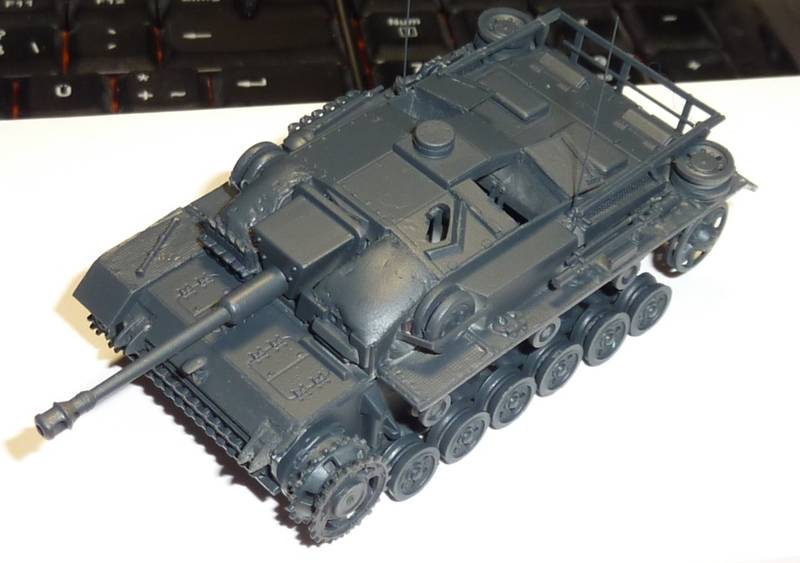
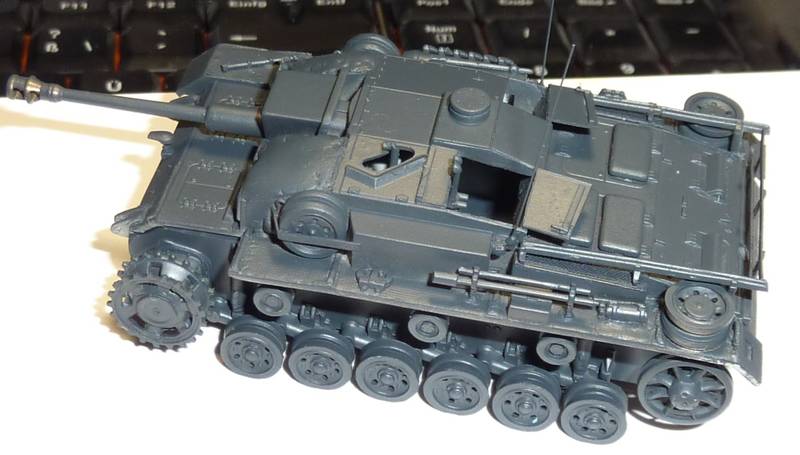
a little look on my workbench. Trumpeter StuG III F with some few homemade details.
But also a lot of work so far.
Feel free to comment.
Queensland, Australia
Joined: October 06, 2009
KitMaker: 382 posts
Armorama: 378 posts
Posted: Saturday, October 15, 2011 - 11:52 PM UTC
Hello Alex
I haven't seen your work here before, or maybe you haven't posted in this forum for a while. Either way, great to see your work.
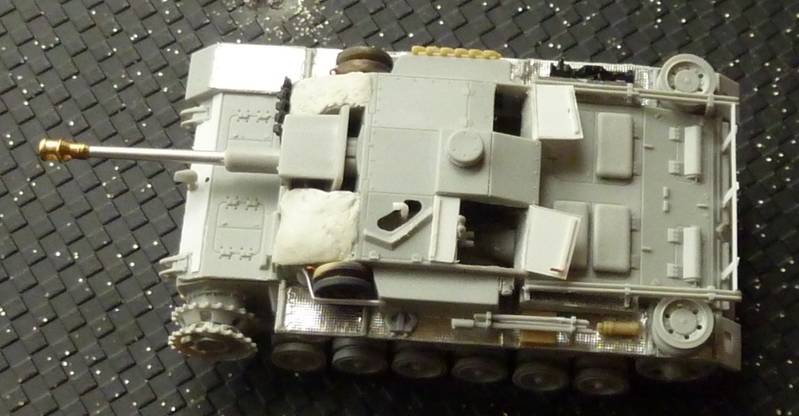
Nice start on the Stug. I like how you improved the mudguards with the anti slip tread - and the other additions.
What are you planning for the paintjob ? Dunkelgelb or maybe a winter whitewash ?
cheers
Neil
http://www.armorama.com/images/awards/425.gif
Queensland, Australia
Joined: April 15, 2010
KitMaker: 224 posts
Armorama: 205 posts
Posted: Monday, October 17, 2011 - 11:47 PM UTC
Hi Alex.
Nice work so far. Looking forward to seeing more progress.
Cheers,
Tim

Canada
Joined: September 30, 2009
KitMaker: 11 posts
Armorama: 8 posts
Posted: Tuesday, October 18, 2011 - 08:07 PM UTC
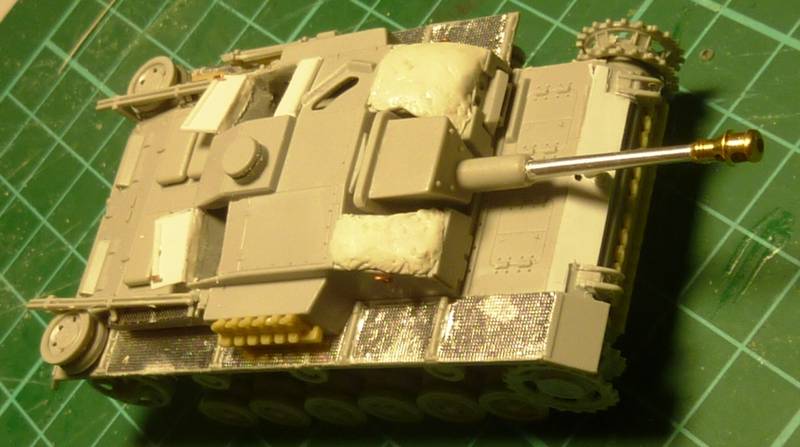
What did you use for the treadplate on the fenders? I found some cigarette foil that had a passable pattern but it's really hard trying to cut and place it without smoothing it out.
Attica, Greece / Ελλάδα
Joined: February 17, 2010
KitMaker: 625 posts
Armorama: 608 posts
Posted: Wednesday, October 19, 2011 - 09:01 AM UTC
Hi Alex,
Nice work on that Stug. I have only built 1 Trumpeter model, but I see that their quality is very high.
Quoted Text
What did you use for the treadplate on the fenders? I found some cigarette foil that had a passable pattern but it's really hard trying to cut and place it without smoothing it out.
Eduard and OKB Grigorov make anti slip surfaces for German vehicles suitable for 1/72. But I've seen excellent results with cig foil too.
P.A.
I used to be a scale modeler like you. Then I took an arrow in the knee.
Hessen, Germany
Joined: February 27, 2006
KitMaker: 81 posts
Armorama: 76 posts
Posted: Wednesday, October 19, 2011 - 08:29 PM UTC
Hello at all,
thanks for your comments to my build.
@Neil: I think i will make a "Panzergrau" (german tankgrey) with some dark yellow stripes or spot.
@Mike: I use cigarette foil. Cut of the tools and some cigarette foil stripes, glue it on the fender, wait few minutes (glue must be dry), then cut it around out with a sharp scapel. I will be a low cost resulut an you save a lot of money because you don´t need PE Parts. An also a very easy way to make it.
@Alexander: watch out by this kits. Some Details incorret or missing. You must invest some work in this Stug III an have few spare Parts from Revell oder Dragon. But it is a miracle for me how Trumpeter makes some very good Kits and then some that will be horrible.
I hope i can make some other parts for the kit in the next days an then i post new pics.
Cheers,
Alex
Canada
Joined: September 30, 2009
KitMaker: 11 posts
Armorama: 8 posts
Posted: Thursday, October 20, 2011 - 05:03 AM UTC
Quoted Text
@Mike: I use cigarette foil. Cut of the tools and some cigarette foil stripes, glue it on the fender, wait few minutes (glue must be dry), then cut it around out with a sharp scapel. I will be a low cost resulut an you save a lot of money because you don´t need PE Parts. An also a very easy way to make it.
Cheers,
Alex
Thanks, maybe I'll try it without taking the backing off next time.
Queensland, Australia
Joined: October 06, 2009
KitMaker: 382 posts
Armorama: 378 posts
Posted: Thursday, October 20, 2011 - 09:25 PM UTC
Hi
regarding using the cigarette packet foil.
I've used it on a couple of models. Its a good cheap option to save a little, money, or to save time if you have to rely on the post for your parts
One tip I'd suggest is to use white PVA adhesive (also known as wood glue or Elmers) to glue it to the fenders. This glue is very slow drying and gives you lots of time to position and move the foil around.
This long drying time also helps if you find the piece needs another trim, easy to peel it off, wipe the glue off, do the trim & have another go, or if you have measured wrong and the piece doesnt fit, easy to peel it off, wipe the glue away and cut another piece, as the glue doesn't react with the plastic.
When its dried it holds very well.
cheers
Neil
http://www.armorama.com/images/awards/425.gif
Canada
Joined: September 30, 2009
KitMaker: 11 posts
Armorama: 8 posts
Posted: Sunday, October 23, 2011 - 07:20 PM UTC
Quoted Text
One tip I'd suggest is to use white PVA adhesive (also known as wood glue or Elmers) to glue it to the fenders.
Actually that is what I use, thinned with some water. The problem I have is trying to position it or get it down around details often leaves it smooth from rubbing out the embossed texture. Guess I'll just have to keep practicing.
Valencia, Spain / España
Joined: December 27, 2010
KitMaker: 324 posts
Armorama: 322 posts
Posted: Monday, October 24, 2011 - 06:37 AM UTC
The model looks very nice, although the pictures have a lot of light. What tracks did you use?
Regards. Pedro.
MECHANICAL DOG
http://neloan.blogspot.com/
My Town
http://www.youtube.com/embed/_XwJUG_La6w
Hessen, Germany
Joined: February 27, 2006
KitMaker: 81 posts
Armorama: 76 posts
Posted: Monday, October 24, 2011 - 07:45 AM UTC
Hello Pedro,
i will use perhaps the MACO Ostketten. But they will not correctly fit around theteethwheel. So i must sand it smaller or cut if of. Why did you not like the trumpeter vinyl tracks? There are not so bad.
Photography is not my strength

Some actually progress pic..it will be very slow go on.
Regards
Alex
Hessen, Germany
Joined: February 27, 2006
KitMaker: 81 posts
Armorama: 76 posts
Posted: Thursday, October 27, 2011 - 09:56 AM UTC
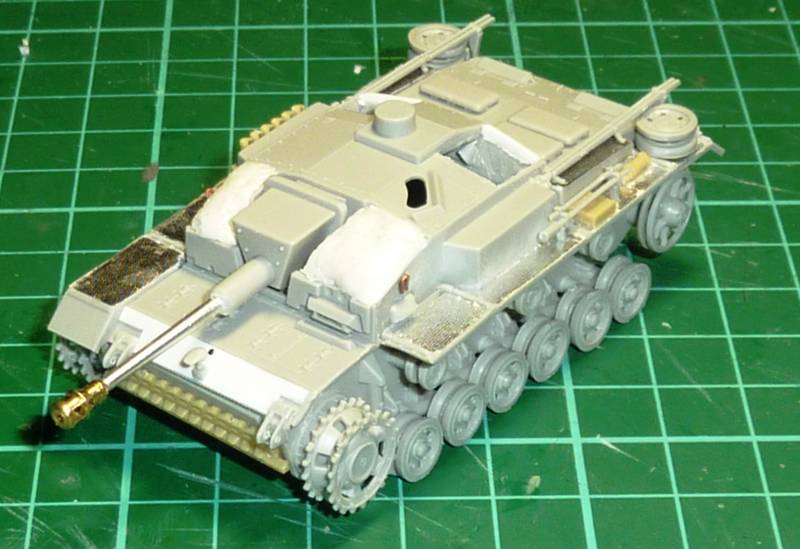
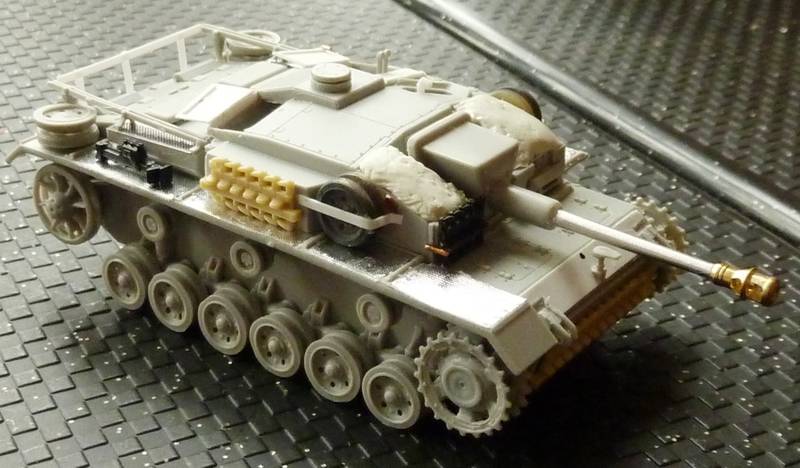
Small steps ahead..
Make scratch binocular an add a dragon one.
And other spare parts from the box. Most Revell oder Dragon. Hatches was the last step with some details. Next i will search for some tools or make a tool box on the engine deck.
But i can make some steps in few minutes because the lack of time.

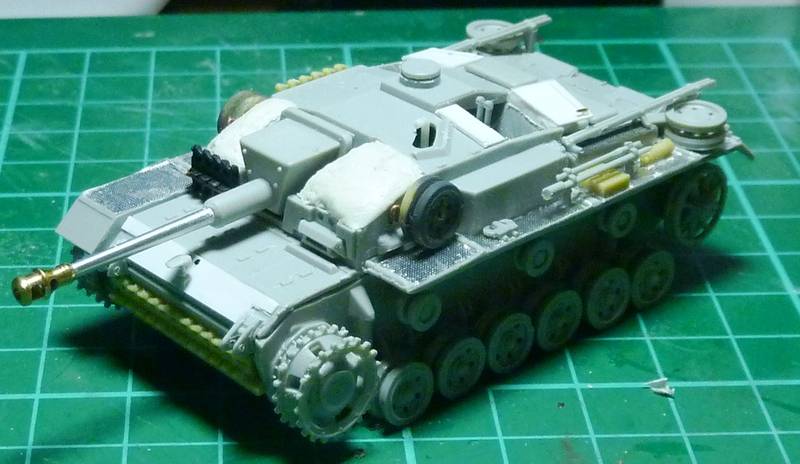
Hope it will be better pics. Learning by doing.
Regards
Alex

#135
California, United States
Joined: August 05, 2007
KitMaker: 1,501 posts
Armorama: 1,485 posts
Posted: Saturday, November 05, 2011 - 08:13 AM UTC
@Wischti Alex,
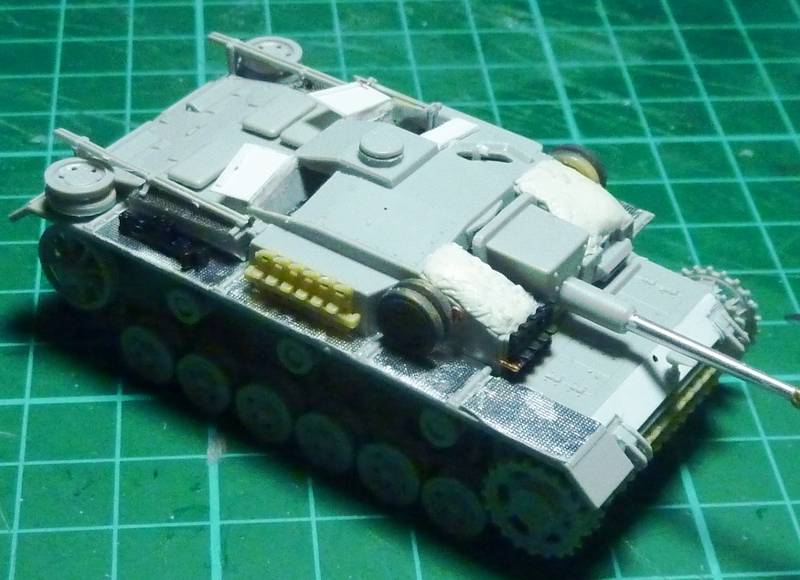
Your build is coming along nicely and enhanced with all of the modifications and scratch made additions youve made. You have a mixture of parts on your build; I imagine you have quite an extensive spare parts box lying near by to come to the rescue when needed?
Your first photographs were actually better than the more recent ones that you posted. I think that light reflecting off of the silver foil sheet that you used to replicate the tread plate and mixed in with the white styrene parts and light colored putty caused an undo amount of glare on the model. I am also learning to take better pictures so I dont really have any good advice on how to remedy this issue. Perhaps taking a few photographs with the lights set at different angles? Your later photographs need light on the wheels, which is what you did on the first set of photographs. Sometimes you just cant win but keep practicing with the camera.
~ Eddy

If you absolutely must have a city completely destroyed overnight . . . call the MARINES
Currently on the bench:
1:12 Bandia Star Wars K-2SO
1:35 Takom T-54B Late
Hessen, Germany
Joined: February 27, 2006
KitMaker: 81 posts
Armorama: 76 posts
Posted: Tuesday, November 08, 2011 - 10:51 AM UTC
Good evening from germany,
some better pics with daylight an some tiny modifications.
@Eddy: hope i will be better photograph in future.
Feel free to comment.
Regards,
Alex
Germany
Joined: November 21, 2010
KitMaker: 189 posts
Armorama: 189 posts
Posted: Wednesday, November 09, 2011 - 02:25 AM UTC
Very good
Waiting for the color!!! :-)
Gruß Daniel
Hessen, Germany
Joined: February 27, 2006
KitMaker: 81 posts
Armorama: 76 posts
Posted: Friday, November 25, 2011 - 02:14 AM UTC
Hello @ all,
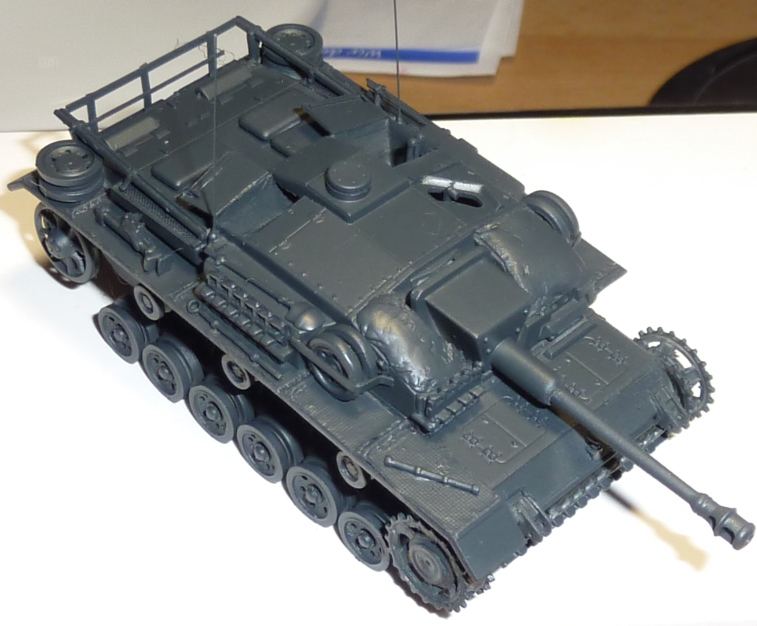
the vallejo panzergrey primer is on the model. Now I will finish some groundwork an correct few details. Then spray it panzergrey and the tracks will be fit on the StuG.
Cheers,
Alex
Queensland, Australia
Joined: October 06, 2009
KitMaker: 382 posts
Armorama: 378 posts
Posted: Friday, November 25, 2011 - 09:35 AM UTC
Hi Woschti
the dark grey looks great, even though its not the final paint job, it shows how the finished model will look, which is very nice
cheers
Neil
http://www.armorama.com/images/awards/425.gif
Izmir, Turkey / Türkçe
Joined: June 11, 2004
KitMaker: 1,426 posts
Armorama: 464 posts
Posted: Wednesday, November 30, 2011 - 10:33 AM UTC
Hi Alex,
Filter made, the colors will look great..
Regards..
All of them Braille Scale...
Hessen, Germany
Joined: February 27, 2006
KitMaker: 81 posts
Armorama: 76 posts
Posted: Saturday, January 07, 2012 - 11:10 AM UTC
Hello @ all,
first coat of panzergrey and one side with maco ostketten. The other side will follow in few days. Next paint step ist a coat of Johnson "Klear", washing, filters, drybrushing, chipping, pigments, etc.

Valencia, Spain / España
Joined: December 27, 2010
KitMaker: 324 posts
Armorama: 322 posts
Posted: Monday, January 09, 2012 - 09:59 PM UTC
Good work Alex but, is the light or I see the panzergrey colour very clear?
Regards. Pedro.
MECHANICAL DOG
http://neloan.blogspot.com/
My Town
http://www.youtube.com/embed/_XwJUG_La6w
Attica, Greece / Ελλάδα
Joined: February 17, 2010
KitMaker: 625 posts
Armorama: 608 posts
Posted: Tuesday, January 10, 2012 - 01:28 AM UTC
The panzergrey primer looks great. What did you use for the base color? Getting panzergrey correctly is a headache everytime for me.
P.A.
I used to be a scale modeler like you. Then I took an arrow in the knee.
Hessen, Germany
Joined: February 27, 2006
KitMaker: 81 posts
Armorama: 76 posts
Posted: Wednesday, January 11, 2012 - 01:51 AM UTC
Hello,
i use tamyia german grey with 5% white. I look lighter because the flashlight and also the other light will not be optimal at this time. I tink it will look better after the washing.
Queensland, Australia
Joined: October 06, 2009
KitMaker: 382 posts
Armorama: 378 posts
Posted: Thursday, January 12, 2012 - 11:23 AM UTC
Hello Alex
I feel the combination of those wide tracks with that variant of the STUG was a good one, visually a very appealing combination.
Its looking good, should be a great piece when all finished
cheers
Neil
http://www.armorama.com/images/awards/425.gif
Western Australia, Australia
Joined: July 22, 2007
KitMaker: 607 posts
Armorama: 599 posts
Posted: Friday, January 13, 2012 - 01:25 PM UTC
Certainly looking excellent so far.
"I do not feel obliged to believe that the same God who has endowed us with sense, reason, and intellect has intended us to forgo their use."
- Galileo Galilei
Attica, Greece / Ελλάδα
Joined: February 17, 2010
KitMaker: 625 posts
Armorama: 608 posts
Posted: Friday, January 13, 2012 - 09:26 PM UTC
I wouldn't worry about the shade of Pzgrey. After some filters it will all come together.
P.A.
I used to be a scale modeler like you. Then I took an arrow in the knee.