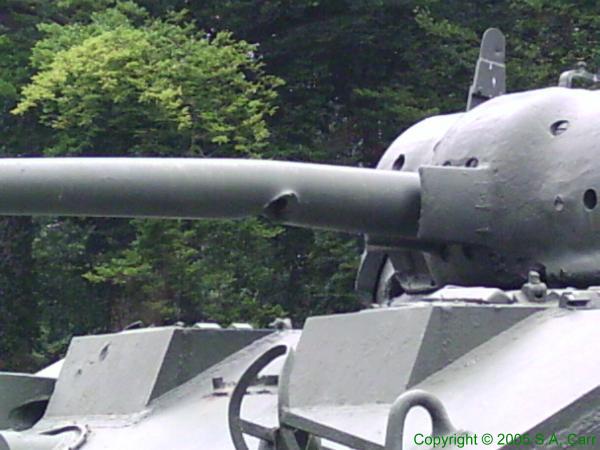
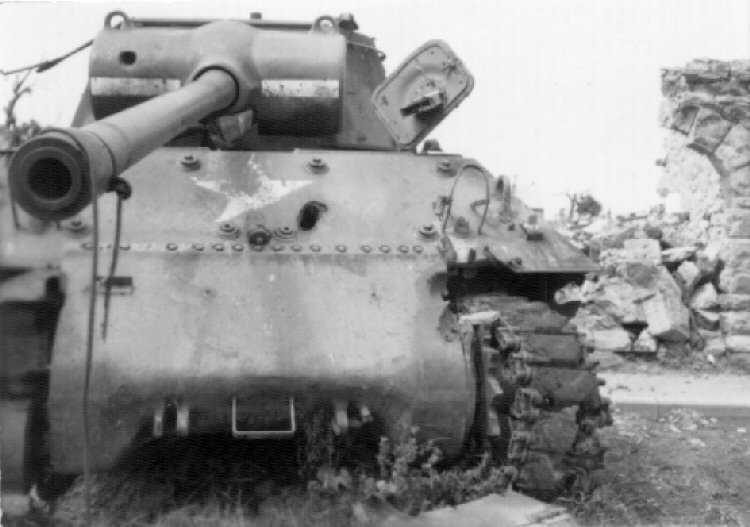
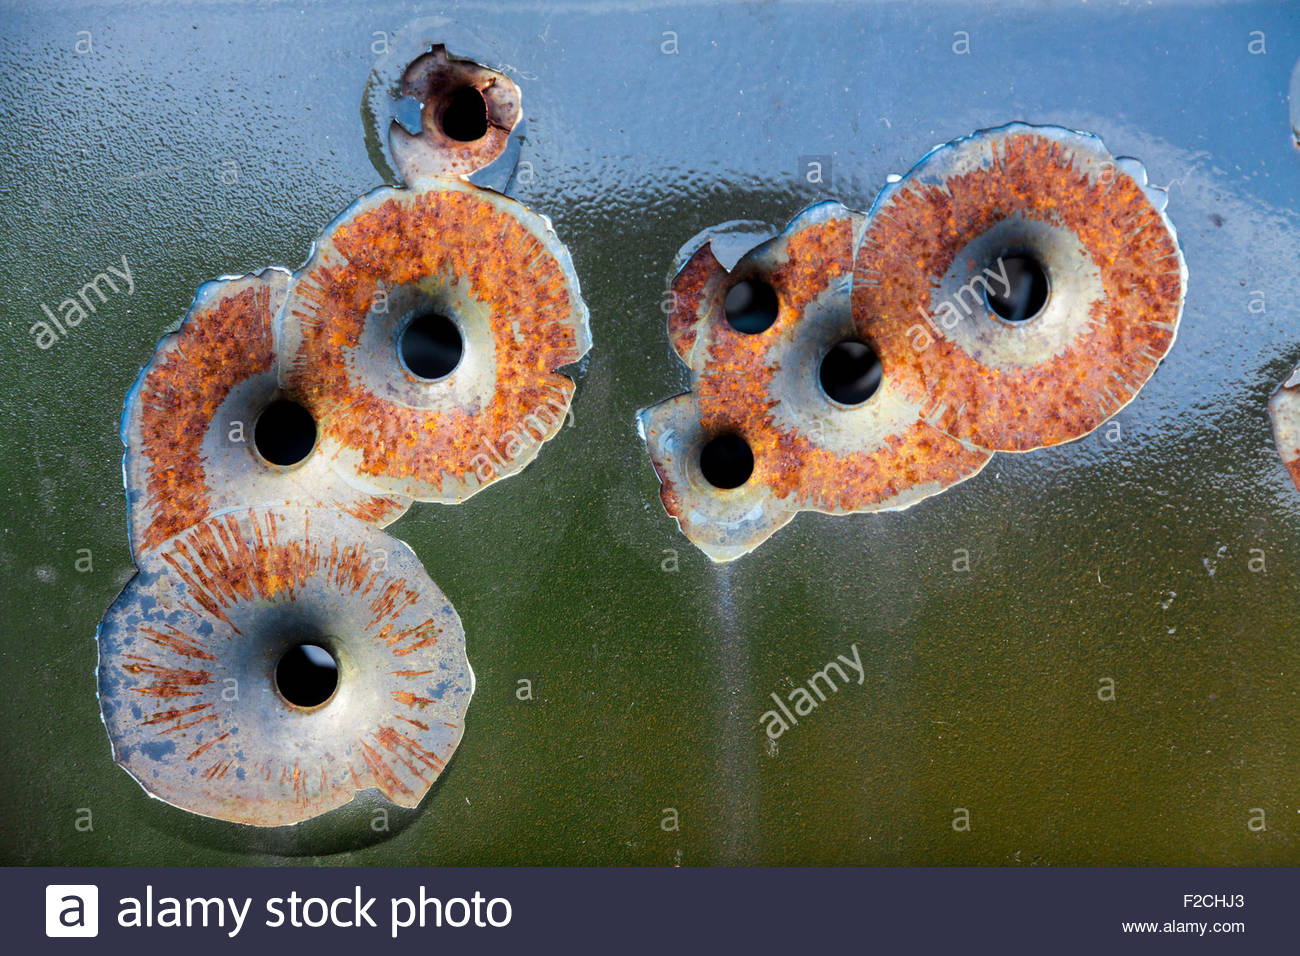
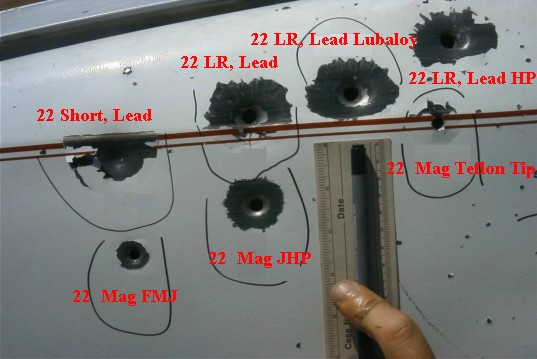
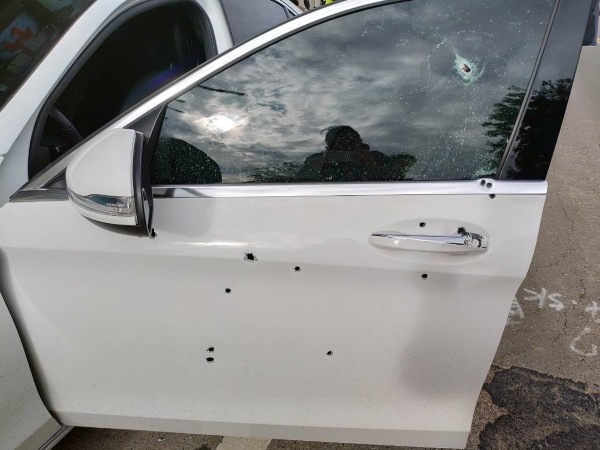
Let photos of real bullet strikes and perforations - such as those examples posted in this thread - be your guide as to what you want such IMPACT & PERFORATION "entry-wound" damage to look like. The posted photos clearly show versions of what small-calibre bullet strikes do to thin / sheet-metal surfaces.
There are likely many, many photos which show - at least in black & white - small-cal strikes on heavier steel... Armored vehicles, etc. Refer to such photos to get good ideas about what the "entry-wound" damage looks like.
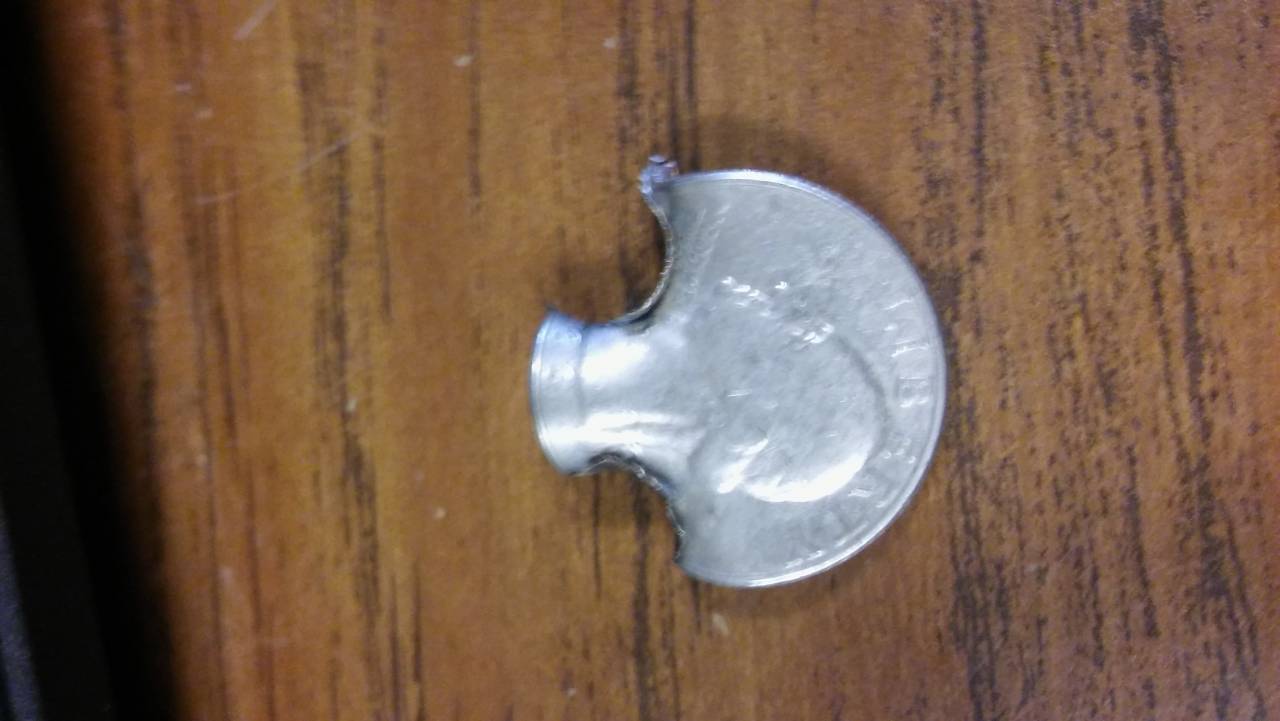
The "entry-wound" aspect is what most modelers are seeking to achieve. "Exit-wounds" are a whole different set of appearances - both in sheet-metal and on thicker steel walls, and of course the type of projectile and the type of thicker metal being penetrated matter a great deal in this.
For those doing 1/35 "targets", keep in mind that a pistol or rifle-cal bullet would likely make a hole in sheet metal that is about 10 x 1/1000inch dia. A 0.5 cal hole would be about 15 x 1/1000in.
IMHO, for modeling "sheet-metal" damage, making appropriately tiny holes in the styrene with a drill, followed by a small amount of trimming with a newish #11 knife-tip (to remove the pushed-up plastic and shape / round in the hole at the impact surface) produces a fine-looking "entry-wound". Keeping in mind that the hole is actually very small... Paint the "wound hole" black, followed by a tiny bit of some silvery color (to show the new bare metal at the hole-rim) and some additional color(s) for rust and paint around the rim, if desired. Unless you are also able to view the "exit side" (in which case you need to model that aspect...), the blackened hole through the styrene will provide nicely. No need for any PE, tin-foil, or other efforts when modeling "only entry-wounds". "Exit-wound" modeling can, on the other hand, benefit greatly from using such approaches.
Modeling small-cal bullet-strikes on steel armor walls generally amounts to basically paint-scrapes revealing bare metal. But armor strikes can get complicated, as "armor" covers a multitude of sin and effects. A 0.30 cal rifle bullet hitting the side of a modern MBT turret means a tiny paint-scratch. The same bullet hitting the 10mm - thick steel "armor" of a "tankette", German Pz.1, older armored-car, or similar means possible penetration, cracked "armor", etc. A similar bullet hitting the side of an aluminum-sided M113 APC means yet another thing... So photos showing types of such impacts on one's desired "target" will be your guide to what you want to model as impact damage. Again, unless you are viewing the "exit-wound" side, you are modeling the "entry-wound", and the styrene will usually serve just fine. You will be making a tiny gouge in most cases. I use that #11 tip for both the tiny gouges and tiny dents caused on thicker armor by small-cal strikes. IF there is penetration - that #11 tip will yield a nice tapered or conical hole - and again, keep the hole size appropriate to the calibre of strike...
In brief; IMHO, use the photos as your guide, keep the holes tiny for small penetrations, keep it simple when you can. And be prepared to see show-judges being negative about what you accomplish - Many show judges have no real idea what the real damage should look like on a 1/35 scale model!

And have FUN as you recreate this interesting detail of battle-worn equipment!
Cheers! Bob