Hello everyone,
This is actually my first time displaying my work on this part of the forum, I have usually just watched from afar and at times I would ask for your help . It’s my first time using oils to weather the model, so any advice on how to improve it would be helpful.
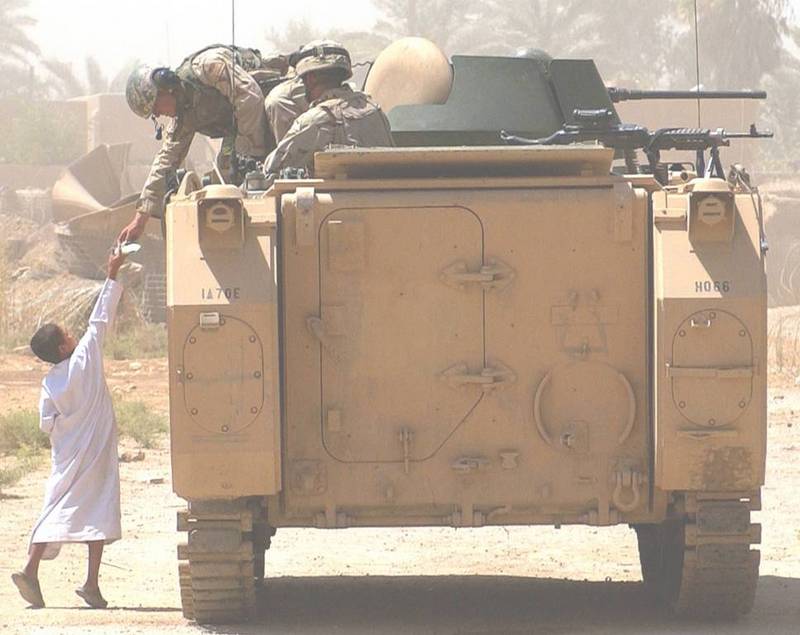
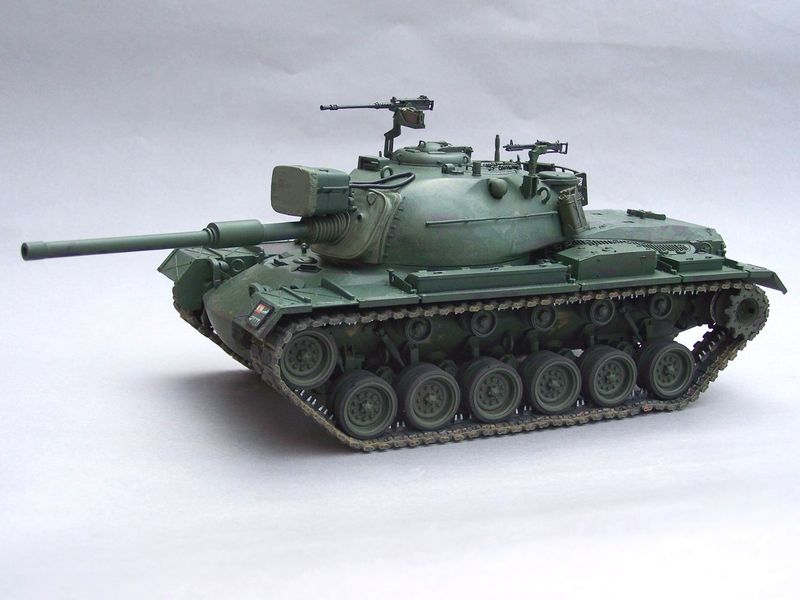
So here it is, an M113 A1 from Academy, painted in the Lebanese Maghaweer camouflage. The Maghaweer Regiment is the Lebanese commando regiment, founded in 1966. This M113 depicts a standard M113 used by the Maghaweer. I based it on a couple of pictures I found on the internet, I have yet to see one in person.
I hope you guys like it, here it is:
I am hoping to recreate several different vehicles used by the Lebanese armed forces, make a small collection of such vehicles. Next up is a Lebanese airborne regiment troop carrier hummer, I will post it here when it’s done. Although I might give priority to another one (depending on what I get my hands on first).
Hope you liked it, any advice or criticism is welcomed.
Regards,
Hosted by Darren Baker
Lebanese Armed Forces vehicle's
VLADPANZER
Lebanon
Joined: December 20, 2010
KitMaker: 568 posts
Armorama: 549 posts
Joined: December 20, 2010
KitMaker: 568 posts
Armorama: 549 posts
Posted: Tuesday, November 29, 2011 - 03:41 AM UTC
HeavyArty
Florida, United States
Joined: May 16, 2002
KitMaker: 17,694 posts
Armorama: 13,742 posts
Joined: May 16, 2002
KitMaker: 17,694 posts
Armorama: 13,742 posts
Posted: Tuesday, November 29, 2011 - 04:58 AM UTC
It looks pretty good. Nice job on the paint and weathering. A couple pointers. The rear lights are off, only the upper left oval should be red. The others are dark slits and part of the blackout drive system.
Also, the interior of the hatches are usually the same color as the exterior so they don't show up as well when opened.
Other than that, great job. I look forward to seeing your other Lebanese builds.
Also, the interior of the hatches are usually the same color as the exterior so they don't show up as well when opened.
Other than that, great job. I look forward to seeing your other Lebanese builds.
bison126
Correze, France
Joined: June 10, 2004
KitMaker: 5,329 posts
Armorama: 5,204 posts
Joined: June 10, 2004
KitMaker: 5,329 posts
Armorama: 5,204 posts
Posted: Tuesday, November 29, 2011 - 06:38 AM UTC
Nice build and deco Vladpanzer. What is your dark green reference ? I'm currently working on a LAF M48A5 so any input would be great.
TIA
Olivier
TIA
Olivier
spetsnazgru
Lebanon
Joined: March 05, 2009
KitMaker: 661 posts
Armorama: 652 posts
Joined: March 05, 2009
KitMaker: 661 posts
Armorama: 652 posts
Posted: Tuesday, November 29, 2011 - 10:05 AM UTC
interesting miye w tlata3sh , always good to see Lebanese tanks and APCs, maybe someday I upload pics of my 2 Lebanese army M113s, one with ZSU-23-2.
VLADPANZER
Lebanon
Joined: December 20, 2010
KitMaker: 568 posts
Armorama: 549 posts
Joined: December 20, 2010
KitMaker: 568 posts
Armorama: 549 posts
Posted: Wednesday, November 30, 2011 - 11:27 PM UTC
@ Gino: Thanks for the heads up, I will be repainting the lower slits on the rear lights. And the next M113 I build will have the correct color for the hatches. I hope you will like my other builds as well!
@ bison 126: Thanks’ a lot bison 126, what would you like to know about them? And when completed make sure to share it with us!!!
@ Jamal: Thanks'! Please upload the pictures I would love to see some more Lebanese armor, I would love to build my own M113 with a ZSU-23-2 on top. Is it difficult?
Thanks’ again for the comments, and thanks’ for looking
Happy modeling!!
bison126
Correze, France
Joined: June 10, 2004
KitMaker: 5,329 posts
Armorama: 5,204 posts
Joined: June 10, 2004
KitMaker: 5,329 posts
Armorama: 5,204 posts
Posted: Thursday, December 01, 2011 - 06:47 PM UTC
Hi
in fact I just need the paint reference for your green. I have a quite comprehensive walkaround of a M48 I did some years ago.
I didn't manage to find a correct match with a Tamiya paint straight out the bottle. So any help will be appreciated.
Olivier
in fact I just need the paint reference for your green. I have a quite comprehensive walkaround of a M48 I did some years ago.
I didn't manage to find a correct match with a Tamiya paint straight out the bottle. So any help will be appreciated.
Olivier
VLADPANZER
Lebanon
Joined: December 20, 2010
KitMaker: 568 posts
Armorama: 549 posts
Joined: December 20, 2010
KitMaker: 568 posts
Armorama: 549 posts
Posted: Sunday, December 04, 2011 - 10:36 PM UTC
I painted mine with Tamiya Olive Drab mixed in a 3:1 ratio with Deep Green ( XF- 62/XF-26). I have seen some M48’s with a very light hue, an almost olive green but those might be the ones that have been out in the field for a very long time. Do share it with us when your done!
Hope this helped,
Regards,
Hope this helped,
Regards,
bison126
Correze, France
Joined: June 10, 2004
KitMaker: 5,329 posts
Armorama: 5,204 posts
Joined: June 10, 2004
KitMaker: 5,329 posts
Armorama: 5,204 posts
Posted: Sunday, December 04, 2011 - 10:54 PM UTC
Thanks Vlad,
the one I intend to depict is this one :
A true to challenge to paint with all the scratches, the rust, the bare metal and primer to represent !
I'm still in the build process. As soon as I start the painting I'll post pics.
Olivier
the one I intend to depict is this one :
A true to challenge to paint with all the scratches, the rust, the bare metal and primer to represent !
I'm still in the build process. As soon as I start the painting I'll post pics.
Olivier
VLADPANZER
Lebanon
Joined: December 20, 2010
KitMaker: 568 posts
Armorama: 549 posts
Joined: December 20, 2010
KitMaker: 568 posts
Armorama: 549 posts
Posted: Saturday, March 31, 2012 - 06:39 AM UTC
Salutations all,
@ I would really like to see your step by step methods, as you mentioned it’s going to be challenging. I am still trying to perfect my weathering skills … if I can call them that! Looking forward to it!!
It’s been a while since I posted anything, I was rather busy, managed to get some free time in the past two weeks. So below are the pictures of the newest additions to my small collection of military vehicles in Lebanese service. I had started work on the Hummer a while ago but never got to finishing it as it was a very tiresome method (It was a time consuming and rather mad idea), I also kind of rushed the build and forgot to fill in some of the sink holes. The Mutt was just for fun, I had gotten it due to its reasonable price, I tried my hand at adding extra details by fixing up the engine compartment. Finally the Land Rover was my most important goal, I was planning on making some adjustments on it but my skills are limited so I had to keep the steering wheel on the right side.
The M151A2 was from Academy, it was a decent kit that came together rather easily. Had to fill in some sink holes on the inner part of the sides, but apart from that it was a simple and clean build. I noticed that in my reference picture (in LAF service) The doors had been removed, so I had to cut the doors off the hinges and since it was a simple build to try and add some interest I added wires and hoses in the engine compartment (head light wires, fuel injectors, etc … ).
The Hummer gun truck was also from Academy, forgot to fill in sink holes and the body gave me a few problems, all in all good for its value. I notice now that the pattern isn’t exactly accurate but I am still proud of it . I noticed that most hummers in LAF service have machine guns at the back, after looking in my spare box managed to find the right MG. It is in the standard camouflage of the special forces division:
The defender was from Hobby Boss and as many of you must already know it’s a very decent kit, I really enjoyed building it. Very minor modifications where done, I closed up the side storage units and some holes that I wasn’t going to use. For the words on the side, that read out “Military Police”, I made my own stencil on the yellow tape from Tamiya using a blade. As I mentioned earlier I was not able to move the steering wheel to the other side as it should be. So here it is a LAF military police Land Rover (forgive my attempts on weathering it):
Sorry for the long post, thanks for looking , hope you guys liked them and please do leave a comment on anything I could have improved specially the weathering. Not sure what’s next on my list but hopefully I can get my hands on a Heller Renault Saviem VAB APC.
Regards,
@ I would really like to see your step by step methods, as you mentioned it’s going to be challenging. I am still trying to perfect my weathering skills … if I can call them that! Looking forward to it!!
It’s been a while since I posted anything, I was rather busy, managed to get some free time in the past two weeks. So below are the pictures of the newest additions to my small collection of military vehicles in Lebanese service. I had started work on the Hummer a while ago but never got to finishing it as it was a very tiresome method (It was a time consuming and rather mad idea), I also kind of rushed the build and forgot to fill in some of the sink holes. The Mutt was just for fun, I had gotten it due to its reasonable price, I tried my hand at adding extra details by fixing up the engine compartment. Finally the Land Rover was my most important goal, I was planning on making some adjustments on it but my skills are limited so I had to keep the steering wheel on the right side.
The M151A2 was from Academy, it was a decent kit that came together rather easily. Had to fill in some sink holes on the inner part of the sides, but apart from that it was a simple and clean build. I noticed that in my reference picture (in LAF service) The doors had been removed, so I had to cut the doors off the hinges and since it was a simple build to try and add some interest I added wires and hoses in the engine compartment (head light wires, fuel injectors, etc … ).
The Hummer gun truck was also from Academy, forgot to fill in sink holes and the body gave me a few problems, all in all good for its value. I notice now that the pattern isn’t exactly accurate but I am still proud of it . I noticed that most hummers in LAF service have machine guns at the back, after looking in my spare box managed to find the right MG. It is in the standard camouflage of the special forces division:
The defender was from Hobby Boss and as many of you must already know it’s a very decent kit, I really enjoyed building it. Very minor modifications where done, I closed up the side storage units and some holes that I wasn’t going to use. For the words on the side, that read out “Military Police”, I made my own stencil on the yellow tape from Tamiya using a blade. As I mentioned earlier I was not able to move the steering wheel to the other side as it should be. So here it is a LAF military police Land Rover (forgive my attempts on weathering it):
Sorry for the long post, thanks for looking , hope you guys liked them and please do leave a comment on anything I could have improved specially the weathering. Not sure what’s next on my list but hopefully I can get my hands on a Heller Renault Saviem VAB APC.
Regards,
VLADPANZER
Lebanon
Joined: December 20, 2010
KitMaker: 568 posts
Armorama: 549 posts
Joined: December 20, 2010
KitMaker: 568 posts
Armorama: 549 posts
Posted: Sunday, April 01, 2012 - 07:30 AM UTC
Hi again,
Just some in progress shots, first is the engine compartment and second is the stenciling of the Land Rover:
Regards,
Just some in progress shots, first is the engine compartment and second is the stenciling of the Land Rover:
Regards,
bison126
Correze, France
Joined: June 10, 2004
KitMaker: 5,329 posts
Armorama: 5,204 posts
Joined: June 10, 2004
KitMaker: 5,329 posts
Armorama: 5,204 posts
Posted: Monday, April 02, 2012 - 01:40 AM UTC
I like your private army Vladimir. Keep on the good work.
Here my M48A5 I finally completed
Olivier
Here my M48A5 I finally completed
Olivier
VLADPANZER
Lebanon
Joined: December 20, 2010
KitMaker: 568 posts
Armorama: 549 posts
Joined: December 20, 2010
KitMaker: 568 posts
Armorama: 549 posts
Posted: Thursday, April 05, 2012 - 06:24 AM UTC
Hi Olivier, that is a great looking M48 … Love the weathering on the rear engine deck and the tracks, how did you weather them? Did you take the reference photos (the ones on your website) yourself?
Regards,
bison126
Correze, France
Joined: June 10, 2004
KitMaker: 5,329 posts
Armorama: 5,204 posts
Joined: June 10, 2004
KitMaker: 5,329 posts
Armorama: 5,204 posts
Posted: Friday, April 06, 2012 - 08:01 AM UTC
Quoted Text
Hi Olivier, that is a great looking M48 … Love the weathering on the rear engine deck and the tracks, how did you weather them? Did you take the reference photos (the ones on your website) yourself?
Regards,
Vladimir,
thanks for the comments. For this one, I tried the hairspray technique. It was the first time and I was a bit heavy handed. The tracks were painted dark grey for the base then I used several washes of different shades of earth and sand.
And I took the pictures myself in early 2008.
Olivier