OOB, Minor scratch build
Tristar & Golden Fluid Acrylics; Vallejo Model Color; Revell Germany acrylic; Golden mediums; Gunze metalizer
AK Interactive Enamel Weathering; Micro Mark pigments
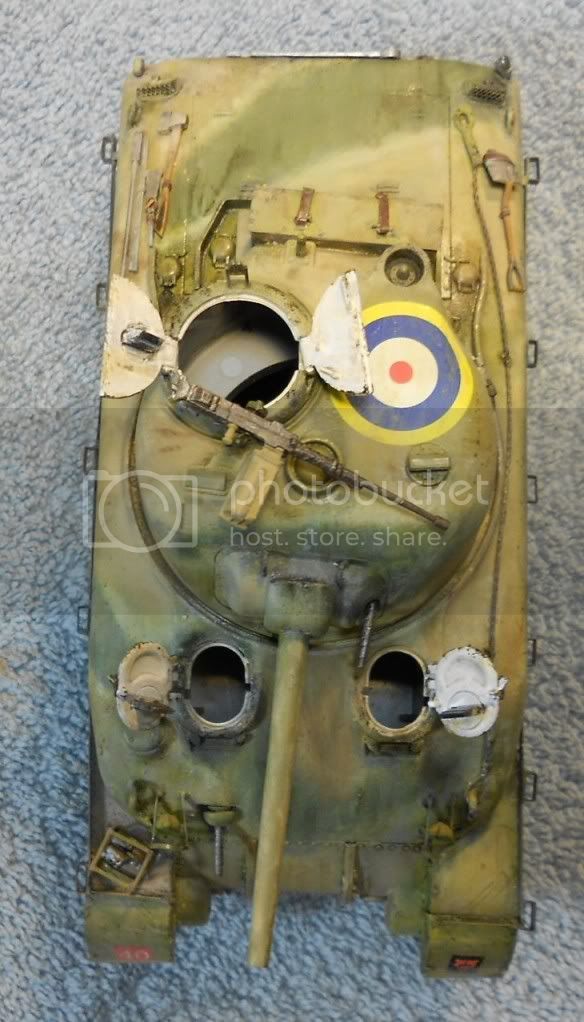
Below are some pics of my humble rendition of Dragon's El Alamein Sherman. This is my first Sherman, my first Western Allies tank and my first desert AFV. A little Dragon bashing. The instructions were hopeless. There were no diagrams of the completed model from both sides, front, rear and above. Experienced builders won't mind but lesser mortals find such things helpful. I did not like DML's decision to include the fender assembly as PE only. Bad things can happen with PE and having plastic back-up is very nice. Tasca made this kit and used styrene for the fenders: I do want to make one of their kits. That said this is a very nice kit. The fit is excellent and Dragon's detail is well displayed. At about 300 parts, this is a simple Dragon model. Although I had to amputate a link, I give DS tracks a definite thumbs up.
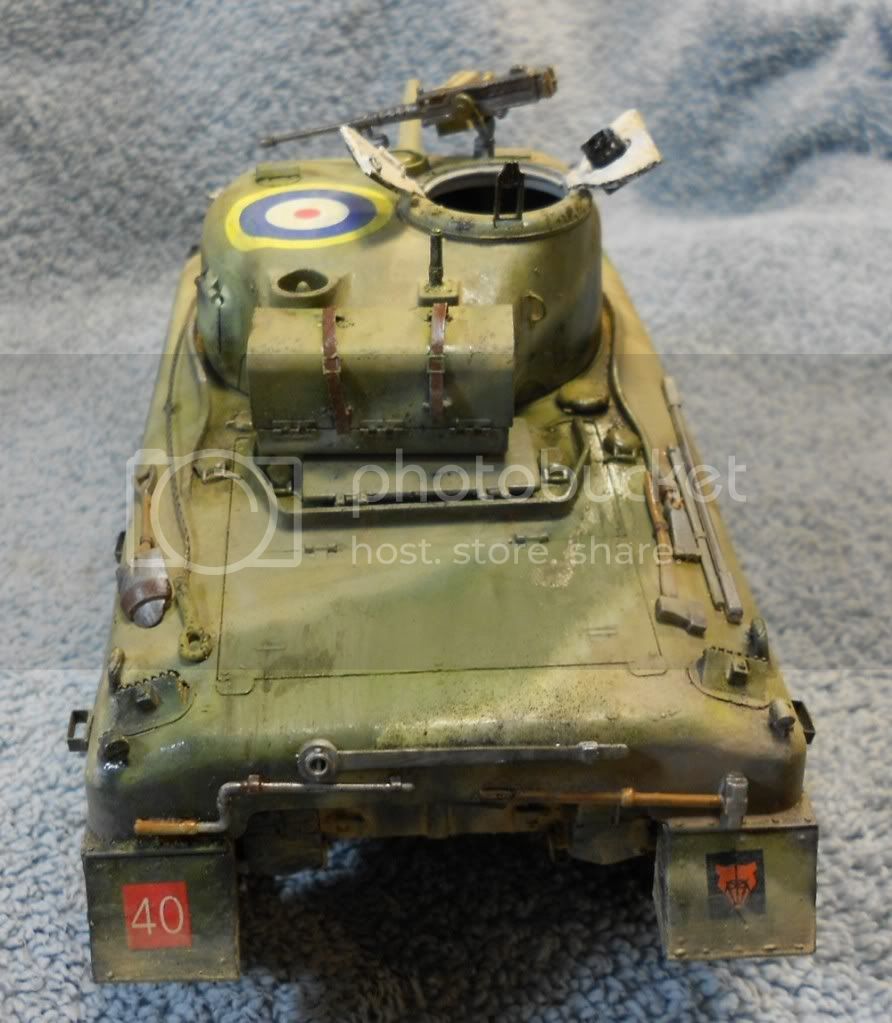
Personally I think heavy weather modelers buying up products created by the founders of the Spanish School have history in their corner. But one size does not fit all. Shermans had a tough finish and they arrived in Africa only a couple of months before Alamein. Hence I did only a little chipping, no rust except for the exhaust and no mud.
What tanks in that theater have was lots of sun, rare shade and big changes and temperature throughout the day. Those factors would have accelerated fading. And you would have had dirt by the bucket and without let-up. Even if there was no mud, grime and caked earth must accumulated on vehicles very quickly. And, although British Shermans were quite fresh, Monty was a training fanatic. Montgomery has detractors but it's hard to accuse him of sending men into battle unprepared. Despite carping from Churchill, Montgomery gave all units preparing for Alamein intensive exercises. So a tank that got to the start line at El Almein, much less one that survived it, would have been one untidy beast.
I picked a paint scheme supplied by Dragon. As understood the diagram it called for a middle stone and green camo with the two colors seperated not by white, as some units did, but by a mixture of stone and green that was feathered into the respective colors. I did everything free hand because this measure would have been soft. I sprayed the Vallejo stone and Revell base over a very dark Sepia prime. I treated both base paint in something resembling Adam Wilder's modulation style. The paints chosen are very good for this because water based acrylics when thinned with acrylic mediums can be sprayed heavily diluted and at very low psi. I applied the stone and green camo simultaneously. It would have been tempting to simply put middle stone over the whole model, add green, and put the racoon stripes on last. But if I did that much of the preshade would have been lost so I did each area independently. There's a pre-weathering pic below and you can get the idea. You'll note that acrylic mediums will leave a gloss or satin finish which is what I wanted. By the end of the day the weathering would dull things considerably. I did a lot of color fading with oils a very interesting technique if a little tricky. I used some AK streaking grime to add to the growing mess. I finished the hull off good dose of light earth colored pigments (I like Micro Mark's brand they are perfectly good and maybe one quarter the cost of MIG) fixed with mineral spirit. I put the tools and opened the hatches late in the game, so a little dry pigment finished the job. As noted there was only a little chipping and no rust outside the exhaust. I did use AK's fuel stain brew and it's good.
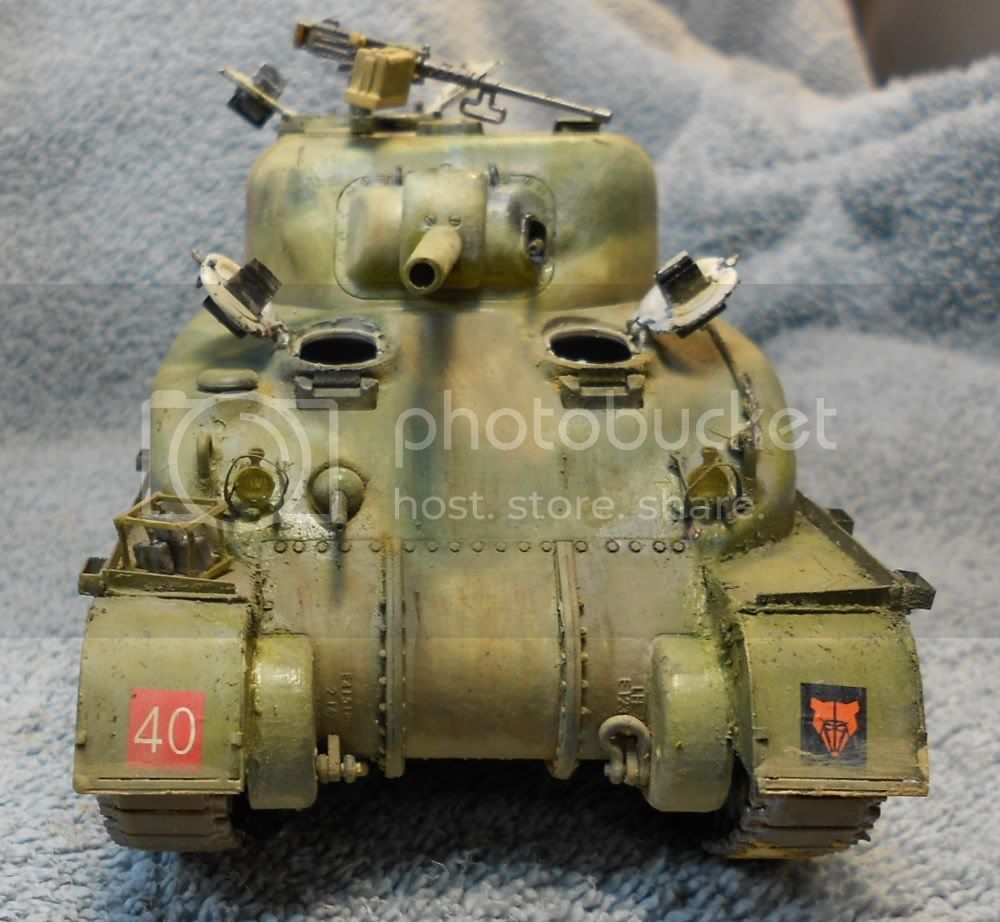
I handled the lower hull differently. Before installing the road wheels, I gave it a coat of very light dry mud. I made this with acrylic gel mixed with lava (the stuff comes in a dozen varieties including glass beads that I think might work for snow) and colored with a light earth AK enamel. The result was a kind of earth base and helped emulate caked dirt but not mud. Just for kicks, when I put on the road wheels I treated them to a technique recommended in Mig Jimenez's latest weathering DVD, this one dedicated to acrylics. (This is a terrific DVD. It's filled with clever technique and proves that a genius modeler like Mig Jimenez could make a great kit using color crayons.) You put acrylic thinner and matte medium on a surface, dump on a good dose of pigments and let it dry. The result is like caked earth or very dry mud. It worked very well. I gave it two more coats of pigments blended with spirits. I used Floquil Grimy Black for the tracks and gave them a good dose of pigments fixed with Tamiya A-20 thinner which acts like MIG's pigment fixer. I drybrushed the sides of the track with Gunze's spectacular burnt iron metalizer paint. (The stuff is amazing if you've never seen it. It goes on very ugly, but when you give it a buff, it's instant steel. I used it on the .50 caliber MG that was part of a Trumpeter collection of armor accessories in a sale bin. I have no idea why Dragon did not throw in a 50 caliber almost all the photos of Brit Shermans in Africa showed them fitted. The Trumpeter part wasn't very good, but it beat nothing and it looks like steel.)
Pics Below
Eric