

Hosted by Darren Baker
River help

TheAmature

Joined: December 29, 2011
KitMaker: 10 posts
Armorama: 10 posts
Posted: Thursday, December 29, 2011 - 08:38 AM UTC
Hello everybody I was hoping to get some help. I'm currently attempting to build my first diorama and I want to include a river. Now I bought the scene a Rama rippling water kit so I have some supplies but I'm not sure how to use them. And how would I make the water look a muddy brown instead of a clear blue. I own an airbrush if that would help anything. Any help is mch appreciated

Plasticbattle

#003

Joined: May 14, 2002
KitMaker: 9,763 posts
Armorama: 7,444 posts

Posted: Thursday, December 29, 2011 - 09:14 AM UTC
Hi Jake.
First thing you gotta do is to build your base and make your river bed. If your product is transparent, you´ll need to fix everything in place and paint it. If you dont want it to be transparent and just a murky brown ... you didn´t need to buy any water product ... you could have filled the area with some hobby spackel, create some waves/ripples with the same medium and paint it a suitable green/brown and covered with a few layers of gloss.
Maybe you should show your ground work, explain a bit better what you want, and you´ll get more specific help. It would take too long to describe every step for every eventuality.
I would recommend you read through the Clervaux river thread first. Lots of info and tips there ... and possibly some good ideas that may help.

TheAmature
Joined: December 29, 2011
KitMaker: 10 posts
Armorama: 10 posts
Posted: Thursday, December 29, 2011 - 10:27 AM UTC
Thanks for the info. I'm going to give that thread a read through and see what I can learn. Right now I'm in between cameras (little brother was using it by the pool I'm sure you can figure out what happened) so I can't show you exactly what I'm doing but I'm attempting to get a new camera by the end of the week hopefully. Then I'll put up a few pictures. Thanks again for the tips

philter4
Joined: January 05, 2011
KitMaker: 20 posts
Armorama: 16 posts
Posted: Friday, December 30, 2011 - 01:40 PM UTC
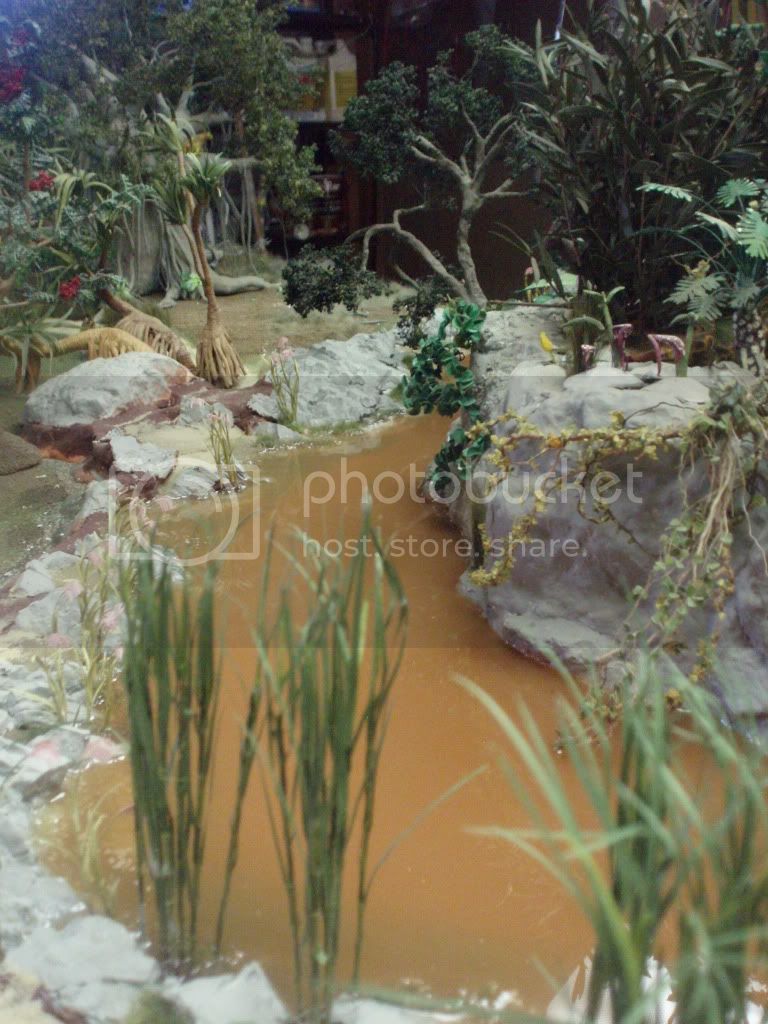
I have tried at least 6 different materials to different dioramas and the one I use now without exception is Magic Water. It is far superior to any of the other brands (I have used 2 from Woodland Scenics, Envirotex, Scalerama, and clear modelling 2 part resin) The basic principle is the same for most, one of the Woodland Scenics is a plastic or wax material that you melt then pour, but it consists of a clear resin and a hardener that is poured over the area and dries to look like water. Magic water seems to me to be the easiest and has held up the best. Here are a couple of photos of my river in an Indian rainforest diorama, the first is the sample river bank I made. (I always make a small section of something before I try the whole project, it gives me a chance to make mistakes without wasting a lot of the porduct or ruining the full sized diorama).

Here is a photo of the riverbed as it sits now, it is almost done but still needs some detailing work.
There are a few tips that I can give to help you avoid some mistakes that I have made, first is to seal the base. I use just a light brushing of the resin I am making the water out of. In the case of Magic Water, I mix some up and use an old paint brush to brush the whole base part way up the banks. After that I put 5 layers of ModgePodge, it is a sealer/glue that goes on white but dries clear. I put each layer on at 20 minute intervals in the summer, in the winter I wait to put the next layer on until the ModgePodge is mostly clear.
Next is the riverbed or any details you want, depending on the final look of the water some or all of this will be visible so make it as if you were not going to cover it at all and the end results will be much better. I also paint the base on top of the last layer of ModgePodge but for a muddy river you do not need to, remember the previous sentence, detail it as if it was not going to be covered and it will look even better when it is done.
At this point I pour the Magic Water on in a very thin layer and check for leaks. If after a few hours I don't see any seepage or leaks I pour the rest of the water, cover it with a foil "tent" so no dust gets on the resin and wait 24 hours. Magic Water lets you pour a much deeper river or lake than any of the other brands, up to 1/2 inch at a time, all of the other resin types recommend 1/4 inch at the most. With Magic Water you can color the water by just adding some acrylic or oil paint to the resin as you mix it, a few drops gives me the muddy look in the photos.
My river is very slow flowing, there are some whorls and eddies when you look at it in person but for faster moving water there are quite a few products that mimic riffles or waves, ScaleRama has a great video tutorial on making waves and splashing water that you can find on their website.

18Bravo
Joined: January 20, 2005
KitMaker: 7,219 posts
Armorama: 6,097 posts
Posted: Friday, December 30, 2011 - 02:26 PM UTC
I've seen a lot of muddy rivers in my day, and that is by far the best representation I've ever seen of one. Excellent stuff.
I'd like to know how you did the plants in the foreground on the bottom photo.
I'd like to know how you did the plants in the foreground on the bottom photo.

philter4
Joined: January 05, 2011
KitMaker: 20 posts
Armorama: 16 posts
Posted: Friday, December 30, 2011 - 02:34 PM UTC
Quoted Text
I've seen a lot of muddy rivers in my day, and that is by far the best representation I've ever seen of one. Excellent stuff.
I'd like to know how you did the plants in the foreground on the bottom photo.
I'm glad you like it, as for the plants, they are wire and paper. All of the plants are made from various combinations of wire, clay, preserved or artificial foliage and paper. I used to use kits by several different brands but about 18 months ago I started replacing all of the kits to plants I make from scratch. Here is a photo of the strangler fig I am working on now. It is in 1:22 and I still have some work left, I decided to add more air roots, I wish I would have done them before the foliage but at the time I started on the canopy I thought there was enough.

TheAmature
Joined: December 29, 2011
KitMaker: 10 posts
Armorama: 10 posts
Posted: Saturday, December 31, 2011 - 10:49 AM UTC
Thanks for all the help and advice guys. Once I get my riverbed done completely and pick up some of the supplies I need and once I have some more freetime to work on this I'll let y'all know how it goes and I'll try to put up a few pictures with my neighbor's camera
 |

WEB HOSTING BY


Copyright ©2021 Armorama and Kitmaker Network, a subsidiary of Silver Star Enterprises
All Rights Reserved. Please read our Conditions of Use and Privacy Policy.
All Rights Reserved. Please read our Conditions of Use and Privacy Policy.