_GOTOBOTTOM
Armor/AFV: 48th Scale
1/48 scale discussion group hosted by Rob Gronovius
Hosted by Darren Baker
M5 Stuart late
GregCloseCombat
Visit this Community
California, United States
Joined: June 30, 2008
KitMaker: 2,408 posts
Armorama: 2,394 posts
Posted: Sunday, February 19, 2012 - 03:14 PM UTC
Here's my start to a 1/48 M5 late Stuart (Kengi resin models, California's own)


Here's what's left plus will need to make light guards and track guides

GregCloseCombat
Visit this Community
California, United States
Joined: June 30, 2008
KitMaker: 2,408 posts
Armorama: 2,394 posts
Posted: Monday, February 20, 2012 - 03:02 PM UTC


Still playing around with stowage and need to add light guards and drill out some lifting hooks. Feel free to comment on any unit markings/references I could use for an Army recon unit, or things to fix here, etc - I'm open.
richtlv3
Visit this Community
Tel Aviv-Yafo, Israel
Joined: April 10, 2011
KitMaker: 95 posts
Armorama: 94 posts
Posted: Tuesday, February 21, 2012 - 06:26 AM UTC
nice Job ... I like it much !!!
how is work with resine? it's seems too hard is it?
waiting for paintwork
GregCloseCombat
Visit this Community
California, United States
Joined: June 30, 2008
KitMaker: 2,408 posts
Armorama: 2,394 posts
Posted: Thursday, February 23, 2012 - 04:01 PM UTC
Hi Richard, resin is not bad. You need to clean up parts more and fit each piece before glueing. I actually enjoy resin more then plastic most of the time, especially conversions. You need Superglue and primer. It's easy to sand and cut. Try a Kengi or Gasoline kit or conversion. They do not cost much more then a plastic kit anyways.
GastonMarty
Visit this Community
Quebec, Canada
Joined: April 19, 2008
KitMaker: 595 posts
Armorama: 69 posts
Posted: Friday, March 02, 2012 - 10:46 AM UTC

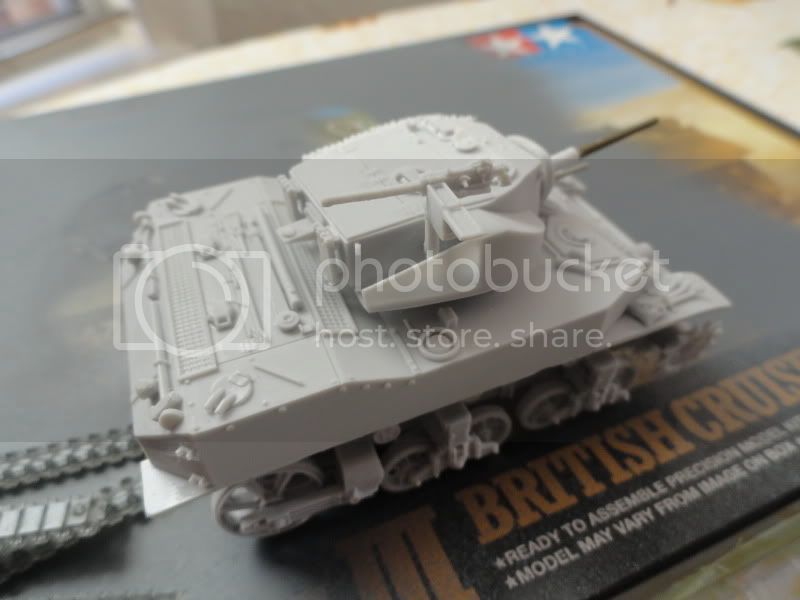
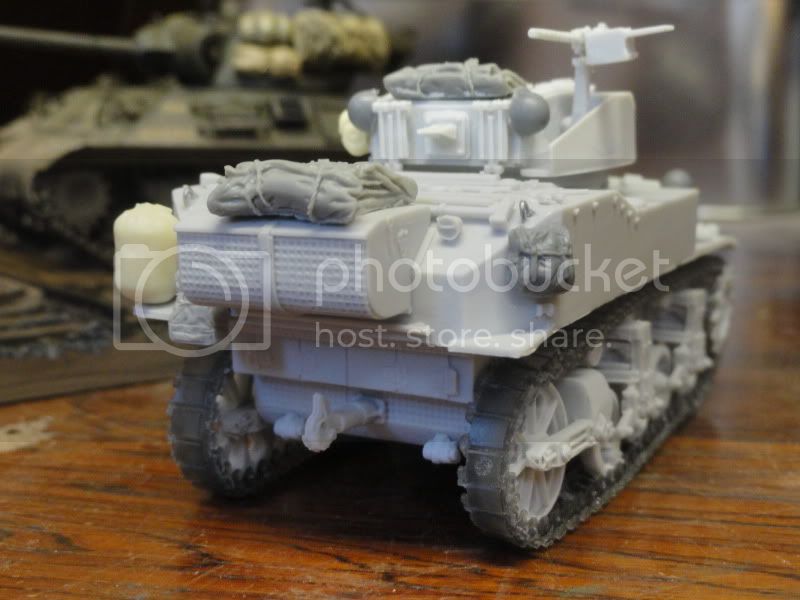
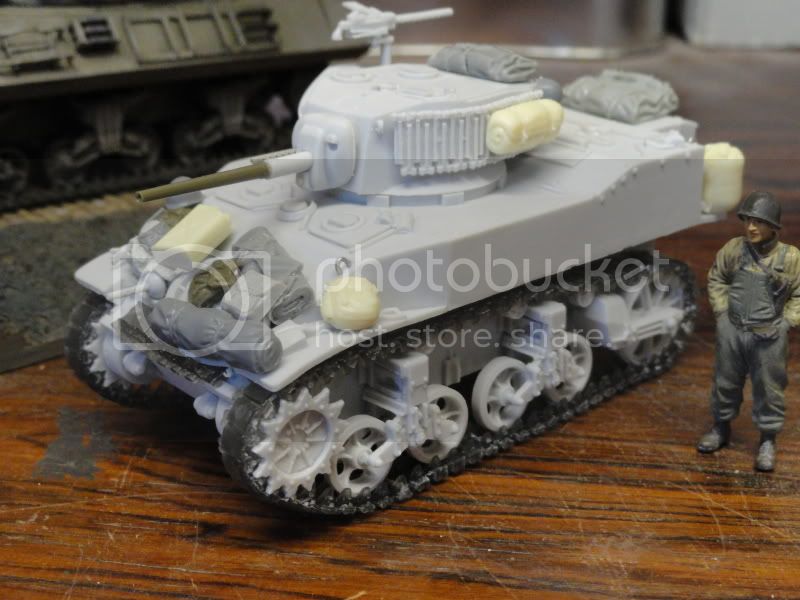
Whatever you do, don't buy the Gasoline 1/48th Stuart full kit (OOP now), no matter how cheap the offer: The tracks are basically unuseable, and it will likely be severely shrunk assymetrically on one side...

Even if it is NOT shrunk, the Gasoline Stuart's front corner angle upper hull plates, and even the overall hull pattern, is not symmetrical IN BASIC PATTERN DESIGN by a long, long way, even though the original tank was...

Look at any built-up example you find on the web, and you will see the upper plating on one side looks absolutely nothing like the other side...

This assymetrical pattern shrinkage (or poor basic master design symmetry, as in the less common Gasoline Stuart case), is periodic in all resin kits, but much less so on conversions than on full complete kits, which are almost always the real gamble here. Full kits are not only far more often crooked, but much more expensive as well.

Some makers like Belcher Bits, Rest Models, Hauler and probably Fighting 48th seem to have a better handle on this. I think transport temperature variations over long distances could play a role in the shrinking/warping the resin during shipping. Still, it seems the maker still counts more.

Be wary of flat plate assembly designs over more reliable solid one-piece non-hollowed-out parts, although my Belcher Bits 80 ton German flat railroad car was straight in its components, if inherently difficult to assemble, being made of 7 large and long thin pieces.

Long thin flat pieces are otherwise usually to be avoided at all costs, but Rest Models from Ukraine are incredible in that even the smallest resin rifle is dead straight. Their 2 German horses kit is amazing in that and other respects: Probably some of the best resin I have ever bought...

There is usually no problem in solid-moulded chunky conversion parts, like non-hollow Sherman turrets for instance. I am wary of anything long, thin and especially anything flat like a flat plate hull, rear bed or cab assembly. Don't even consider long gun barrels, even if Hauler's short KV2 barrel is flawless and dependable because it is short and thick (superb internal rifling on top of that). Hauler's resin seems like it would be dependable and stable no matter what it portrays...

In the Gasoline Stuart, the shrinkage problem stemmed in part from the hollowed-out upper and lower hull design, a much more dicey resin concept it seems, for some makers, than a solid hull...

Even absolute top quality resin kits like Accurate Armour are not immune: I took a fall on their "heavy ambulance" (flat plate rear hold assembly) which was severely assymetrical in a way no amount of carving could fix, as was some of the thin main body mouldings. Their Coles crane truck was OK, and had only the one piece solid cab being hollow: Much less risky than multiple flat parts...

I strongly suspect Spencer Pollard's build of the Accurate Armour ambulance had the exact same assymetries as mine, but he makes no mention of them...

Buy full resin kits or even resin conversions with extreme caution, by looking at the part breakdown design, and ignore all the cheerleading. Fully expect to take a bath on fit/symmetry on any one of them at any time.

The required use of the cyano glue's short adjustment time (no hold/sudden freeze hold) on resin is another roll of the dice, but at least there you have some control...

Gaston


GregCloseCombat
Visit this Community
California, United States
Joined: June 30, 2008
KitMaker: 2,408 posts
Armorama: 2,394 posts
Posted: Friday, March 02, 2012 - 02:45 PM UTC
Gaston has a point there. Some of the 'old' Gasoline kits may not be up to current standards. In general avoid Gasoline kits that begin with number '50....' as it refers to 50th scale which means it was done prior to Tamiya coming in and reviving the 48th scale.

Hey Gaston why don't you join the 48 campaign? Anything goes, you can do a plane or tank or whatever. Build with us here

https://armorama.kitmaker.net/modules.php?op=modload&name=Campaigns&file=index&req=showcontent&id=577
GastonMarty
Visit this Community
Quebec, Canada
Joined: April 19, 2008
KitMaker: 595 posts
Armorama: 69 posts
Posted: Saturday, March 03, 2012 - 12:02 PM UTC

Thanks for the offer Greg!

The unstarted March 1 requirement, with unstarted proof picture, is a bit of a problem for me: This limits me to my Bandai M12/M30 combo, whose completion by September depends on how well other projects are going...

Count me in, provisionally, with those two!

Gaston


GregCloseCombat
Visit this Community
California, United States
Joined: June 30, 2008
KitMaker: 2,408 posts
Armorama: 2,394 posts
Posted: Saturday, March 03, 2012 - 12:26 PM UTC
All right! Thanks for joining the group

Here's where I am


I will probably need to go back and add a strap here and there and some magic sculpt where gaps are (pics are wonderful for finding those)
tankmodeler
#417
Visit this Community
Ontario, Canada
Joined: March 01, 2004
KitMaker: 3,123 posts
Armorama: 2,539 posts
Posted: Saturday, March 03, 2012 - 03:42 PM UTC
Stuarts are always a favourite of mine and you've done a fine job building this kit, but I am amazed at the number of detail errors in the kit visible in your photos. The turret ring is wrong, the differential cover is wrong, the rear air louvers are wrong, the filler caps are wrong, the road wheel style is wrong, the air inlet grill frames are enormous, there are no spare tracks & brackets, the grousers seem to have only one end to them and there's some sort of pie plate & splash guard on the hull roof to the right rear of the turret where there should be a very inconspicuous antenna blanking plate. There are a number of other small errors and missing details as well.

I don't understand this. The Stuart isn't some sort of rare vehicle. There's tons of them around and mountains of data available to do it right. Why make such a wrong kit? Again, you've done a fine job, but I just don't understand the person who made the master not getting some really basic details more right than this.

I've made a number of kit masters and it just bugs me to see someone either not up to doing a competent job or who doesn't care enough to do things right.

It's sad.

Paul
GregCloseCombat
Visit this Community
California, United States
Joined: June 30, 2008
KitMaker: 2,408 posts
Armorama: 2,394 posts
Posted: Saturday, March 03, 2012 - 06:16 PM UTC
No such thing as a perfect model I guess. I do wish it had the later solid roadwheels. I could probably sand down the air inlet frames. The suspension towers were what bugged me the most with poor fit and detail. Thanks for the comments. Do you have any pics? I thought the turret ring was right?

The resin maker, Ken Swenson, has done a pretty extensive amount for movies:


http://www.imdb.com/name/nm0842398/
tankmodeler
#417
Visit this Community
Ontario, Canada
Joined: March 01, 2004
KitMaker: 3,123 posts
Armorama: 2,539 posts
Posted: Sunday, March 04, 2012 - 04:36 AM UTC
You can see the difference in the turret ring in these photos. What is missing is the beveled armored splash ring around the cylindrical turret ring proper.

This photo shows the beveled parts on a real Stuart:

http://www.fsmm.org/collection_images/buttons/M5a1%20(cam-3).jpg

This one shows it a bit clearer on a 1/35 AFV Club kit. YOu can also see teh differences in that blanking cover & the dinner plate on the 1/48 kit. The fire extinguisher pulls on the 1/48 kit are in teh wrong position as well, it seems.

http://www.pirespreto.com/wp-content/gallery/m5a1-stuart/m5a1_5.jpg

This shot shows how the bevels fair pretty much into teh bottom of the skirt around the base of the Stuart turret.

http://www.flickr.com/photos/32854572@N02/3075854439/

Hope this helps. As I said, you've done a fine job, it's just the basic kit that's let you down.

Paul
GregCloseCombat
Visit this Community
California, United States
Joined: June 30, 2008
KitMaker: 2,408 posts
Armorama: 2,394 posts
Posted: Sunday, March 04, 2012 - 05:06 AM UTC
Now that's really helpful - thanks I see the curved edge and that the square parts should extend out a little further. I will play around and try either pe copper strips or magic sculpt to get the curve on there. Also I can re-do more grab handles on the engine deck. I'll look more through those pics and see what else I can do to the rear too.

Thanks for the help again - glad you pointed it out before I start painting
GregCloseCombat
Visit this Community
California, United States
Joined: June 30, 2008
KitMaker: 2,408 posts
Armorama: 2,394 posts
Posted: Sunday, March 04, 2012 - 06:31 PM UTC
I used magicsculpt and some plastic strip to re-do the turret ring. Hobby knife to cut away the raised vent frame. Grab handles next


and here's a shot of the rear (nothing changed - for discussion)


tankmodeler
#417
Visit this Community
Ontario, Canada
Joined: March 01, 2004
KitMaker: 3,123 posts
Armorama: 2,539 posts
Posted: Monday, March 05, 2012 - 07:38 AM UTC
That turret ring looks really good, well done!

Since you seem receptive to changes to enhance accuracy, and inspired by that loas photos (of the rear end of teh vehicle) here are a copule shots that show how the air exit louvers should look.

Thos shot shows how face of the lower louvres sits almost flush with the plane of the engine compartment doors and not forward at the step in the rear plate.

http://www.flickr.com/photos/32854572@N02/3075873391/

This ia a somewhat out-of-focus shot of my 1/35 Stuart VI showing the general arrangement of the three louver assemblies.

http://www.amps-armor.org/ampssite/Photos/Full/reviewPhotos/1632/IMG_3432.JPG

Another oblique shot of my model showing how the upper louver assembly is both approximately flush with teh sirface of the rear overhand and that it hands below and mostly obscures the access doors.

This photo shows the upper louver folded out of the way for engine door access and has the lower louver in place. You can also see the spare track brackets on this immacculately restored M5A1. Man, what a beauty! (big image!)

http://data.primeportal.net/tanks/de_craecker/m5a1/M5A1%20Stuart%20LT%20(09).JPG

You can go to my review of the AFV Stuart here:

http://www.amps-armor.org/ampssite/reviews/showReview.aspx?ID=1632&Type=FB

It shows the louvres in several more photos and also has enough detail shots to see, by comparison, some of the more glaring errors in the 1/48 kit. Look at that "dinner plate" blanking cover, for instance.

HTH

Paul
GregCloseCombat
Visit this Community
California, United States
Joined: June 30, 2008
KitMaker: 2,408 posts
Armorama: 2,394 posts
Posted: Monday, March 05, 2012 - 03:36 PM UTC
Thanks!!! That is good info and I would love to see that restored Stuart in person. I hope to get a chance again later in the week to start some more work on it. Cheers
GregCloseCombat
Visit this Community
California, United States
Joined: June 30, 2008
KitMaker: 2,408 posts
Armorama: 2,394 posts
Posted: Sunday, May 27, 2012 - 01:21 PM UTC
I gave up fixing the rear lower screen as I couldn't find any mesh screen small enough. I do have plans to have this as part of a large dio of the photo from Battle of the Bulge


Beetlejuice
Visit this Community
Pennsylvania, United States
Joined: May 17, 2012
KitMaker: 10 posts
Armorama: 8 posts
Posted: Saturday, June 02, 2012 - 01:30 AM UTC
Again, a damn fine build there Greg, congrats! Although I'm still trying to figure out where you get the time for all of these models!!!!
Too bad about all of the mods that you had to do AFTER the build was completed, of course it does add to the overall appeal.
It looks like the Master for this Stuart needs to be taken back to the "Drawing Board". Too many nit-picky errors that really stand-out.
GregCloseCombat
Visit this Community
California, United States
Joined: June 30, 2008
KitMaker: 2,408 posts
Armorama: 2,394 posts
Posted: Saturday, June 02, 2012 - 12:16 PM UTC
Hi Beetle, I agree with you. I wouldn't do this one again (one of Kengi's first kits) but it's good for a one time build and there isn't any other Stuart much better out there now in 48. If AFV Club would have a change of heart and do some Allied armor..... Thanks for your comments and I'll get to this again soon. I don't have much time, but I stay well organized with everything in a box so I can whip it out and build some, then put it easily away again. 48 scale usually has less parts to worry about losing too lol
BBD468
Visit this Community
Texas, United States
Joined: March 08, 2010
KitMaker: 2,465 posts
Armorama: 2,383 posts
Posted: Saturday, June 02, 2012 - 12:51 PM UTC
Hi Greg,

The M5 looks realy good man! I really kike the stowage as well. looking forward to more.

Gary
Totalize
Visit this Community
Ontario, Canada
Joined: February 04, 2009
KitMaker: 743 posts
Armorama: 549 posts
Posted: Saturday, June 02, 2012 - 01:07 PM UTC
Greg,

Super nice build. This the first time I have seen this one. Sorry I missed it.

looking forward to seeing more.

PantherF
Visit this Community
Indiana, United States
Joined: June 10, 2005
KitMaker: 6,188 posts
Armorama: 5,960 posts
Posted: Saturday, June 02, 2012 - 02:29 PM UTC
Nice lookin' little ride there! I really like the streak work you did too!


~ Jeff
 _GOTOTOP