Churchill Mk.VII from Tamiya
Vladimir, Russia
Joined: November 20, 2010
KitMaker: 209 posts
Armorama: 205 posts
Posted: Monday, June 18, 2012 - 05:00 AM UTC
Hi, everybody!
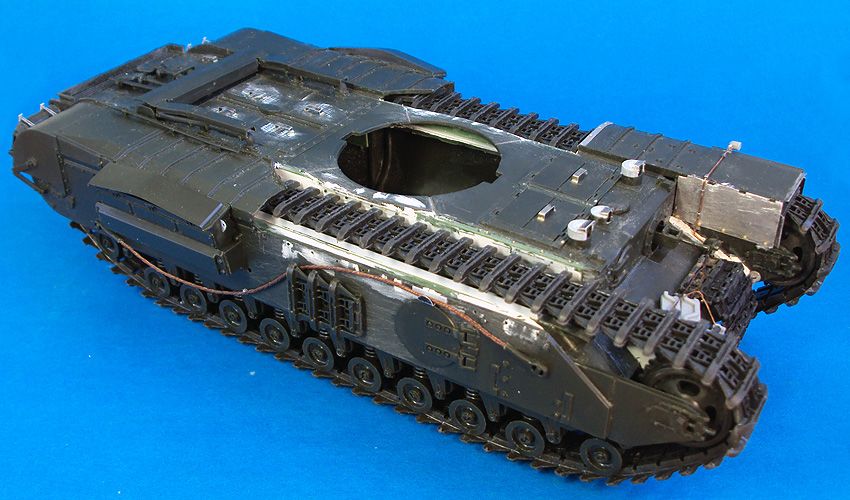
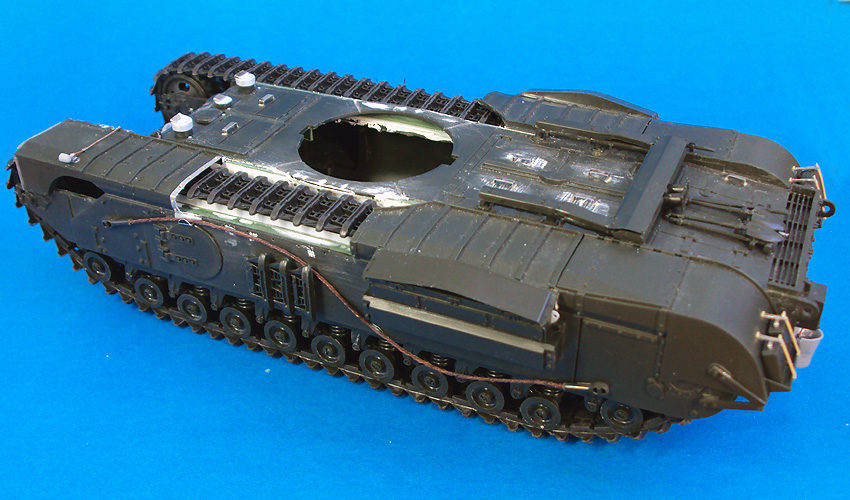
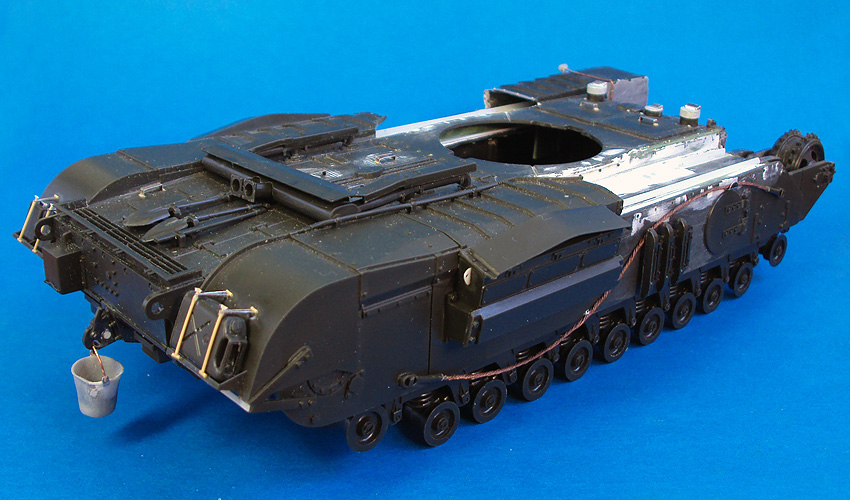
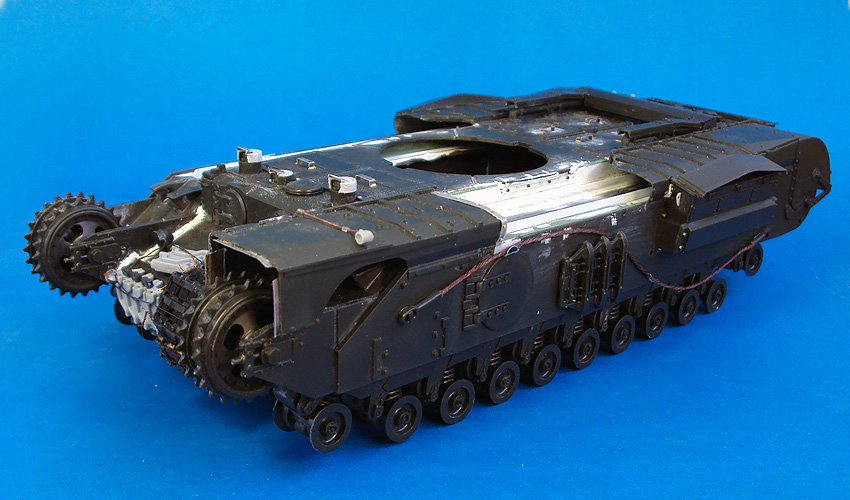
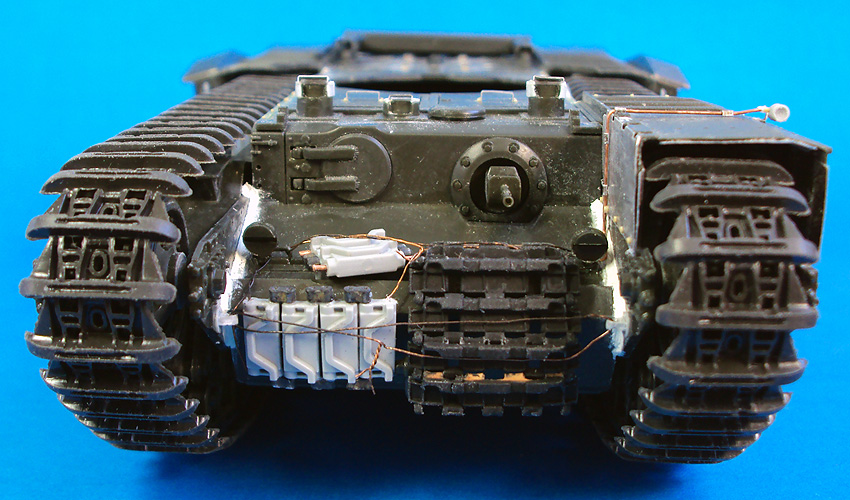
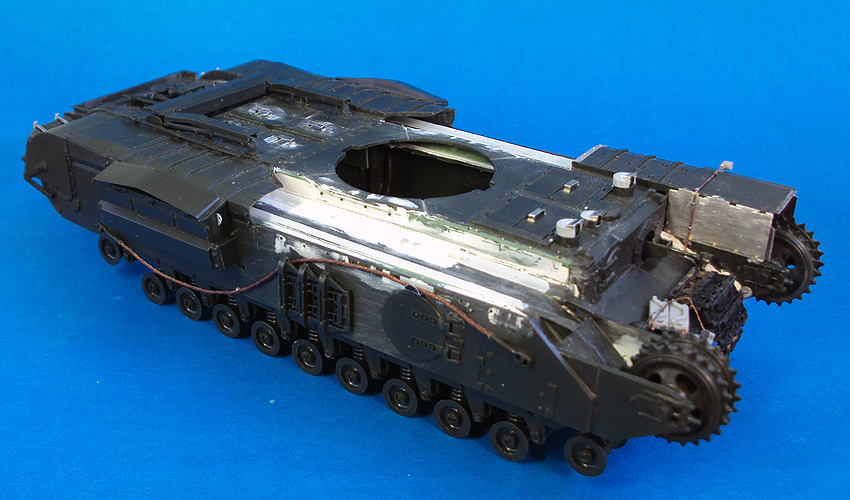
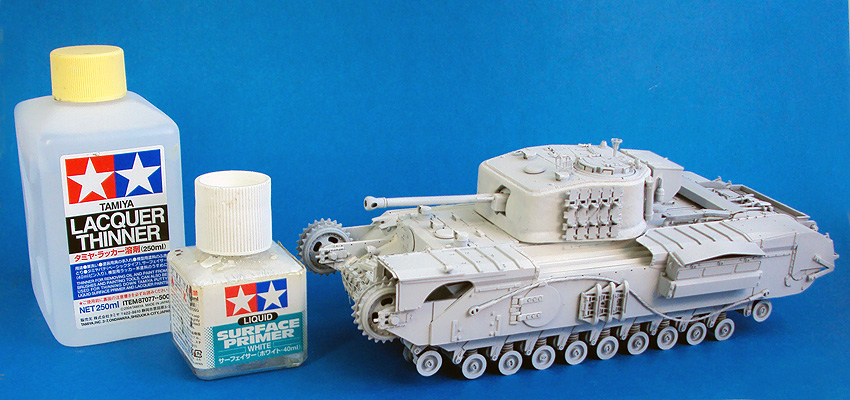
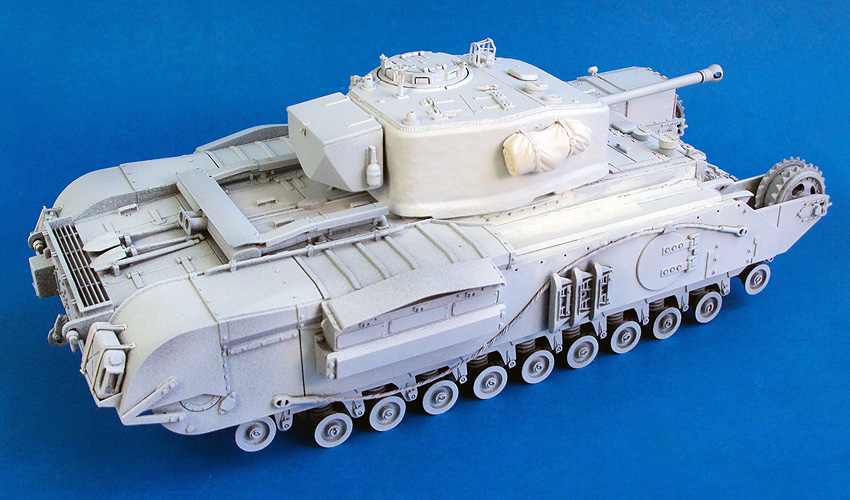
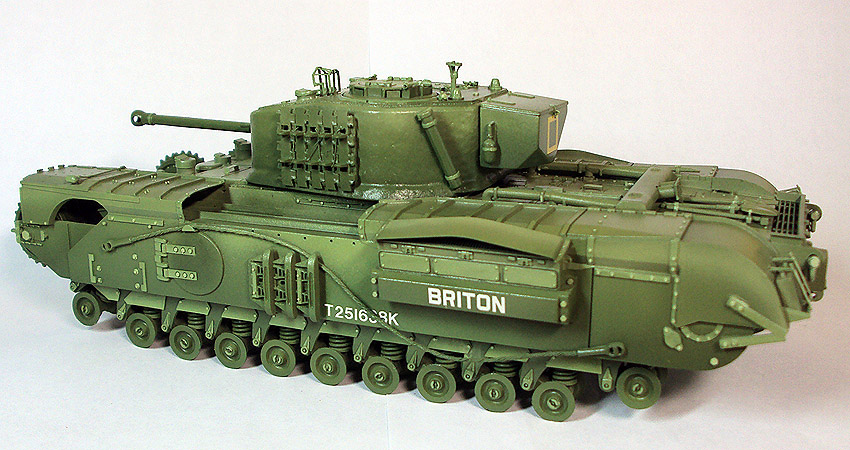
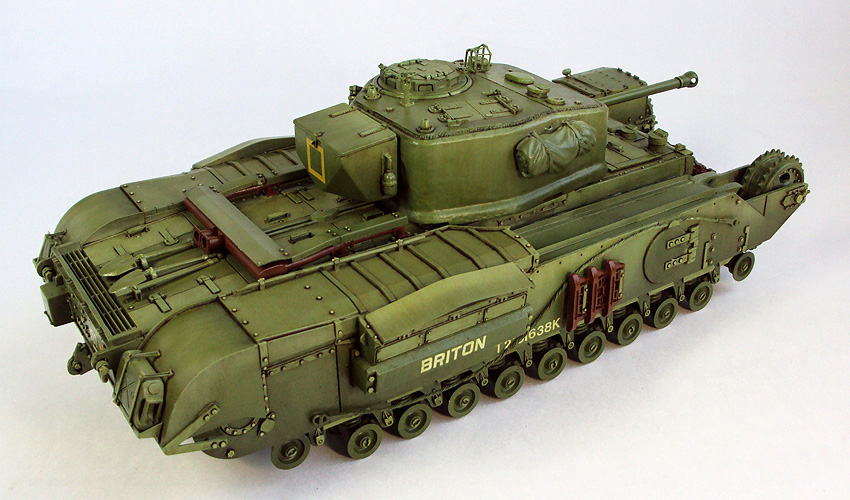
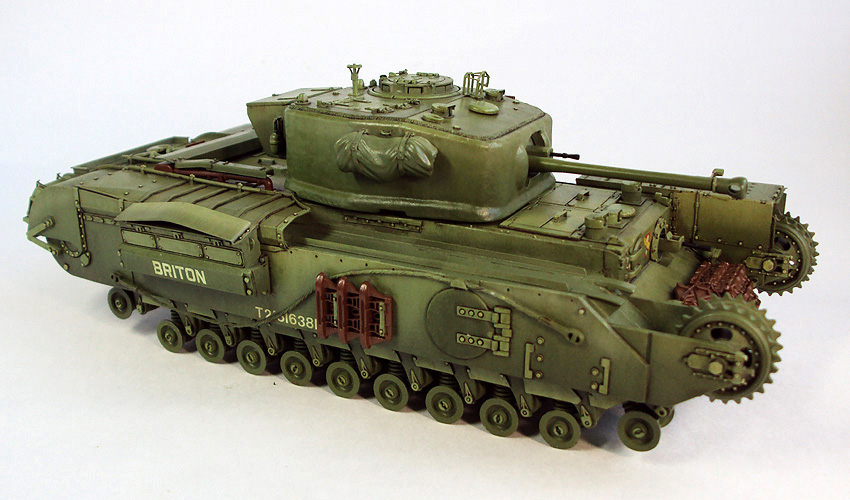
In view of that construction of a diorama is temporarily suspended, decided to collect from a box and without Churchill's troubles.

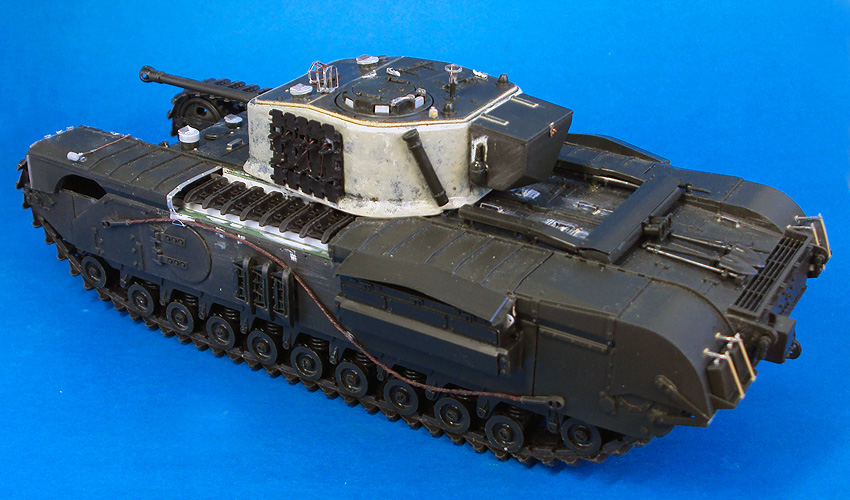
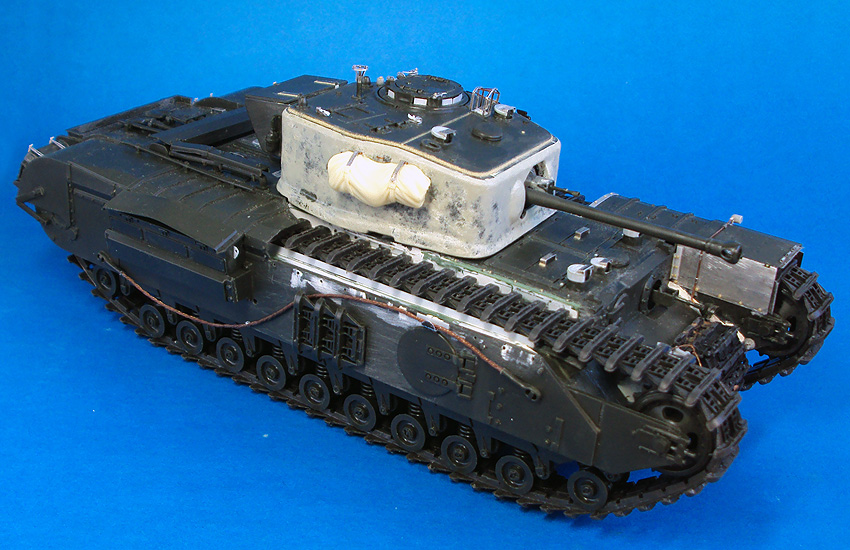
Model old, but quality quite at level. For receiving more or less watchable model I will correct the visible elements simplified by the producer, to put it briefly, I will traditionally collect.
Here that at me it developed for yesterday evening. The only thing that wasn't pleasant - color of plastic, it is very difficult for perception in operating time.
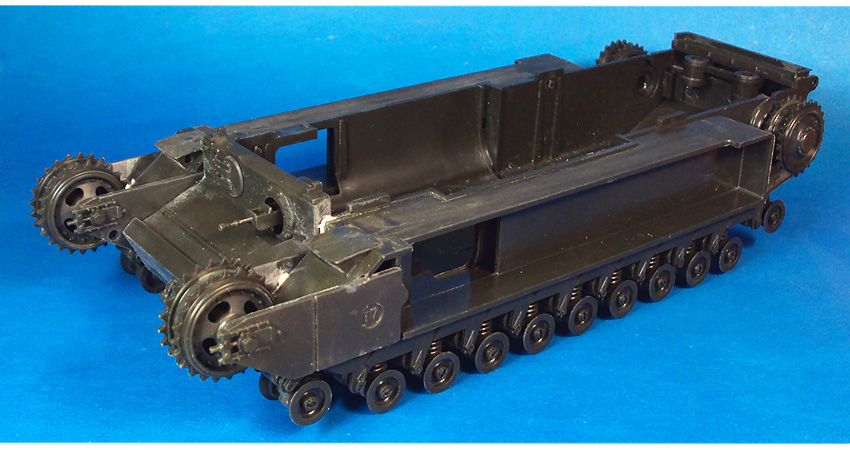
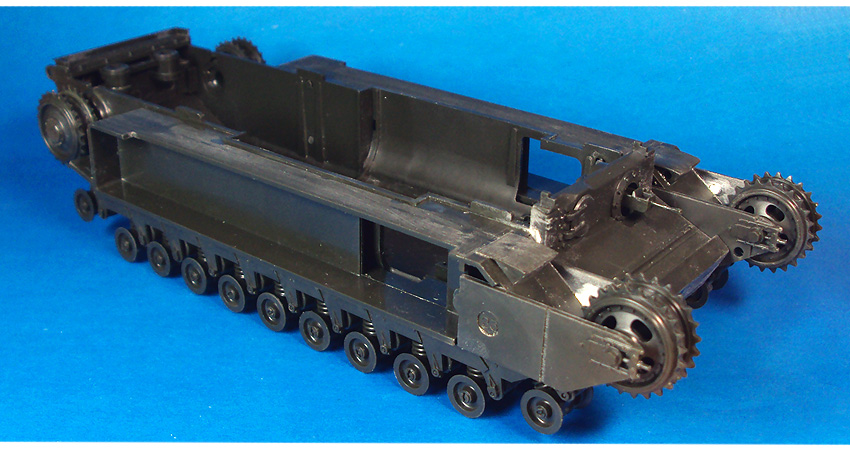
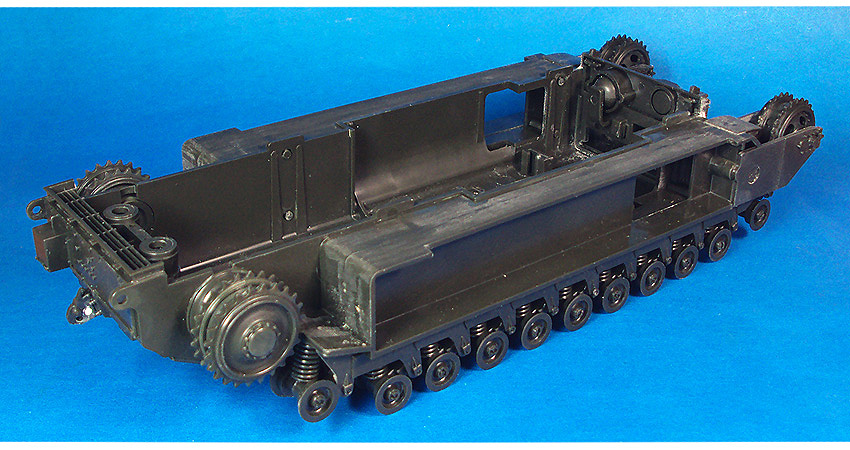
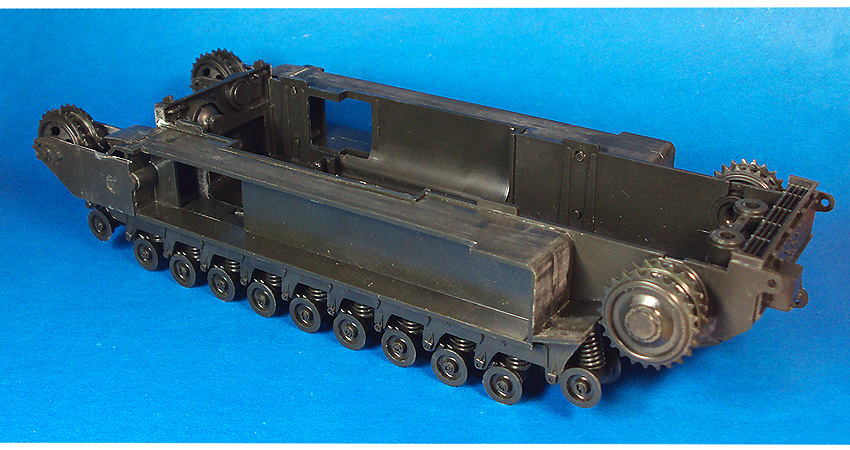
Vladimir, Russia
Joined: November 20, 2010
KitMaker: 209 posts
Armorama: 205 posts
Posted: Saturday, July 14, 2012 - 12:56 AM UTC
England - South West, United Kingdom
Joined: January 06, 2007
KitMaker: 3,661 posts
Armorama: 2,764 posts
Posted: Saturday, July 14, 2012 - 01:03 AM UTC
very nice work. bringing an older it up to standard.
Support Our Troops! Hit the Yes button If you find reviews or features helpful.
Vladimir, Russia
Joined: November 20, 2010
KitMaker: 209 posts
Armorama: 205 posts
Posted: Saturday, July 14, 2012 - 09:23 PM UTC
Thanks for an assessment.
England - East Anglia, United Kingdom
Joined: August 12, 2005
KitMaker: 14,499 posts
Armorama: 11,675 posts
Posted: Saturday, July 14, 2012 - 09:44 PM UTC
Hi Kirill,
Excellent work, coming along well.
Al


'Action this Day'
Winston Spencer Churchill
Vladimir, Russia
Joined: November 20, 2010
KitMaker: 209 posts
Armorama: 205 posts
Posted: Sunday, July 29, 2012 - 05:37 AM UTC

#023
Zurich, Switzerland
Joined: March 13, 2009
KitMaker: 2,058 posts
Armorama: 1,656 posts
Posted: Sunday, July 29, 2012 - 06:46 AM UTC
Great work on this oldie, but as you say, it's a goodie! looking forward to the painting.
Cheers!
Stefan
Too many models - too little time...
Texas, United States
Joined: June 12, 2007
KitMaker: 1,866 posts
Armorama: 1,696 posts
Posted: Sunday, July 29, 2012 - 06:48 AM UTC
I like it a lot. Most appealing to me is the fact that you're using the old Tamiya kit, and doing it well.

#003
Donegal, Ireland
Joined: May 14, 2002
KitMaker: 9,763 posts
Armorama: 7,444 posts
Posted: Sunday, July 29, 2012 - 07:05 AM UTC
Hi Kirill. I like what you´ve done here .... the additions and modifications will add a lot to the finished model and make it stand out. Painting and weathering to this standard will make it a killer model.
I tend to stick to the best available model of whatever Im building, but this does not always mean that it makes it better. Making a unique and individual model goes even further, no matter what the base kit is. The extra tracks held by wire is a nice touch as well!!

IPMS Stockholm
"The problem with common sense, is that it is not that common"
Vladimir, Russia
Joined: November 20, 2010
KitMaker: 209 posts
Armorama: 205 posts
Posted: Sunday, July 29, 2012 - 09:02 PM UTC
Quoted Text
Great work on this oldie, but as you say, it's a goodie! looking forward to the painting.
Cheers!
Stefan
Hi Stefan!
Yes, to refine the model really had to spend a lot of time, but it is a problem all the old sets.
Thank you for your interest in this work!
Quoted Text
I like it a lot. Most appealing to me is the fact that you're using the old Tamiya kit, and doing it well.
Thank you for an assessment of Russel!
Frankly, I'd love to be gathered the Churchill from AFV, but I hope from this model to obtain a good result.
Quoted Text
Hi Kirill. I like what you´ve done here .... the additions and modifications will add a lot to the finished model and make it stand out. Painting and weathering to this standard will make it a killer model.
I tend to stick to the best available model of whatever Im building, but this does not always mean that it makes it better. Making a unique and individual model goes even further, no matter what the base kit is. The extra tracks held by wire is a nice touch as well!!
Hi, Frank!
I am glad that my model made an impression on you and I'm glad you found time to write a few lines. It's always interesting to know what people think of your colleagues on hobby models!
PS Guys, I apologize for my terrible English.
Vladimir, Russia
Joined: November 20, 2010
KitMaker: 209 posts
Armorama: 205 posts
Posted: Wednesday, August 01, 2012 - 07:00 AM UTC

#023
Zurich, Switzerland
Joined: March 13, 2009
KitMaker: 2,058 posts
Armorama: 1,656 posts
Posted: Wednesday, August 01, 2012 - 08:34 PM UTC
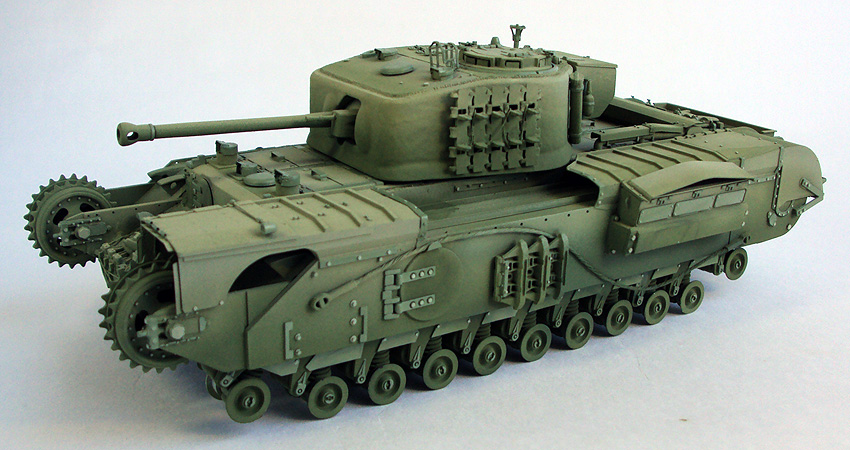
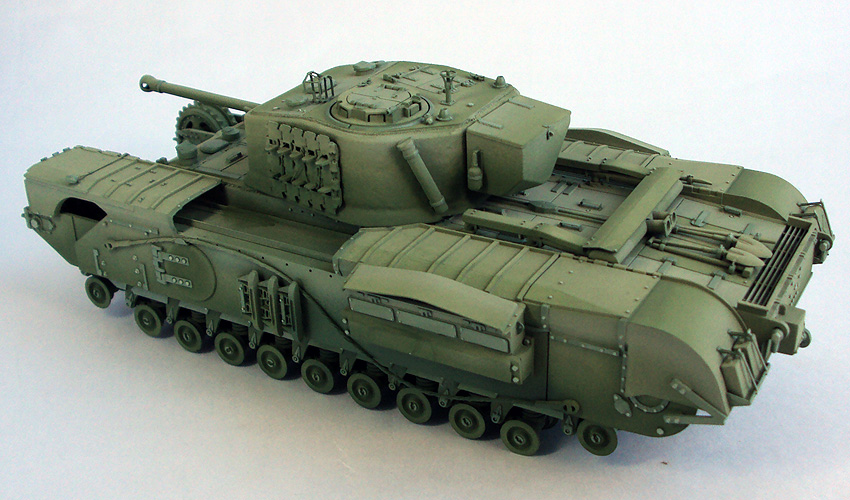
Nice work on the paint. How did you do it? Did you use dry brushing?
One think I just noticed is the Jerry can on the right back: You might want to add the missing middle handle.
Cheers!
Stefan
Too many models - too little time...
Vladimir, Russia
Joined: November 20, 2010
KitMaker: 209 posts
Armorama: 205 posts
Posted: Wednesday, August 01, 2012 - 08:50 PM UTC
Quoted Text
Nice work on the paint. How did you do it? Did you use dry brushing?
One think I just noticed is the Jerry can on the right back: You might want to add the missing middle handle.
Cheers!
Stefan
Thanks for rating Stephen.
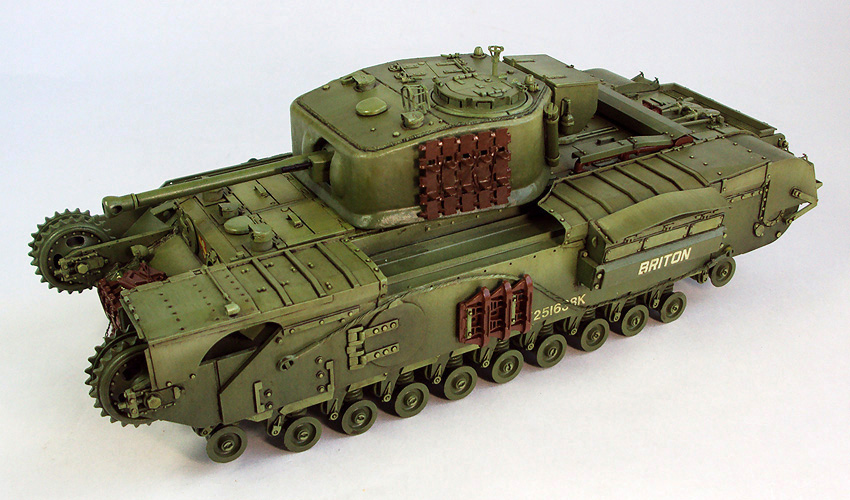
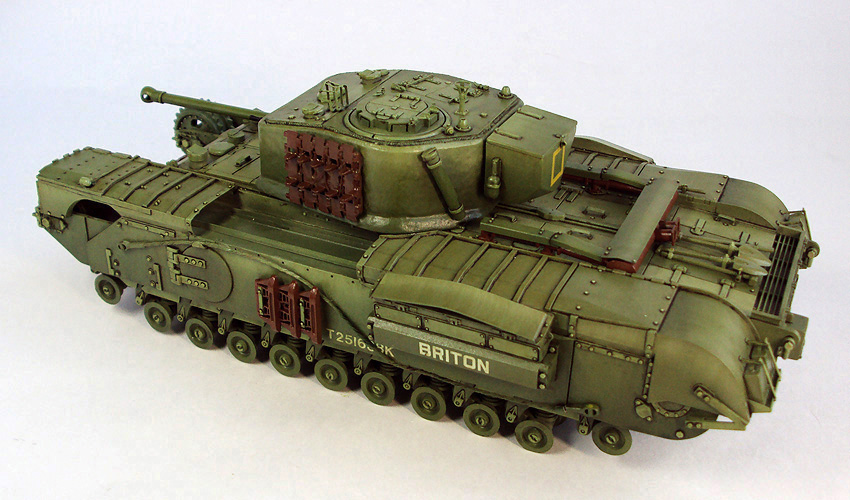
No, dry brush, I do not apply at all.
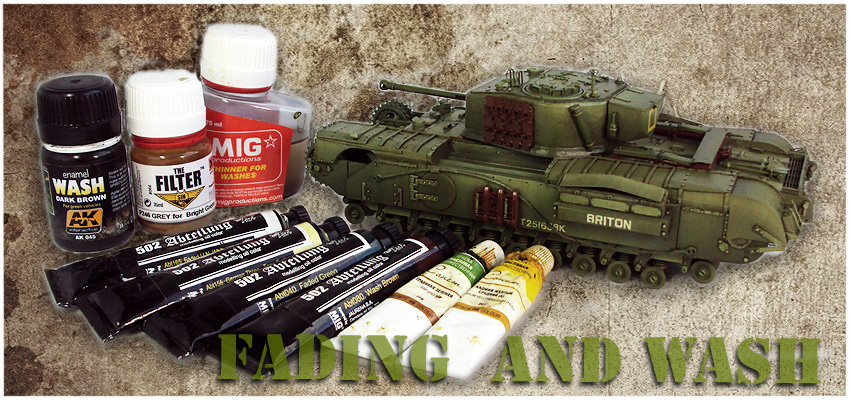
All the models I'm trying to paint in the style of modulation (the photo shows the data on the stage - the airbrush color gradient separation of individual elements of the brush lighter shade).
It employs a lot of masters, but in my opinion are the best, Adam Wilder and Mig Jimenez.
Spare trucks and cans for gasoline and other little things I have not dyed - they'll do in the final stage.

Vladimir, Russia
Joined: November 20, 2010
KitMaker: 209 posts
Armorama: 205 posts
Posted: Sunday, August 12, 2012 - 08:40 AM UTC

#417
Ontario, Canada
Joined: March 01, 2004
KitMaker: 3,123 posts
Armorama: 2,539 posts
Posted: Monday, August 13, 2012 - 05:17 AM UTC
Kirill,
Steven is correct. Before you go much farther in finishing the model, you really need to correct the jerrycan on the rear fender. At the very least it needs three bars on the handle instead of the two it currently has. It should also have a new filler cap that indicates whether it is a gasoline can or a water can. To match the rest of the work you have done, it really should be replaced with a can from TASCA or even the older Italeri jerrycan accessory set, which has very superior jerrycans to those that used to come in the Tamiya kits.
Given all the work you have done on the model, it would be a shame to have such a glaring error remain on the finished kit. It really does detract from the rest of the model.
All the best,
Paul
Paul Roberts
Past Editor, Boresight
Armor Modeling and Preservation Society
Vladimir, Russia
Joined: November 20, 2010
KitMaker: 209 posts
Armorama: 205 posts
Posted: Monday, August 13, 2012 - 07:59 PM UTC
Quoted Text
Kirill,
Steven is correct. Before you go much farther in finishing the model, you really need to correct the jerrycan on the rear fender. At the very least it needs three bars on the handle instead of the two it currently has. It should also have a new filler cap that indicates whether it is a gasoline can or a water can. To match the rest of the work you have done, it really should be replaced with a can from TASCA or even the older Italeri jerrycan accessory set, which has very superior jerrycans to those that used to come in the Tamiya kits.
Given all the work you have done on the model, it would be a shame to have such a glaring error remain on the finished kit. It really does detract from the rest of the model.
All the best,
Paul
Paul,
You and Steven are absolutely right about the cans. But unfortunately, I do not ever am making constructive mutations both at the stage color model. And this entire project for recreation, so much did it simply and bluntly. Did not want to go into the materiel. Again, this project happy holiday.

But I thank you for attention. Someday I will gather a sample of English from all over the tank design Responsibility and thoroughness. Well, on this model error with the canister I try disguise ..

England - East Anglia, United Kingdom
Joined: August 12, 2005
KitMaker: 14,499 posts
Armorama: 11,675 posts
Posted: Monday, August 13, 2012 - 08:57 PM UTC
Hi Kirill,
Lovely paint job, looks excellent. I can send you a jerrycan if you need one.
Cheers
Al


'Action this Day'
Winston Spencer Churchill
Vladimir, Russia
Joined: November 20, 2010
KitMaker: 209 posts
Armorama: 205 posts
Posted: Tuesday, August 14, 2012 - 03:14 AM UTC
Thank you for rating of Alan! =)
I am very glad that you are willing to help with the canister, but I found another solution to this problem.
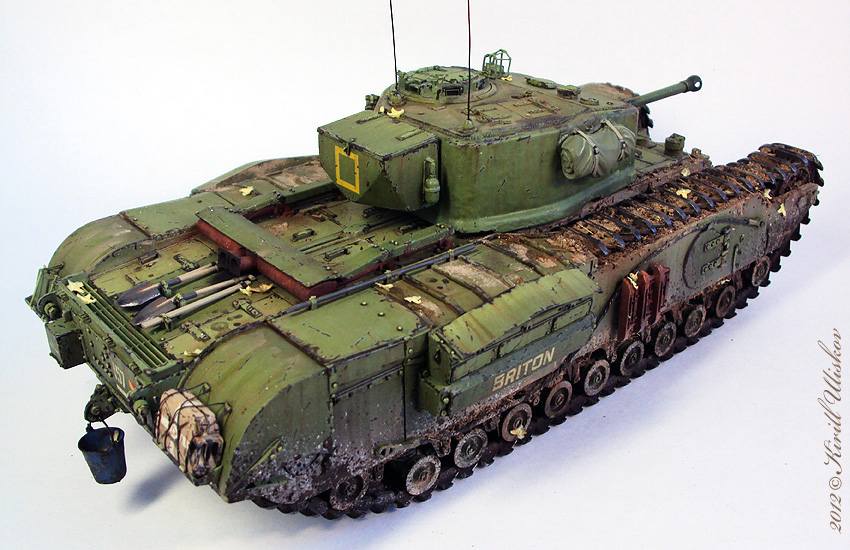
I used captured German canister. Painted a different color, it adds a personal model. I believe that the tankers could easily replace your canister in the event of damage to the trophy.
What do you think about this version?
England - East Anglia, United Kingdom
Joined: August 12, 2005
KitMaker: 14,499 posts
Armorama: 11,675 posts
Posted: Tuesday, August 14, 2012 - 06:44 AM UTC
Hi Kirill,
Don't see any problem with a captured fuel can. You've done a super job on the build and paint work.
Cheers
Al


'Action this Day'
Winston Spencer Churchill

#417
Ontario, Canada
Joined: March 01, 2004
KitMaker: 3,123 posts
Armorama: 2,539 posts
Posted: Tuesday, August 14, 2012 - 06:50 AM UTC
Quoted Text
What do you think about this version?
Excellent solution.
As long, of course, as the replacement German jerrycan also has three bars on the handle and a correct filler cap.
:)
The early Tamiya versions of both Allied and Axis cans had incorrect details.
Paul
Paul Roberts
Past Editor, Boresight
Armor Modeling and Preservation Society
Vladimir, Russia
Joined: November 20, 2010
KitMaker: 209 posts
Armorama: 205 posts
Posted: Tuesday, August 14, 2012 - 07:08 AM UTC
guys,
The German right cans I have and they pretty much like the U.S. at different times. But the British have not yet acquired, as ranks first in the engineering model of the British World War II.
In general now, I have collected the correct German jerry can for water, painted it in the base color and now I do a little chipping on it.
Incidentally replacement canisters entailed another interesting solution. Since the German canister British thicker canister, the attachment can not be closed normally, had to come up with. how to fix it. I solved this by using a wire, I think it would have done so these tankers.

Vladimir, Russia
Joined: November 20, 2010
KitMaker: 209 posts
Armorama: 205 posts
Posted: Tuesday, September 04, 2012 - 06:27 AM UTC
Vladimir, Russia
Joined: November 20, 2010
KitMaker: 209 posts
Armorama: 205 posts
Posted: Sunday, September 16, 2012 - 06:12 AM UTC
California, United States
Joined: June 30, 2008
KitMaker: 2,408 posts
Armorama: 2,394 posts
Posted: Sunday, September 16, 2012 - 06:41 AM UTC

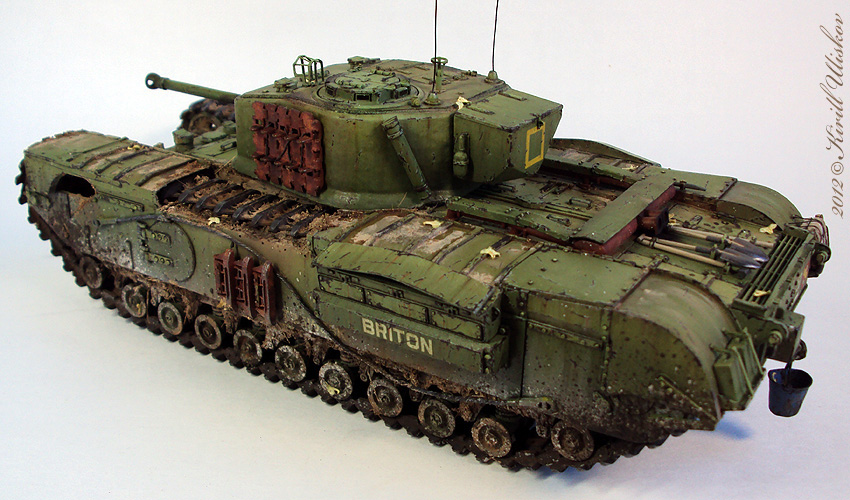
Great work. That is probably the best modulation I've seen! The mud goes well with the base and makes a nice scene like the photo. Awesome work

Vladimir, Russia
Joined: November 20, 2010
KitMaker: 209 posts
Armorama: 205 posts
Posted: Sunday, September 16, 2012 - 06:30 PM UTC
Quoted Text
 Great work. That is probably the best modulation I've seen! The mud goes well with the base and makes a nice scene like the photo. Awesome work
Hi Greg!
I'm glad you liked my model.
Thanks for the kind words.


