

Hosted by Darren Baker
Tasca M4A3E8 "Army Mule"

exer

Joined: November 27, 2004
KitMaker: 6,048 posts
Armorama: 4,619 posts

Posted: Sunday, July 01, 2012 - 04:58 AM UTC
Superb work Scott. The archer numbers really look great.


SEDimmick

Joined: March 15, 2002
KitMaker: 1,745 posts
Armorama: 1,483 posts

Posted: Sunday, July 01, 2012 - 11:44 AM UTC
 From 2012-07-01
My latest project, a M4A3E8 from the 6th Armored Division in Germany, 1945. This is one of two photos I'm working off of in this build. I'm using the Tasca M4A3E8 Sherman and a bare minimum of aftermarket stuff on it, so I can actually finish it!
 From 2012-07-01
The additional armor plate came from a Tank Work Shop set. I had to do slight modification to the frontal armor, which was to slightly trim about 2-3mm from each side to make it a better match to the photos. I used Miliput Super Fine for the welds. I still need to add the additional weld lines that are seen in the red circle in the first photo.
 From 2012-07-01
left hand side.
 From 2012-07-01
Overall shot of the turret. The casting numbers are from Archer Fine Transfers and are very nice. Applied using some Future floor wax so they don't come off the bare plastic. .60 Sheet styrene was used for the additional armor.
On the actual vehicle (and others) the armor was from other knocked out/mechanically destroyed Shermans.
 From 2012-07-01
Shot of the left slide armor and "luggage" rails added made from .20 brass. Miliput was used again for the welds.
 From 2012-07-01
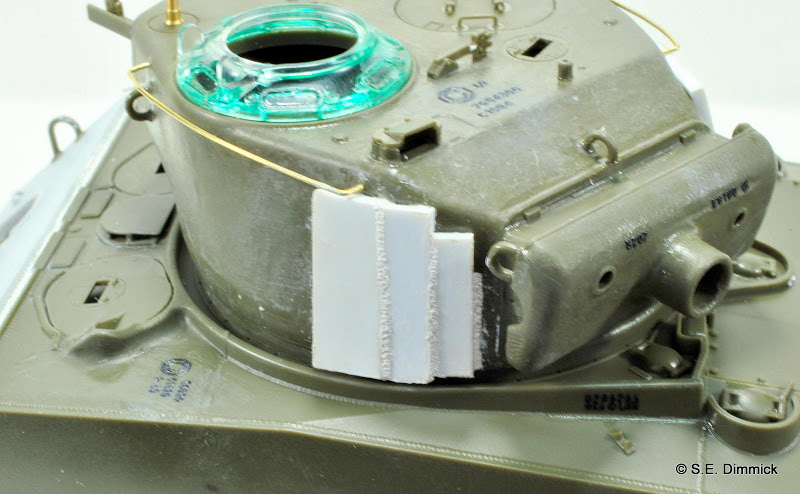
Overall shot of the right hand side
Right hand side of the turret. I didn't have a shot of "Army Mule" from this side, so I had no idea how the armor was applied here. Luckily a couple days ago someone posted photos from 6th Armored Division on the Allied DG on Missing Lynx. One photo had a different tank with crew standing on this side and you could see they used a single armor plate to do the up-armoring. Good enough for me. You can also see the tiny casting numbers from the Archer set on the pistol port and turret ring guard. still need to drill out the water drain holes at the rear.
 From 2012-07-01
Overall shot of the model. I have the suspension sans tracks done and still need to add the rest of the armor plate on the front that protects the transmission nose.
Brobru

Joined: October 10, 2011
KitMaker: 95 posts
Armorama: 86 posts

Posted: Tuesday, July 03, 2012 - 08:16 AM UTC
Looks very good! I am subscribing! 

BBD468
Joined: March 08, 2010
KitMaker: 2,465 posts
Armorama: 2,383 posts

Posted: Tuesday, July 03, 2012 - 09:50 AM UTC
Fantastic work Scott!  Im subscribing as well.
Gary
Im subscribing as well.Gary


vonHengest
Joined: June 29, 2010
KitMaker: 5,854 posts
Armorama: 4,817 posts

Posted: Tuesday, July 03, 2012 - 07:45 PM UTC
That is coming along nicely, I look forward to seeing this one weathered 

Captin_Caveman_III
Joined: October 20, 2008
KitMaker: 1,069 posts
Armorama: 1,062 posts
Posted: Thursday, September 06, 2012 - 12:58 AM UTC
Nice scratch work so far...
SEDimmick
Joined: March 15, 2002
KitMaker: 1,745 posts
Armorama: 1,483 posts
Posted: Thursday, September 06, 2012 - 01:06 AM UTC
I have some updated photos I'll have to upload....
 |

WEB HOSTING BY


Copyright ©2021 Armorama and Kitmaker Network, a subsidiary of Silver Star Enterprises
All Rights Reserved. Please read our Conditions of Use and Privacy Policy.
All Rights Reserved. Please read our Conditions of Use and Privacy Policy.