Virginia, United States
Joined: October 06, 2004
KitMaker: 50 posts
Armorama: 37 posts
Posted: Thursday, November 15, 2012 - 11:14 PM UTC
Three Shermans. Well images of one of the builds. Three approaches to the Ford Built M4A3.Me and two friends decided to have some fun. My approach is to use various Tasca Sherman kit parts starting with an M4A2 upper hull and replacing the upper rear engine deck with that of a modified M4A3 type. The other builds are done using a Tamiya M4 upper hull and the third is done with the Formations resin hull.


Frank Blanton
"What if the Hokey Pokey IS what it is all about"

#045
South Carolina, United States
Joined: September 23, 2005
KitMaker: 362 posts
Armorama: 350 posts
Posted: Friday, November 16, 2012 - 12:03 PM UTC
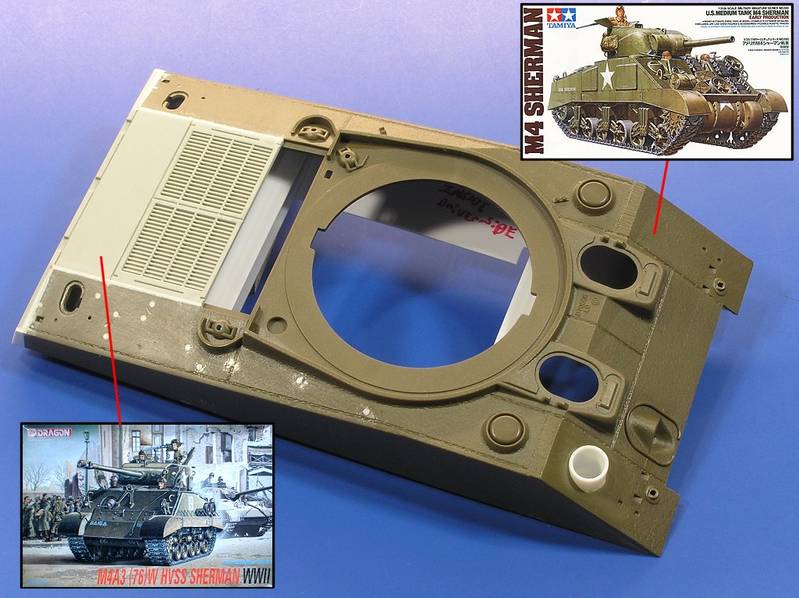
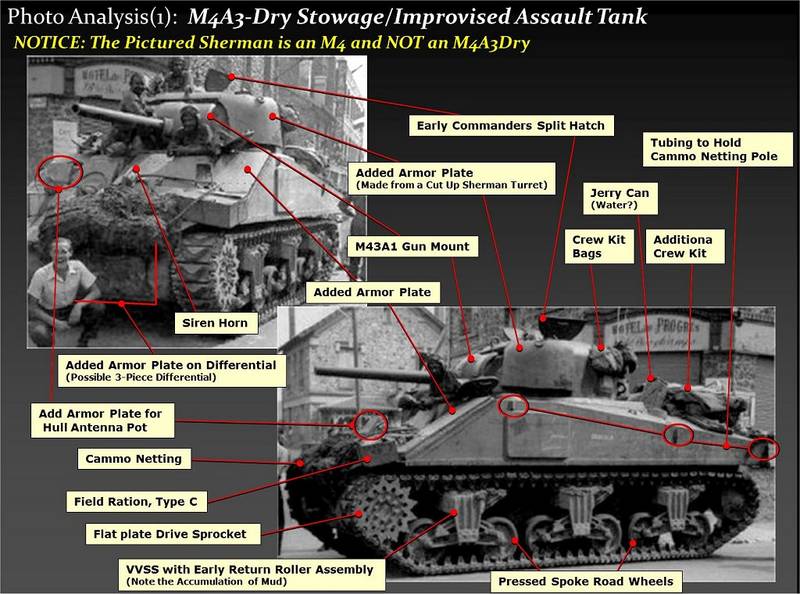
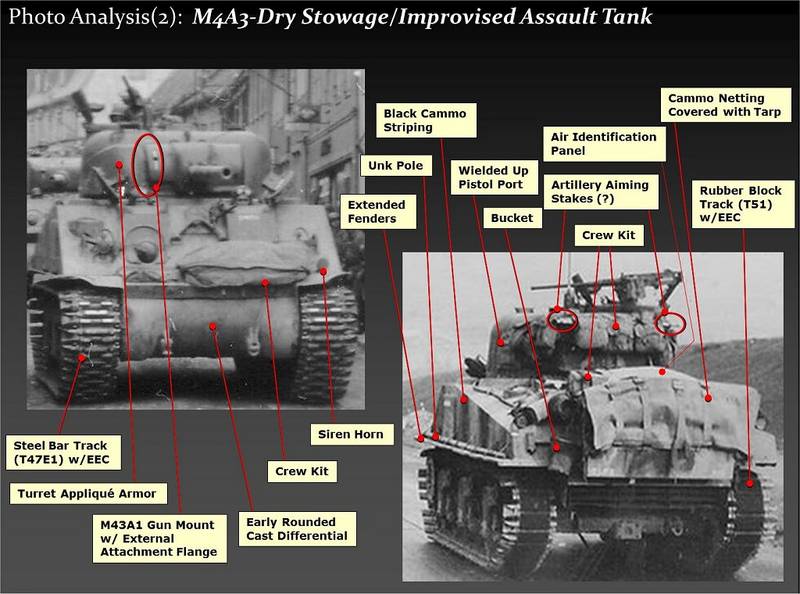
Sherman No2 Here is the second Sherman that is part of this sorted little tail of three Shermans. Majority of the M4A3 Dry Stowage Shermans were manufactured by Ford and used primarily as trainer Shermans state side. However the with the depletion of the Sherman inventory during the Battle of the Bulge a limited number of these training M4A3s where shipped over to the ETO. It is my intention to build this example to represent one of these replacement Shermans as it might have appeared near the end of the war while conducting operations within Germany.
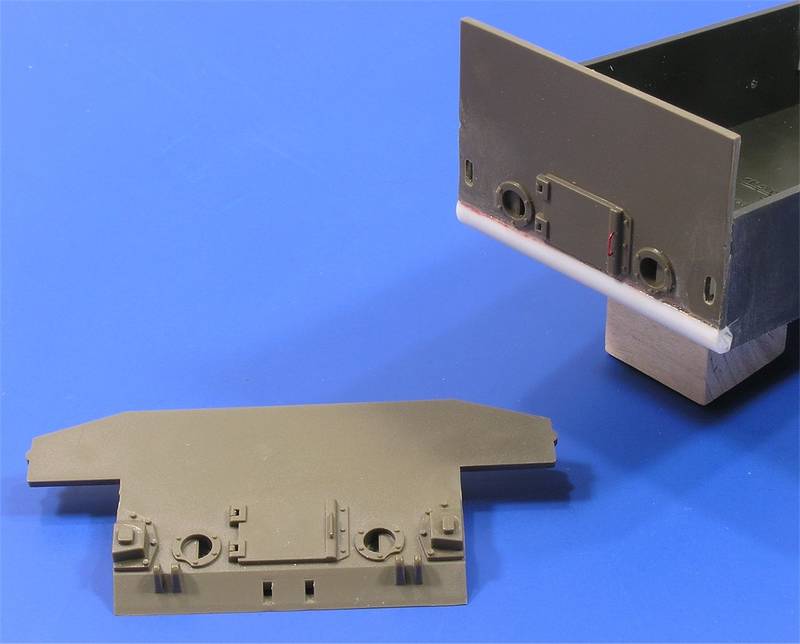
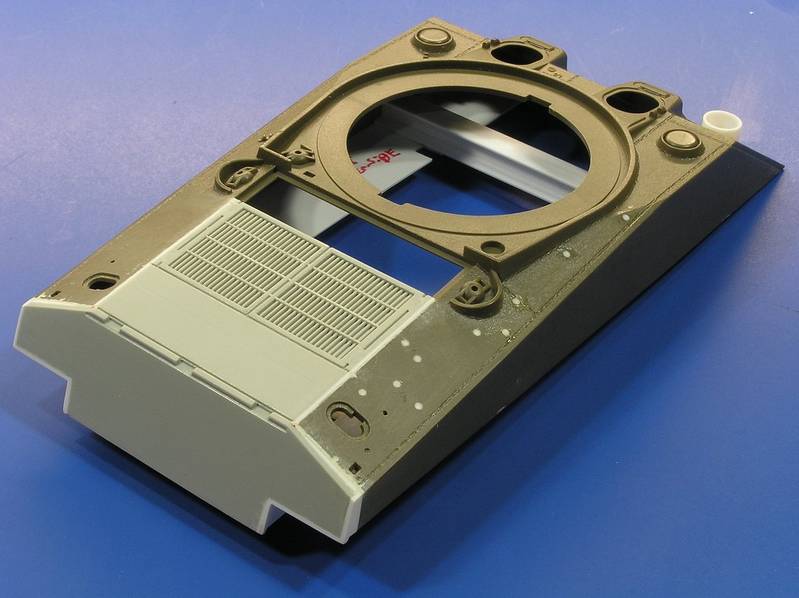
My approach to this build is to use only items from my spare parts box therefore no one single kit will act as the primary donor. Thus far the upper hull is from the Tamiya M4 and the engine deck and rear plate are from an old Dragon M4A3E8(76)W kit. I began work by fitting the engine deck and rear plate that I cut from the Dragon M4A3 upper hull. I kept this as one part so that the correct angle of the rear plate would be maintained. I then fitted and glued this to the Tamiya upper hull, filling the gaps as need with styrene and putty. I then moved on to filling the open sponsons with sheet styrene. Once that was completed I added the mounting area for the exhaust deflector.
Eric Rains
Greenwood, SC, USA
Joined: July 08, 2007
KitMaker: 3 posts
Armorama: 2 posts
Posted: Friday, November 23, 2012 - 07:35 AM UTC
Sherman #3
Finally, here is the third tank in our quest for A3 dry perfection. This is a combination of a Formations upper hull, Tamiya M4 turret, what I THINK is a CMD trans cover and a DML M4A3 lower hull. The lower hull is a free gift from Dragon when you buy their M4 Composite PTO kit as they include the incorret part in the box. But, DragonCare is merciful as always and will provide the correct M4/M4A1 lower tub at your request.
The plan is to round the lower rear hull, weld up the Shell Ejection Port, slap some Tasca bogies on her along with a few thousand scale pounds of stowage and call her done.
Any comments are cetainly welcome.
JW Cesafsky

#045
South Carolina, United States
Joined: September 23, 2005
KitMaker: 362 posts
Armorama: 350 posts
Posted: Friday, November 23, 2012 - 09:53 AM UTC
Eric Rains
Greenwood, SC, USA
Removed by original poster on 11/25/12 - 16:20:16 (GMT).
Virginia, United States
Joined: October 06, 2004
KitMaker: 50 posts
Armorama: 37 posts
Posted: Sunday, November 25, 2012 - 04:31 AM UTC
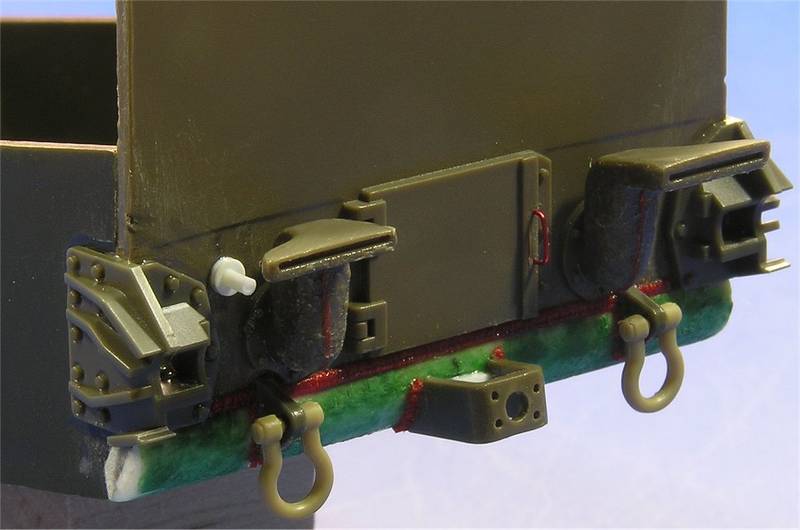
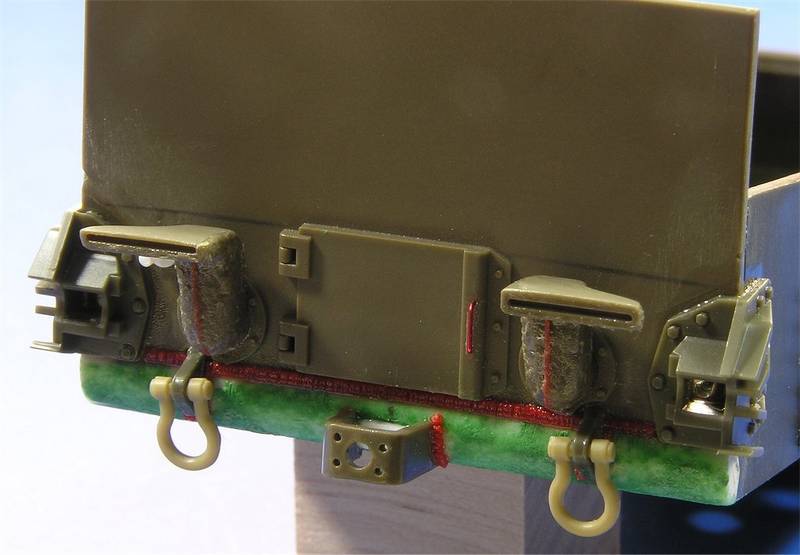
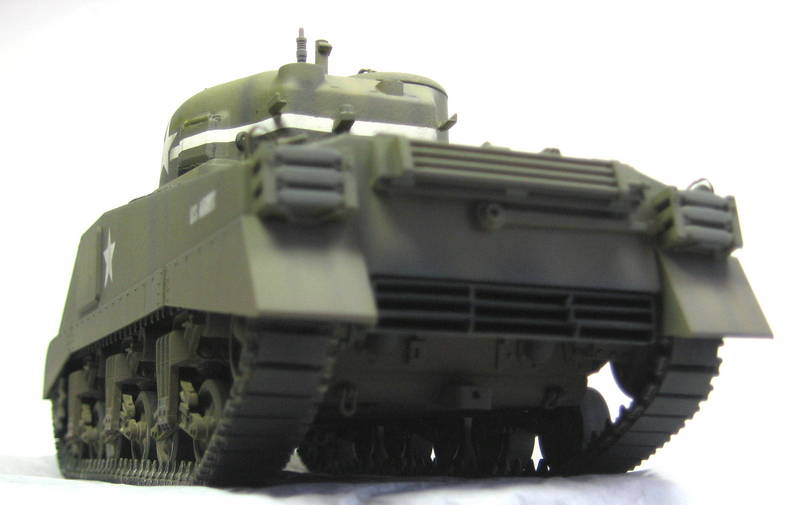
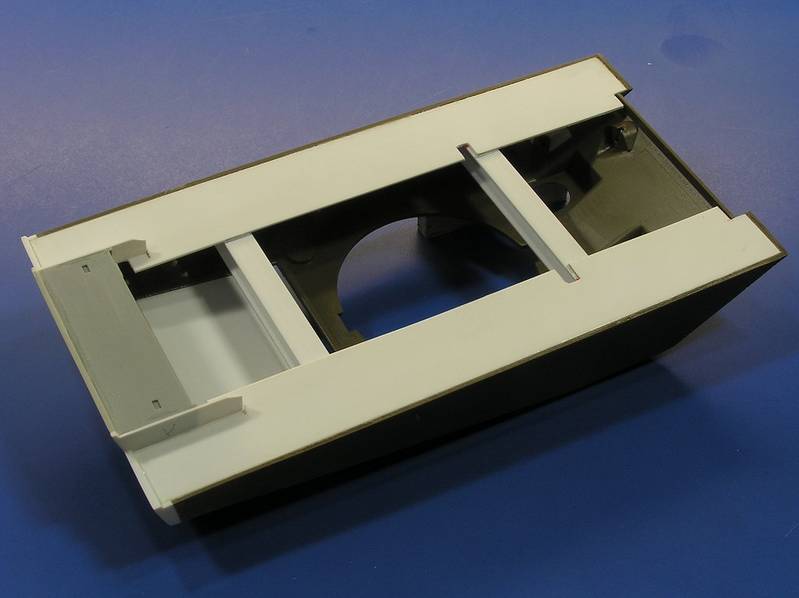
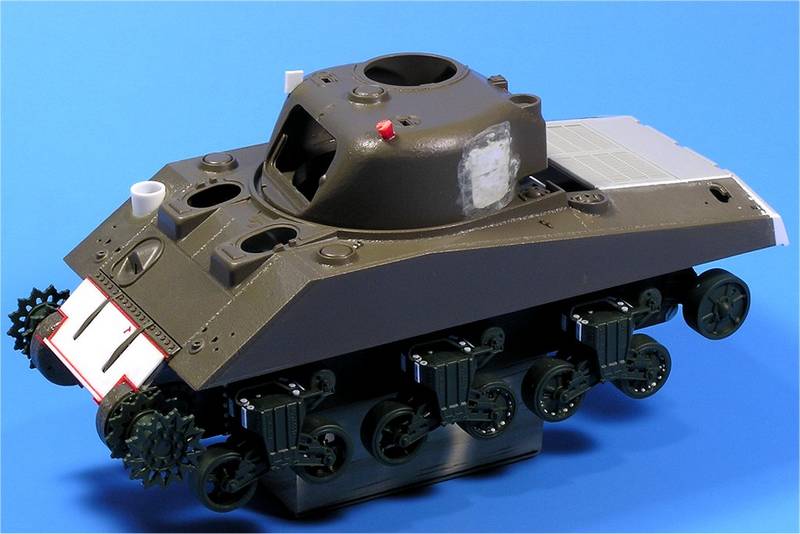
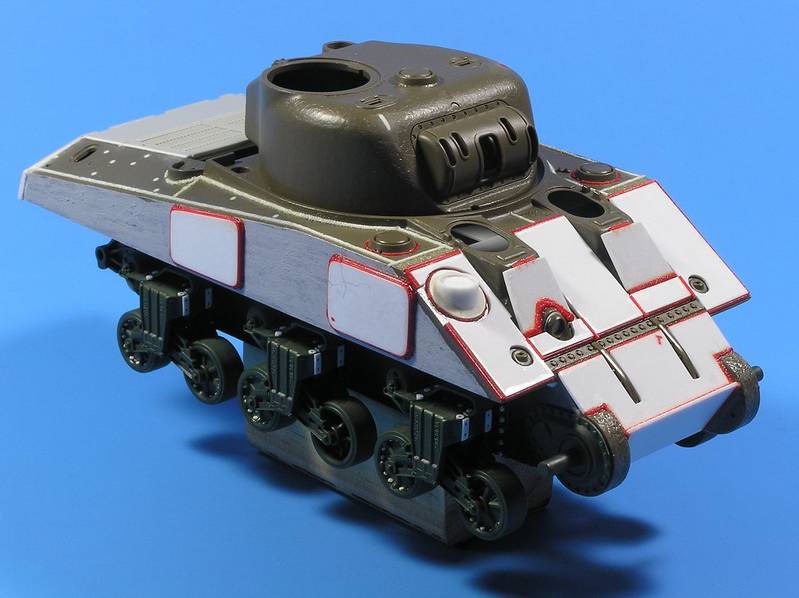
An image of the lower rear hull of my Tasca parts build.

Frank Blanton
"What if the Hokey Pokey IS what it is all about"
Virginia, United States
Joined: October 06, 2004
KitMaker: 50 posts
Armorama: 37 posts
Posted: Sunday, November 25, 2012 - 04:32 AM UTC
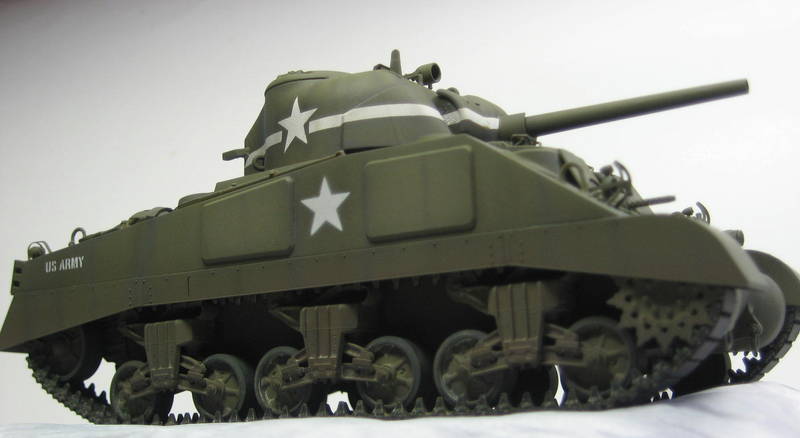
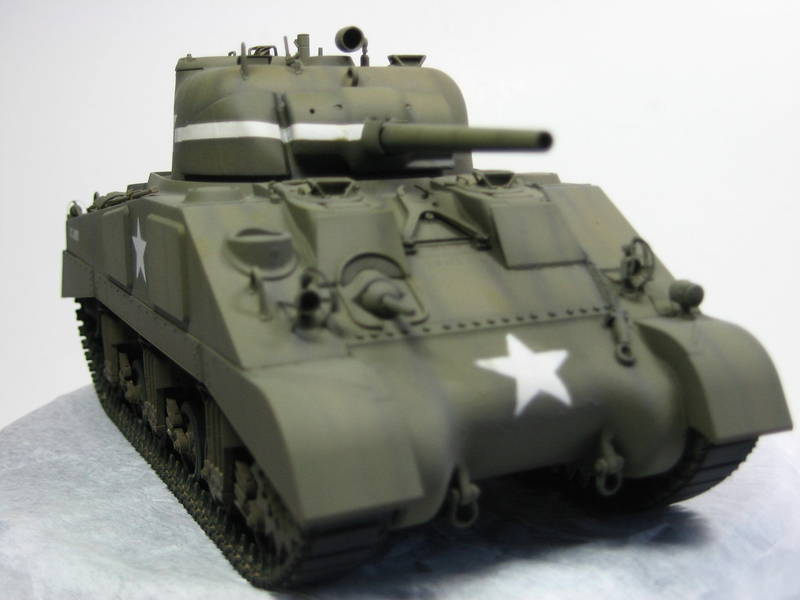
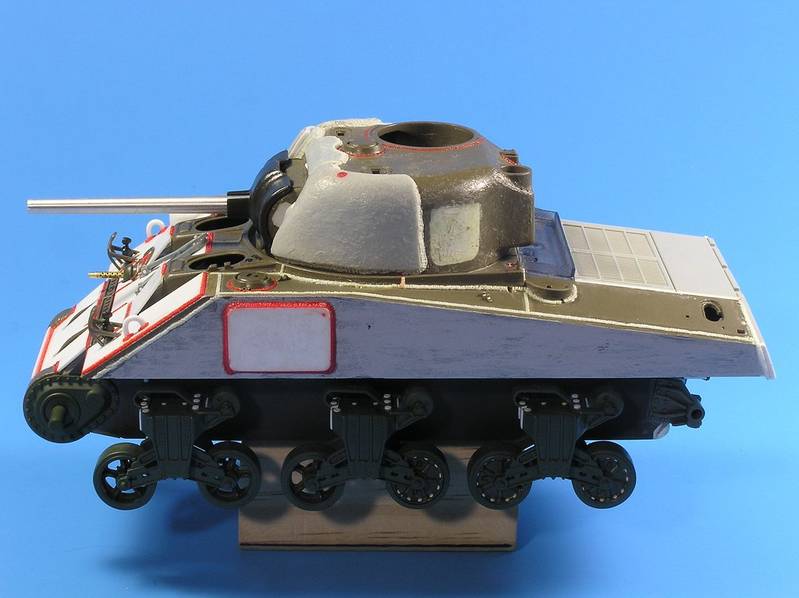
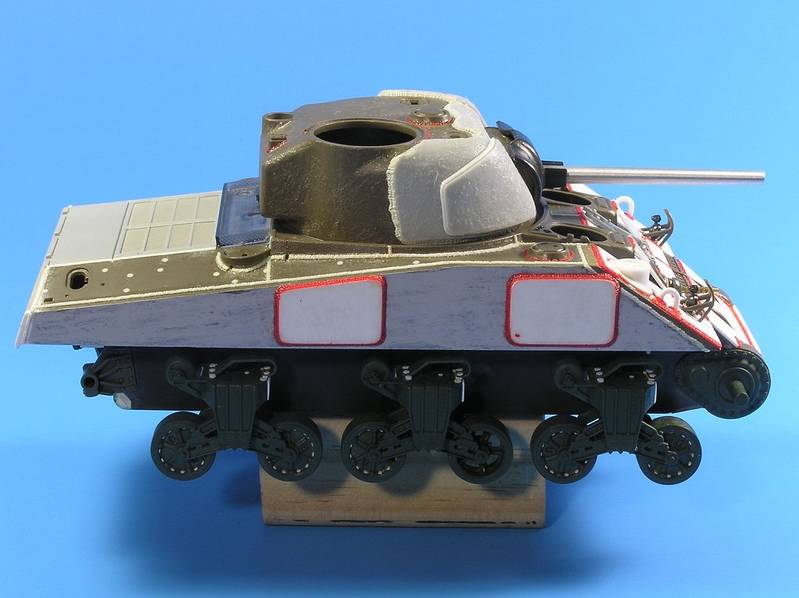
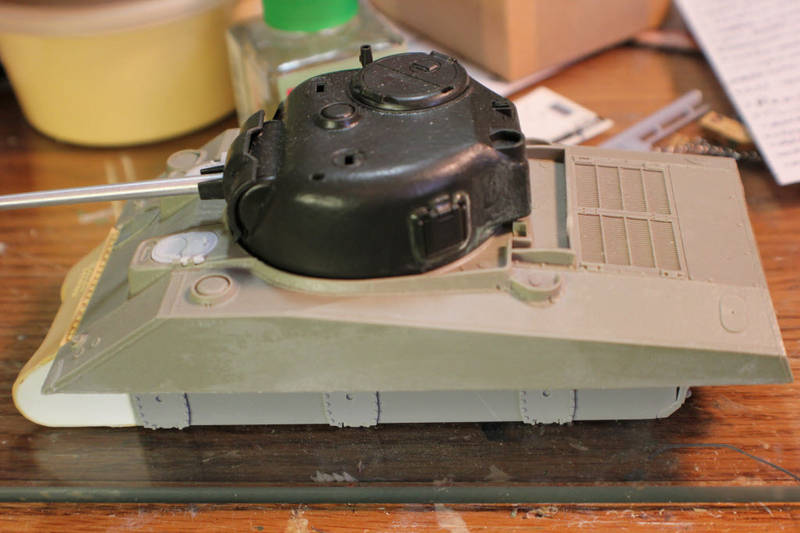
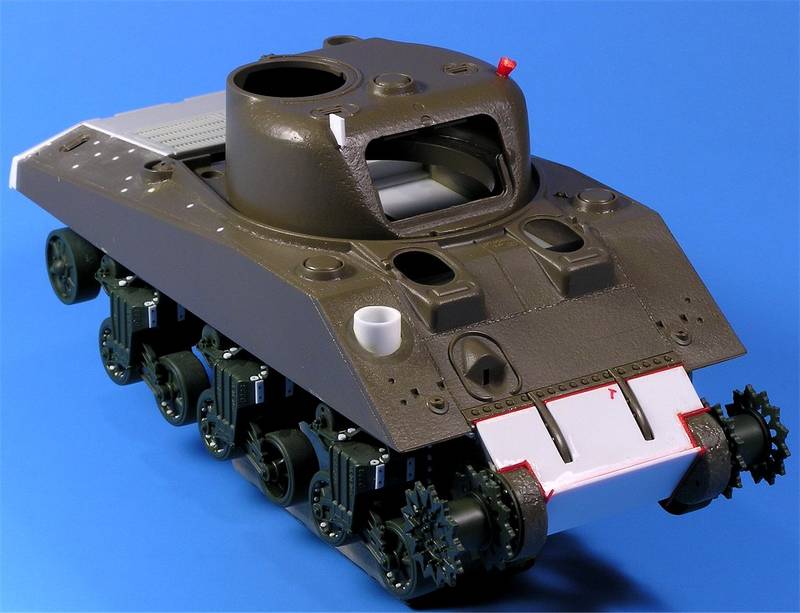
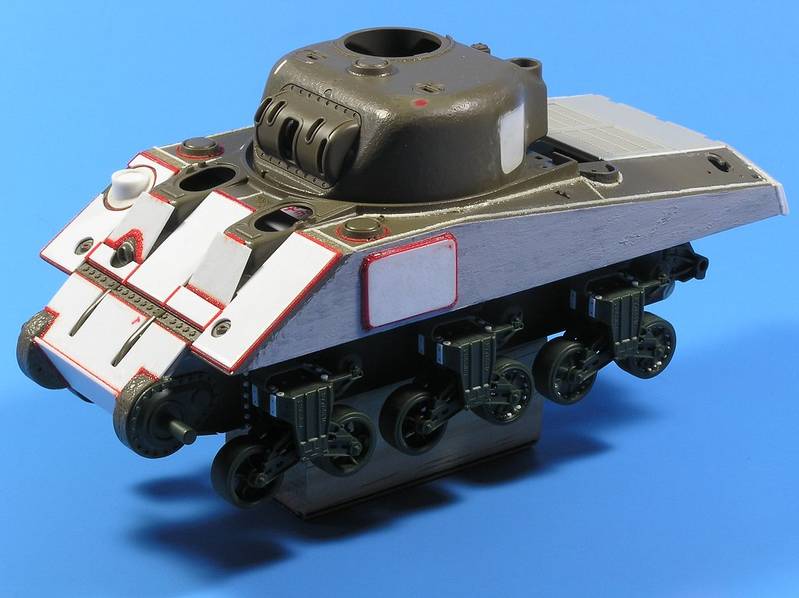
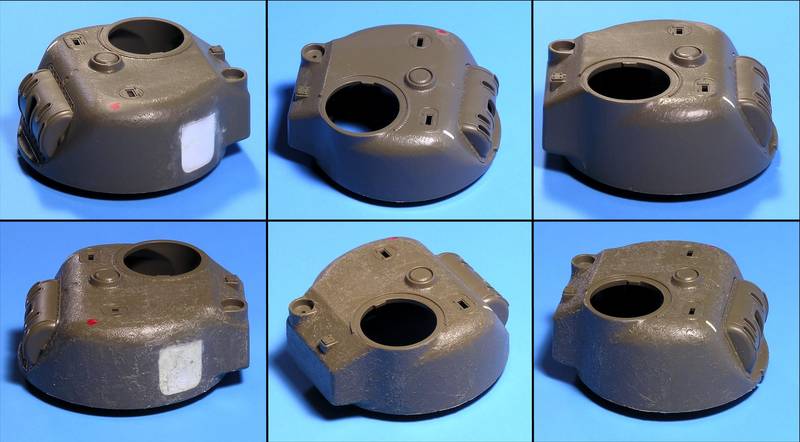
Side view of Ford Dry Stowage M4A3 Tasca build.

Frank Blanton
"What if the Hokey Pokey IS what it is all about"
#045
South Carolina, United States
Joined: September 23, 2005
KitMaker: 362 posts
Armorama: 350 posts
Posted: Sunday, December 09, 2012 - 10:20 AM UTC
Greeting to Everyone! Just thought I would post a quick update today. I lost about a weeks worth of model build time as I received my Christmas gift from my wife
and oh what a gift and Oh what a great and understanding person I am married to.

Here are a few pixs of my gift that need a little assembly
First in the closed position
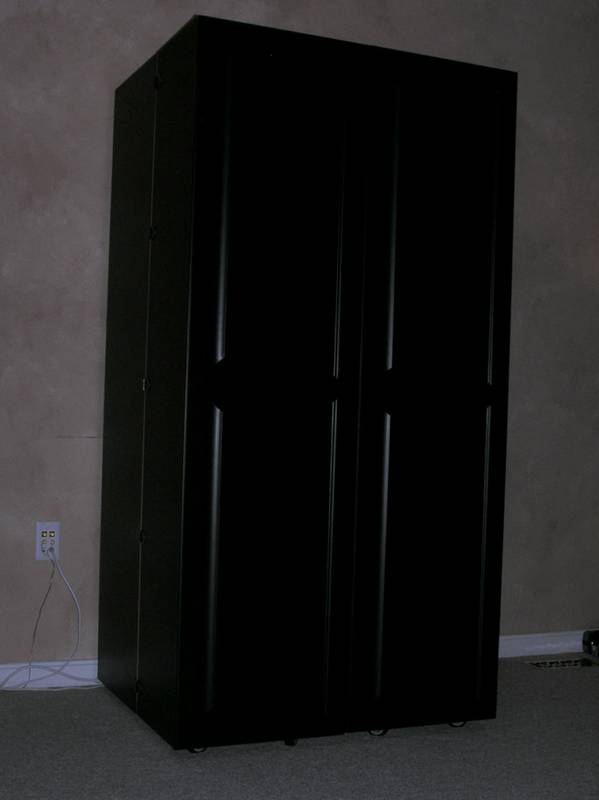
Now Opened
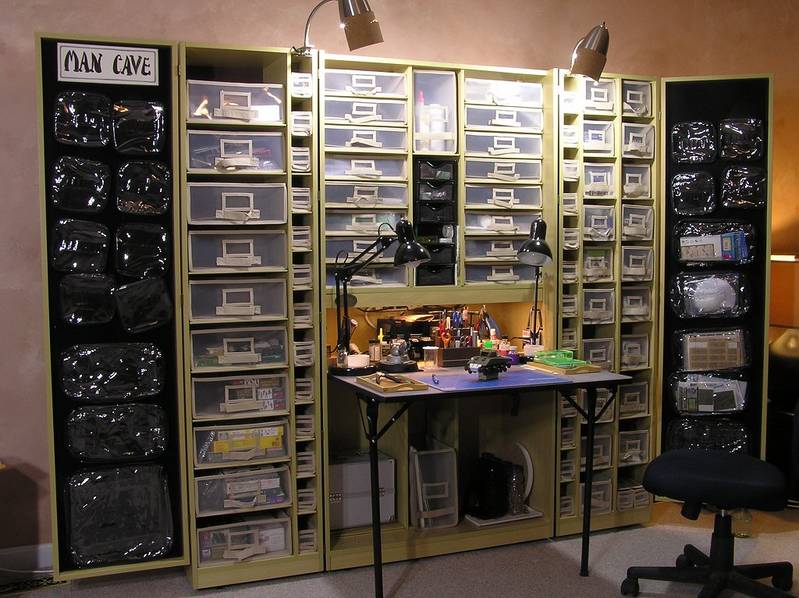
And for scale

As you can see I now have lots of room
that MUST be fill with modeling goodness!!
Now on to the Sherman...I have about finished up the work on the lower hull and bogy assemblies with a bit of detailing added. I also started fitting the extra armor plates to the transmission and the stretched sprue for the weld work. Ill start on the tracks which are from Panda but will spread the track work out in the hopes to avoid burn-out.
Eric Rains
Greenwood, SC, USA
Virginia, United States
Joined: October 06, 2004
KitMaker: 50 posts
Armorama: 37 posts
Posted: Tuesday, December 11, 2012 - 12:13 AM UTC
Excellent model Eric. The Dry Stowage A3 is coming along nicely. I hope to add some more images over the weekend! Great looking Mobile Man Cave! I may need the info on that bad boy when I eventually move into a condo some day.
Frank Blanton
"What if the Hokey Pokey IS what it is all about"
Georgia, United States
Joined: January 31, 2010
KitMaker: 2,191 posts
Armorama: 1,814 posts
Posted: Tuesday, December 11, 2012 - 12:56 AM UTC
I don't know how I missed this. Very cool idea for a build log. One suggestion... in every post, put the #1, #2, or #3 at the top, so it's a bit easier to follow each build.
Eric, what is that work station closet thing? Is there a website for that?
Join AMPS.
http://www.amps-armor.org/ampssite
Minnesota, United States
Joined: February 20, 2007
KitMaker: 339 posts
Armorama: 325 posts
Posted: Wednesday, December 12, 2012 - 04:57 PM UTC
Oh man, this is cool. Three Sherman kits, three great modelers and a custom convertable work-station man-cave thingie. It doesn't get any better than this!

I'm with Jesse, starting each post with the Sherman number would help keep these builds straight in my mind.
Keep it coming guys!
"Seems like a lot of work for only a small amount which will actually be visible...but hey, I'll know it's there!" -- Rallying cry of anal-retentive modelers everywhere!
Virginia, United States
Joined: October 06, 2004
KitMaker: 50 posts
Armorama: 37 posts
Posted: Thursday, December 20, 2012 - 11:26 PM UTC
Guy #1 Frank Blanton call sign Poldark reporting,
This weekend I will add the gun travel lock and I have been informed by THE Sherman Tank Guru Joe Demarco that my glacis mounted siren should be mounted on the left front fender as all Ford M4A3 Dry Stowage Shermans were.

Frank Blanton
"What if the Hokey Pokey IS what it is all about"
Scotland, United Kingdom
Joined: March 09, 2003
KitMaker: 232 posts
Armorama: 149 posts
Posted: Friday, December 21, 2012 - 12:05 AM UTC
Hi guys, following this with great interest, I'm a big Sherman fan & know Frank personally. He's the Sherman man lol.. Eric where did you get that cabinet? I'd love to get one for in my Garage so any info you could share on it would be greatly appreciated, name, where you got it etc.
Keep up the great work & info on these builds, waiying with baited breath for more.
Cheers, Kenny.
Build List :
Abrams Dio
Dragon Wagon & Panther G
Shermans & Jeeps
Virginia, United States
Joined: October 06, 2004
KitMaker: 50 posts
Armorama: 37 posts
Posted: Tuesday, December 25, 2012 - 12:42 AM UTC
Thanks Kenny! I will let Eric know that you need info on that cabinet.
Frank Blanton
"What if the Hokey Pokey IS what it is all about"
Virginia, United States
Joined: October 06, 2004
KitMaker: 50 posts
Armorama: 37 posts
Posted: Tuesday, December 25, 2012 - 01:18 AM UTC
Frank Blanton
"What if the Hokey Pokey IS what it is all about"
Virginia, United States
Joined: May 07, 2003
KitMaker: 1,174 posts
Armorama: 772 posts
Posted: Tuesday, December 25, 2012 - 05:04 PM UTC
Three Guys:
No, Not Moe, Larry, & Currly. Great idea. Always love a Sherman build. Frank : Great results!!!! Love the tools & turret texture.Eric nice build as well. Looks like someone has some catch up to do. Keep up the great build guys, looking Fwd to more.
Todd

"HAAA YOU THINK THIS CAR IS BAD,,MY OTHER ONE ONLY HAS TWO WHEELS'
In War...., Everybody Loses something!!
WHEN DOES A HOBBY Become A SICKNESS
Kentucky, United States
Joined: May 27, 2007
KitMaker: 327 posts
Armorama: 259 posts
Posted: Tuesday, December 25, 2012 - 10:30 PM UTC
GREAT BUILD

Virginia, United States
Joined: October 06, 2004
KitMaker: 50 posts
Armorama: 37 posts
Posted: Sunday, January 06, 2013 - 05:00 AM UTC
Frank Blanton
"What if the Hokey Pokey IS what it is all about"
#045
South Carolina, United States
Joined: September 23, 2005
KitMaker: 362 posts
Armorama: 350 posts
Posted: Sunday, January 06, 2013 - 05:59 AM UTC
Sherman No.2 Greeting to everyone!
Here is a little update for my contribution to the Tale of Three Shermans
.as you see Sherman No.1 is moving right along!!.
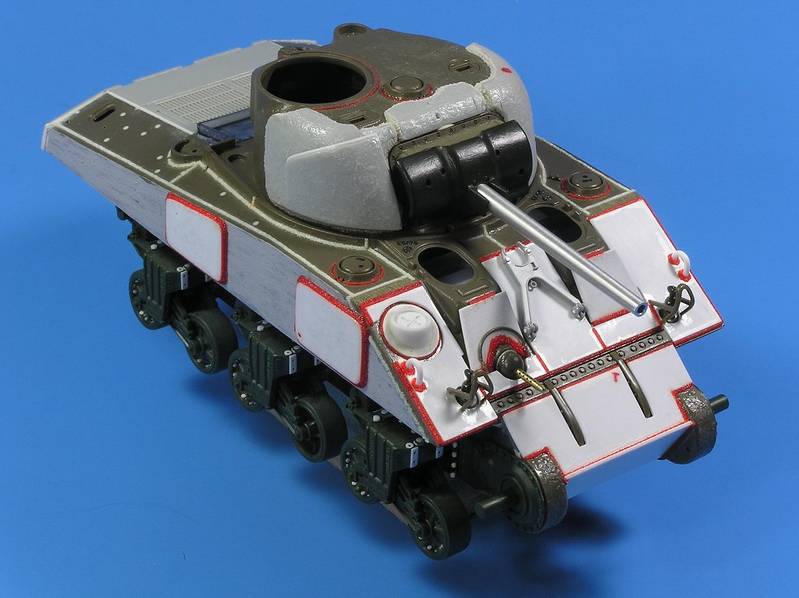
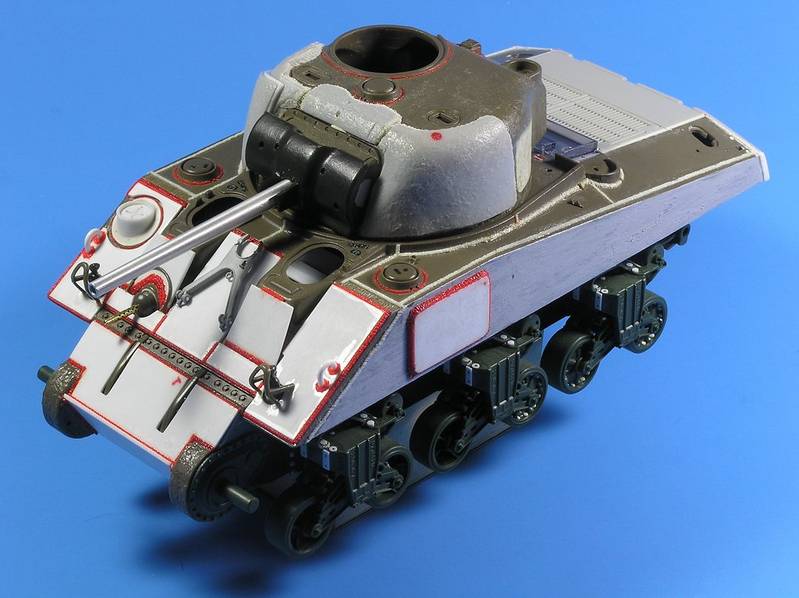
With the holidays the progress has been a little slow. The first set of photos is an analysis process I like to do with my primary photo reference and kind of gives an idea where Im headed with this model subject. Much of the work on my Sherman has been in the form of adding welds and that is a somewhat time consuming process. I added the up armor plate to the front along with the welds for them. Lastly gave the some texture to hull sides and turret. For the hull sides I used Mr. Surfacer 500. For the turret I used a technique developed by fellow modeler Big-John. I included some before and after shots.
Thanks For stopping by and as always comments are most welcome
Eric Rains
Greenwood, SC, USA
Virginia, United States
Joined: October 06, 2004
KitMaker: 50 posts
Armorama: 37 posts
Posted: Sunday, January 06, 2013 - 11:48 AM UTC
Very nice work there Eric! Can not wait to see it in person!
Frank Blanton
"What if the Hokey Pokey IS what it is all about"
Virginia, United States
Joined: October 06, 2004
KitMaker: 50 posts
Armorama: 37 posts
Posted: Saturday, January 12, 2013 - 12:01 AM UTC
Guy #3 has lost internet service and not sure how soon it will be restored. So for the moment it will be Eric and myself posting.
Frank Blanton
"What if the Hokey Pokey IS what it is all about"
#045
South Carolina, United States
Joined: September 23, 2005
KitMaker: 362 posts
Armorama: 350 posts
Posted: Sunday, March 10, 2013 - 03:58 AM UTC
Eric Rains
Greenwood, SC, USA