_GOTOBOTTOM
Dioramas
Do you love dioramas & vignettes? We sure do.
At the Waters Edge
snowgoon81
Visit this Community
United States
Joined: January 30, 2009
KitMaker: 67 posts
Armorama: 67 posts
Posted: Sunday, November 25, 2012 - 08:14 AM UTC
Hi all, just finished this one. Took about a year to make, though a lot of that time was waiting for DML to release their peleliu set. Amtank is Italeri and all the figs are Dragon.

I'm sure there will be questions, so ask away!


snowgoon81
Visit this Community
United States
Joined: January 30, 2009
KitMaker: 67 posts
Armorama: 67 posts
Posted: Sunday, November 25, 2012 - 08:18 AM UTC
Some quick clarifications:

First time doing Water or Palms.
Turret on LVT is from TigerModels, it's impossible to fit two figs in it, hence the guy leaping off the side to "consult" with the infantry leader.
All figs are from Dragon's peleliu or Tarawa sets.
roudeleiw
Visit this Community
Luxembourg
Joined: January 19, 2004
KitMaker: 2,406 posts
Armorama: 2,224 posts
Posted: Monday, November 26, 2012 - 01:26 AM UTC
Very well done!

Nice colours overall. Good structure and colouring of the sand also.

I like it!

Claude

parrot
Visit this Community
Ontario, Canada
Joined: March 01, 2002
KitMaker: 1,607 posts
Armorama: 1,581 posts
Posted: Monday, November 26, 2012 - 12:35 PM UTC
No questions.Nice piece of work.I like it a lot.

Tom
dioman13
Visit this Community
Indiana, United States
Joined: August 19, 2007
KitMaker: 2,184 posts
Armorama: 1,468 posts
Posted: Monday, November 26, 2012 - 03:42 PM UTC
Hey Chris, well done. Nice layout, colors and your water is great too! Between yours and Pawels, I have my work cut out to try and get 1/2 as good as you guys. Amtrack looks nice and fits in good.
bill1
Visit this Community
West-Vlaaderen, Belgium
Joined: August 14, 2005
KitMaker: 3,938 posts
Armorama: 520 posts
Posted: Monday, November 26, 2012 - 10:22 PM UTC
Yo Chris,

Looks like the pacific dioramas are a hot item here...

Yours look very well to...nice layout and color setting.

The water that hit the beach is ver realistic, well done.

Keep up!

Greetz Nico.
muddyfields
Visit this Community
Scotland, United Kingdom
Joined: February 04, 2006
KitMaker: 884 posts
Armorama: 622 posts
Posted: Tuesday, November 27, 2012 - 03:04 AM UTC
Hi
That's a very well laid out diorama. Interesting mix of figure's , very well painted.
Like very much.

Biggles2
Visit this Community
Quebec, Canada
Joined: January 01, 2004
KitMaker: 7,600 posts
Armorama: 6,110 posts
Posted: Tuesday, November 27, 2012 - 03:26 AM UTC
What was your techniques for the foliage? Is it commercial products or scratch-built? Is the water resin with clear acrylic waves?
snowgoon81
Visit this Community
United States
Joined: January 30, 2009
KitMaker: 67 posts
Armorama: 67 posts
Posted: Tuesday, November 27, 2012 - 04:00 PM UTC

Quoted Text

What was your techniques for the foliage? Is it commercial products or scratch-built? Is the water resin with clear acrylic waves?


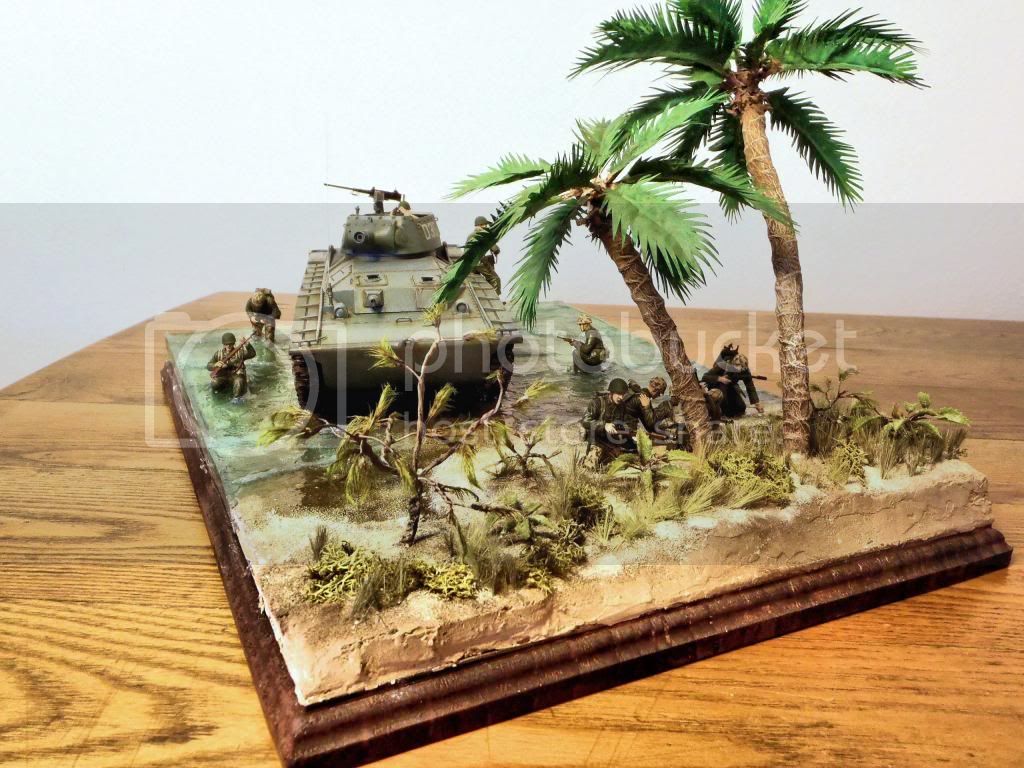
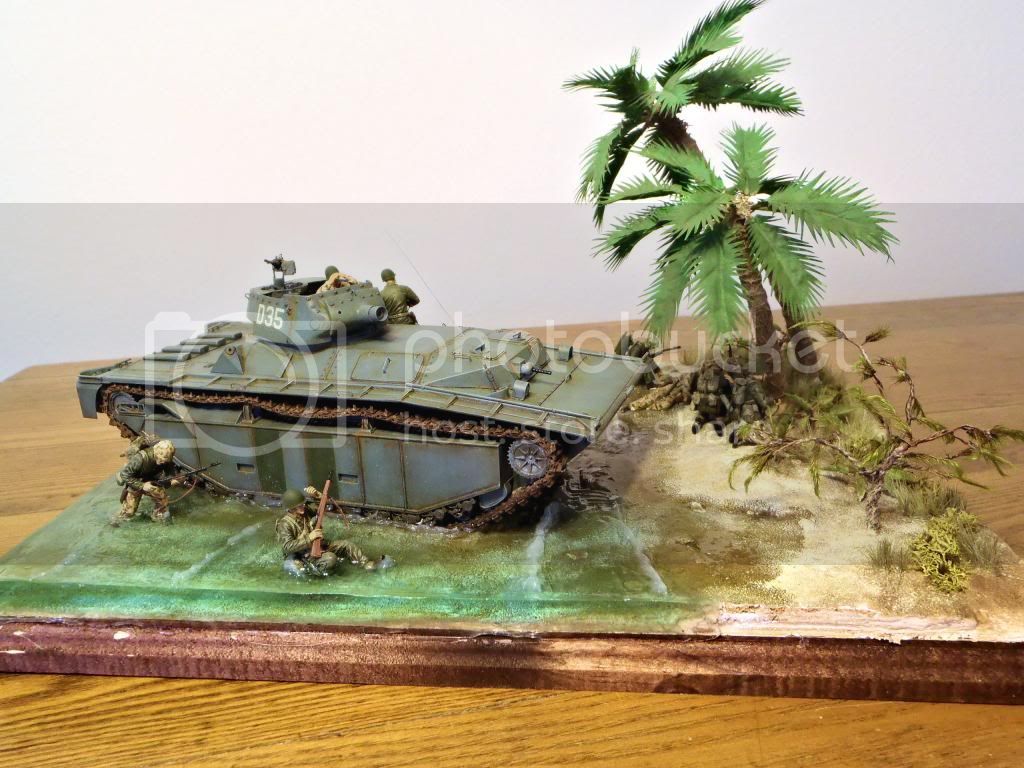
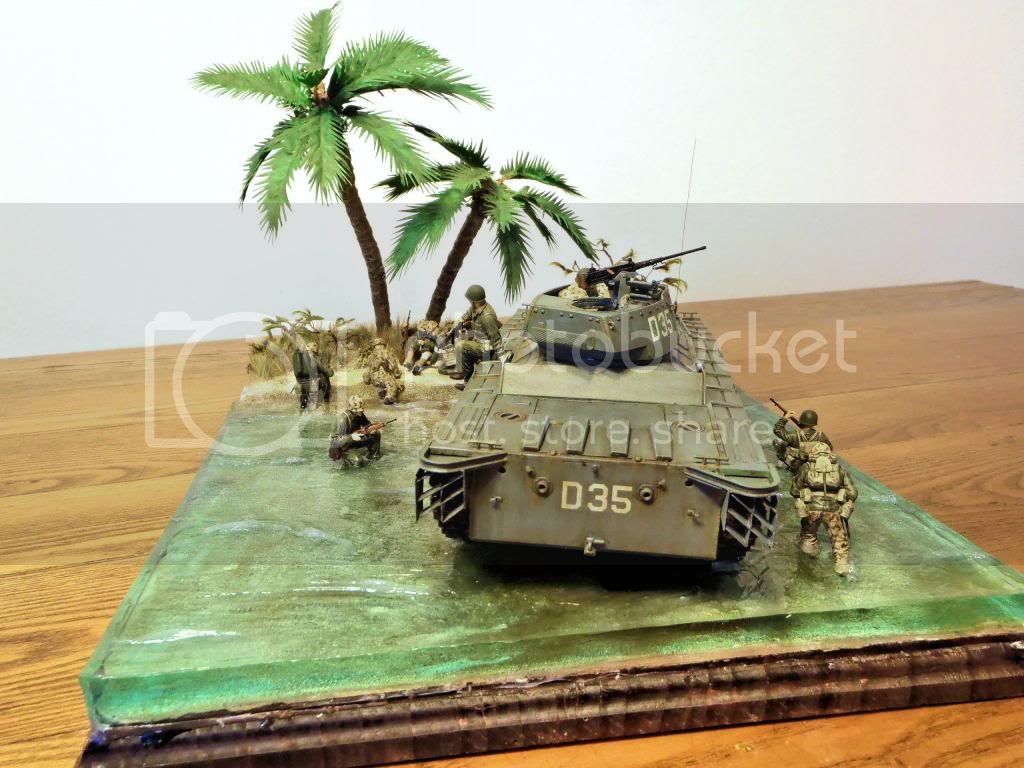
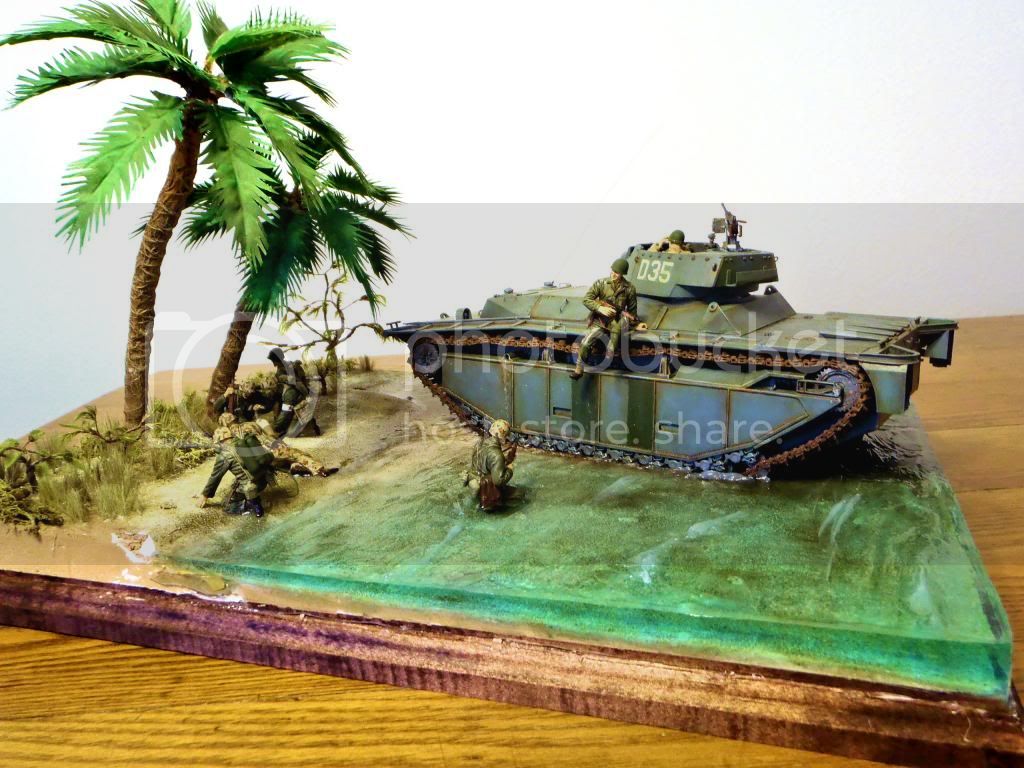
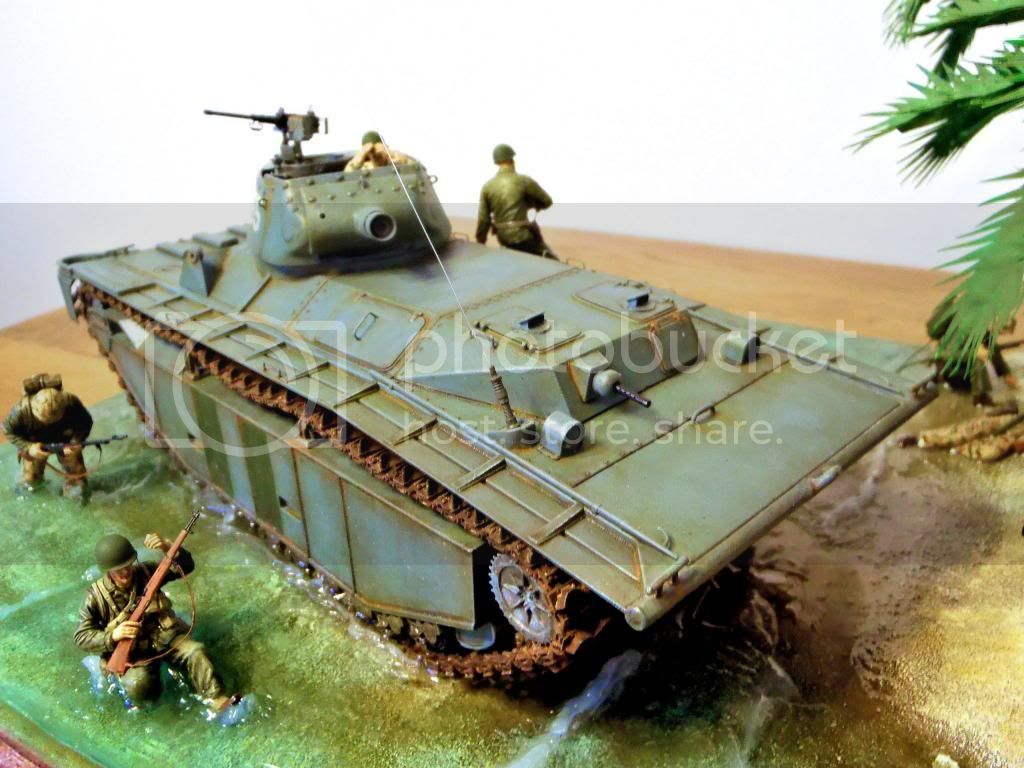
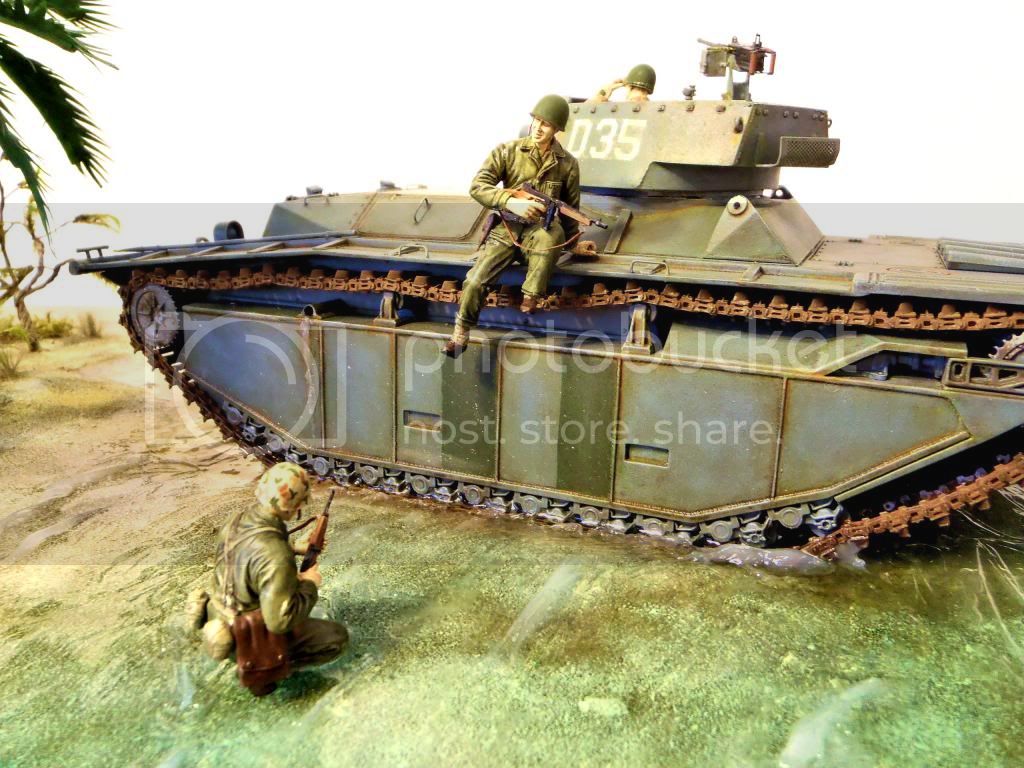
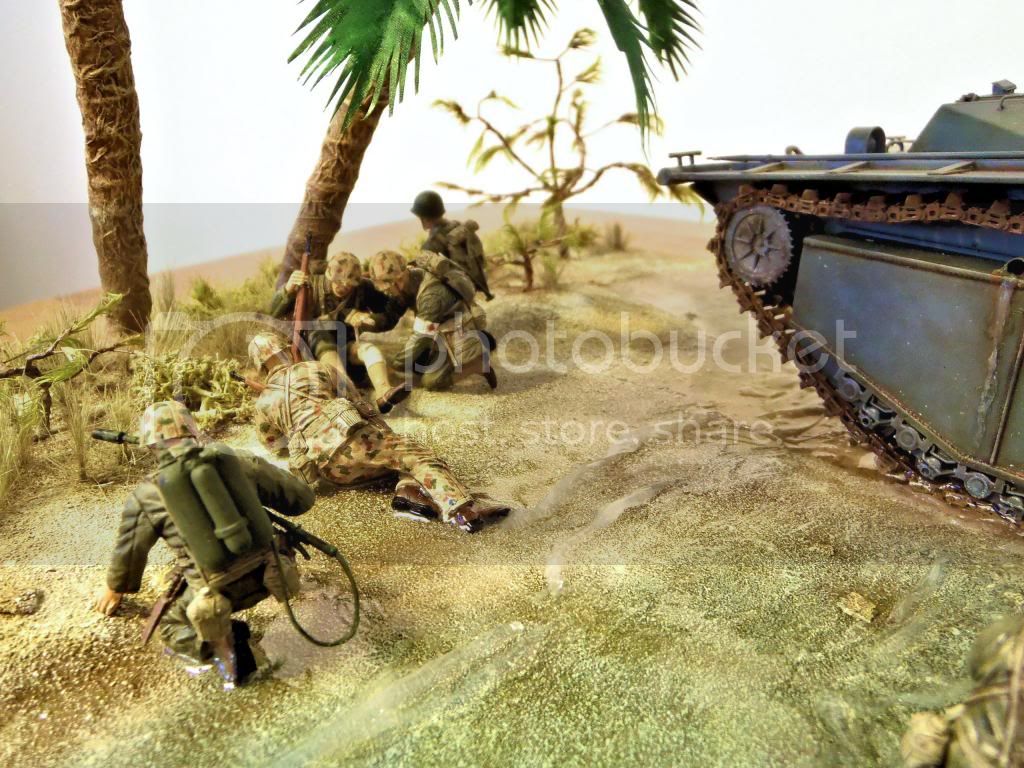
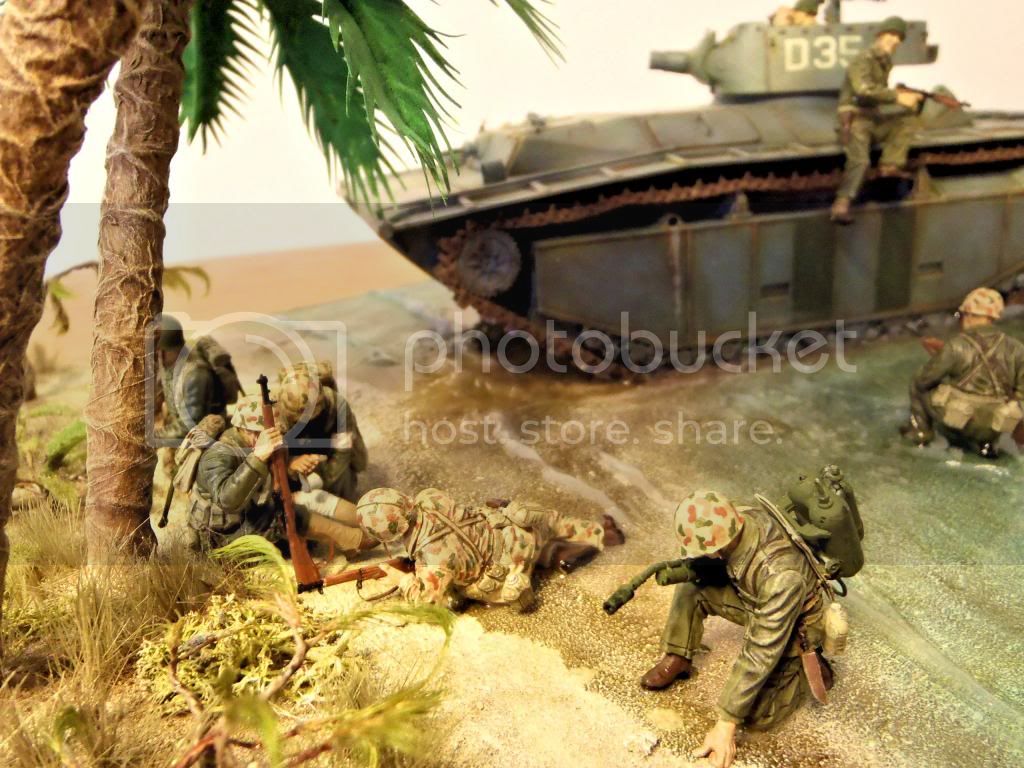
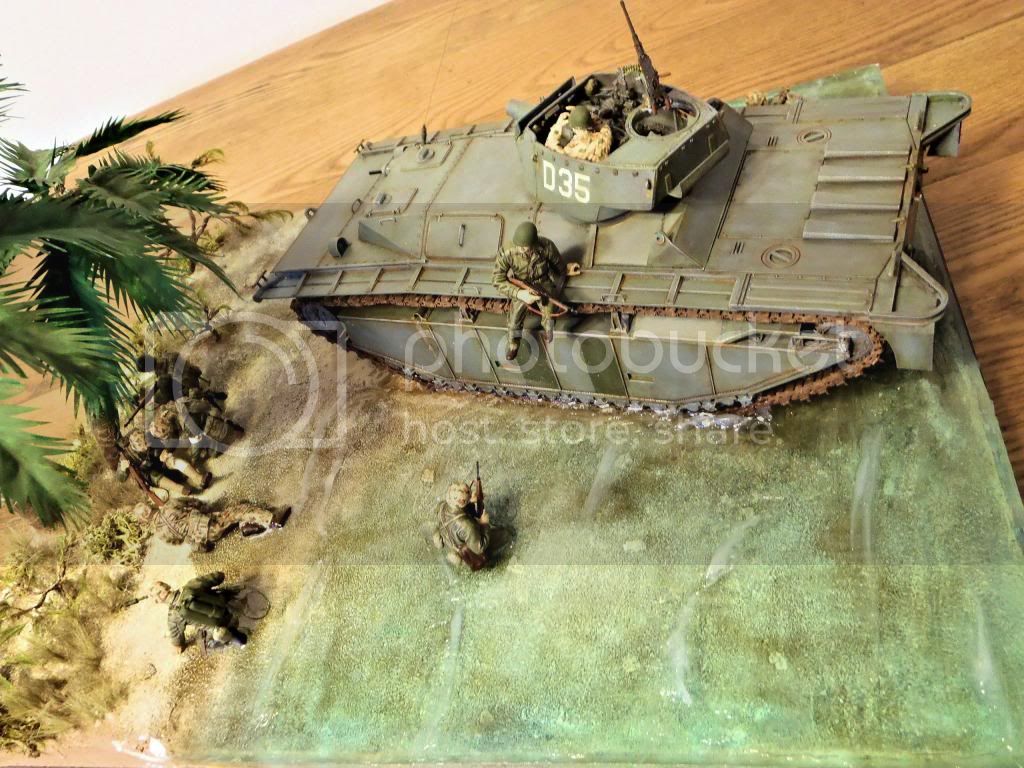
The palms are 100% scratch.
Step 1 - cut a dowel into approx 1" lengths
Step 2 - drill a hole through the dowel pieces, lengthwise
Step 3 - thread a piece of wire through all the dowel sections, this is the trunk
Step 4 - wrap a piece of twine around the dowels, glue in place, this will be the "growth rings"
Step 5 - make fronds from fake cloth leaves, or other medium (there are plenty of posts with pictures on this site)
Step 6 - attach fronds to trunk top
Step 7 - add dead growth just under base of fronds, I used sections of medium weight brown paper and shredded one edge to give the effect of dead frond roots
Step 8 - wrap a piece of tissue around trunk with white glue/water mixture, this is the bark
Step 9 - Paint!

I made the smaller tree using a wire armature for the trunk/branches and glued on some tufts of stuff I found in the fake flower dept of the local hobby store. Same thing for the smaller bushes, just made smaller armatures.

The water is a clear two-part resin with some food coloring for effect. It was poured in two 1/4" installments. You can't see from the pictures, but the water has an awful lot of micro bubbles in it, I didn't do a good job of helping it outgas. The waves are clear silicon caulk (for sealing your bathroom) thinned and smoothed with paint thinner. you can get water based stuff, but this is what I had on hand.

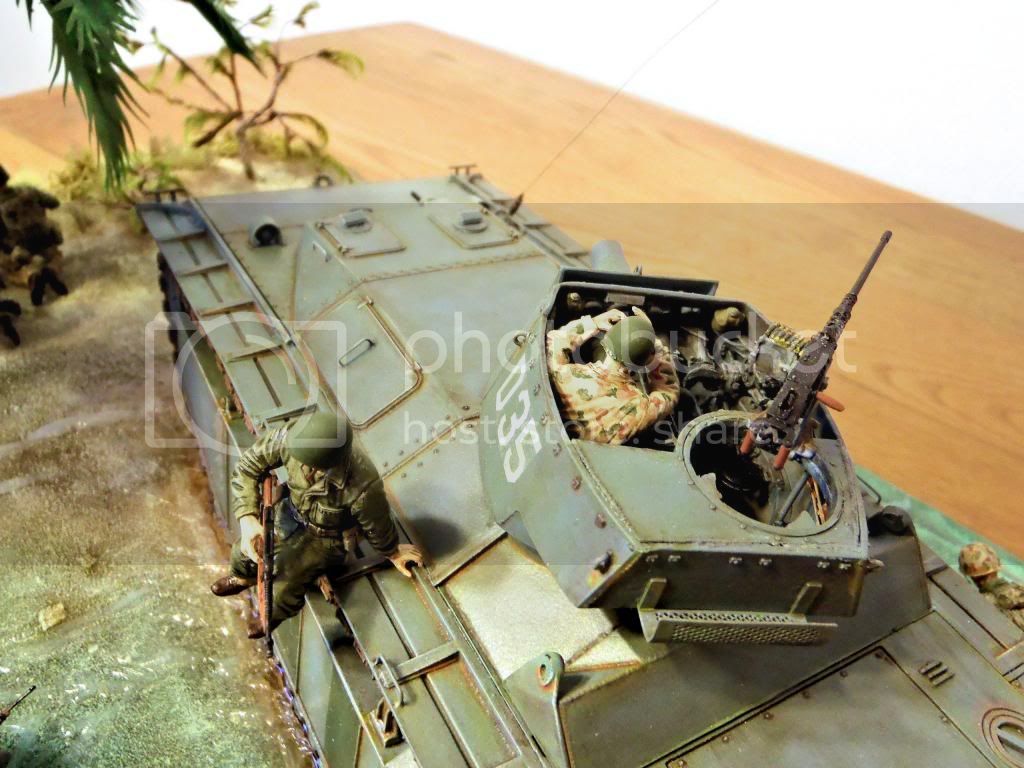
Sometimes I really wish I owned an airbrush. Everything is base painted with a rattle can, and then it's all brush work. Weathering is a combination of drybrushing with acrylics, washes with oils, and dusting with pigments.

I'm glad you all are enjoying it! I had a blast making it. Thanks for the comments, feedback like this site offers is what keeps a lot of us going I think.
Biggles2
Visit this Community
Quebec, Canada
Joined: January 01, 2004
KitMaker: 7,600 posts
Armorama: 6,110 posts
Posted: Wednesday, November 28, 2012 - 03:50 AM UTC
If this was your first attempt with these techniques, then you have really done excellently!
Babyloon
Visit this Community
Warszawa, Poland
Joined: November 04, 2011
KitMaker: 50 posts
Armorama: 49 posts
Posted: Saturday, December 01, 2012 - 12:20 PM UTC
love the water color. Looks so fresh !
 _GOTOTOP