_GOTOBOTTOM
Armor/AFV: AA/AT/Artillery
For discussions about artillery and anti-aircraft or anti-tank guns.
Hosted by Darren Baker
Flakpanzer Gepard Build
Buckeye198
Visit this Community
Ohio, United States
Joined: May 02, 2010
KitMaker: 596 posts
Armorama: 265 posts
Posted: Tuesday, December 18, 2012 - 04:20 AM UTC
Hello Armorama! It's been quite a while, but I'm finally back at the workbench and building something outside of a campaign! A good friend of mine picked up this kit in Taiwan. Unfortunately, he forgot that he didn't have any time or resources to build it, so I was nice enough to buy it off of him

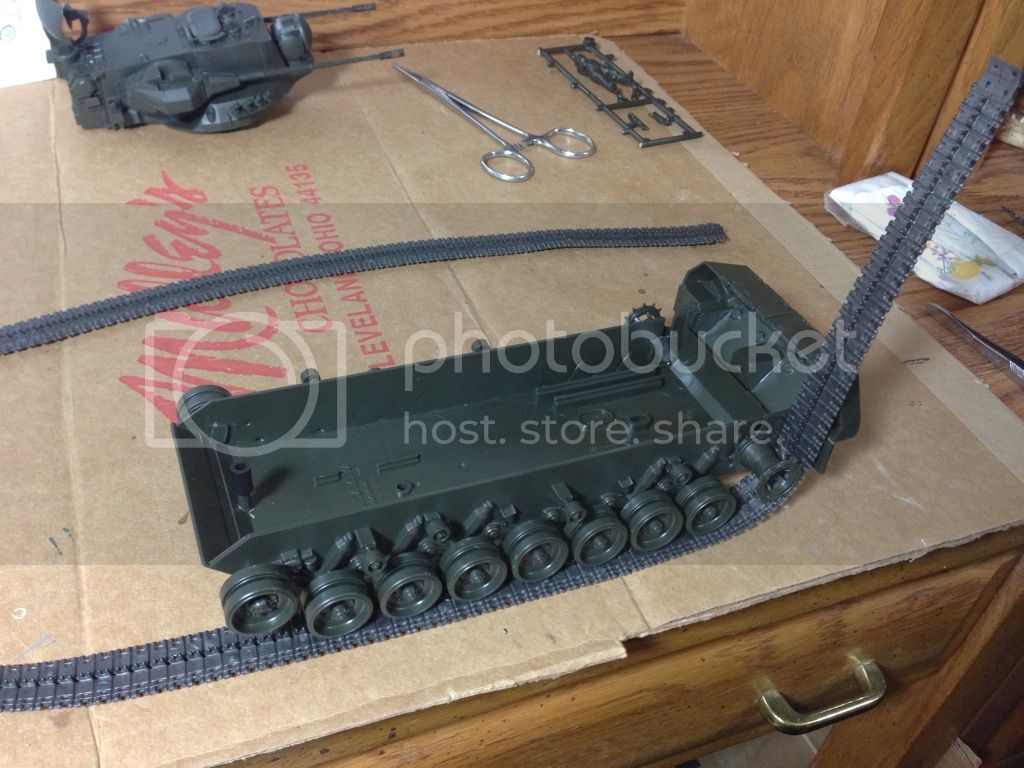
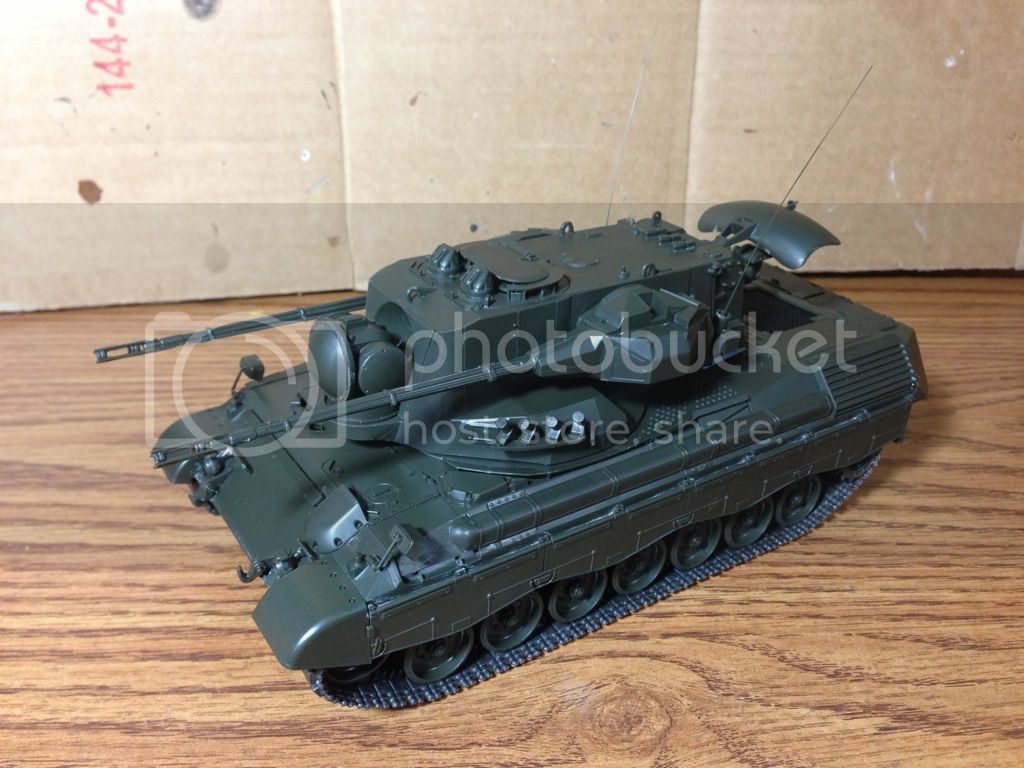
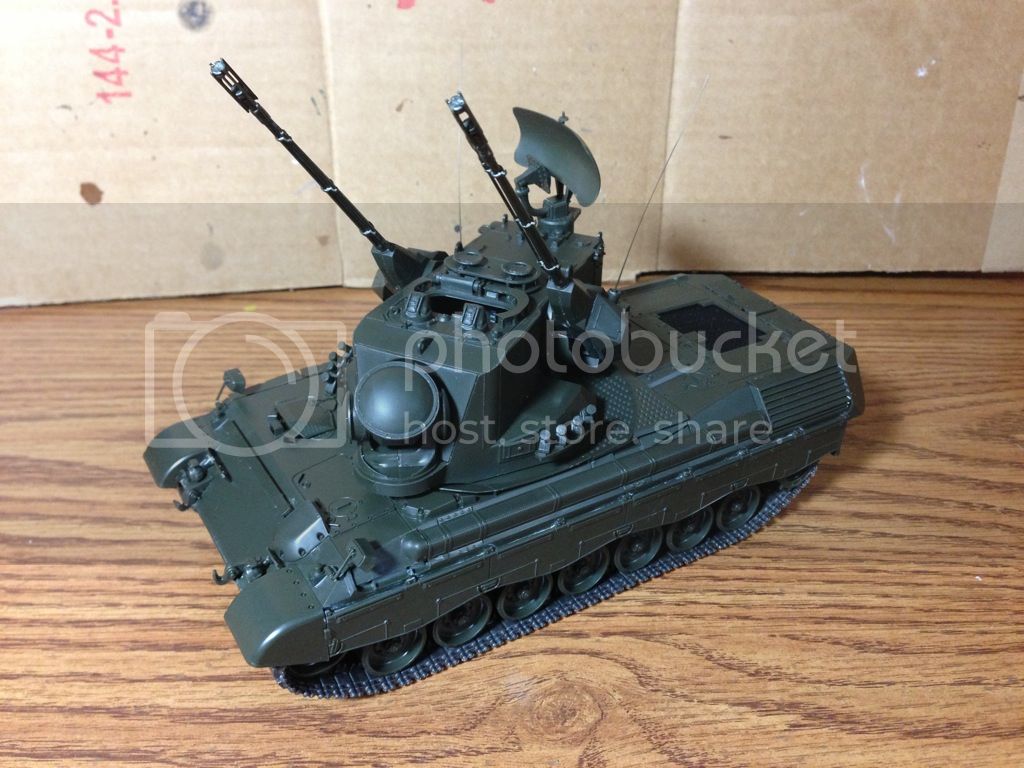
Because my airbrush is still pretty unreliable and I don't have the time over this break to really master it, I've elected not to paint this kit, but rather to treat it as an assessment of my construction abilities. It'll be like the box art example kit...no paint, no putty, no scratchbuilding...just build straight out of the box and then display.

Here's the prebuild shot. However, the road wheels are just about complete...I was so excited to build something again that I forgot to take a picture before beginning. The pieces are well molded, very minimal flash, lots of good surface details and some impressive little pieces for a kit from the 70s!


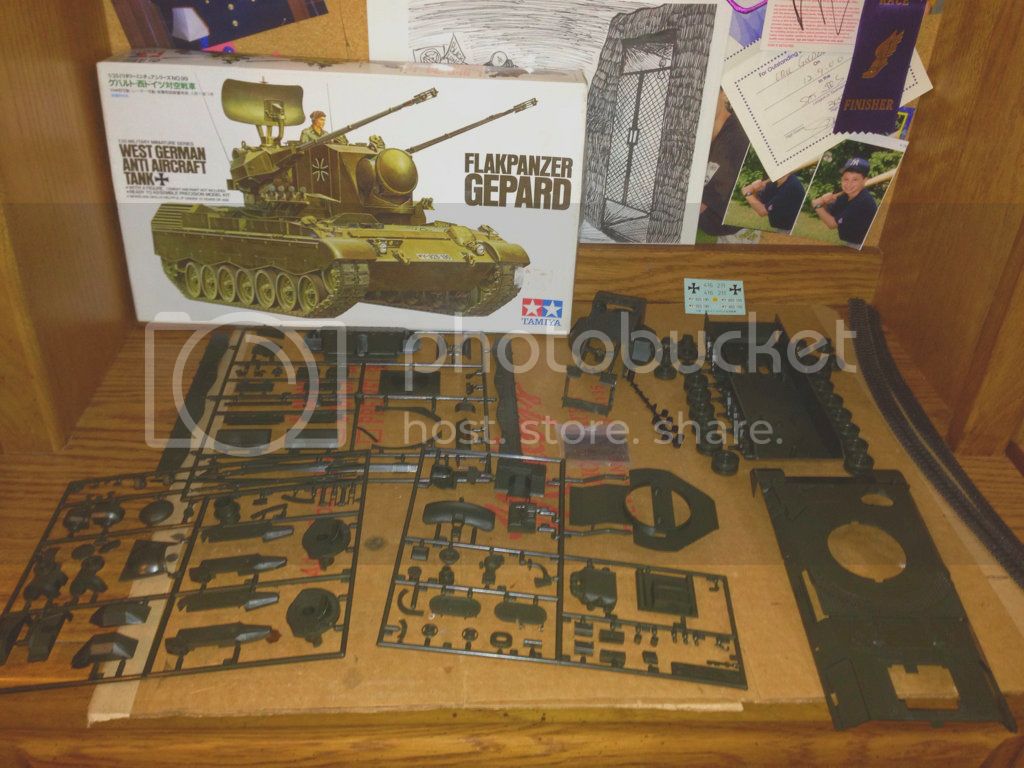
The name of this game is efficiency. So many of my previous builds have had at least some degree of shoddy construction masked by generous helpings of glue and/or paint. There's no hiding this time around...this build is a serious trial of my construction skills I've honed for nearly a decade, and one of my worst habits is using too much glue.


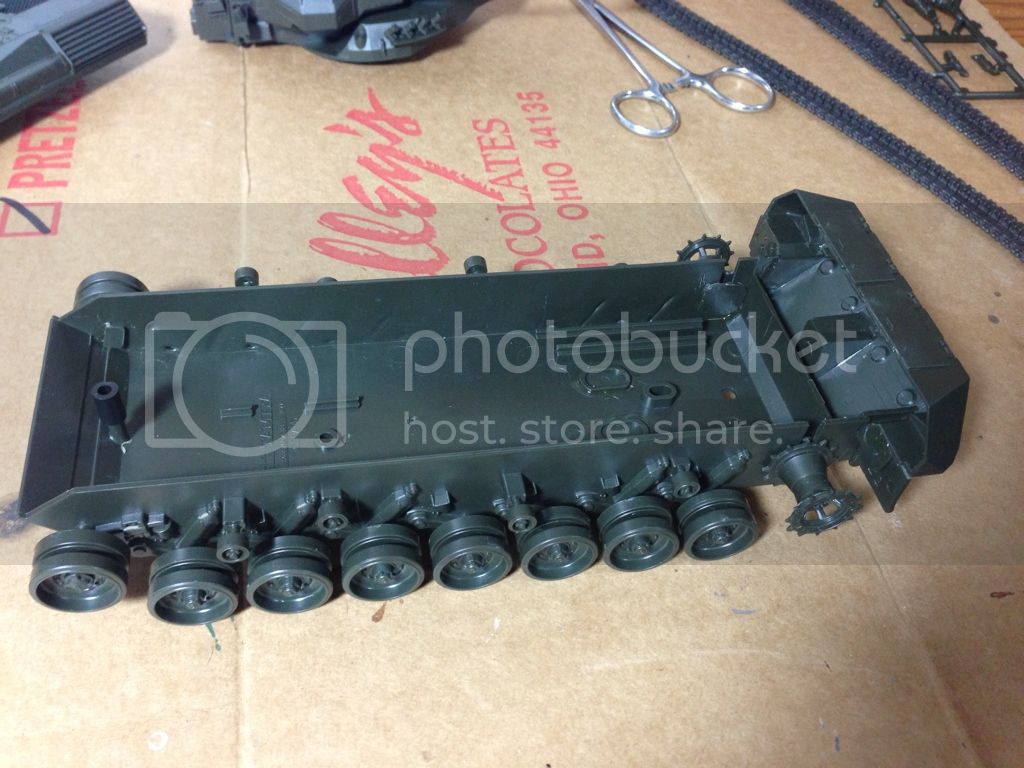
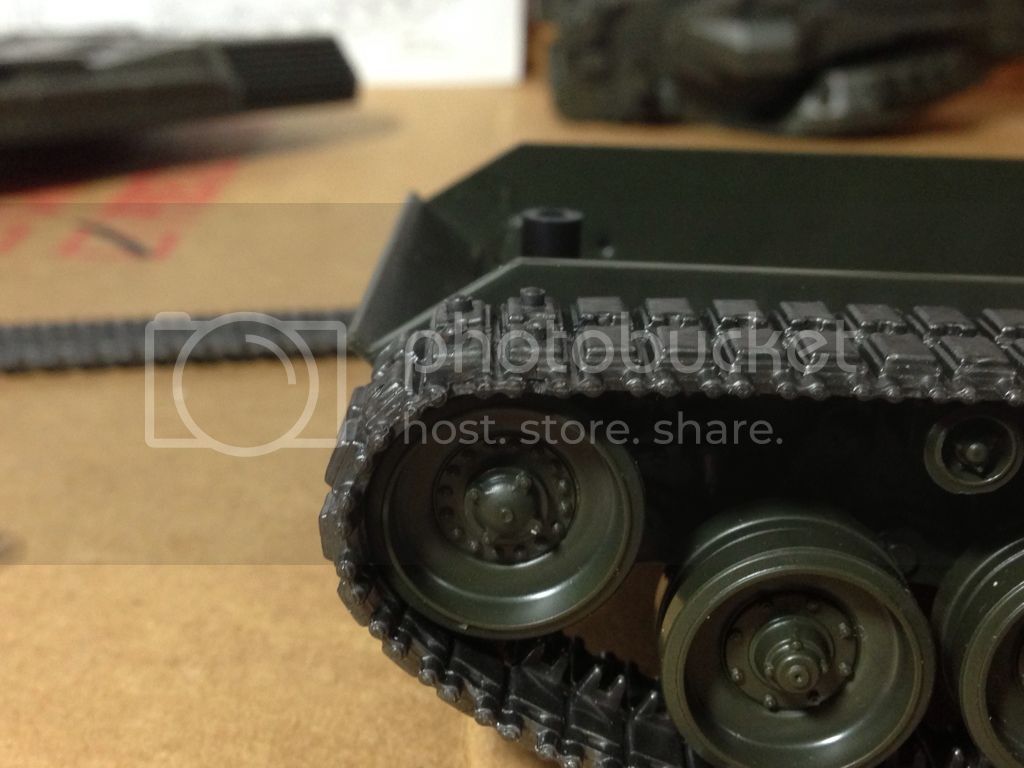
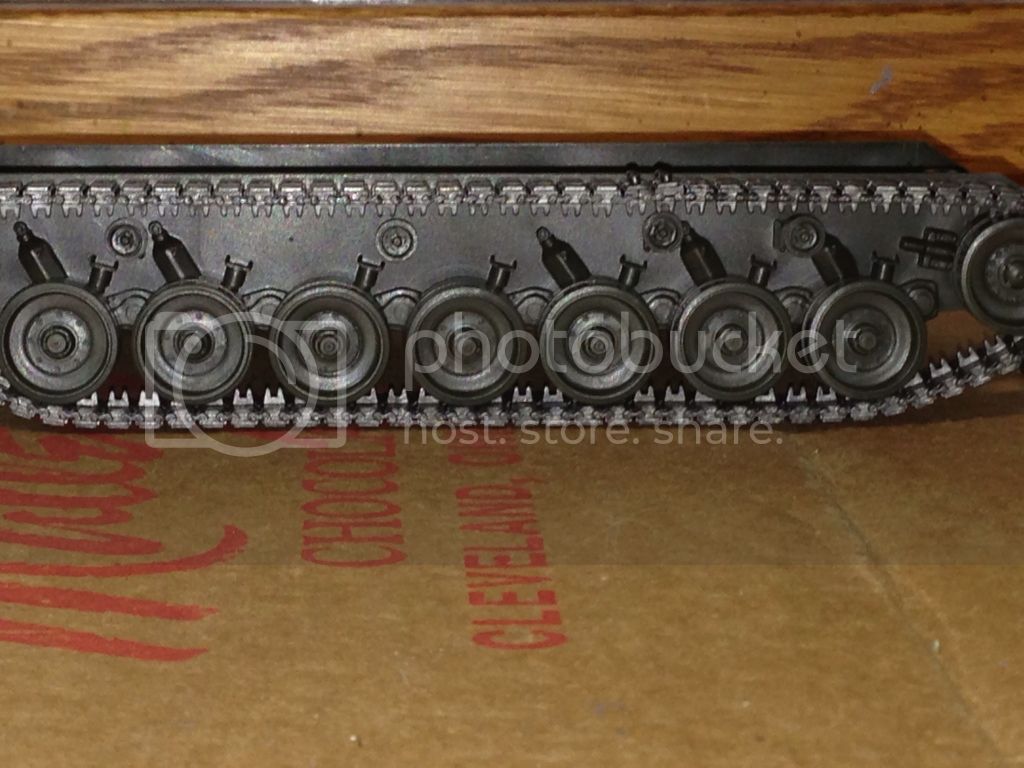
The road wheels, idlers, and drive sprockets were easy builds with ample detail and minimal cleanup. Another facet of my building assessment is that I will make everything moveable that can be. The vast majority of my builds are stationary; hatch covers, wheels, propellers, flaps, etc. But this build will be completely moveable, and there are a LOT of moveable pieces in this kit! First off, every one of these wheels (except the small top idlers) spins!


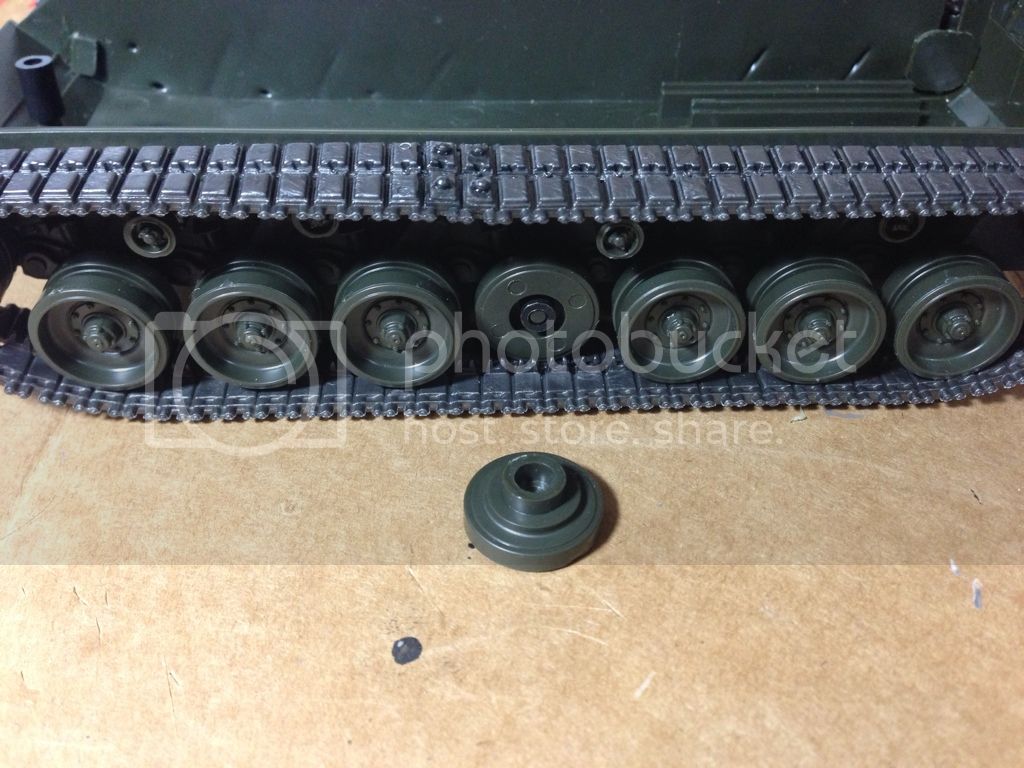
Another view of the wheels. I think it's pretty well known that there should be a gap between the third and fourth road wheels. But I don't have the time nor resources to fix it during this break.


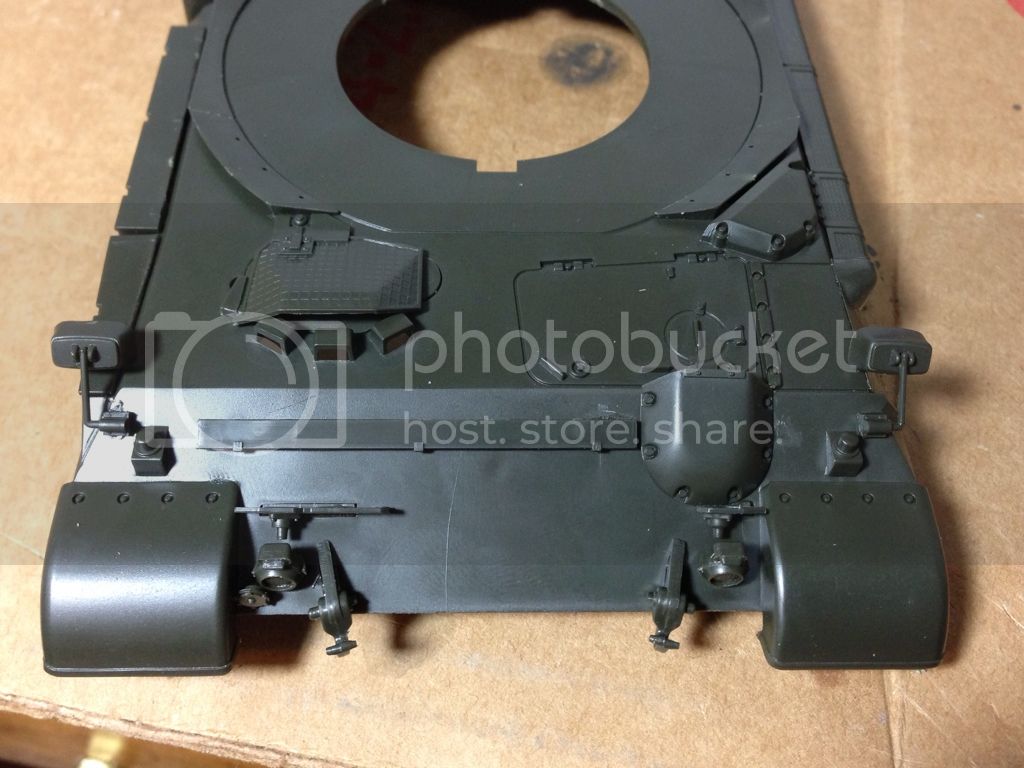
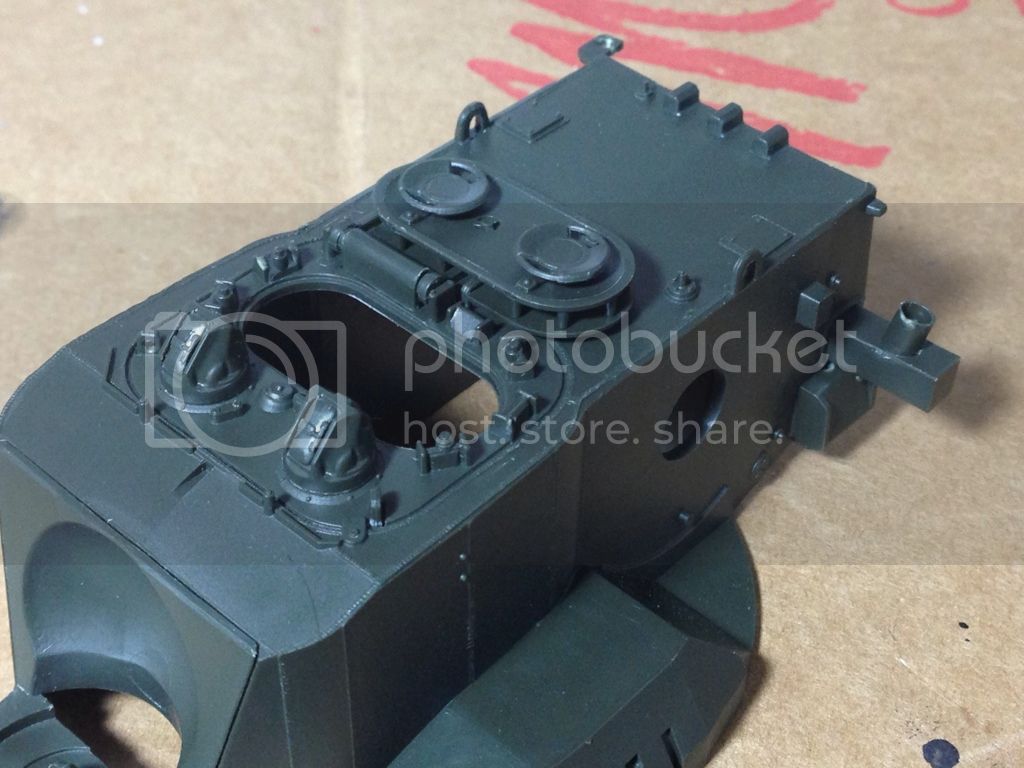
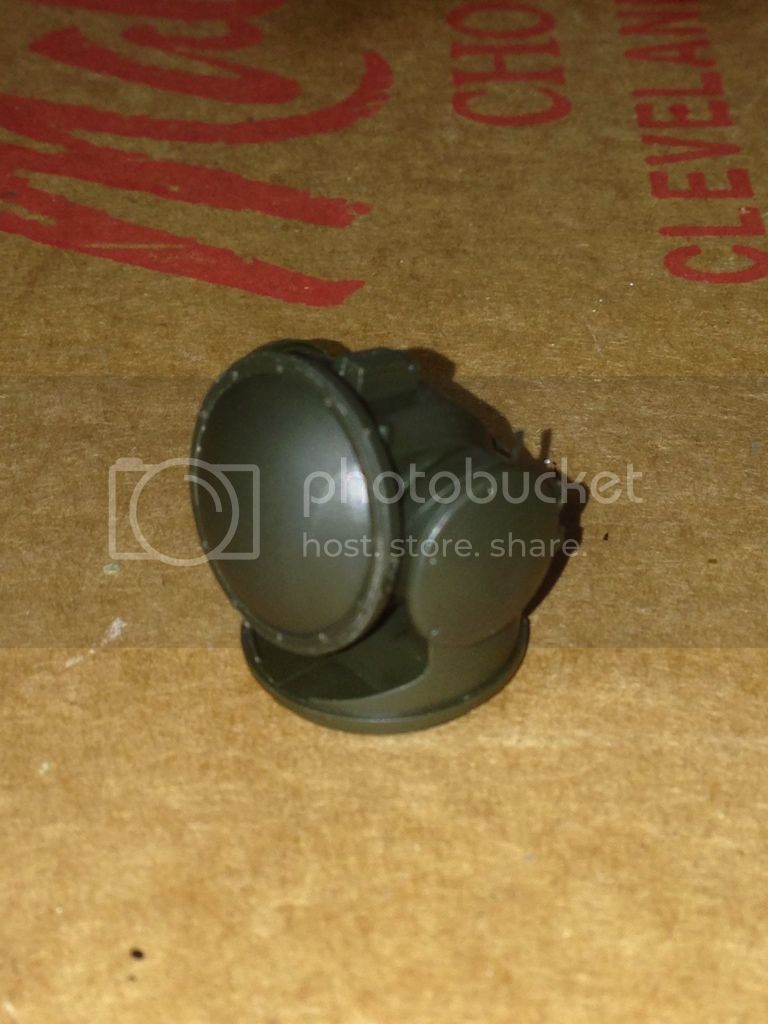
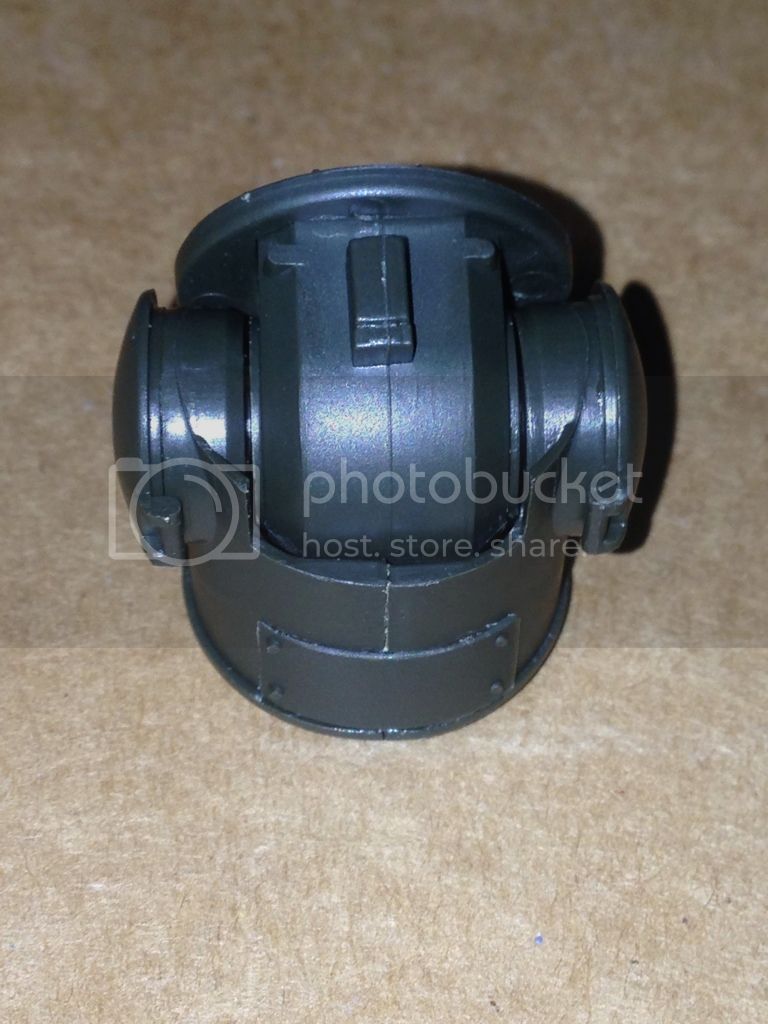
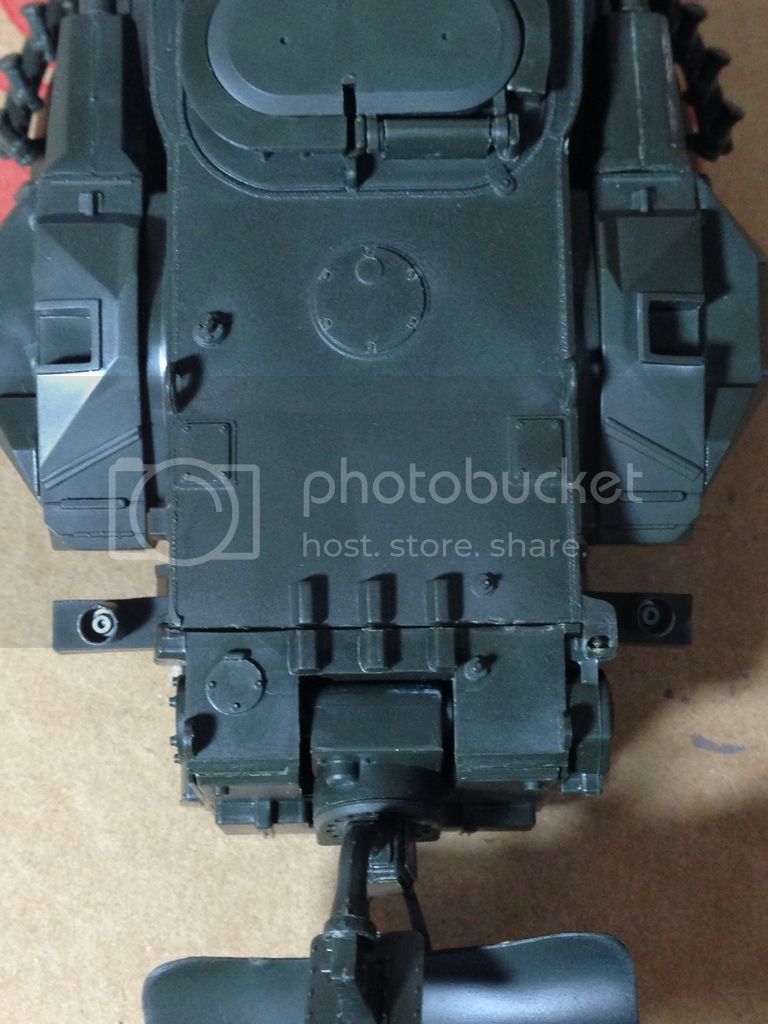
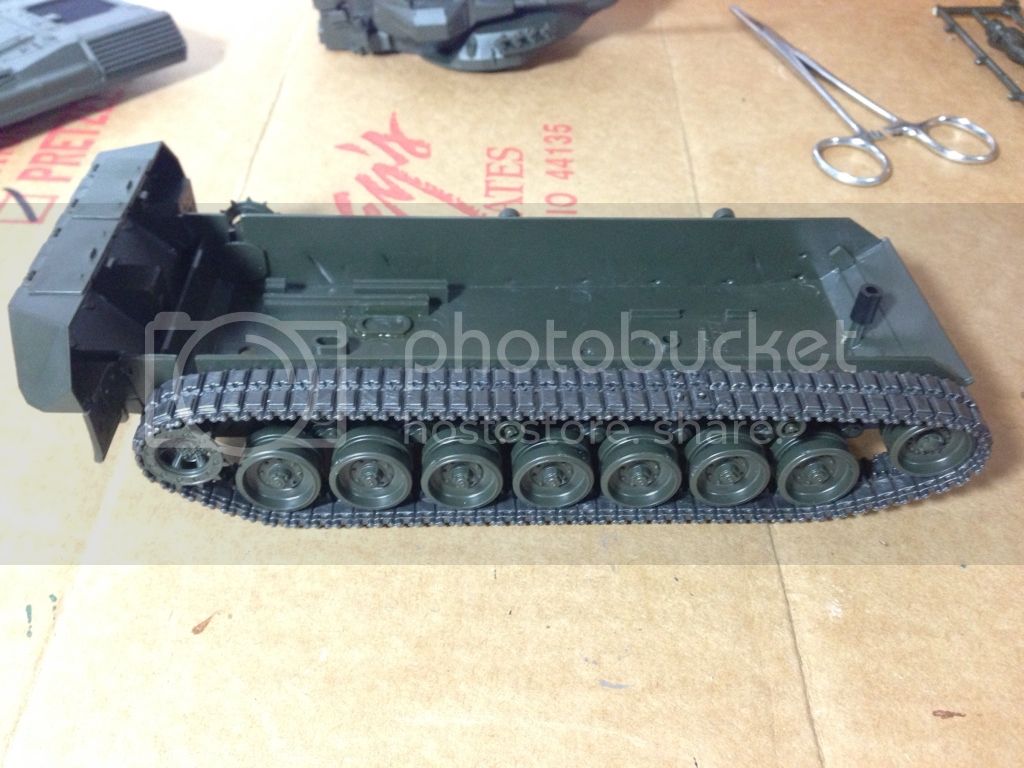
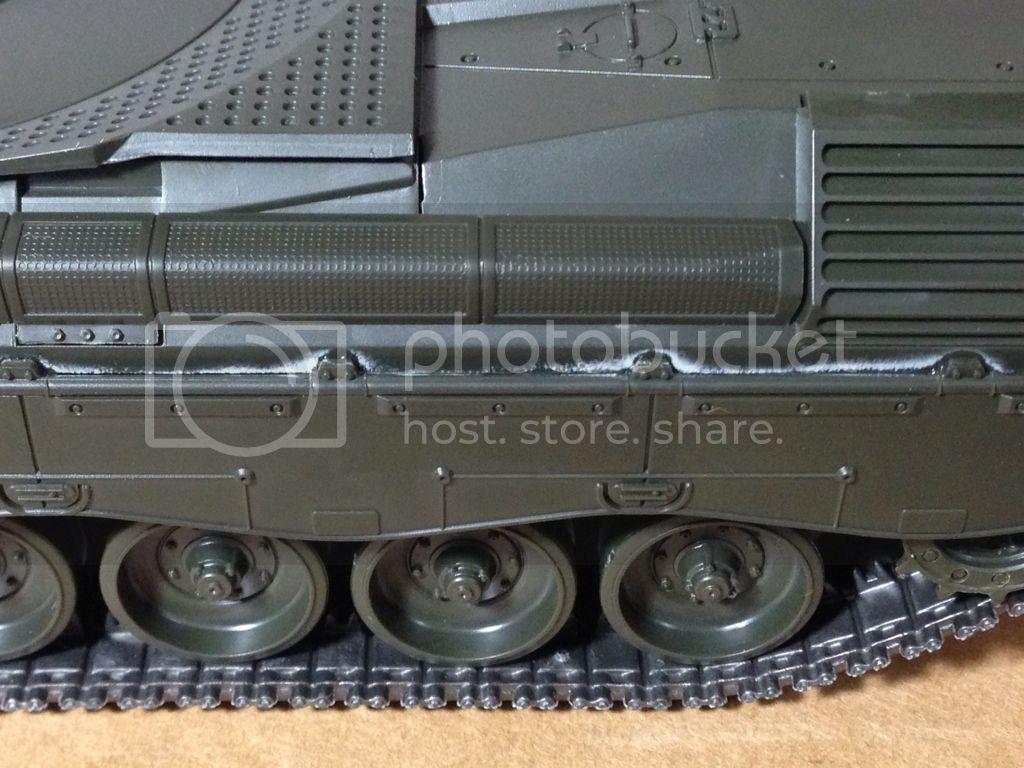
The stern section went together without a hitch. I've heard that attaching this to the chassis and the the upper hull can be a challenge though.


I'll post more as I do them. Also, pardon the iffy photo quality...this is the first time that I'm using my iPhone for model pictures.
AKirchhoff
Visit this Community
Germany
Joined: September 12, 2008
KitMaker: 307 posts
Armorama: 304 posts
Posted: Thursday, December 20, 2012 - 07:01 AM UTC
Hi!
Be warned-the kit does not represent a production vehicle. It has some features of the prototype. The most obvious fault is the lack of about 8cm additional(scale 1/1) space between 3rd and 4th wheel stations on both sides. Furthermore, s stowage box on the left side is missing, an armoured fitting on the hull left of the driver has wrong shape, and a few smaller details are also not representing the production state.

However, the enlarged hull is difficult to build, if done, the track is too short, and, despite having served on Gepard for a few months, I canīt tell you where to lenghten the upper hull.

Some nice detail pictures are here:
http://www.bundeswehr-modellbau.info/01aa7892db1071916/01aa7892ea0a0ec03/01aa7892dc0bb6292/50325295da060b002.html

But be aware, most of these show the A2 version, which was the latest version before the vehicle was withdrawn from service.

Let me tell, at no time Gepard in German army was used with side skirts. All the fittings were in place, even the front trackguard was the version for use with side skirts. But these were never hold in stock and I do not remember to have seen a single picture with these fitted. Netherlands army used the side skirts, but these vehicles (CA-1 or Cheetah) had different radars and smoke dischargers and a few more differences. Gepard 1 was used German army olive or in Nato 3 colour scheme. We painted it in 1985 on our unitīs vehicles. Vehicles were paintbrushed at first by the crew, later on that job went to based workshops when doing scheduled maintenance.

Andreas

Thudius
Visit this Community
Uusimaa, Finland
Joined: October 22, 2012
KitMaker: 1,194 posts
Armorama: 1,077 posts
Posted: Thursday, December 20, 2012 - 09:41 AM UTC
I'll be tackling this beastie soon as well. Just got back into he game myself after a long break and have the Tamiya Leopard 1A4 and Italeri A4 on the bench right now, I'll get some pics and a post going this weekend. Hopefully.


Quoted Text


However, the enlarged hull is difficult to build, if done, the track is too short, and, despite having served on Gepard for a few months, I canīt tell you where to lenghten the upper hull.

Andreas


I got the Tankograd book and did some quick comparisons against Shackelton's and the Tankograd Leopard drawings. To me, it looks like the hull does not need to be lengthened at all. Have a careful look at where the road wheels line up on the drawings. The Leos line up nicely, as suspected, but the Gepard shows the first 3 units moved forward. A check of reference photos confirms the units are moved forward.

What this means, in my view, is that you need to move those 3 units (both sides of course) forward so that the edge of the trailing arm of the left side is almost butted against the front edge of the lower glacis plate. My plan is to use a spare lower hull, or the suspension bits, from a Heller A2 kit I got for the sake of the turret. More to follow as and when I start this project.

So to sum up, I don't think it is actually necessary to lengthen the hull to accommodate the shift in road wheel spacing.

Sorry for the minor threadjacking.

Kimmo
LeoCmdr
Visit this Community
Alberta, Canada
Joined: January 19, 2005
KitMaker: 4,085 posts
Armorama: 3,917 posts
Posted: Thursday, December 20, 2012 - 10:11 AM UTC

Quoted Text

I'll be tackling this beastie soon as well. Just got back into he game myself after a long break and have the Tamiya Leopard 1A4 and Italeri A4 on the bench right now, I'll get some pics and a post going this weekend. Hopefully.


Quoted Text


However, the enlarged hull is difficult to build, if done, the track is too short, and, despite having served on Gepard for a few months, I canīt tell you where to lenghten the upper hull.

Andreas


I got the Tankograd book and did some quick comparisons against Shackelton's and the Tankograd Leopard drawings. To me, it looks like the hull does not need to be lengthened at all. Have a careful look at where the road wheels line up on the drawings. The Leos line up nicely, as suspected, but the Gepard shows the first 3 units moved forward. A check of reference photos confirms the units are moved forward.

What this means, in my view, is that you need to move those 3 units (both sides of course) forward so that the edge of the trailing arm of the left side is almost butted against the front edge of the lower glacis plate. My plan is to use a spare lower hull, or the suspension bits, from a Heller A2 kit I got for the sake of the turret. More to follow as and when I start this project.

So to sum up, I don't think it is actually necessary to lengthen the hull to accommodate the shift in road wheel spacing.

Sorry for the minor threadjacking.

Kimmo


The hull was lengthened on the Gepard and that is what created the road wheel spacing. If you were to increase the length of the hull to correct it and create the gap you could not use the kit tracks....as the Gepard track uses an extra track link in the run of the track due to the increased in hull length.

What we need is PSM to produce a conversion kit to correct and update the Tamiya Gepard.
Buckeye198
Visit this Community
Ohio, United States
Joined: May 02, 2010
KitMaker: 596 posts
Armorama: 265 posts
Posted: Thursday, December 20, 2012 - 02:34 PM UTC
Andreas, Kimmo, and Jason: thank you all for your knowledge! I guess there's still some disagreement about whether the chassis was lengthened or the road wheels were moved forward...either way, I'm afraid I'll have to turn a blind eye to this issue given the nature of my build being as strictly OOB as possible.

I'm very surprised to hear that this is basically a prototype model! I would've figured that the molds, which were made in 1977, would be contemporary with a vehicle pressed into service in 1973 rather than the prototype design. I guess model company standards are just higher now

From what I have read, Eduard and a German company (I apologize that I can't find the name...) have made conversion kits for the Tamiya Gepard. I'm not sure if they're updates or just details, but either way it's worth checking out if you're going to build this.

I hope to have more pictures up tonight...I'm making lots of progress, but the pictures are slow going.
LeoCmdr
Visit this Community
Alberta, Canada
Joined: January 19, 2005
KitMaker: 4,085 posts
Armorama: 3,917 posts
Posted: Thursday, December 20, 2012 - 03:52 PM UTC

Quoted Text

Andreas, Kimmo, and Jason: thank you all for your knowledge! I guess there's still some disagreement about whether the chassis was lengthened or the road wheels were moved forward...either way, I'm afraid I'll have to turn a blind eye to this issue given the nature of my build being as strictly OOB as possible.

I'm very surprised to hear that this is basically a prototype model! I would've figured that the molds, which were made in 1977, would be contemporary with a vehicle pressed into service in 1973 rather than the prototype design. I guess model company standards are just higher now

From what I have read, Eduard and a German company (I apologize that I can't find the name...) have made conversion kits for the Tamiya Gepard. I'm not sure if they're updates or just details, but either way it's worth checking out if you're going to build this.

I hope to have more pictures up tonight...I'm making lots of progress, but the pictures are slow going.


Eduard make a PE set.

RN Modellbau founded by the late Ralf Nowack produced a 1/35 resin conversion for the Gepard kit updating it to the Gepard A2 version. The conversion is no longer available.

Here is a build of the Gepard using the conversion...

http://www.panzer-modell.de/berichte/gepard1a2/gepard.htm

http://www.track-link.com/gallery/2308

From Volume 2 of the Leopard Trilogy the hull was lengthened by 80 mm (2.28 mm in 1/35)between the 3rd and 4th road wheels. The track links were increased by one link to 85 per side as I stated earlier.
HermannB
Visit this Community
Bayern, Germany
Joined: October 14, 2008
KitMaker: 4,099 posts
Armorama: 4,067 posts
Posted: Thursday, December 20, 2012 - 07:09 PM UTC
To all that may be interested.

The master parts of RN Modellbau have been putchased by MR Modellbau. There is a chance that they will be re-released some day.
For the scrach builder among us, I did some yaers ago measurements of the A2 relavant partr that I am willing to share. If interested, contact me via PM.

Cheers
Hans-Hermann
LeoCmdr
Visit this Community
Alberta, Canada
Joined: January 19, 2005
KitMaker: 4,085 posts
Armorama: 3,917 posts
Posted: Friday, December 21, 2012 - 01:33 AM UTC

Quoted Text

To all that may be interested.

The master parts of RN Modellbau have been putchased by MR Modellbau. There is a chance that they will be re-released some day.
For the scrach builder among us, I did some yaers ago measurements of the A2 relavant partr that I am willing to share. If interested, contact me via PM.

Cheers
Hans-Hermann


It seems MR Modellbau is concentrating on the small scale products that RM Modellbau produced. It would be nice to see the RN Gepard conversion again but maybe with some improvements.
LeoCmdr
Visit this Community
Alberta, Canada
Joined: January 19, 2005
KitMaker: 4,085 posts
Armorama: 3,917 posts
Posted: Friday, December 21, 2012 - 01:35 AM UTC
FYI this Gepard road wheel spacing issue has been discussed before and was easy to find on the site...

https://armorama.kitmaker.net/forums/164975
Buckeye198
Visit this Community
Ohio, United States
Joined: May 02, 2010
KitMaker: 596 posts
Armorama: 265 posts
Posted: Sunday, December 23, 2012 - 06:42 PM UTC
Wow I totally forgot to get back to this thread...well here's my next update.

Topside was pretty plain before construction. All of the detail except for the port hatch and the fenders was added on in construction. And all of the parts to be added are very well detailed. The PE kit would be nice for the driver's hatch cover though.


The included wire grill cover was a welcome addition. Probably could be a bit thinner, but that's what aftermarket PE is for.


If it weren't for the two glue smears around that armored bulge, it would be hard to tell that these topside details weren't molded on. Good job, me!


Here's a real problem though. The starboard lockboxes are pretty devoid of detail and don't conform well to the side of the vehicle. But again, I didn't use any model putty because I wanted this to be just my construction skills...no filling, just fitting.


Here's another small point. Look just to the left of the fender, and you'll see some open spots that you can see through. For whatever reason, the openings for the starboard cable anchor and headlamp were made too large. I could've filled them in with putty or glue, but that's not what this build is about, remember?


Another poor fit, this time on the port side. I actually have no idea what this part is (I bet PE would be nice here though), but I think the misfit was my fault. I should've installed the faux-grill part first, as it had very little wiggle room, and the connecting plate afterwards, which had a lot of flexibility in its placement.


And here's the main event, the Oerlikons! Remarkably simple construction of each arm and good detail in the barrels (especially for 30+ year molds!).


Some putty would've been nice here. To be fair, the seams aren't as noticeable in person as they are in this picture. But still. Generally, a very nice fit.


The muzzle break was well designed and easily constructed, consisting of only one piece additional to the main barrel.


I'll finish up with the turret and final construction in a bit. The build is still enjoyable though, and I'm happy with the kit this far into it.
Thudius
Visit this Community
Uusimaa, Finland
Joined: October 22, 2012
KitMaker: 1,194 posts
Armorama: 1,077 posts
Posted: Monday, December 24, 2012 - 01:30 PM UTC
Keep at it. For an old kit the molds sure have held up well, ditto for the Leopard. Now if I could only find a Heller kit for a song. Why yes, I do have a masochistic streak.

And my apologies for the earlier threadjack. Merry Christmas to everyone
Buckeye198
Visit this Community
Ohio, United States
Joined: May 02, 2010
KitMaker: 596 posts
Armorama: 265 posts
Posted: Tuesday, December 25, 2012 - 06:25 AM UTC
Time to catch up on my posts again! I'll post through the turret here. And of course, a Merry Christmas to all of you who celebrate!

Some putty, sandpaper, and time could easily have solved this plate's seams. But alas, I had none. But hey, if this is the worst seam of the entire kit (I shouldn't speak too soon...) then I'd say this is a pretty quality vintage kit! Kimmo, you are definitely right about these molds holding up! I'm still very impressed!


I was very impressed with the turret. A lot of the details on the turret's topside were additional pieces, giving it extra accuracy rather than the usual "close enough" that is found on so many vintage-tooled kits. The commander's hatch is really intricate, too, despite consisting of only three unique parts. Of course, it's movable, but without an interior, it only moves to satisfy my "everything-must-move" criteria.


The tracking radar went together nicely and can move to face anything around the vehicle. And that's kinda the point of a tracking radar, isn't it?


The rear of the tracking radar was a bit of an ugly fit, but unless you're planning on displaying it reversed, you can hide these seams easily.


This is how I like to build all the subsections. Remove the parts, clean up the seams, dry-fit everything, then glue them. I do make sure that I can't confuse the parts before I take them off the tree though.


The searching radar dish in the rear rotates and retracts for stowage, the tracking radar dome in the front rotates on the vertical and central axes, the commander's hatch opens, the cannons raise and lower together, and the rear instrument cabinet opens as well. Of course, the turret will move as well when it's on the chassis.


Instrument cabinet is kinda bare, but the aftermarket kits would add detail there. As an OOB build though, the construction was easy and straightforward.


Kind of an ugly seam that I couldn't find a way to get rid of it. I don't know how to fix the seam without permanently sealing the cabinet shut, but I'm sure that many of you out there could find a way.
Buckeye198
Visit this Community
Ohio, United States
Joined: May 02, 2010
KitMaker: 596 posts
Armorama: 265 posts
Posted: Tuesday, December 25, 2012 - 06:26 AM UTC
Oh and Happy 500th Post to me!!
eoinryan
Visit this Community
Cork, Ireland
Joined: April 30, 2010
KitMaker: 232 posts
Armorama: 134 posts
Posted: Tuesday, December 25, 2012 - 07:12 AM UTC

Robby,

Happy Christmas and happy 500th post (I've a bit of a way to catch up with you!).

It's great to see another Gepard build. I built one about two years ago. For a 35 year old kit is great, although I do remember a lot of sanding and filing.

There are plenty of moving parts on the OOB build. When you are painting the interior sections, make sure to prime them, especially the instrument cabinet! If not you will end up putting endless coats on!

Almost ther with the build, good opportunity to flex your painting and weathering skills next!

Eoin

Buckeye198
Visit this Community
Ohio, United States
Joined: May 02, 2010
KitMaker: 596 posts
Armorama: 265 posts
Posted: Tuesday, December 25, 2012 - 06:18 PM UTC
Eoin, thanks for the advice! I will not be painting this model (at least not now) since my airbrush is still spotty and I just don't have the time before I have to go back to school. I'll probably get to it some day because I really don't like having unpainted models on my shelf, but for now I'll have to settle with just the construction.

Here's the lower hull with the rear section. Another easy fit (mostly).


However, I did go a bit overboard with the glue. I was doing so well at not using rivers of glue up until now. And as a result, I had a bit of a mess to deal with at the rear seam.


Time to add the tracks! They came out of the box curved like that, so I had to deal with that. I found that the fit was better if the tracks were curved inwards instead of out.


Line up the wheels on the tracks and then thread the tracks rearward...


...Keep threading it back until it's just about to the end...


...Insert the pegs into the holes just enough so that you can let go of the tracks without them opening back up...


...Then roll the tracks back so that the pegs are right over the idler wheel and press down. Add a drop of glue, and you have success! I don't like their suggestion to melt the pegs in place with a heated flathead screwdriver. Too much stuff going on and glue does the same thing anyway.


Of course if you are like me and didn't glue the idler well enough, then it'll split in half under the pressure and release the track. So don't do that.


Starboard track went together fine though.


And of course, port side then found another problem. I have a feeling I'll be regluing this model pretty frequently...


The rubber band tracks are just long enough to connect, so there's no sag and they won't rest properly on the small upper idlers. Additionally (as was discussed before) if you opt to lengthen the hull, the tracks will fit even worse. I don't know if tracks are included in the aftermarket kits, but it's definitely something to look for.


I have also decided that I will be including the side skirts. My rationale is that it's already not accurate as a production model, so what harm will it do to add on some cool looking parts that are included with the kit? Also, the skirts will hide nicely the aforementioned track issue. I did a quick dry fit and there seems to be a pretty noticeable gap between the upper and lower hulls. I'm not sure why they didn't mold it so that the two halves could make contact around the entire model, but whatever. It's an imperfection that the modeler has to account for and I'll fix it by sweeping it under the rug.

And that's all I have for now. I hope everyone had a nice and meaningful holiday and I'll finish up soon!
Buckeye198
Visit this Community
Ohio, United States
Joined: May 02, 2010
KitMaker: 596 posts
Armorama: 265 posts
Posted: Saturday, December 29, 2012 - 01:51 PM UTC
And this is the final installation (for construction, at least) for my Gepard build log!

The instructions told me to stretch sprue for the antenna, so I had to oblige


The completed turret! From a distance it looks REALLY good (it looks great up close too), especially for 35 year old molds!


Every model has a "bad side" and I guess the Gepard's is port. I figured that I could use superglue for the port side skirt, but I forgot that superglue produces a white residue around area where it's applied.


A toothpick scraped most of the residue off without scratching up the plastic. On the starboard side, I was sure to use regular glue and had no issues.


Sorry, I forgot to take pictures of uniting the hull halves. It wasn't too awful though. Like I said before the sides of the lower hull don't reach the upper, so that's wasted glue if you go along those edges (like I did). The rear could use a little bit of puttying up, but the front is a near perfect fit.


I decided to leave off the decals because in case my airbrush is ever in good working order again, I want to save myself the hassle of painting around decals. Plus if I don't put on the Bundeswehr insignia, no one can be upset about me installing the track skirts


So that's that. As I've said multiple times before, this is a very high quality kit given its age; it even stands up to a lot of kits produced today. Its technical flaws are pretty important, but they're forgivable unless you're a real rivet-counter. Its flaws as a model kit however are relatively few and easy to fix, namely with the addition of an aftermarket kit. And as a modeler, this build has brought to light my flaws and presented me with an opportunity to address and fix those flaws. Of course, thanks to everyone who's followed me through the build and for all your advice
paul51
Visit this Community
Hamilton, New Zealand
Joined: January 03, 2010
KitMaker: 159 posts
Armorama: 158 posts
Posted: Saturday, December 29, 2012 - 02:10 PM UTC
Hi Robby, This looks good and I look forward to the final painted result.
 _GOTOTOP