


Well - maybe reliving its creation will speed up the process of getting into it again back home...
But lets start from the beginning:
Once upon a time...
...while taking a mountain bike ride in the Machtesh Ramon (Ramon Crater) in Israels Negev Desert with some friends back in 1991 a patrol on a Mutt M151 checked on us.

So when I came across the Shmira-kit from Academy about 20 years later, the idea was born to build such a patrol car.
The mentioned Academy kit provided the base. But as I figured out during my build the kit is a hybrid of a M151 A1 and a M151 A2. The front fenders are A1 as stated but the rear wheel housing is one of an A2. With most of the pictures available showing A2s I decided to go for an A2. CMK provided the front fenders and Eduard an additional PE-set for some detailling.
And here are some pics taken during the build:


A close up from the left shows a bit of detailling of the steering rod.

The CMK Shmira conversion kit provided the wanted A2-fenders but unfortunatly no matching lights. These were taken from another M151 kit and boosted a little bit with Evergreen-PS-rod.
If you wonder now whether the hood looks pretty beaten up well, then you are right. That´s just what it is. As I intend to build a war-and-weather-beaten vehicle serving it´s last days in miluim (Reserve duties) exercises, I wanted to add some damage to represent a look like the one below.

So I tried various techniques to create the damage I envisioned. Finally a 500 g hammer did the trick. Pounding hood, grill, fenders and sideskrits I got close to the desired result. In this process the grill broke (propably due to a production flaw) and was covered with the filter CMK wisely provided in their conversion.
Straight front wheels often look a bit boring. So I cut the front axels and realigned them at an angle.
The rear of the original Shmira kit didn´t please me in the first place. And after the Eduard bumpers were attached, the spare wheel didn´t fit anymore and the PE-part looked a bit weird. So the whole thing was replaced with another rear from yet another M151 kit and - surprisingly - now everything fits.

Note the various hues of colors deriving from the different plastic from different kits
And now some more progress...
Lets start with the upper steering arm that neither the Academy nor the Tamiya kit provide.

After several attempts with thick aluminum foil/sheet the best results were achieved with PS-sheet and PS profile. A bent PS strip was glued to a preformed copper wire and covered with 0,2 mm PS-sheet which then was trimmed to shape. At last 2 vertical rods were added. Although I am not completely dissatisfied with my modest scratch build the result leaves room for improvement. But - see for yourself:


As you might have noticed, in the meantime something happend to the lights. I found the representaion of the housing screws with 0,5 mm PS-rod too coarse and replaced them with 0,4 mm soldering wire. A band of aluminum foil from a wine bottle neck was then wrapped around the front of the housing.


Some more strap holders - or however they are called - were added to the hood and the rear wheel housings.

As you might have noticed, the filler cap beside the hood (right) was removed as a haven´t seen it on any of the israeli Mutts.
The next picture shows the detailed fuel tank with the inlet and some wireing along with the battery cover under the co-driver´s seat. Why to take this pain? Well - I didn´t like the kit´s seats and the ones of the CMK Conversion didn´t satisfy me either for they had not the rugged and patchy look I am after. This means that I will have to reconstruct the seats bottom up. Meaning: starting with a tube frame, then adding springs and cushions.

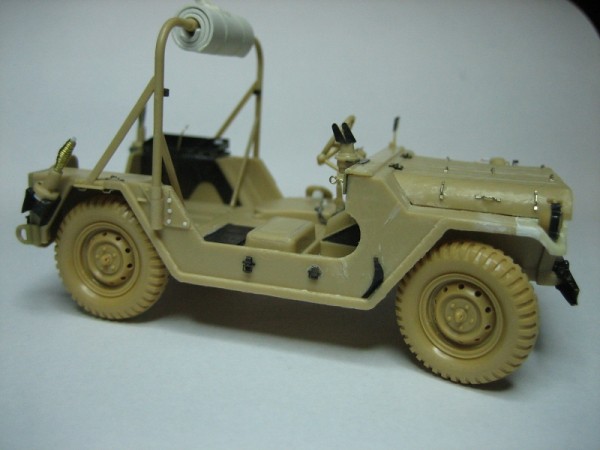
So finally I consider my tiny little Mutt ready.
Ready to be ruined by paint.
Here are some farewell pictures:


Any comments or suggestions are wellcome.
Michael


