_GOTOBOTTOM
Dioramas: Techniques
Diorama techniques and related subjects.
Hosted by Darren Baker
Build Log:"Komm und nimm es dir!"Diorama
All_You_Can_Kit
Visit this Community
Jakarta Raya, Indonesia
Joined: August 22, 2012
KitMaker: 599 posts
Armorama: 527 posts
Posted: Saturday, February 23, 2013 - 07:57 PM UTC
Hi all! Similar with the previous build story, I design a topic as a additional reference from my finished diorama on "Komm und nimm es dir!(Come & Get It!)" Diorama. Actually, this topic was also a build story and I think such historical log will be useful for anyone of you that decide to start how to build a simple diorama especially by using a couple amount of scrap materials (againn ).

Ok, just take a look and really can't wait for your valuable comments!


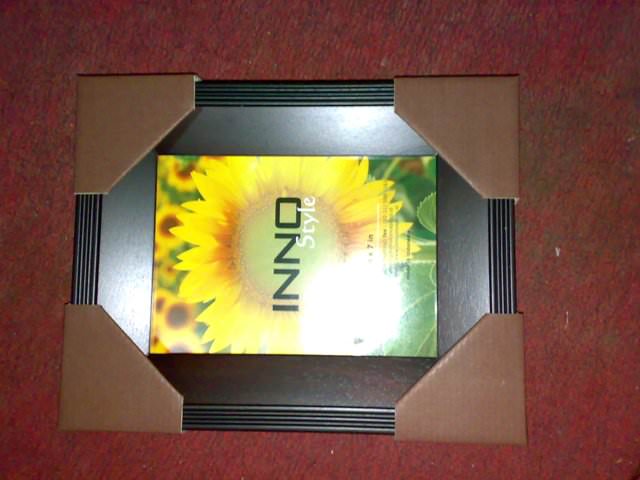
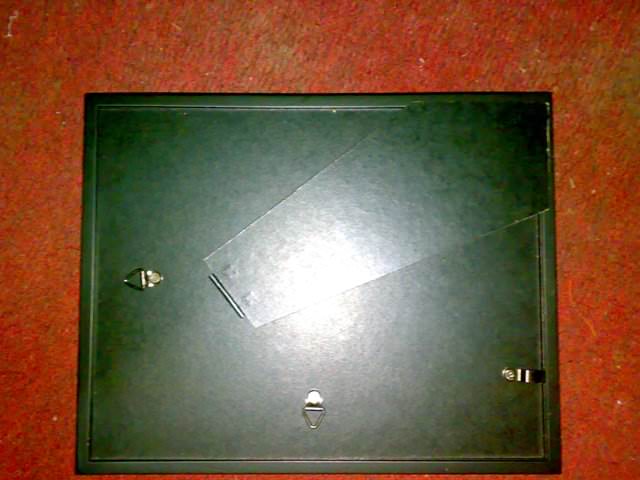
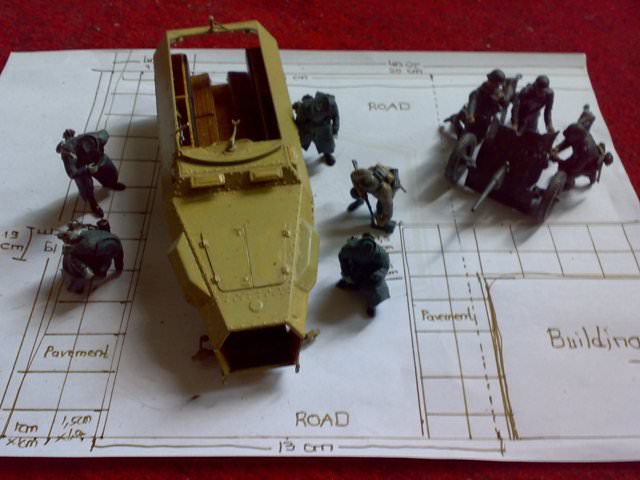
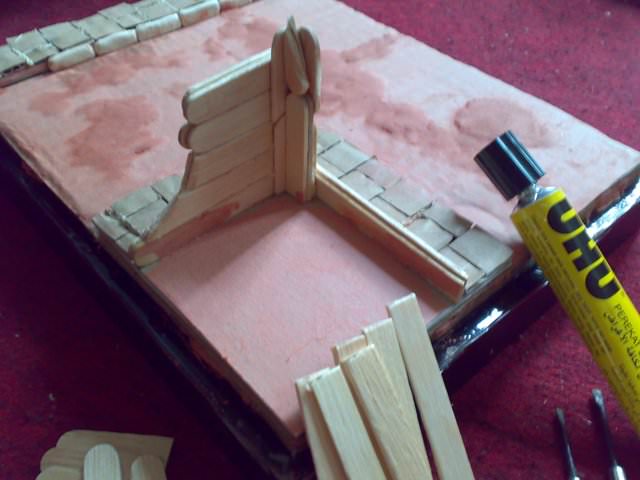
I also use a simple wooden photo frame which its' size considerately suitable for my diorama plan. In order to not wasting time too much, removal of its' back cover, standing platform, instruction sheet, and any unneeded materials was performed. Don't forget to always remember that better to keep them for unexpected use in the future rather than throw them away into trash bin


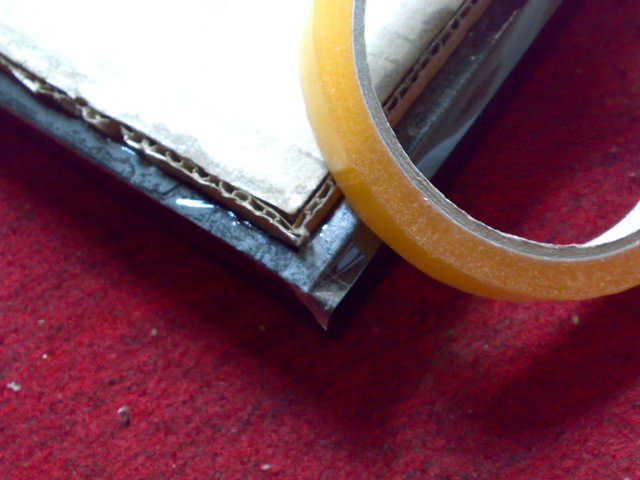
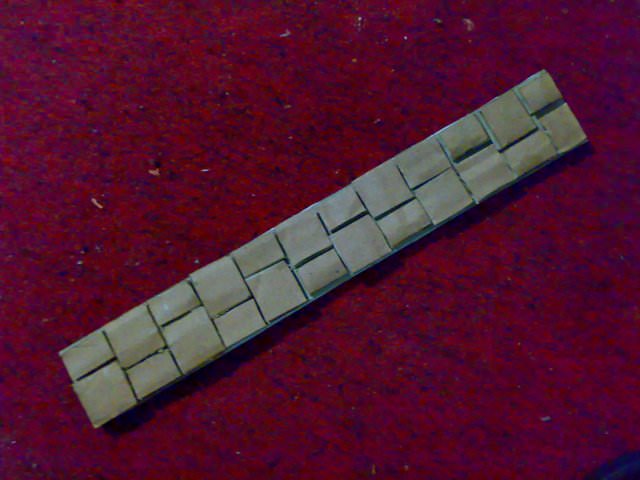
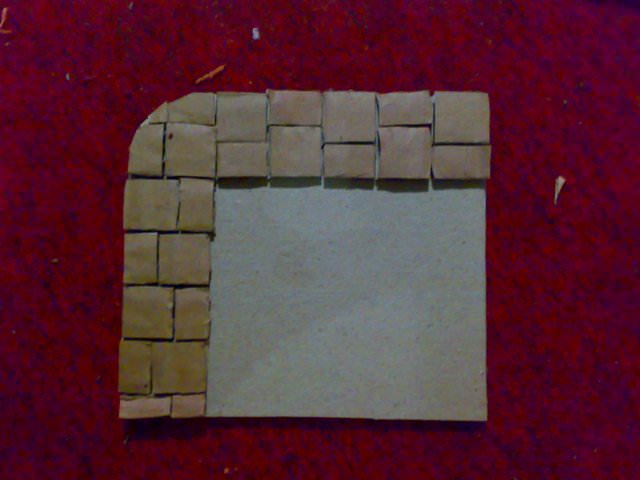
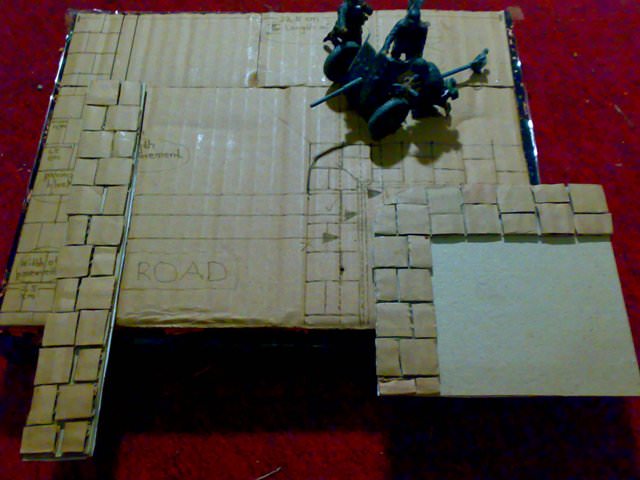
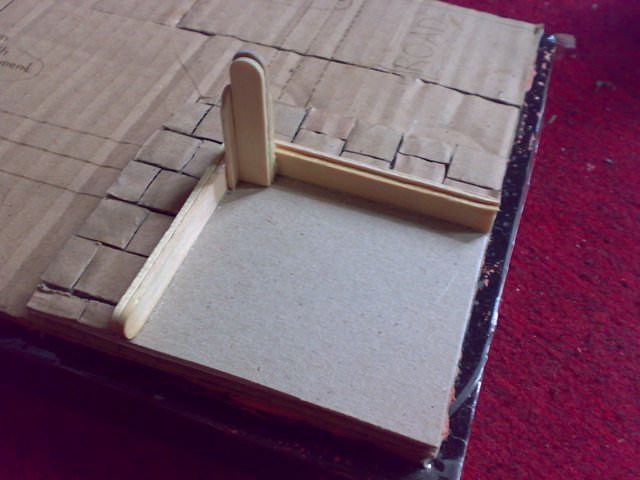
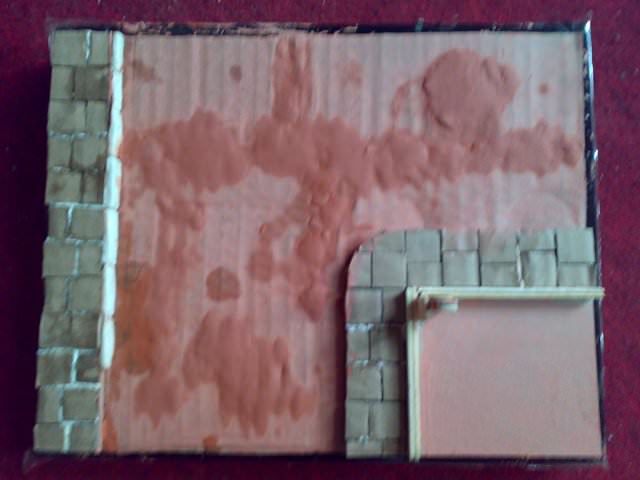
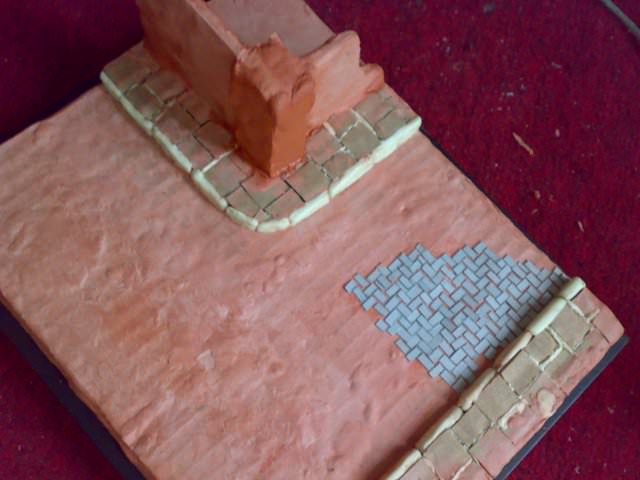
Those pictures above shows that I used several layer of used sprues in order to made the ground base became stronger and higher than without them. After that, I covered such layers with ex-used carton sheet from mineral water packages.

I will continue post this story ASAP due to my unfinished Sunday afternoon home's neighborhood tasks

Cheers


Garry

Cobra1972
Visit this Community
Victoria, Australia
Joined: February 24, 2013
KitMaker: 36 posts
Armorama: 31 posts
Posted: Monday, February 25, 2013 - 12:52 AM UTC
Looking forward to following this one
All_You_Can_Kit
Visit this Community
Jakarta Raya, Indonesia
Joined: August 22, 2012
KitMaker: 599 posts
Armorama: 527 posts
Posted: Monday, February 25, 2013 - 04:50 AM UTC

Quoted Text

Looking forward to following this one


Hello again Mick,

When back from my office after do my overtime, the clock currently point out at 11.45 PM in Jakarta when I wrote this reply
Oh no, I'm really sorry since my eyes don't want to negotiate for more

I will continue it ASAP

Thank you for following this build story, Mick!


Best regards


Garry
velotrain
Visit this Community
Massachusetts, United States
Joined: December 23, 2010
KitMaker: 384 posts
Armorama: 320 posts
Posted: Monday, February 25, 2013 - 04:58 AM UTC
Hello Garry my friend -

I'd just like to give you a friendly reminder on being more selective / careful regarding your base materials. I'm a big fan of found objects and recycling, but you got yourself into trouble with "Wait for my Command" because you used recycled cardboard for the sidewalk stones, but these got soaked from your adhesive and then became quite warped. You don't want any material that soaks up moisture adjacent to a wet layer. If you want, you can try sealing with a spray shellac or polyurethane or something else.

I'd also be careful in using those sprues under cheap (not thick, not stiff, moisture-absorbent) cardboard, as if you press down at any point during the build, you've got an uneven backing layer that could shape whatever you have on top, and with enough moisture a point on the sprue might even poke through the cardboard.

You have a tremendous amount of energy in doing so many dios in such a short time, but I think it would be valuable for you to sit down after each one, make notes on what went well and what didn't, things to try and or avoid next time, and really work on bringing your "self-grade" up a notch each time.

I hope there isn't too much of a language barrier in all that.

Onward and upward. I think the Japanese started the concept of "continuous improvement", or maybe they were just the most successful at marketing it.

Charles
All_You_Can_Kit
Visit this Community
Jakarta Raya, Indonesia
Joined: August 22, 2012
KitMaker: 599 posts
Armorama: 527 posts
Posted: Tuesday, February 26, 2013 - 03:46 AM UTC

Quoted Text

Hello Garry my friend -

I'd just like to give you a friendly reminder on being more selective / careful regarding your base materials. I'm a big fan of found objects and recycling, but you got yourself into trouble with "Wait for my Command" because you used recycled cardboard for the sidewalk stones, but these got soaked from your adhesive and then became quite warped. You don't want any material that soaks up moisture adjacent to a wet layer. If you want, you can try sealing with a spray shellac or polyurethane or something else.

I'd also be careful in using those sprues under cheap (not thick, not stiff, moisture-absorbent) cardboard, as if you press down at any point during the build, you've got an uneven backing layer that could shape whatever you have on top, and with enough moisture a point on the sprue might even poke through the cardboard.

You have a tremendous amount of energy in doing so many dios in such a short time, but I think it would be valuable for you to sit down after each one, make notes on what went well and what didn't, things to try and or avoid next time, and really work on bringing your "self-grade" up a notch each time.

I hope there isn't too much of a language barrier in all that.

Onward and upward. I think the Japanese started the concept of "continuous improvement", or maybe they were just the most successful at marketing it.

Charles


Nice input Charles, many thanks!

Of course yes, I hope that I understand about what you mean by replying this post. Regarding to my recent two build stories, I just want to share that all of my performed steps, full with trial and errors. Every word you remind me are: correct, such as:
- Usage of soakable cardboard --> correct
- Overused of sprues --> correct
- Wasting time & energy --> correct
- Continuously improves --> also correct!

Regarding the trial and error issues, I already realize that several steps may had too many losses than their benefits and I already noted it, too. From your such valuable reminder also give me some fresh other perspectives and manner of diorama building efficiently and effectively in the future

Thanks again Charles and I hope my understanding as stated above didn't conduct any misinterpretations

Best regards from Indonesia


Garry
All_You_Can_Kit
Visit this Community
Jakarta Raya, Indonesia
Joined: August 22, 2012
KitMaker: 599 posts
Armorama: 527 posts
Posted: Wednesday, March 13, 2013 - 05:03 PM UTC

Quoted Text


Quoted Text

Looking forward to following this one

...
I will continue it ASAP
...


Hi all, I continue to write this build story and my deepest apology to Mick since I told that this topic will be continued ASAP, but not happen at all in the real world

No more words I could say, just enjoy the continuation of this build history as follows:


Soon after the overall sprue layers covered by the carton sheet, I isolated the edge of the frame by using a masking tape in order to protect them when modelling clay start to cover the base in the further step.


After that, I covered the base with modelling clay that widely spread over it in order to add some height of the represented terrain. After this step being evaluated by myself, honestly I have to tell that such step was useless since it means work inefficiently. It became a valuable lesson for me for another project.


I designed the rough sketch on a paper sheet, perform a brief layout test of the diorama items, and representing it directly at the base.

Not yet finished and I will continue it later. Enjoy!

Best regards


Garry
lespauljames
Visit this Community
England - South West, United Kingdom
Joined: January 06, 2007
KitMaker: 3,661 posts
Armorama: 2,764 posts
Posted: Thursday, March 14, 2013 - 09:02 AM UTC
thats quite an in depth plan,! although i wouldnt use cardboard for your base, if you get it wet from paint e.t.c it will warp. packing foam, like what you get in TV boxes, with plaster atop to smooth it is a much safer choice, or styrofoam, or sheet plastic, just a few thoughts to help you with your work.

James
All_You_Can_Kit
Visit this Community
Jakarta Raya, Indonesia
Joined: August 22, 2012
KitMaker: 599 posts
Armorama: 527 posts
Posted: Friday, March 15, 2013 - 10:24 AM UTC

Quoted Text

thats quite an in depth plan,! although i wouldnt use cardboard for your base, if you get it wet from paint e.t.c it will warp. packing foam, like what you get in TV boxes, with plaster atop to smooth it is a much safer choice, or styrofoam, or sheet plastic, just a few thoughts to help you with your work.

James


Hello James, thanks for your sharing, this build history actually shows how many trial and errors I have! Also, lot of lessons for me about unefficiency of using cardboard. I will consider the usage of materials that you suggested for the future work

Cheers


Garry
All_You_Can_Kit
Visit this Community
Jakarta Raya, Indonesia
Joined: August 22, 2012
KitMaker: 599 posts
Armorama: 527 posts
Posted: Saturday, March 16, 2013 - 11:11 AM UTC
Hi all, I continue to write this build story and just enjoy, again, the continuation of this build history as follows:


Those pictures displayed above showed about what I call for "Modular System", in which allow me to create particular details of those 2 major parts of the base (the columned pavement and the semi-squared one) and install them later by following the sketch design.


After that, I start to perform on building blocks of the wall that planned to be partially broken caused by artillery/tank shot. By using ex-used ice cream sticks, I carefully deal for such step.


While I wait for the drying up session of the previous step, I have to ensure that all of the 'sink holes' left over the overall body of the base were fixed by using DAS modelling clay.


After that, from those pictures above, I carefully start to cover the wall building blocks, also with DAS modelling clay, and shaping them later as smooth as possible in order to make a smooth installment of the wall tile.


Just like my previous build, I perform the rectangled cobblestones by install them one by one in order to make them appear as natural as possible In the future, I may leave such technique due to unefficiently usage of time and I will start to practice for scribing


Finally... Voila! Those pictures above shows the final result of the base preparation and I could say about 95% of such preparation was finished

Cheers


Garry
1stjaeger
Visit this Community
Wien, Austria
Joined: May 20, 2011
KitMaker: 1,744 posts
Armorama: 1,727 posts
Posted: Saturday, March 16, 2013 - 12:12 PM UTC
Very promising start Garry!!

Will follow this for sure!

Cheers

Romain
All_You_Can_Kit
Visit this Community
Jakarta Raya, Indonesia
Joined: August 22, 2012
KitMaker: 599 posts
Armorama: 527 posts
Posted: Saturday, March 16, 2013 - 12:27 PM UTC

Quoted Text

Very promising start Garry!!

Will follow this for sure!

Cheers

Romain


Thanks for your very kind comments, Romain

Actually, this is a "build story" rather than a "build log" as I stated in my first post. I create this topic since I think such story may be useful for anyone that have interest to start how to build a simple diorama. Hmm... not a perfect story of course, many trial and errors I have, so any constructive corrections and critics are welcome

Have a nice modelling day, Romain!

Cheers


Garry
lespauljames
Visit this Community
England - South West, United Kingdom
Joined: January 06, 2007
KitMaker: 3,661 posts
Armorama: 2,764 posts
Posted: Saturday, March 16, 2013 - 01:43 PM UTC
Garry I like your road bricks. The pattern came out nice.
All_You_Can_Kit
Visit this Community
Jakarta Raya, Indonesia
Joined: August 22, 2012
KitMaker: 599 posts
Armorama: 527 posts
Posted: Saturday, March 16, 2013 - 06:18 PM UTC

Quoted Text

Garry I like your road bricks. The pattern came out nice.


Thank you, James! Glad to hear that you like it. In the future, I will try more efficient way by scribing to deal with the road bricks or cobblestones

Cheers


Garry
 _GOTOTOP