_GOTOBOTTOM
Яusso-Soviэt Forum
Russian or Soviet vehicles/armor modeling forum.
Bronco SU-152 Early Build
CMOT
Staff MemberEditor-in-Chief
ARMORAMA
Visit this Community
England - South West, United Kingdom
Joined: May 14, 2006
KitMaker: 10,954 posts
Armorama: 8,571 posts
Posted: Thursday, February 28, 2013 - 07:43 PM UTC
This very recent release from Bronco Models of the SU-152 Early is their second crack at this model following on from a late version that was not released all that long ago. As I needed to start getting some items built this one had the most appeal for me and I will be following the build stages in the instructions very closely.

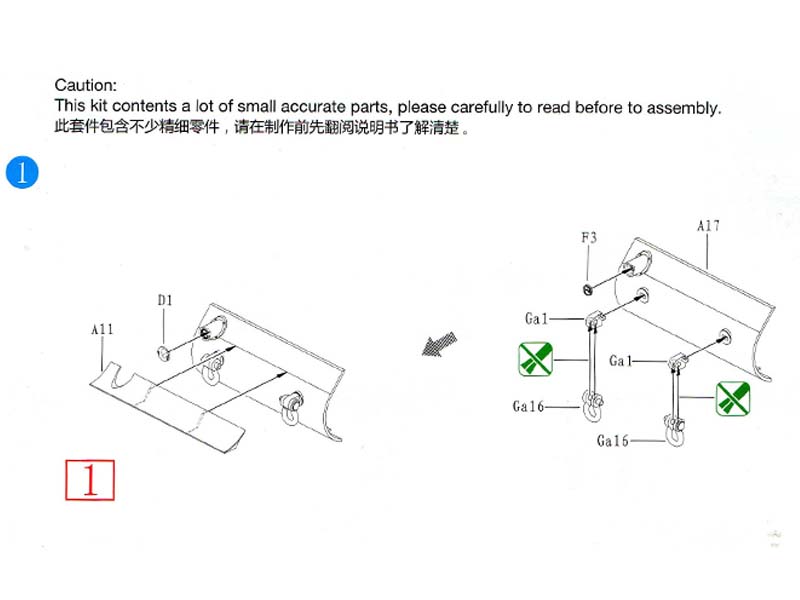
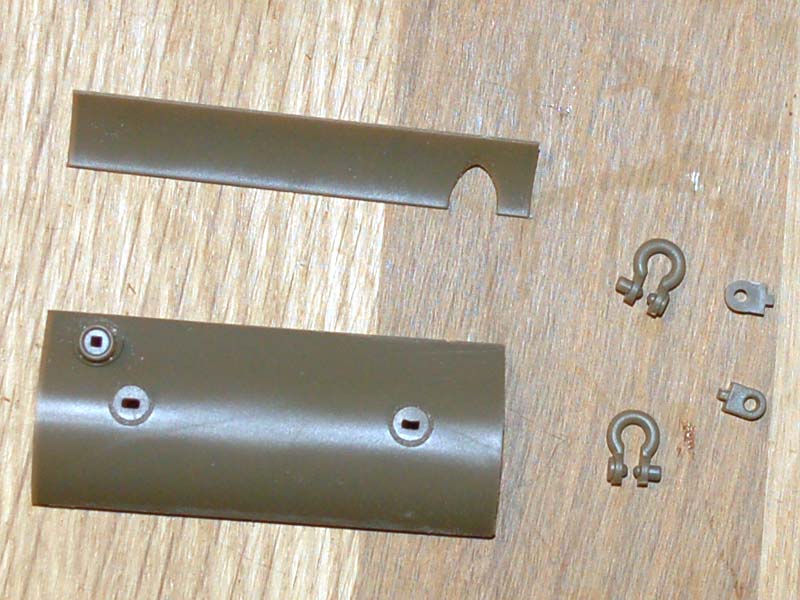
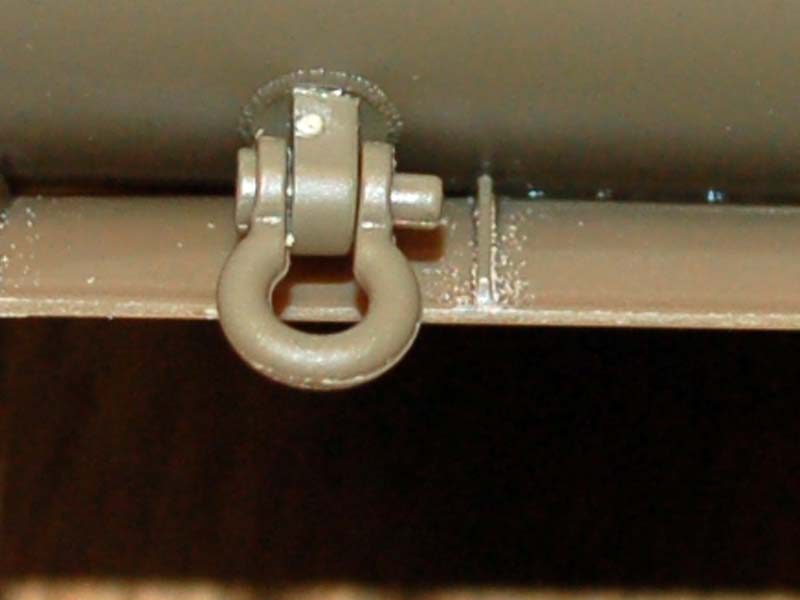
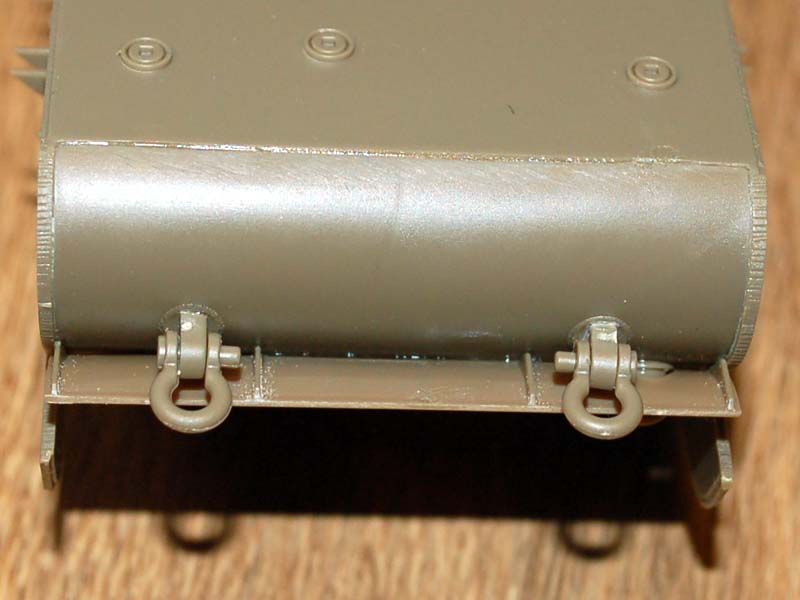
Stage 1 puts the rear of the hull together and is a very basic skill level task only really needing some clean up and the slight problem of lining up part A11 as there is no guide on the plastic parts or locations for it. I have not added the lights at the moment as I prefer to add them at a later stage of the build, however it is worth noting that if you choose to add the metal cover then this is not relevant.


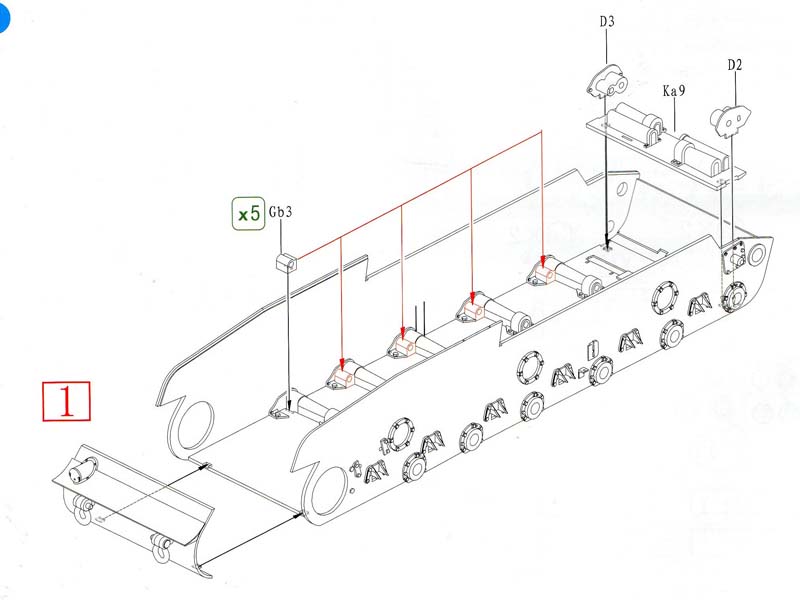
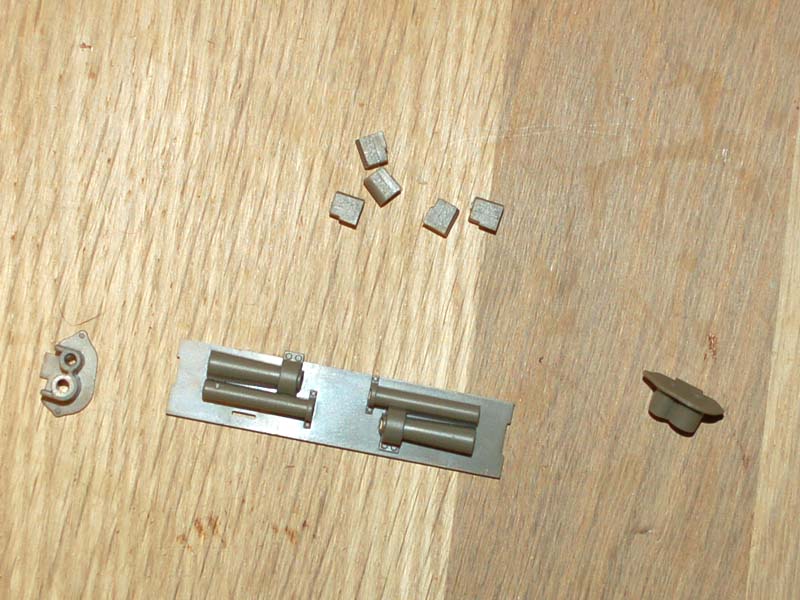
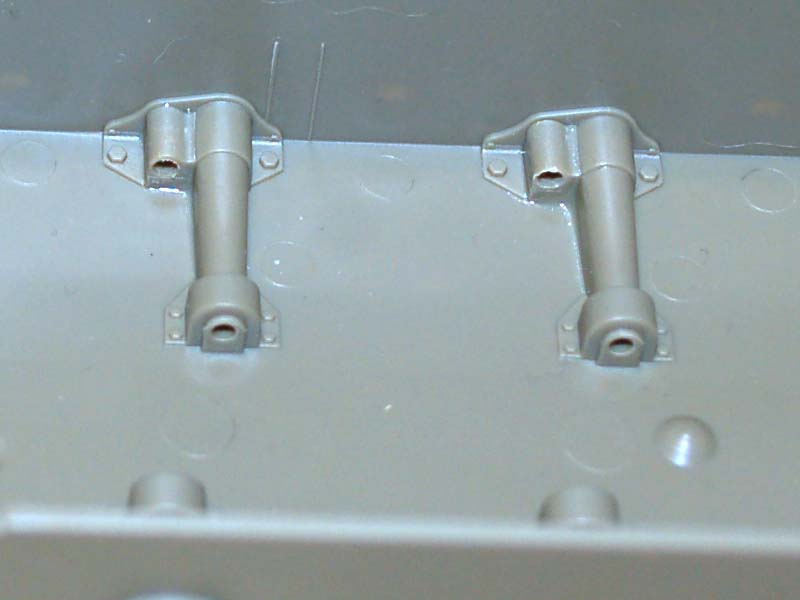
Stage 2 covers the addition of the rear hull to the lower hull and it is a very good fit with no difficulties to overcome. The five suspension retainers down one side of the hull are also easy to add but it is worth noting that a thorough clean-up of the sprue connection point is a must or they will not sit fully home on the hull, also I had to clean a small amount if flash I missed in my review from the holes that the torsion bars locate into. The front suspension parts have to be carefully placed as they are ended and the is a front and a rear to the part, if you look at the part in the instructions there is a slot on the rear left hand side and if you use that as a guide you will not have an issue.


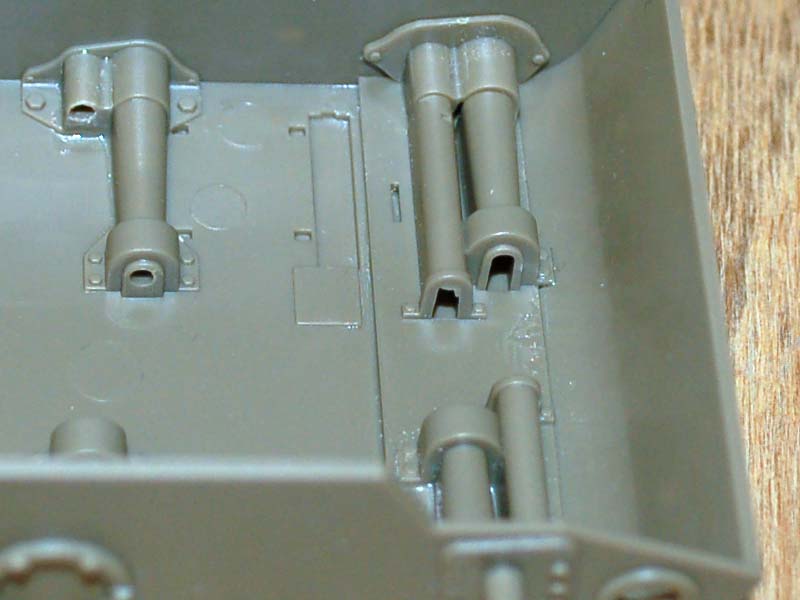
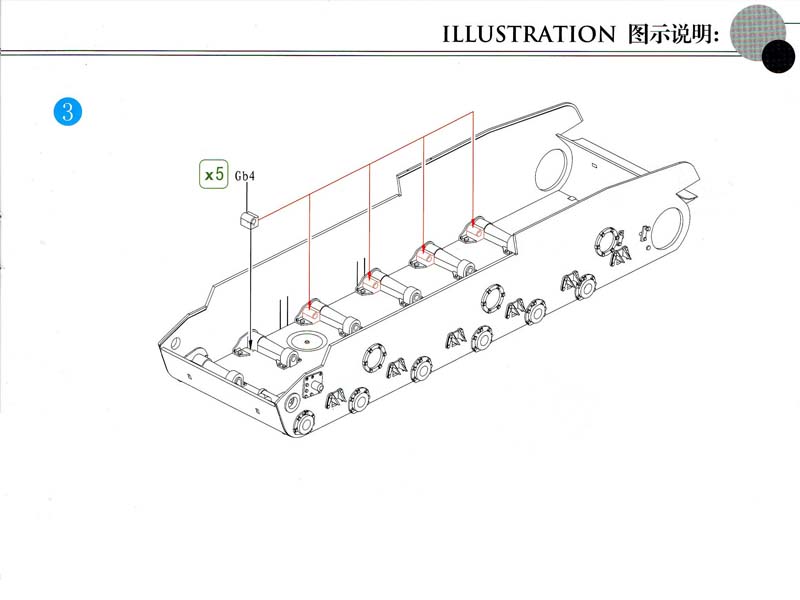
Stage 3 consists of adding the torsion bar retainers to the other side of the hull, and as long as you do the same as the previous side no problems should present themselves.


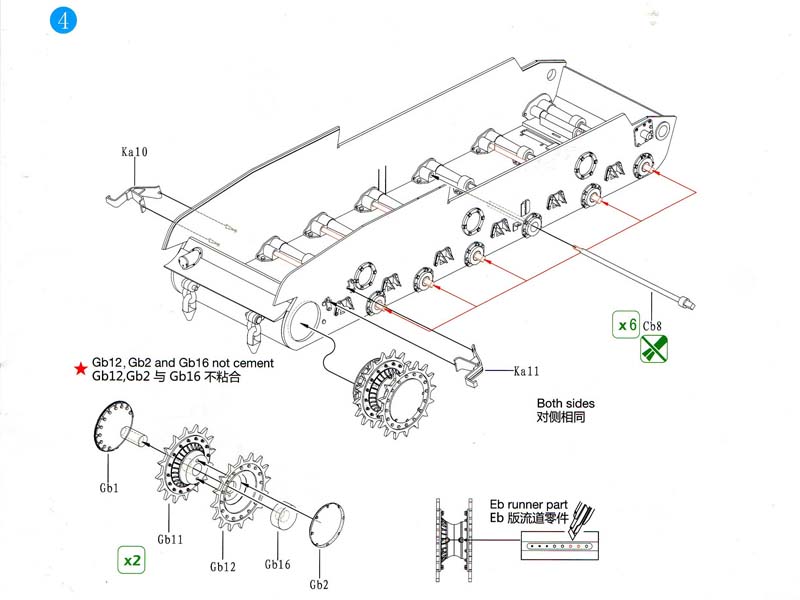
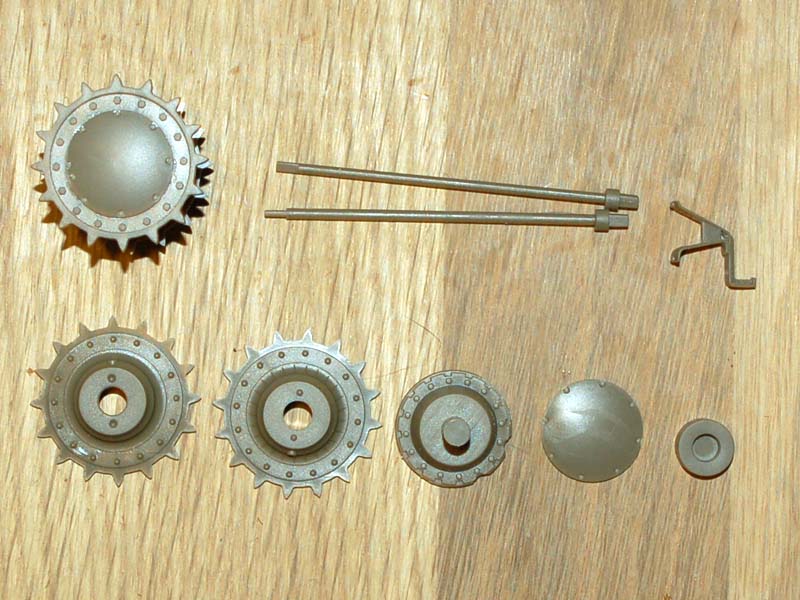
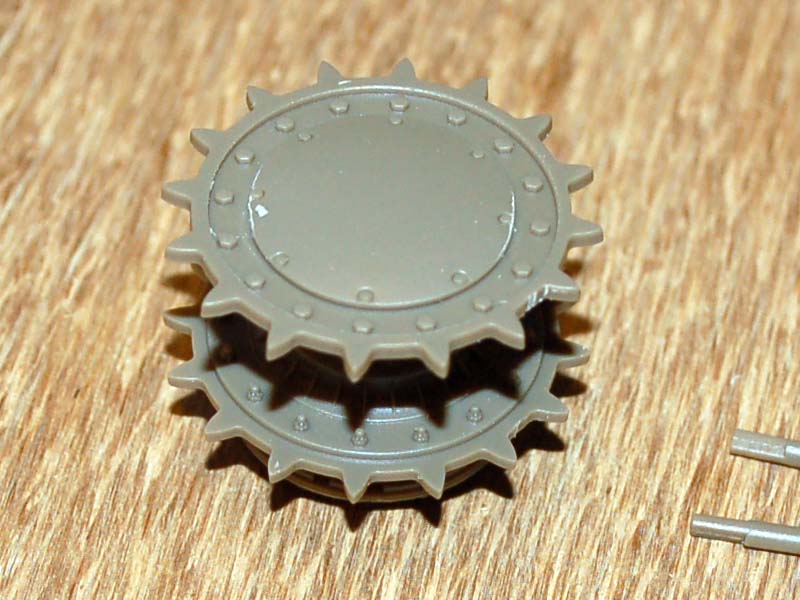
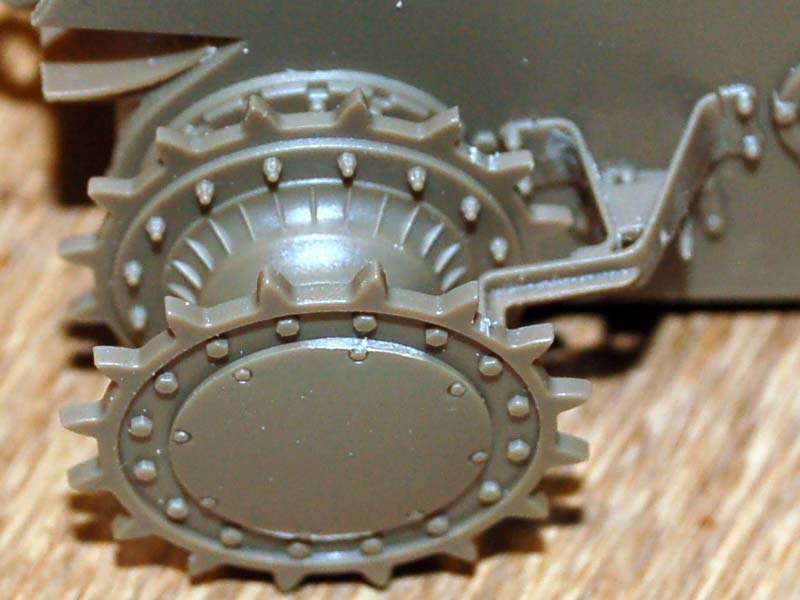
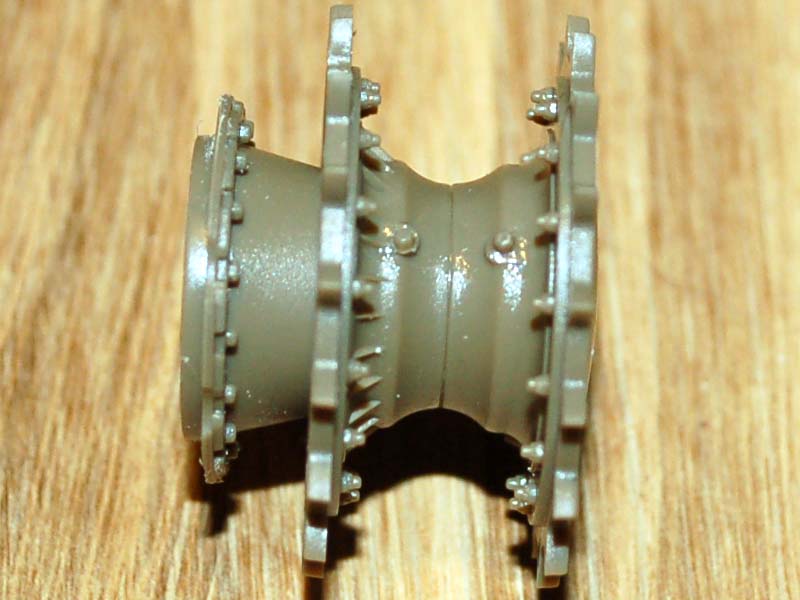
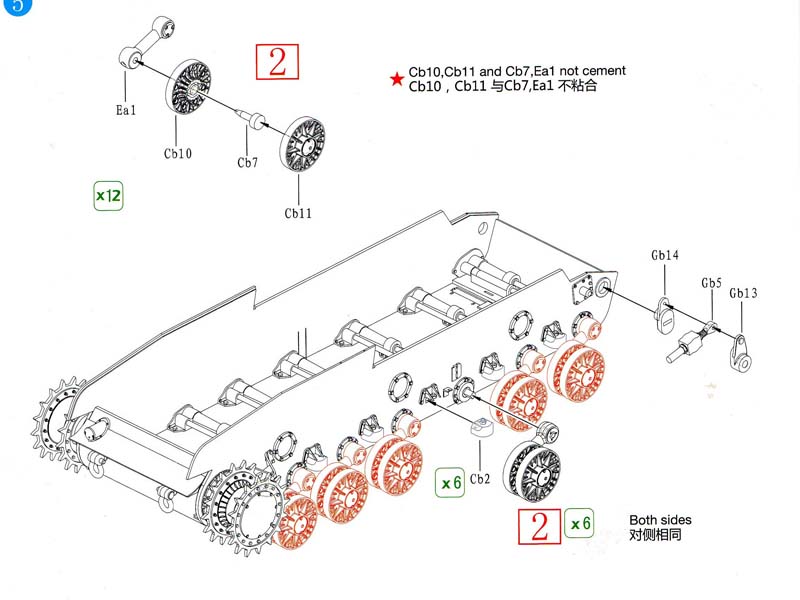
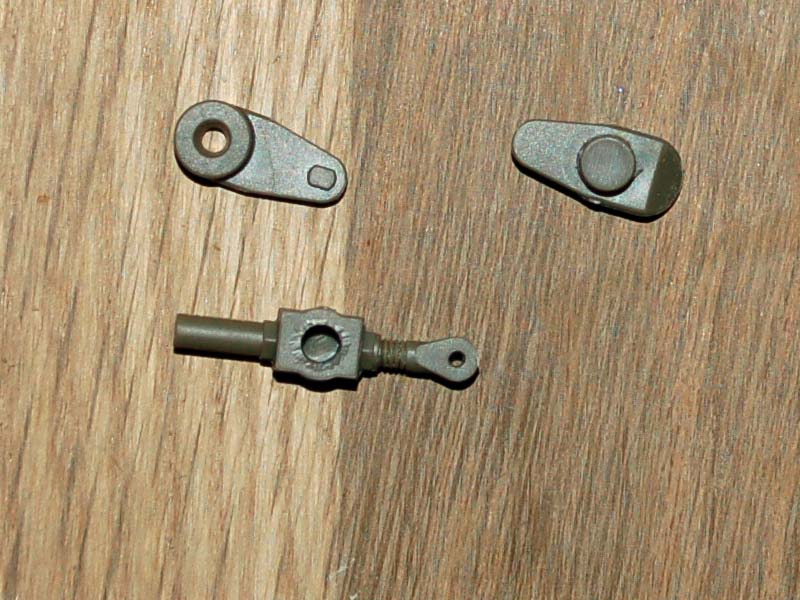
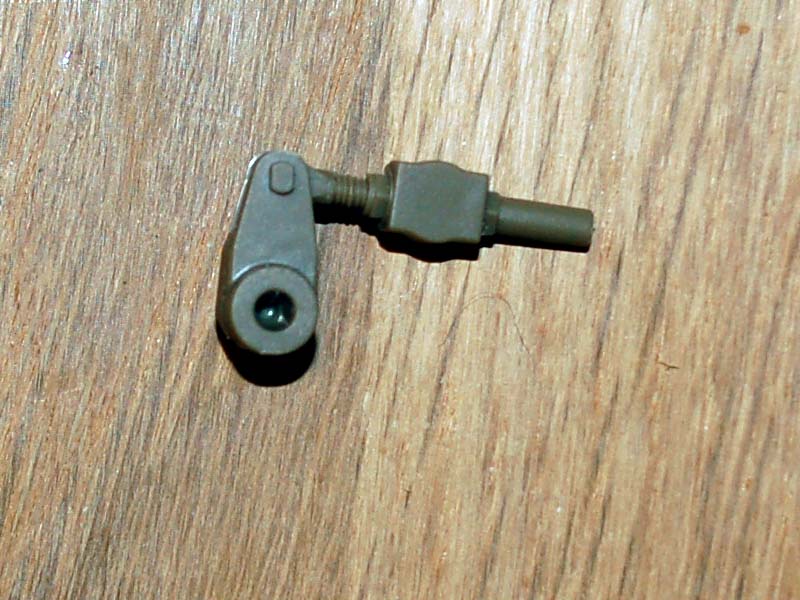
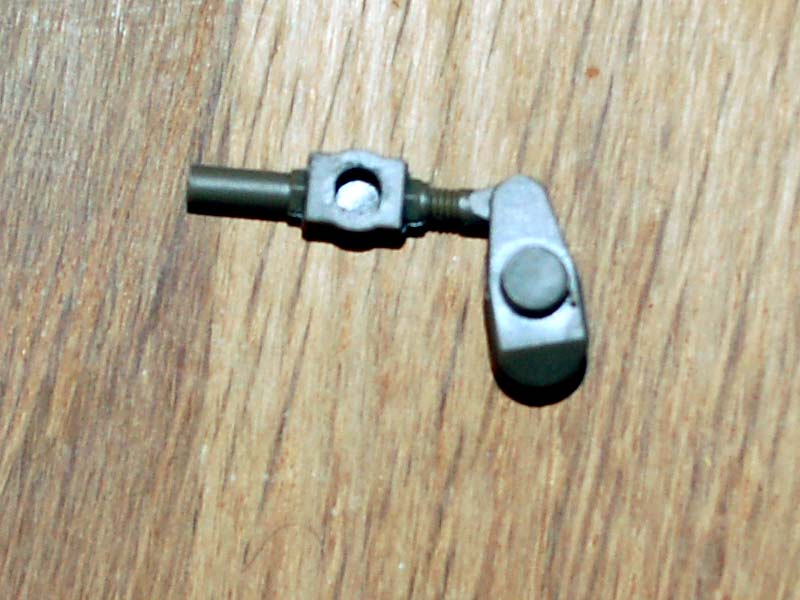
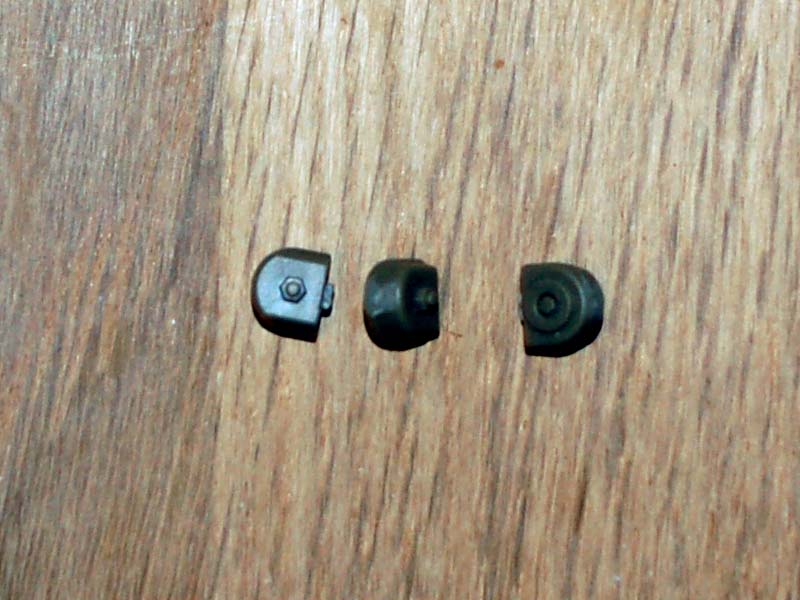
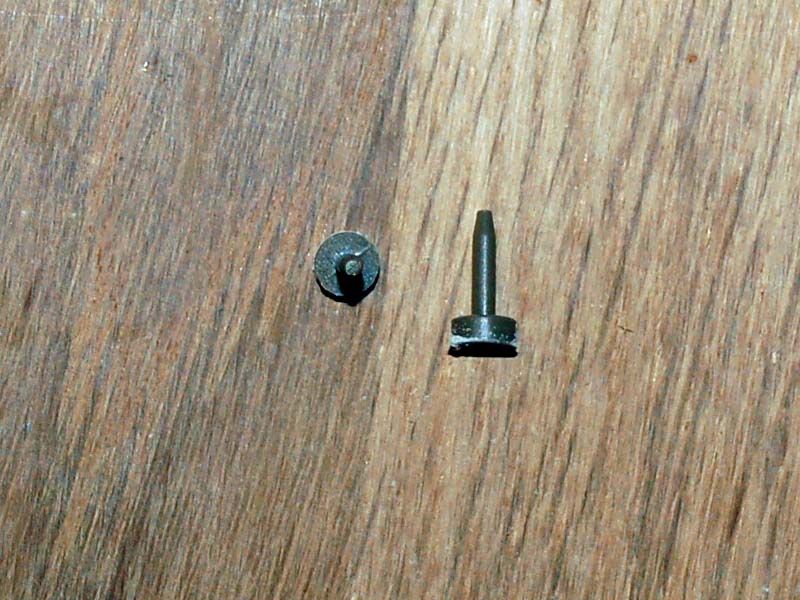
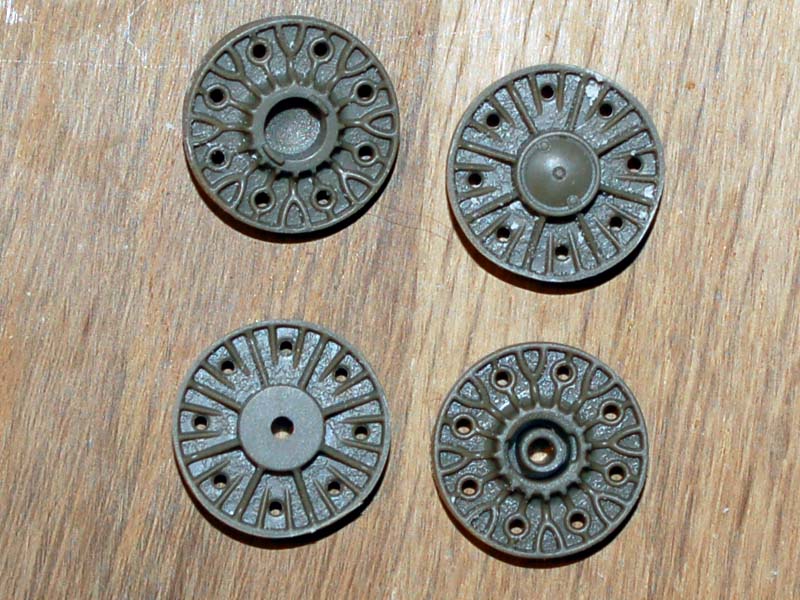
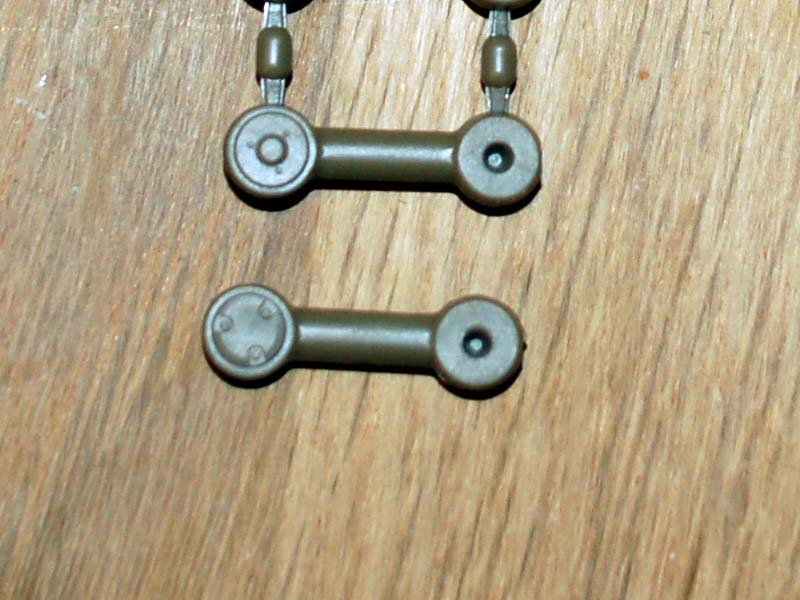
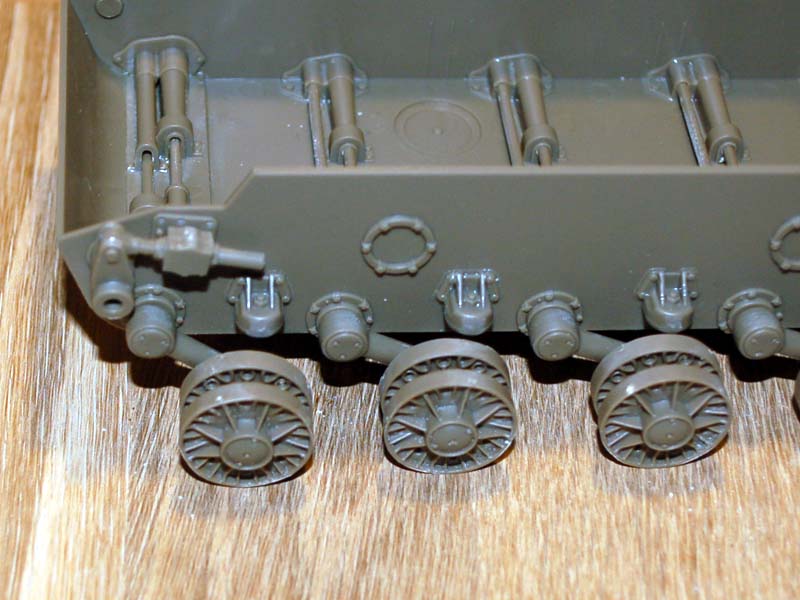
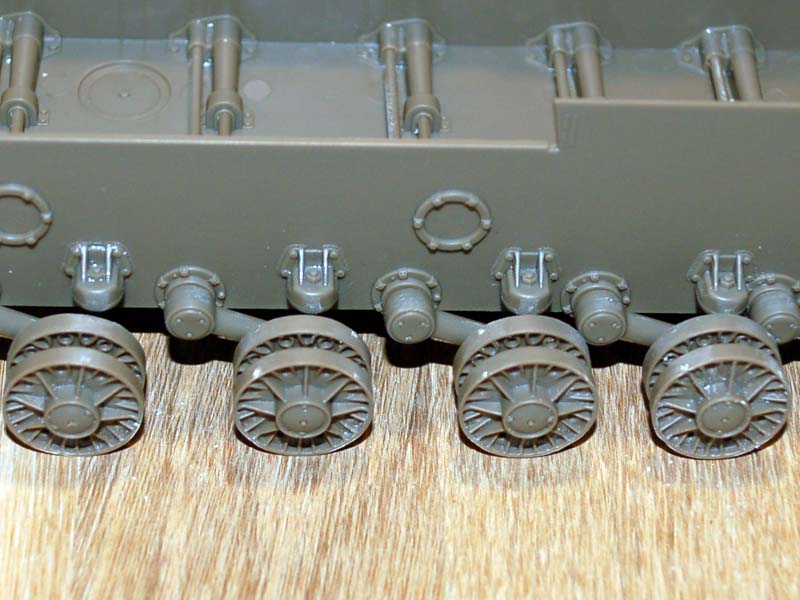
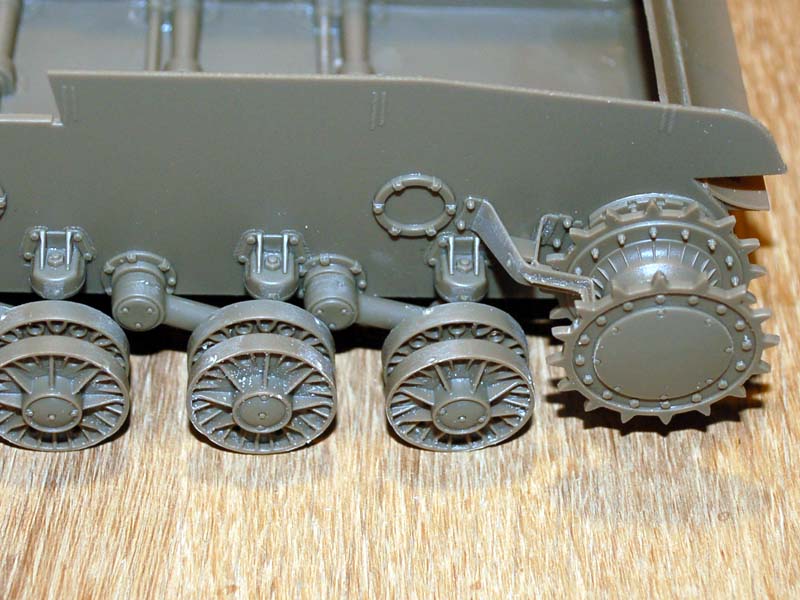
Stage 4 covers the addition of the torsion bars on one side of the vehicle, and the assembly and addition of the drive wheels and mud scrapers. The torsion bars are a very tight fit and so I have opted not to apply any glue as it seems a pointless task to me, to give you an example I found one difficult to locate and only managed to pull it out using pliers. The drive wheels on the model have exceptional detail on them most of which is covered up though. Firstly I glued the two halves of the wheels together making sure the raised area where the grease nipples (I believe) are added, it is possible to have this on polar opposite sides so you have been warned. I did not encounter any other areas to warn you about on the wheels. The mud scrappers on the other hand did not want to locate in the small holes provided as a location, and so I sanded of the locaters on the sand scraper itself and the used on bracket detail on the hull for a location which solved the issue.


Jacques
Visit this Community
Minnesota, United States
Joined: March 04, 2003
KitMaker: 4,630 posts
Armorama: 4,498 posts
Posted: Friday, March 01, 2013 - 03:28 AM UTC
Watching this with rapt attention!
CMOT
Staff MemberEditor-in-Chief
ARMORAMA
Visit this Community
England - South West, United Kingdom
Joined: May 14, 2006
KitMaker: 10,954 posts
Armorama: 8,571 posts
Posted: Friday, March 01, 2013 - 04:08 AM UTC
Well I did promise Jacques. The biggest problem I am facing at the moment is finding the parts amongst all those sprues.
Minsk94
Visit this Community
Wisconsin, United States
Joined: June 16, 2008
KitMaker: 418 posts
Armorama: 408 posts
Posted: Friday, March 01, 2013 - 06:14 AM UTC
If you feel like doing some extra detailing:


CMOT
Staff MemberEditor-in-Chief
ARMORAMA
Visit this Community
England - South West, United Kingdom
Joined: May 14, 2006
KitMaker: 10,954 posts
Armorama: 8,571 posts
Posted: Friday, March 01, 2013 - 08:09 AM UTC
Alex I think that detail is within my ability and I will see what I can do for you.
CMOT
Staff MemberEditor-in-Chief
ARMORAMA
Visit this Community
England - South West, United Kingdom
Joined: May 14, 2006
KitMaker: 10,954 posts
Armorama: 8,571 posts
Posted: Friday, March 01, 2013 - 08:09 AM UTC
I will start with an image of what I believe are the grease nipples on the drive wheel which I failed to photograph for the first post.


Stage 5 covers the addition of the suspension arms, the road wheels, the idler wheel adjusters, and the travel stops for the suspension arms.


I am starting with the adjusters which are easy enough to assemble but make sure you get the orientation for each side right. I would have liked to have seen the ability to adjust the tensioner but that is not a complaint just a wish list so to speak, you could of course with some scratch work make this possible.


Next there are the 12 travel stops for the suspension arms, these parts are very nicely detailed and from what I have seen so far the detail fans should be pleased for the most part.


These are the pins for attaching the road wheels to the suspension arms. My advice is to place the pin through the inner wheel and attach to the suspension arm before securing the outer wheel or you will have problems because the large part inside the wheel can move back and forth.


This next image shows both sides of the inner and outer road wheel.


This picture shows the difference between the later versions suspension arms (Top) and the ones for the early SU-152 (Bottom), both are supplied in the box so make sure you select the correct ones from all of those sprues.


Finally here is how the parts look when they are all brought together on the hull.


Removed by original poster on 05/14/19 - 01:20:37 (GMT).
CMOT
Staff MemberEditor-in-Chief
ARMORAMA
Visit this Community
England - South West, United Kingdom
Joined: May 14, 2006
KitMaker: 10,954 posts
Armorama: 8,571 posts
Posted: Friday, March 01, 2013 - 03:52 PM UTC
Yes Matt there is a partial interior which gets started soon, however there are no bukheads or storage racks in the box.
Removed by original poster on 05/14/19 - 01:21:04 (GMT).
CMOT
Staff MemberEditor-in-Chief
ARMORAMA
Visit this Community
England - South West, United Kingdom
Joined: May 14, 2006
KitMaker: 10,954 posts
Armorama: 8,571 posts
Posted: Saturday, March 02, 2013 - 05:34 PM UTC
Funnily enough Matt I spent a couple of hours digging up pictures of the interior to see what I could do.
Minsk94
Visit this Community
Wisconsin, United States
Joined: June 16, 2008
KitMaker: 418 posts
Armorama: 408 posts
Posted: Sunday, March 03, 2013 - 03:42 PM UTC
Did you find anything?
CMOT
Staff MemberEditor-in-Chief
ARMORAMA
Visit this Community
England - South West, United Kingdom
Joined: May 14, 2006
KitMaker: 10,954 posts
Armorama: 8,571 posts
Posted: Sunday, March 03, 2013 - 05:28 PM UTC
Yes Alex with the only problem being most were Russian sites that I could not read, I did find some tech drawings which I think will be the most help.
Minsk94
Visit this Community
Wisconsin, United States
Joined: June 16, 2008
KitMaker: 418 posts
Armorama: 408 posts
Posted: Monday, March 04, 2013 - 03:54 AM UTC
Interesting. Would you be willing to share? I have never came across any information on SU-152 interior except couple of well know photos. Though I have a contact now, who may be able to help.
BTW, here is some photos that may be of help to you: http://www.tigerscorner.ru/index.php?topic=833.0
CMOT
Staff MemberEditor-in-Chief
ARMORAMA
Visit this Community
England - South West, United Kingdom
Joined: May 14, 2006
KitMaker: 10,954 posts
Armorama: 8,571 posts
Posted: Monday, March 04, 2013 - 07:21 AM UTC
Alex I just did some google searches using various word combinations and saved the pictures I thought would help, if you E-mail or PM me your Email I will zip them up and send them over.
Minsk94
Visit this Community
Wisconsin, United States
Joined: June 16, 2008
KitMaker: 418 posts
Armorama: 408 posts
Posted: Monday, March 04, 2013 - 03:53 PM UTC
Sure. That way if I get to come across some new info I will know if you have it already.
PM sent. Thanks!
 _GOTOTOP