_GOTOBOTTOM
Armor/AFV: Modern - USA
Modern Armor, AFVs, and Support vehicles.
Hosted by Darren Baker
M1151 Enhanced Armament Carrier
Mike-Fox
Visit this Community
Belgium
Joined: March 17, 2013
KitMaker: 12 posts
Armorama: 7 posts
Posted: Saturday, March 16, 2013 - 11:22 PM UTC
Hello everyone i'm Mike Fox from Belgium and this is my first post on Armorama.
I am building the M1151 Enhanced Armament Carrier from Academy.
The boxart
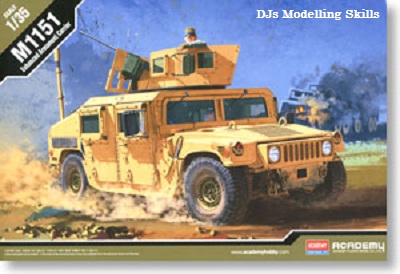


It was a long time ago i build a kit from Academy and i was a little bit unsure about the quality but i was surprised how well the chassis fitted.


The only thing I regretted was that the front wheels could not rotate.
I was at first not going to use the wheels from the box because they exist in 2 halves.
Already found an updated set of Verlinden for 10 euros with resin wheels, radio set and some PE in it.
But I had read somewhere on the WWW that these tires out of the box were not so bad.
So i assambled the wheels to have a look
And here is the result


After this i started with the interieur.In front between the seats there come's a radio and a computer screen. i upgraged this a little bit with some cables. I also put the radioset from the Verlinden set in the back off the vehicle, and also upgraded this with some cable


I also used the break and gas pedals from the set, altough after the build you will not be able to see them
:|


The doors have heavy armor around the windows, wich are covered with tamiya tape for the futher paintjob.

inside


outside


kubisz
Visit this Community
Wojewodztwo Slaskie, Poland
Joined: February 18, 2007
KitMaker: 978 posts
Armorama: 977 posts
Posted: Saturday, March 16, 2013 - 11:33 PM UTC
Hello Mike, welcome here

Nice start with Your M1151, but...

Quoted Text

I also put the radioset from the Verlinden set in the back off the vehicle


... what for? This is not modern radio. Remove it.
Mike-Fox
Visit this Community
Belgium
Joined: March 17, 2013
KitMaker: 12 posts
Armorama: 7 posts
Posted: Saturday, March 16, 2013 - 11:35 PM UTC
Update 1

In the update set there was some nice materiaal to upgrade the trunk. there was a name plate AM GENERAL and after some adjustments this fitted nicely


For the inside there was some more work too let it fit.because the PE was a little bit too high. because i did not wanted too lose the details from the PE i used some plasticcard in the trunk too fix this.


Perfect fit after adjustments


kubisz
Visit this Community
Wojewodztwo Slaskie, Poland
Joined: February 18, 2007
KitMaker: 978 posts
Armorama: 977 posts
Posted: Saturday, March 16, 2013 - 11:43 PM UTC
Mike - this Verlinden set is designed for older Humvee versions. So many elements won't be good for M1151, for example these both plates on rear tailgate ('AM General' is not present at it since early 90s of last century). I hope You'll be able to remove them without problems.

Visit this site: http://www.hmmwvinscale.com/, find a M1151 walkaround and look at the photos before assembling another updates.
Mike-Fox
Visit this Community
Belgium
Joined: March 17, 2013
KitMaker: 12 posts
Armorama: 7 posts
Posted: Saturday, March 16, 2013 - 11:52 PM UTC
Update 2

I started with turret wich existed out of 6 pieces were i had to put 5 windows in. There were a lot of sinkholes, fortunaly for me they were on the inside and after some sanding they were all gone. for the rest the build was good.


The shield for the .50 was too thick soo i sanded this of until it looked realistic


Mike-Fox
Visit this Community
Belgium
Joined: March 17, 2013
KitMaker: 12 posts
Armorama: 7 posts
Posted: Sunday, March 17, 2013 - 12:04 AM UTC

Quoted Text

Mike - this Verlinden set is designed for older Humvee versions. So many elements won't be good for M1151, for example these both plates on rear tailgate ('AM General' is not present at it since early 90s of last century). I hope You'll be able to remove them without problems.

Visit this site: http://www.hmmwvinscale.com/, find a M1151 walkaround and look at the photos before assembling another updates.


Thanks kubisz for the reply and the link. I put in the radio in the back because i found some pics were there were radio's in the back of the vehicle. I have put in the plates because it gave more detail but did not know that they were no more used. Will not be able too remove it now because most of it is primed and the interieur is already painted from this weekend. Next time i put a post quicker on this forum because on a belgium forum nobody gave me this information.
35th-scale
Visit this Community
Kildare, Ireland
Joined: November 21, 2007
KitMaker: 3,212 posts
Armorama: 2,807 posts
Posted: Tuesday, March 19, 2013 - 12:28 AM UTC
Welcome to Armorama Danny. That's looking good so far...Once closed up the detail on the radio won't be visible much. Same for the panes in the rear cargo bed....so don't worry about them. If it looks like a Huumvee than that's good enough.
Mike-Fox
Visit this Community
Belgium
Joined: March 17, 2013
KitMaker: 12 posts
Armorama: 7 posts
Posted: Tuesday, March 19, 2013 - 06:55 AM UTC
Update 3

The upgrade for the .50 has arrived, it is from ABER (35 L-80)


After about 2 days of cutting, drilling, glueing, bending, soldering and a few bad words...
This is the result


This was the small update, until nthe next
pilote14
Visit this Community
Pas-de-Calais, France
Joined: November 01, 2010
KitMaker: 459 posts
Armorama: 432 posts
Posted: Tuesday, March 19, 2013 - 08:02 AM UTC
wouah ! nice build ! great...
i've build mine oob !
hliu24
Visit this Community
California, United States
Joined: November 19, 2010
KitMaker: 798 posts
Armorama: 797 posts
Posted: Tuesday, March 19, 2013 - 10:23 AM UTC
excellent PE work on the M2!


jay
bat-213
Visit this Community
Canada
Joined: December 30, 2011
KitMaker: 902 posts
Armorama: 788 posts
Posted: Tuesday, March 19, 2013 - 11:12 AM UTC
your build is great,love the work on the 50.
youngtiger1
Visit this Community
California, United States
Joined: May 14, 2008
KitMaker: 534 posts
Armorama: 344 posts
Posted: Wednesday, March 27, 2013 - 06:55 PM UTC
Wow, that 50 cal upgrade sure looks awesome. I'll have to remember it. Thanks.

Mike
Mike-Fox
Visit this Community
Belgium
Joined: March 17, 2013
KitMaker: 12 posts
Armorama: 7 posts
Posted: Wednesday, April 03, 2013 - 02:31 AM UTC
Update 4

This week i found the time to do some AB-work
I use Tamiya paint and iso-alcohol
First i sprayed a black pre shade and then a layer of Nato green wich i highlighted.


The seats were given the same treatment


The radio equipment is also covered with some paint


Because the vehicle is coming in dessert sand color i wanted some variation so i sprayed de motor hood in Nato camo. to give the impression it is a replacement part.


And everything received a thin layer of clear.

Mike-Fox
Visit this Community
Belgium
Joined: March 17, 2013
KitMaker: 12 posts
Armorama: 7 posts
Posted: Wednesday, April 03, 2013 - 03:08 AM UTC
Update 5

Started a little bit with the interieur
I used the products of AK interactive. First i put on the dust effects (yellow arrow) and then blended them in with a brush moistened with a little bit of white spirit.(red arrow)


close up of the result


compleet interieur


I also worked on the pc screen. the keys painted and a map for the screen.


thats it for now
35th-scale
Visit this Community
Kildare, Ireland
Joined: November 21, 2007
KitMaker: 3,212 posts
Armorama: 2,807 posts
Posted: Wednesday, April 03, 2013 - 08:17 AM UTC
Looks stunning!
 _GOTOTOP