

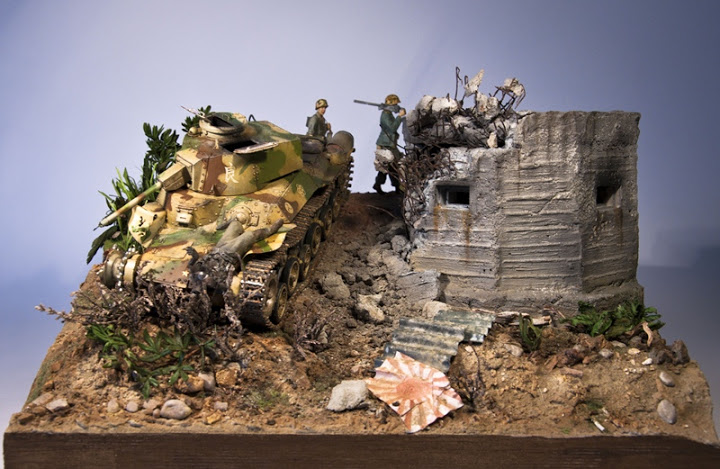
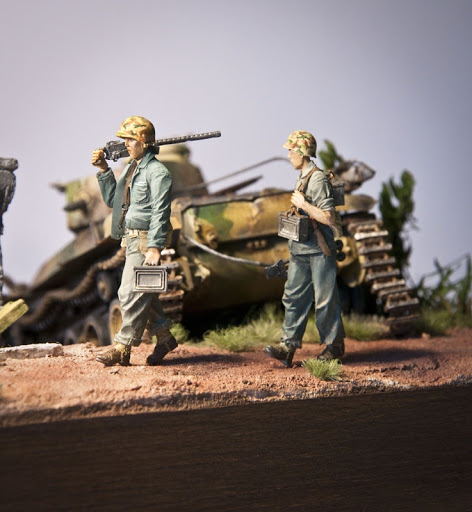
I'm back with a new dio of mine.


 OUTSTANDING
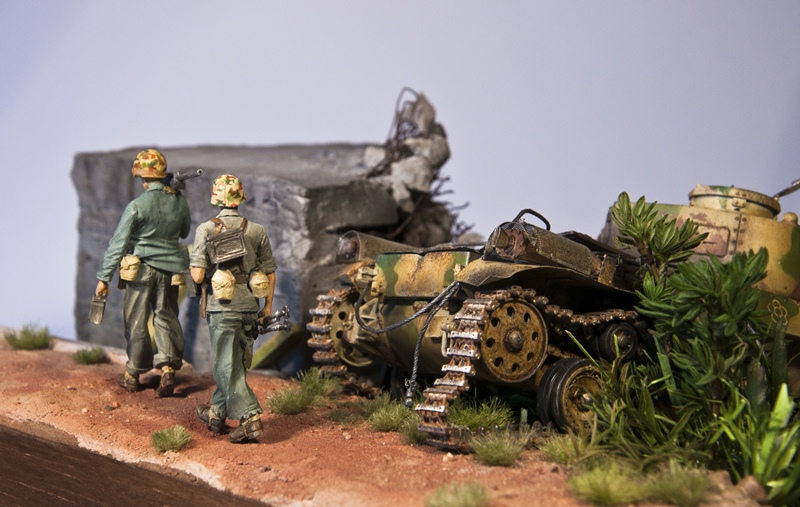
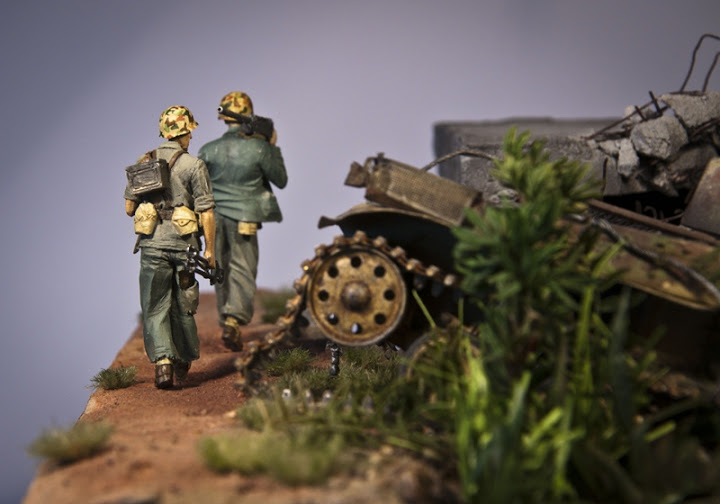
 My only nitpick would be over the lack of small debris in the trench around the bunker near where the Marines are walking. I would think that this would be pretty full of dirt, foliage, and bunker pieces.
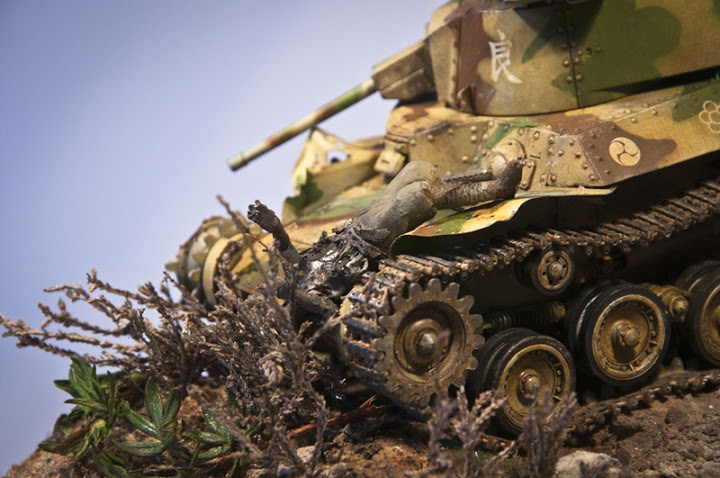
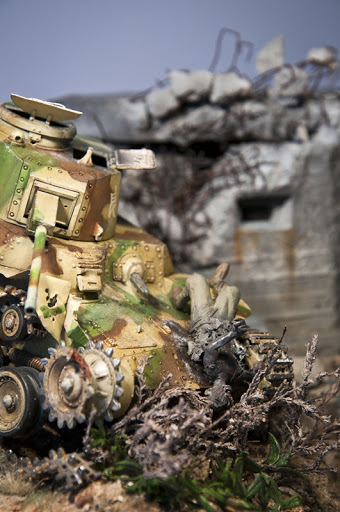
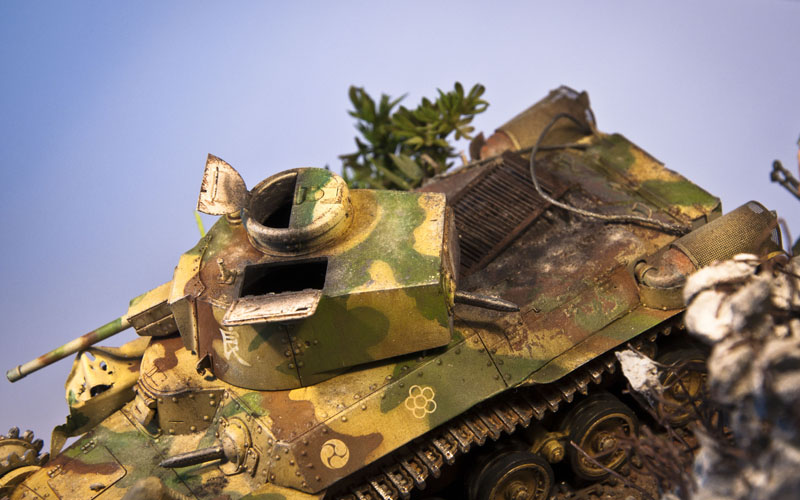
One point. I don't know waht you want to represent with the half burned man, but, if he's a tanker, the tank should not be more burned too?put quote text here
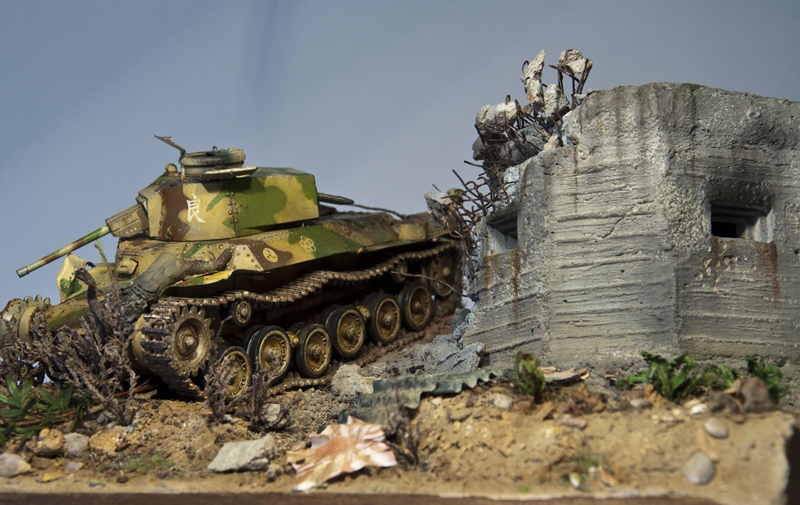
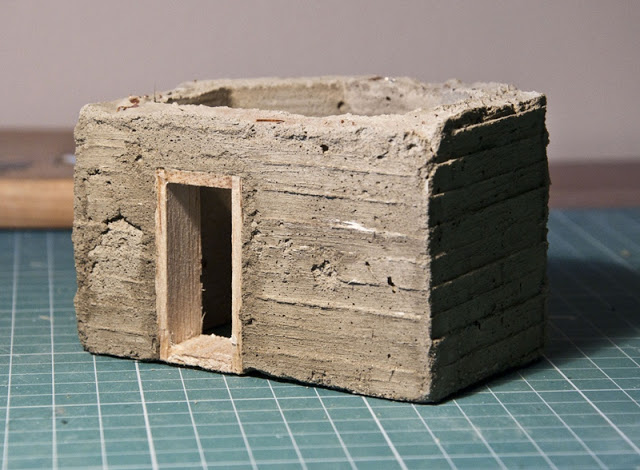
The bunker is sratch build? If yes, what materials you use?
the best part is the burnt soldier how did you create that effect


if he's a tanker, the tank should not be more burned too?


 |


