Hi all,
I've been lurking here for a while now and frankly have been far too intimidated by the amazing quality of the work by fellow members here on the boards to post any photos of my own work. Finding some courage recently, I decided I would post some photos and get some feedback and advice.
This is my first ever AFV build and my first attempt at modelling in about 20 years, so advice is welcomed, but please keep in mind that I am a Noob and have no real idea what I am doing.
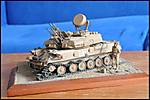
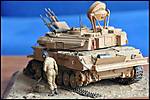
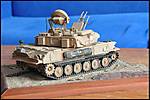
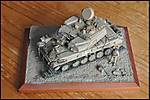
The kit is an old ZSU-23-4M 'Shilka' by Dragon (Kit #3518) given to me as a gift about 15 years ago. I found it in storage last year after living abroad for several years and thought I would finally take a crack at building it. The years have not been kind to the plastic: the main hull was badly warped and the decals had all deteriorated. Undeterred and inspired by the great work that I was looking at here on the boards, I went out and bought some glue and paint.
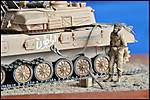
At first I wasn't sure what army to portray this as, but eventually settled on Syrian partly for the ease of the paint scheme and partly because I really liked the look of the MIG Arab Tanker Vol.1 that I also built. In a fit of inspiration I decided to depict the ZSU-23 with a thrown track to add a little interest and also tried my hand at making a simple base to display it on.
Once assembly was completed (with what I am sure was far too much glue), I sprayed the ZSU-23 with a can of Tamiya Tan (AS-15). As this was my first model I had not made the investment in an airbrush (although am now seriously considering it). I then gave the entire model a wash with Burnt Umber oil paint, although I fear, as with the glue, I may have been a little heavy handed with this.
As the decals were of no use, I tried painting the markings by hand, with less than great results. I also added a number of small details such as a few pieces of stowage which I had also found in storage. I finally added some additional weathering with some Tamiya Weathering Master pigments to try and show accumulated sand and dust.
The base was a cheap $4 8x10 photo frame which I had built up with Styrofoam and papier mache, dusted with sand and eventually sprayed. The 'rocks' were small pieces of bark from the garden.
All in all I am quite happy with it as a first attempt, although am not so blind as to recognise that I still have a LOT of room for improvement. I'll welcome any advice or constructive criticism that You can give me. Thanks in advance for your feedback and thanks also to those of you on the boards from whom I learned some of the techniques that I have rather poorly attempted to replicate on this build.
Hosted by Darren Baker
1st AFV: ZSU-23-4M 'Shilka'
turkeyshot
New South Wales, Australia
Joined: February 06, 2012
KitMaker: 138 posts
Armorama: 133 posts
Joined: February 06, 2012
KitMaker: 138 posts
Armorama: 133 posts
Posted: Wednesday, June 19, 2013 - 12:43 PM UTC
MusicOn
Virginia, United States
Joined: October 15, 2006
KitMaker: 179 posts
Armorama: 178 posts
Joined: October 15, 2006
KitMaker: 179 posts
Armorama: 178 posts
Posted: Friday, June 21, 2013 - 09:35 PM UTC
Really nice work! Having built one myself (also Syrian - nice choice) I know the paint you went through! You should post this to the Russian forum - they are connoisseurs of the ZSU-23-4!
Tanksami
Victoria, Australia
Joined: August 06, 2011
KitMaker: 1,314 posts
Armorama: 1,217 posts
Joined: August 06, 2011
KitMaker: 1,314 posts
Armorama: 1,217 posts
Posted: Friday, June 21, 2013 - 09:49 PM UTC
Hi Jason,
Firstly welcome to Armorama & back to modelling!! I have never made the ZSU 23 / 4 but have heard that they aren't much fun!!
I also think for using a spray can from what I can tell you have made a great start back into modelling
I know I for one learn or at least try to every time i start a new project & now I just need to take a leaf out of your book & finish!! lol
Cheers Mike
bat-213
Canada
Joined: December 30, 2011
KitMaker: 902 posts
Armorama: 788 posts
Joined: December 30, 2011
KitMaker: 902 posts
Armorama: 788 posts
Posted: Sunday, June 23, 2013 - 10:35 AM UTC
great looking build,love the broken track.
turkeyshot
New South Wales, Australia
Joined: February 06, 2012
KitMaker: 138 posts
Armorama: 133 posts
Joined: February 06, 2012
KitMaker: 138 posts
Armorama: 133 posts
Posted: Sunday, June 23, 2013 - 02:31 PM UTC
Thanks for the positive feedback guys. I have been quite dubious about posting this build after viewing the amazing quality of so many of the other builds here on the boards. Your comments encourage me. Cheers
35th-scale
Kildare, Ireland
Joined: November 21, 2007
KitMaker: 3,212 posts
Armorama: 2,807 posts
Joined: November 21, 2007
KitMaker: 3,212 posts
Armorama: 2,807 posts
Posted: Sunday, June 23, 2013 - 07:29 PM UTC
That is one mean looking beast very well done!
turkeyshot
New South Wales, Australia
Joined: February 06, 2012
KitMaker: 138 posts
Armorama: 133 posts
Joined: February 06, 2012
KitMaker: 138 posts
Armorama: 133 posts
Posted: Monday, June 24, 2013 - 03:03 PM UTC
Thanks for the feedback guys!
After reorganising my photo galleries recently, I inadvertently removed all of the photos from the first post in this thread. My bad: sorry. I have tried to update the links, but for some reason I am not able to access the post to edit it. To address this, I have reposted the links to the photos below: